User manual
New Test
"Test creation wizard" will lead you through the process of creating a test step-by-step.
- Accessing the page
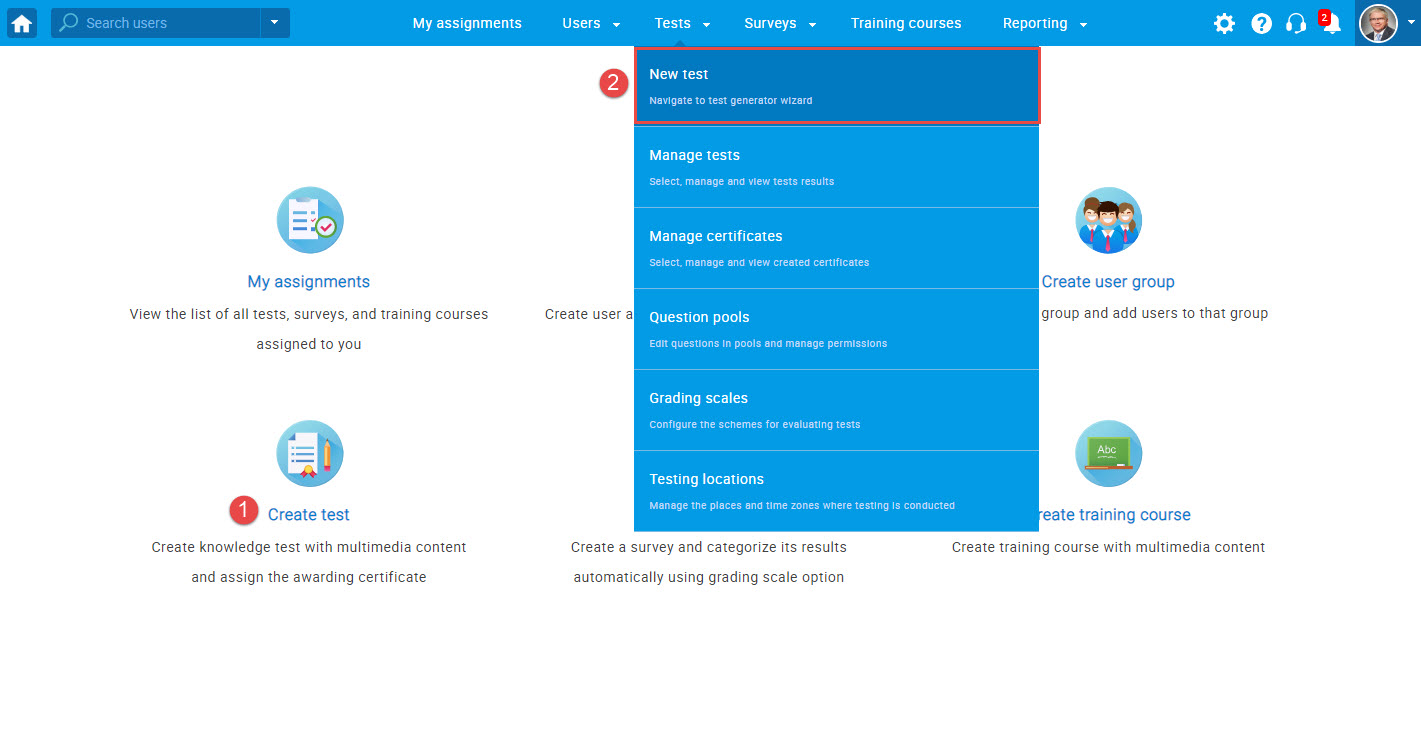
You can access the "Test wizard" from the homepage by:
- Clicking the "Create test" quick action button or
- Clicking on "Tests" in the application's toolbar and then choosing "New test."
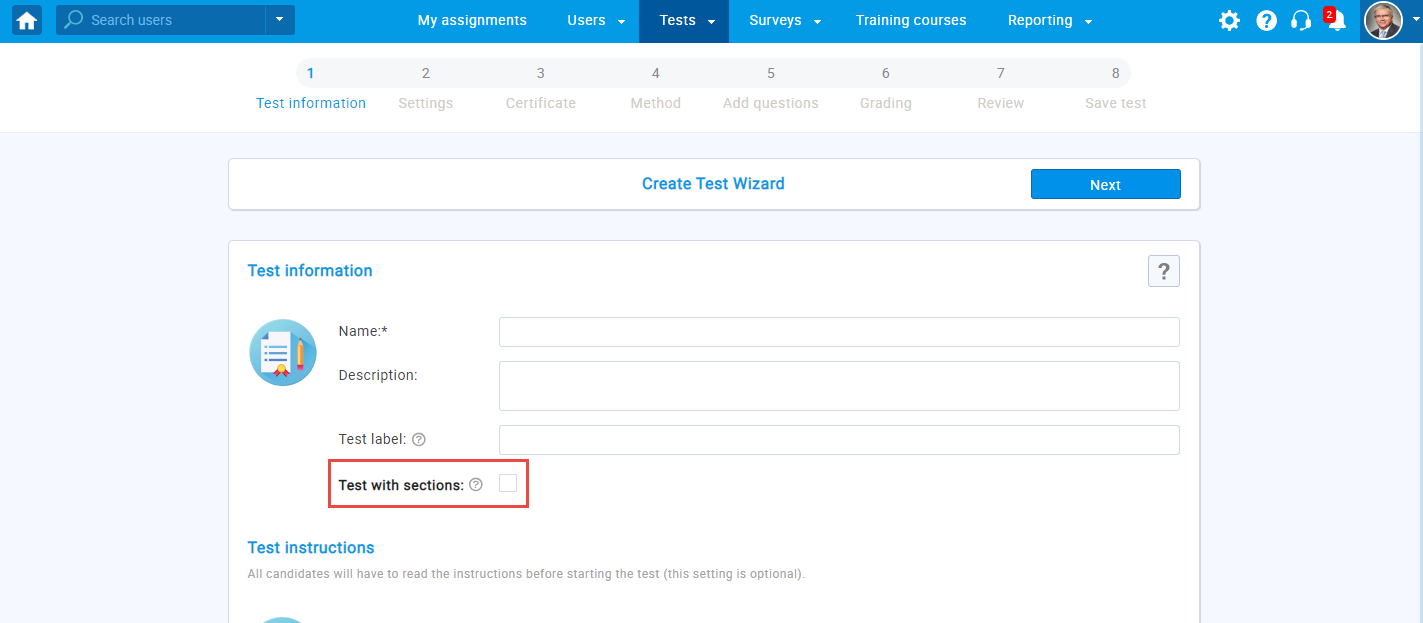
With YouTestMe GetCertified you can create tests:
- With sections.
- Without sections.
Sections can be used to represent different areas of knowledge or topics the test covers.
To create a test with sections, check the box "Test with sections."
- Test without sections
Below you can find the instructions on how to create a test without sections.
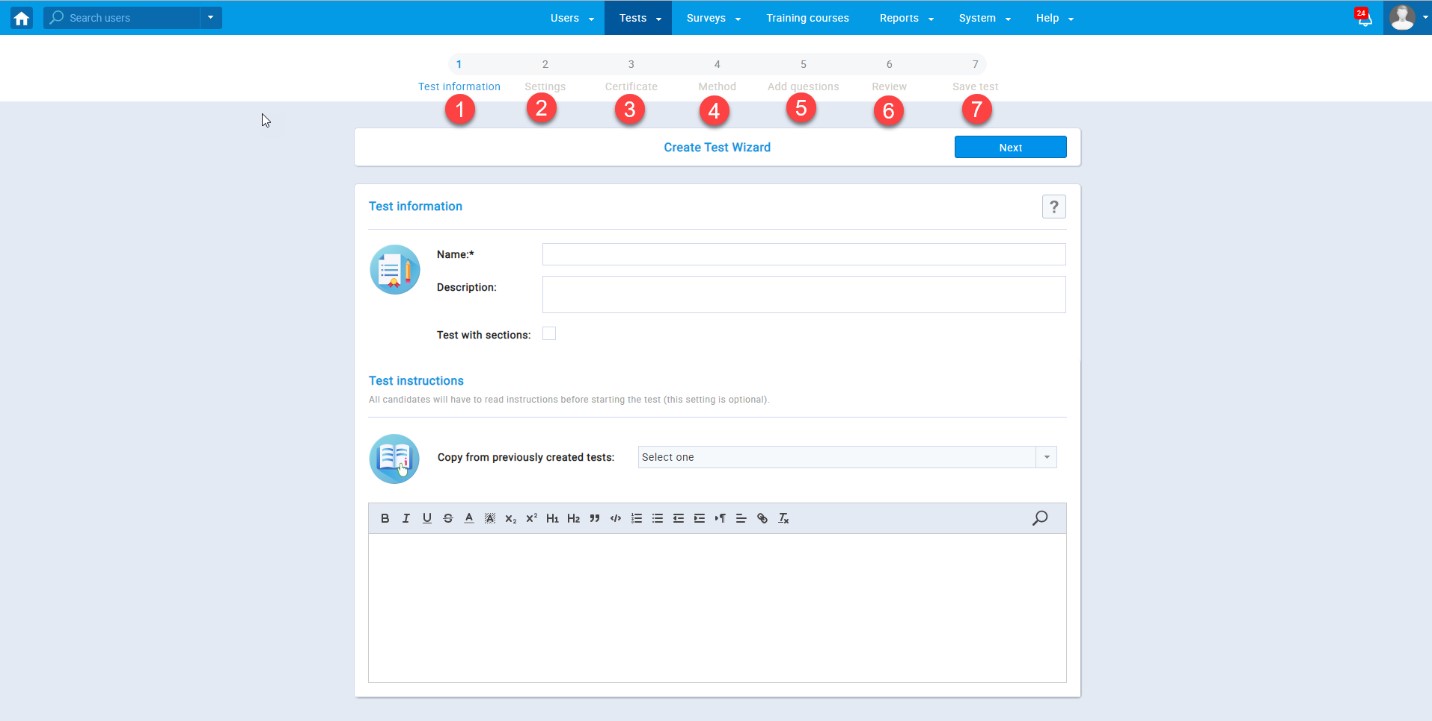
In this case, the "Test wizard" is divided into eight steps.
- Test information
- Settings
- Certificate
- Method
- Add questions
- Grading
- Review
- Save test
- Test information
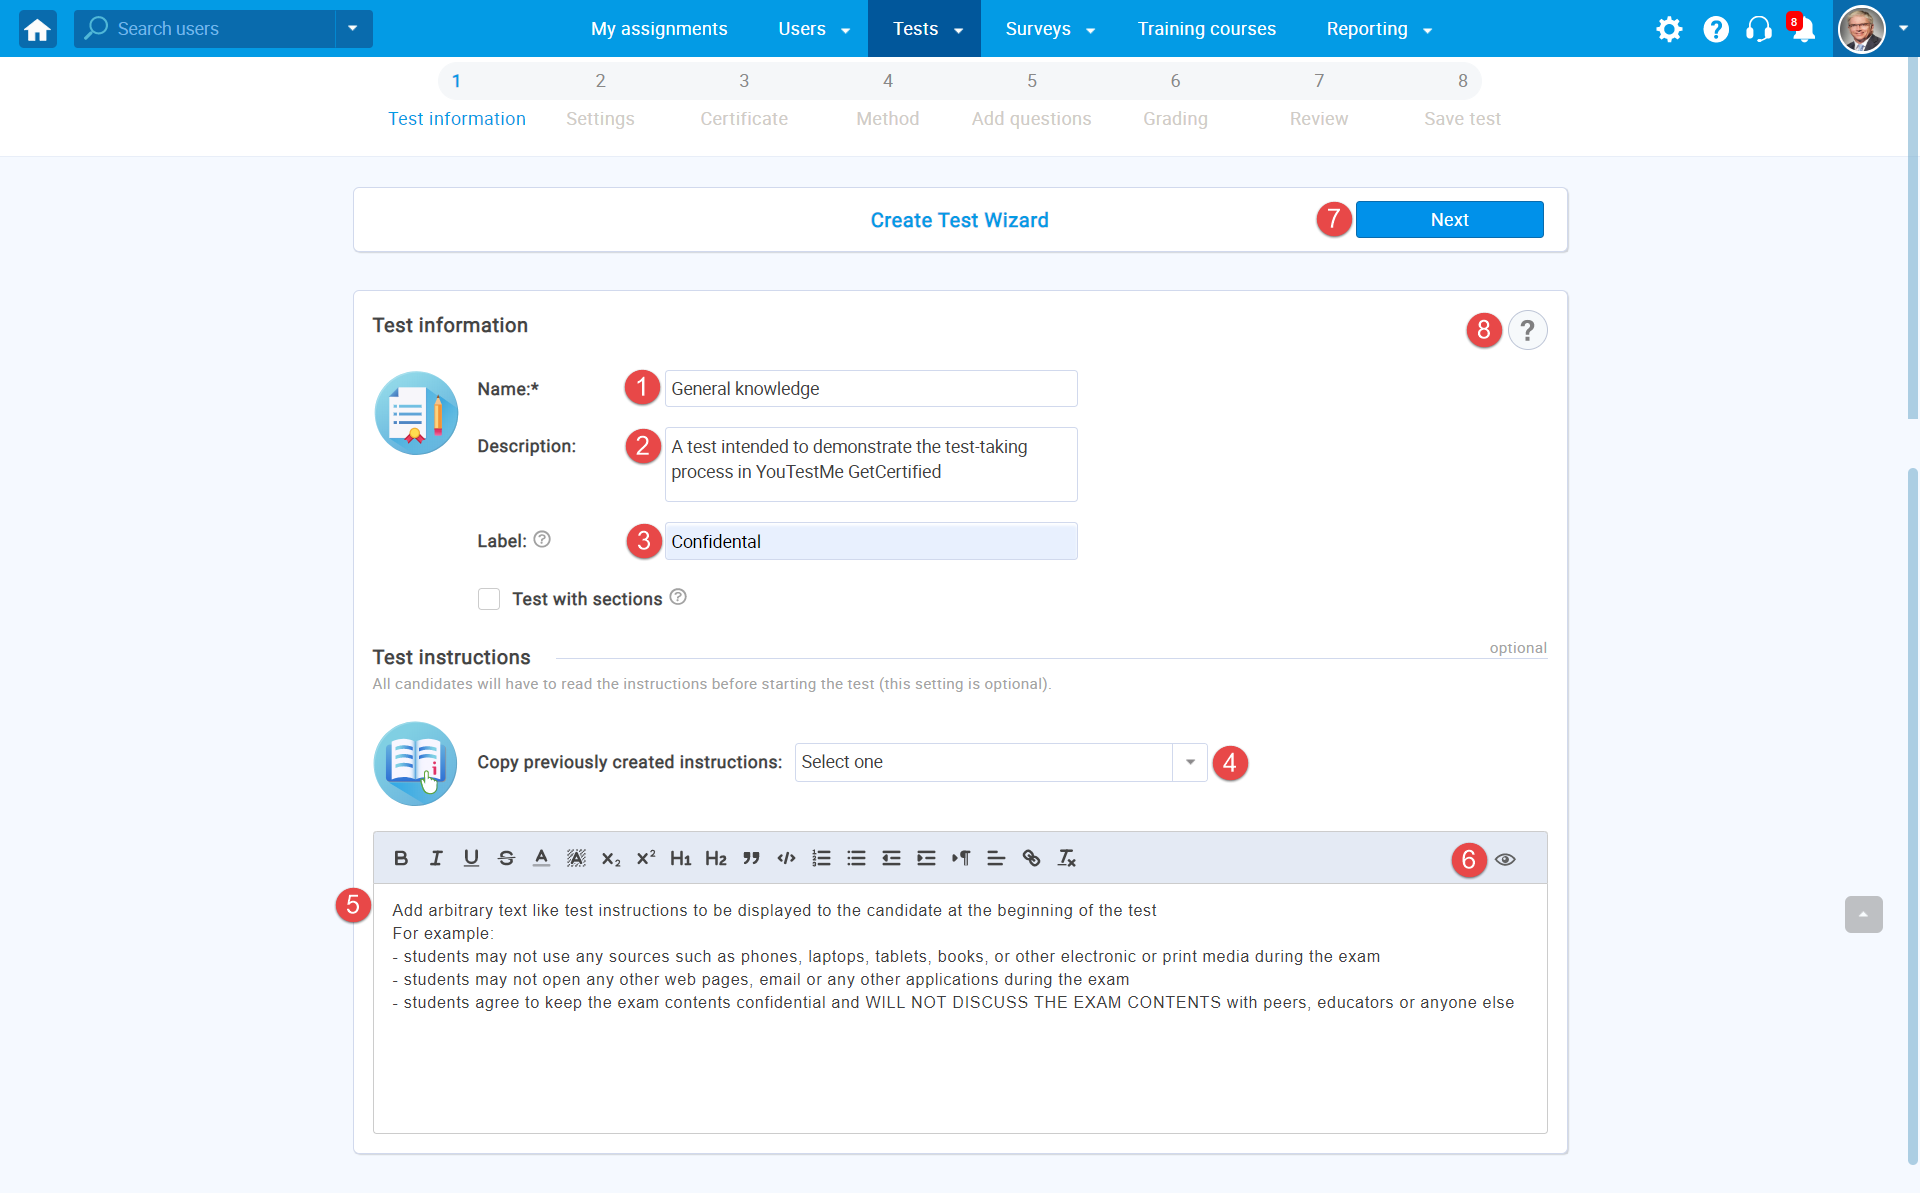
On this page, you can:
- Enter the "Name" of your test - this field is mandatory.
- Enter its "Description" - can be used to explain the test details.
- Add the test "Label" - an optional label used for additional classification that will be displayed in every exported report. Eg. "Classified", "Confidential"...
- "Copy from previously created tests" - by selecting already created instructions or
- Enter new "Test instructions" - specific rules or guidelines that students need to acknowledge in a pop-up dialog before they start the test and in the notes during the whole test-taking process.
- "Open instructions preview" - use this option to preview the test instructions and description.
- Click the "Next" button to proceed to the next step of test creation.
- Visit "Help" - click the question mark to be redirected to the help section for this part of the application.
- Test settings
THe"Settings" step contains the following options for configuring your test:
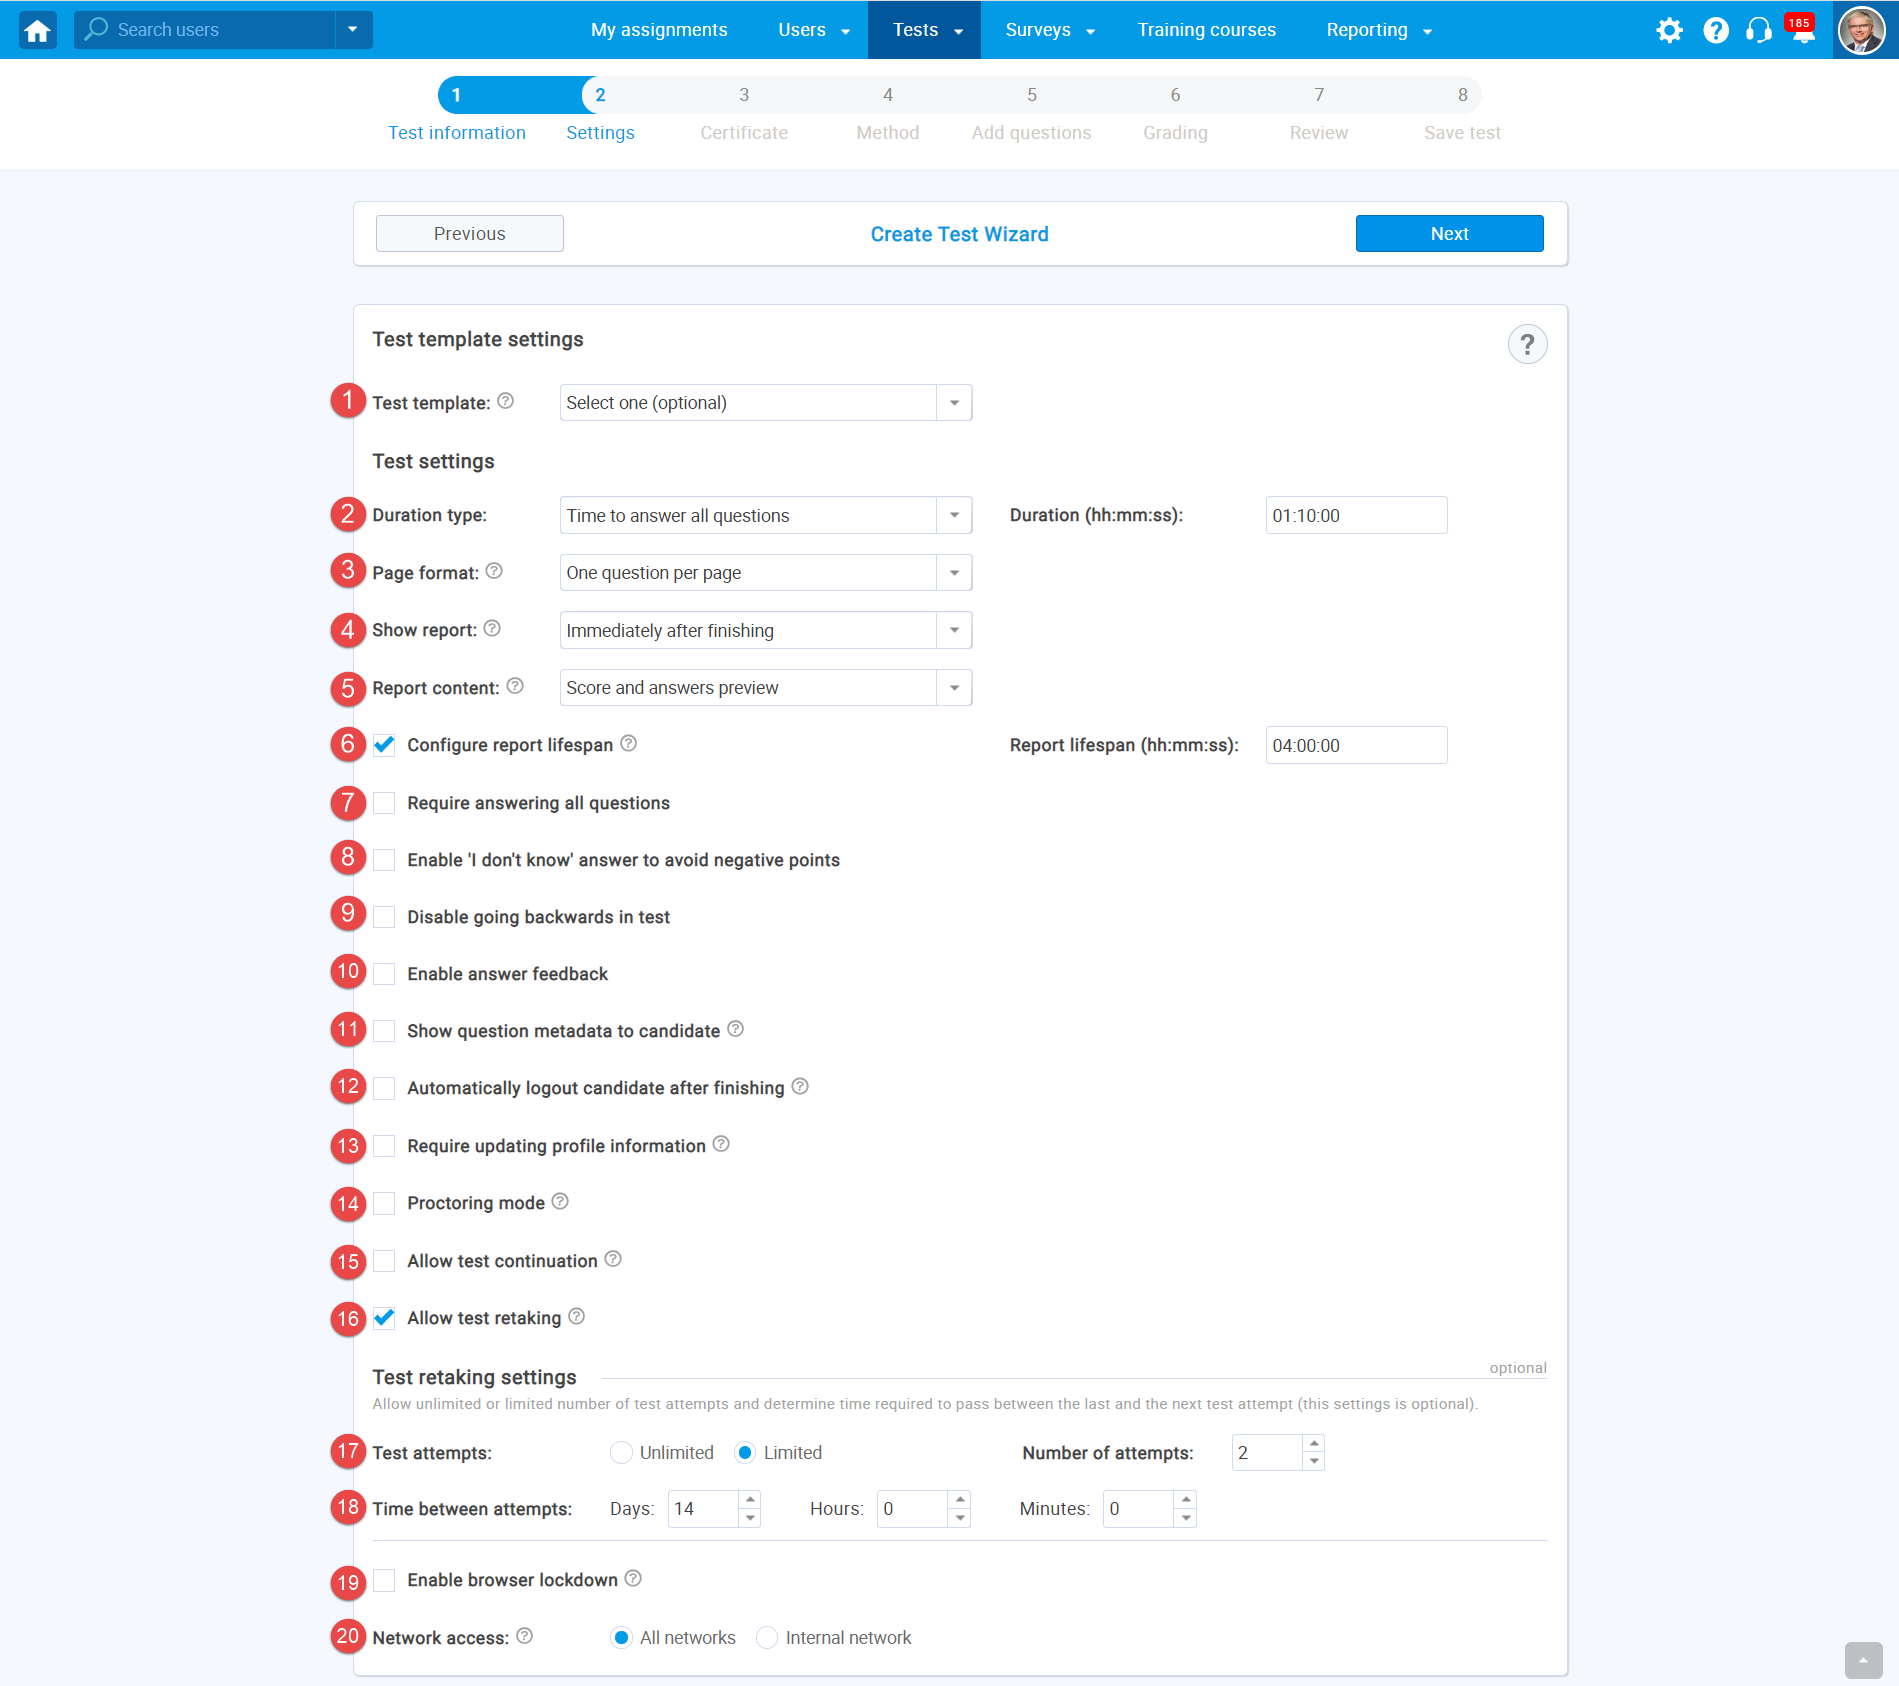
- "Test template" - when creating a test, you can save its settings and question pools configuration as templates. You can use one of the previously created test templates by choosing it from the drop-down menu. For more information, please visit Test templates.
- "Duration type" - choose how you want to
time-limit your test by selecting the duration type:
- "Unlimited" - the test will not be time-limited.
- "Time per question" - each question in the test will have its time limit. The exact time limit for each question can be configured during the question creation process.
- "Time to answer all questions" - set the time limit for the whole test.
- "Page format" - set how the questions will
be displayed. You can choose between:
- "One question per page"
- "All questions on one page"
- "Show report" - decide when will the report
be available to users:
- "Real time grading" - during the test-taking process, users will see the changes in their test score after submitting each answer.
- "On manager's approval" - users will see the report after the test manager approves it.
- "Immediately after finishing" - users will
see the report immediately after completing the test.
- "Report content" - define the content of the
report the user will receive. You can choose between two options:
- "Score and answers preview" - the user will see his score and all question and answer details - e.g. his answer and the correct answer.
- "Score only" - the user will see only the score.
- "Configure report lifespan" - set how long the question details are visible to the users after they open their personal report for the first time.
- "Require answering all questions" - if you choose this option users won't be able to finish the test without answering all questions.
- "Enable "I don't know" answer to avoid negative points" - users will be able to check the "I don't know" box when answering the question, to avoid negative points.
- "Disable going backwards in the test" - users will not be able to go back to the previous questions while taking the test if you check this option.
- "Enable answer feedback" - a feedback can be displayed to a user in a pop-up window after he answers each question.
- "Show question metadata to candidates" - question points, type, and difficulty will be displayed to users during the test-taking.
- "Automatically logout candidate after finishing" - the application will automatically logout the user upon completing the test.
- "Require updating personal information" - hen initiating the test, a screen with the user's personal information will appear. The user can confirm the validity of the information or make necessary changes in order to start the test.
- "Proctoring mode" - if enabled, the system will receive the information from the user's web camera microphone and screen, flag suspicious behavior (e.g. background noise, unauthorized faces in front of the camera). You can also examine the video recording afterwards or live monitor the users. The whole session process will automatically be available to you in a PDF report generated by the system.
- "Allow test continuation" - by enabling this
option you will allow users to save their answers, take a pause
and continue the test within the tests' availability period.
Availability period is set later in the testing
session creation process.
Note: This option can not be combined with the option "enable browser lockdown". - "Allow test retaking" - by checking this option, users will be able to retake the test during the test availability period. You can limit this option by setting the options 17. and 18.
- "Test attempts" - you can choose between:
- "Unlimited" - the users can repeat the test an unlimited number of times.
- "Limited" - the users can take the test as many times as you allow them.
- "Time between attempts" - set the time required to pass between each retake attempt.
- "Enable browser lockdown" - the users will not
be able to cut, copy, save or print anything from the screen during
the test-taking process. Also, the web browser will be in the
full-screen mode, and if the users try to minimize it, the test
attempt will be terminated.
Note! This option can not be combined with the option "allow test continuation." - "Network access" - you can limit the access to the test only to people within your local (internal) network. For more information on defining the internal network, please see the internal network.
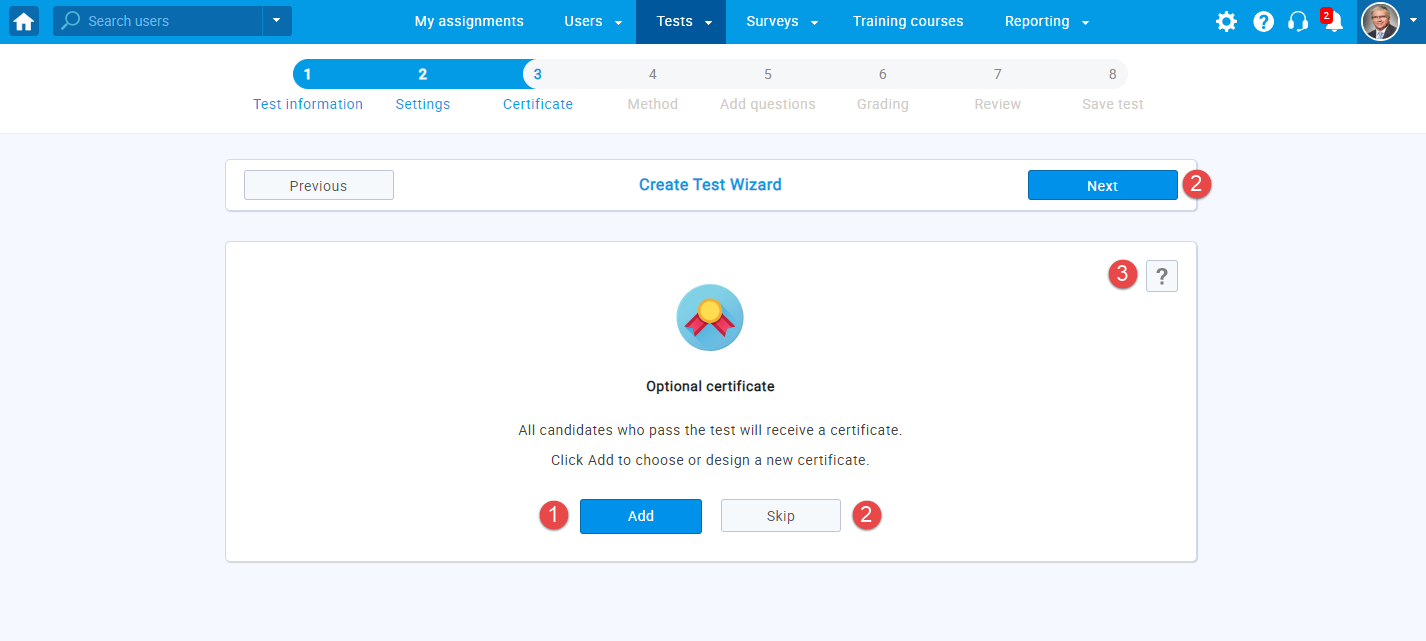
- Certificate
A test can have its own certificate granted to users who successfully complete it.
- Click the "Add" button to add the certificate to the test.
- Click the "Skip" or "Next" button to move on with test creation without adding the certificate.
- Click "Help" if you need any assistance with this part of the application.
If you choose to add the certificate, you will see the following screen:
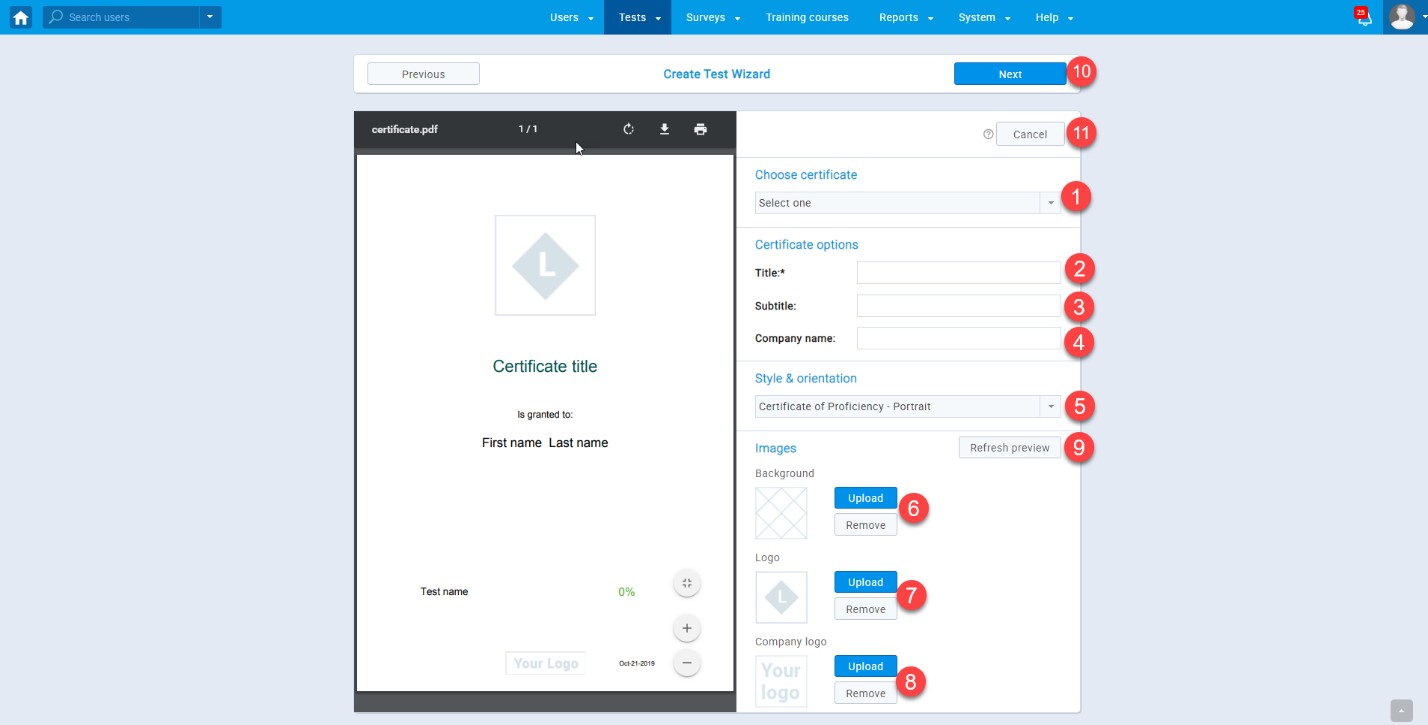
- "Choose certificate" - select one of the previously created certificates.
- "Title" - enter the title of the certificate.
- "Subtitle" - Enter a subtitle.
- "Company name" - enter the name of the company that issues the certificate.
- "Style and orientation" - choose one of the preconfigured styles and orientations (landscape, portrait).
- "Background" - upload a background for the certificate. Use the remove option to remove it and add a new one.
- "Logo" - upload a logo for the certificate. Use the remove option to remove it and add a new one.
- "Company logo" - upload a Company logo. Use the remove option to remove it and add a new one.
- "Refresh preview" - at any moment during the certificate creation, you can use this option to preview the changes you have made.
- "Next" - click the next button to proceed to the next step of the test creation process.
- "Cancel" - use this option to remove the certificate and continue with the test creating process.
- Method
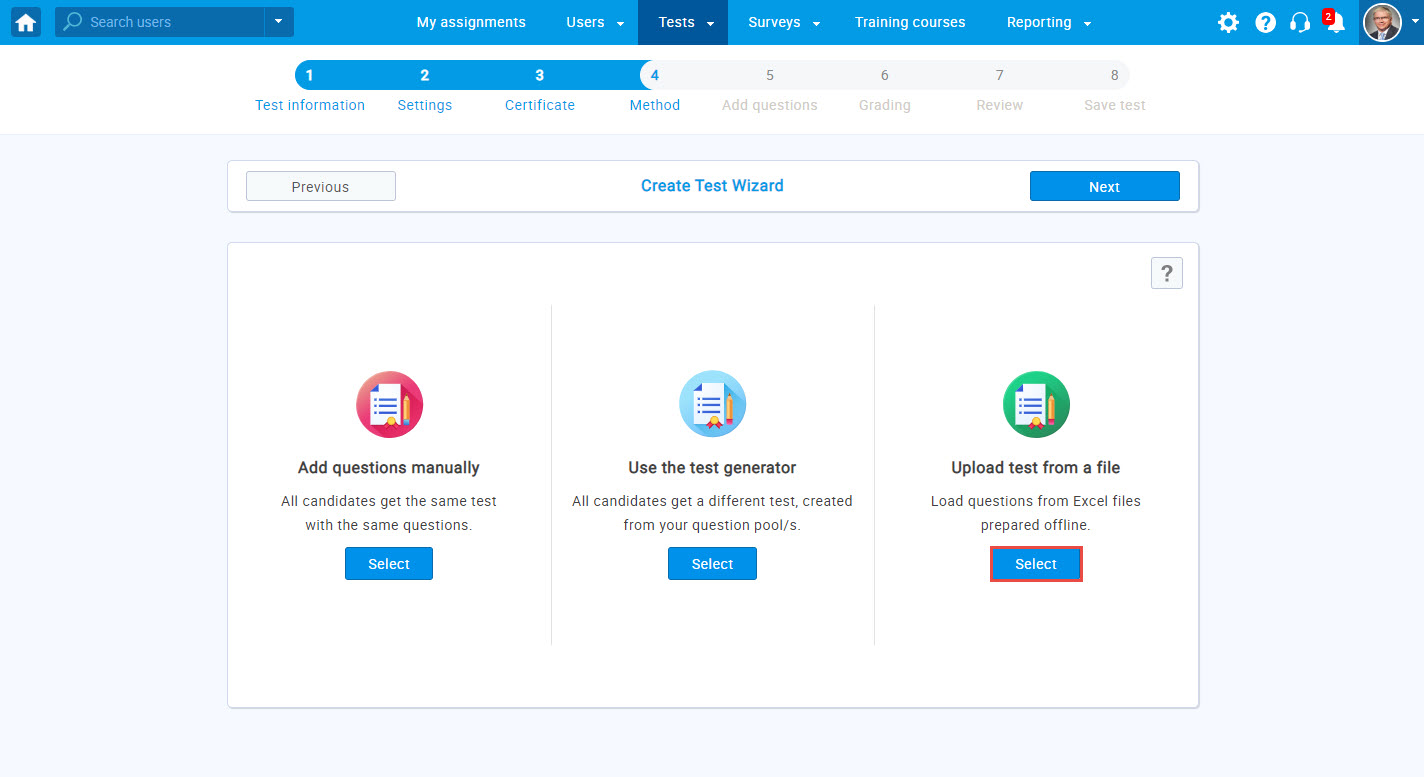
You can choose between the following methods for adding questions to your "Test":
- "Add questions manually" - create questions manually or add the existing ones from question pools. This method creates a unique test version.
- "Use the test generator" - this method allows you to create an unlimited number of versions of the same test. These test versions will be unique but comparable since they will contain the same ratio of easy, medium, and hard questions.
- "Upload test from Excel" - When you choose this option, you can still modify your test settings and questions. For more information, lookup loading test from Excel.

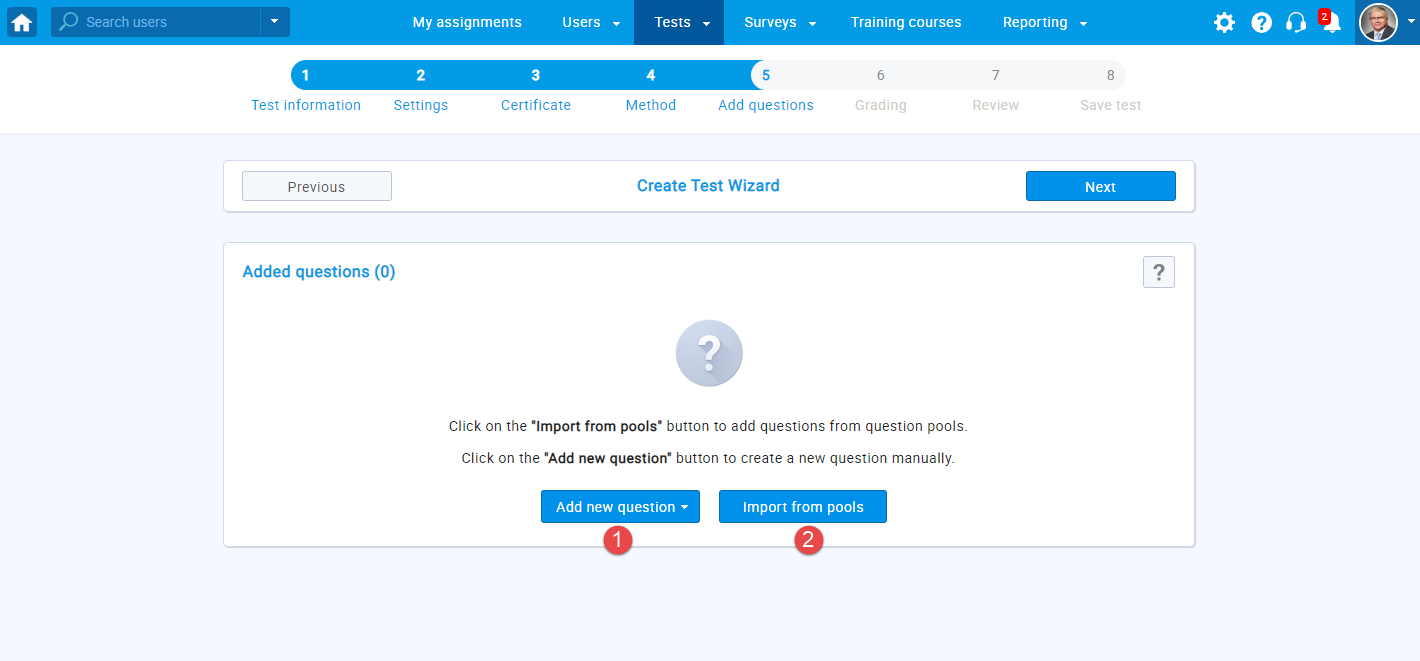
- Add questions manually
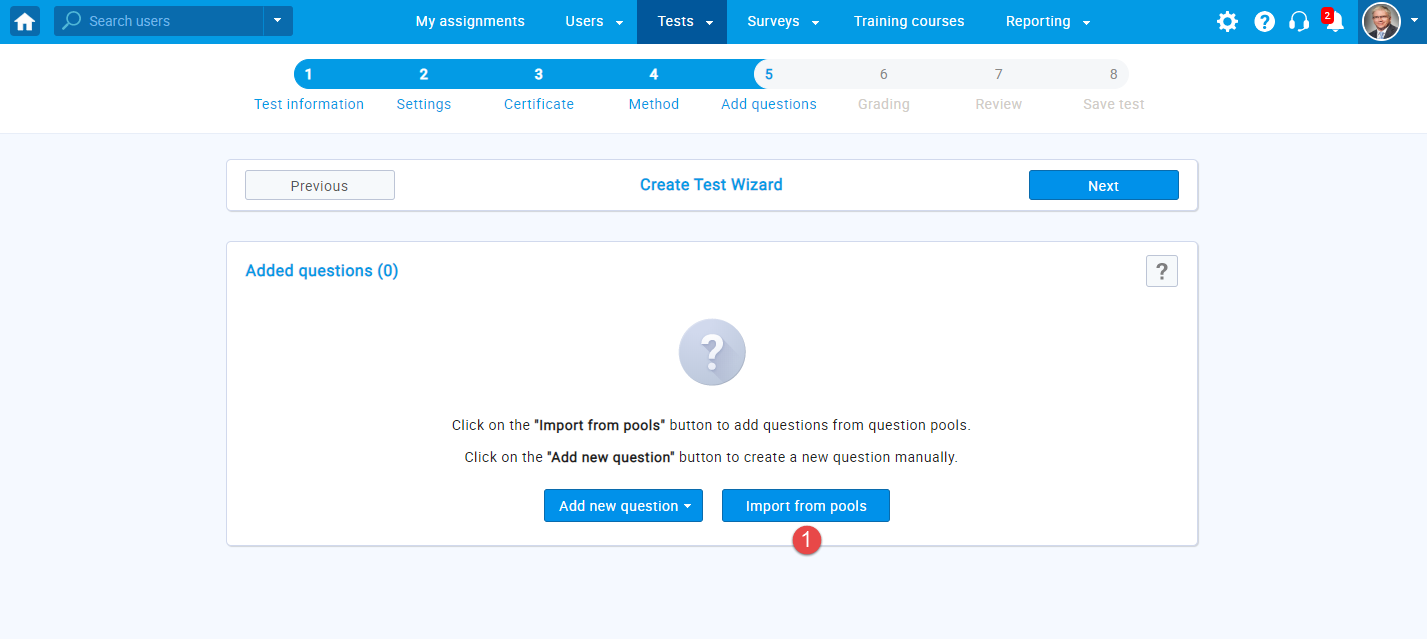
The options for adding your questions manually to the test are:
- "Add new question" - choose this option to create questions manually, one at a time.
- "Import from pools" - choose this option to add questions from previously created question pools.
You can also combine these options.
- To create a question manually, select "Add
new question," and choose the question type from the drop-down
list.
You will find a detailed explanation of each question type below. - Click "Help" if you need any assistance with this part of the application.
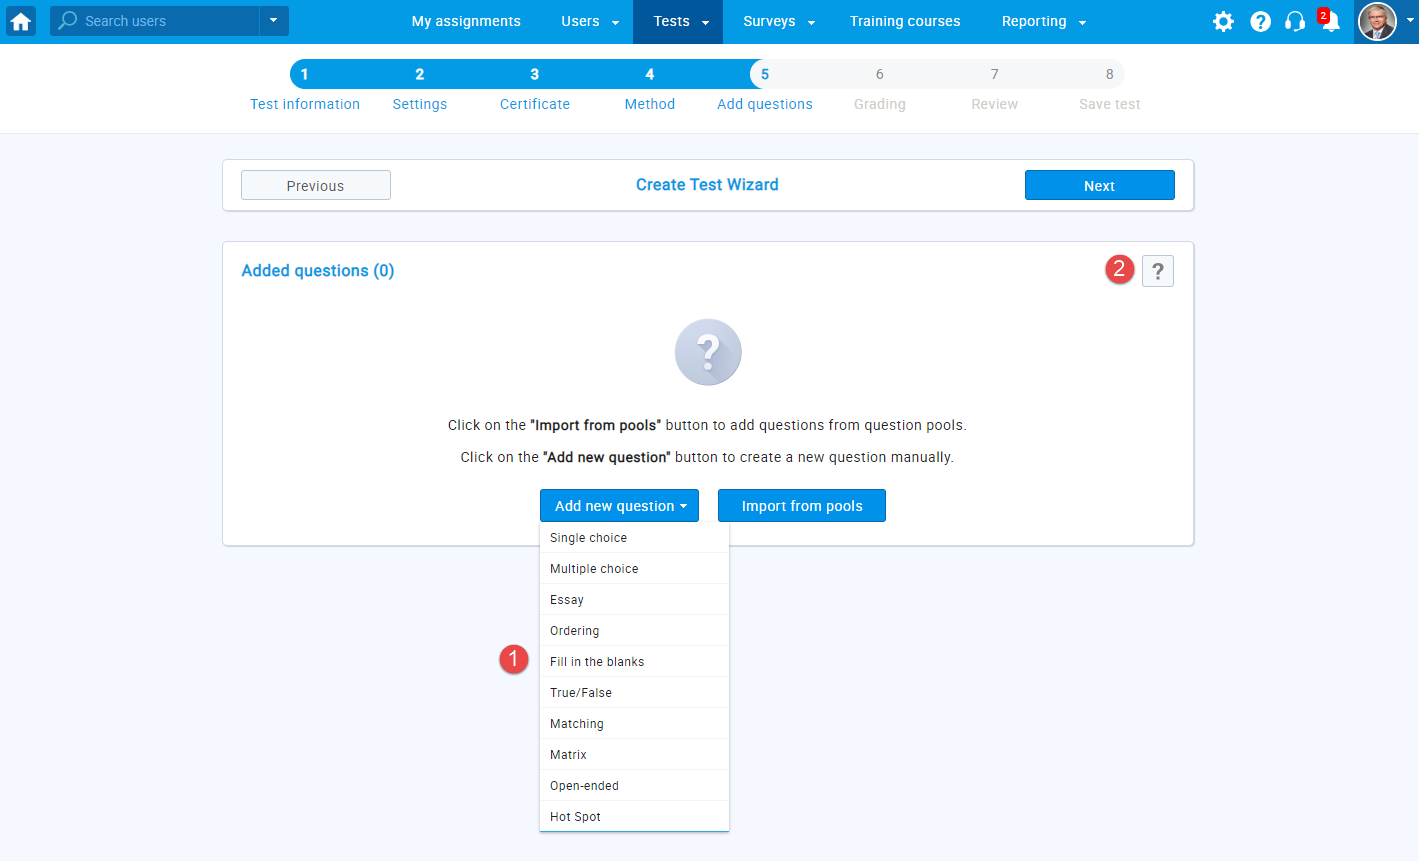
You can choose between the following question types:
- "Single choice" - multiple answers are displayed but the user can select only one.
- "Multiple choice" - the user can mark multiple answers as correct.
- "Essay" - users have to type an essay in a text box. These questions need to be graded manually.
- "Ordering" - users need to rearrange answers into the correct order.
- "Fill in the blanks" - users need to fill in the missing parts of sentences. This question type can be graded manually or automatically (if you enter offered answers in the drop-down form).
- "True/False" - users have to mark the sentence as "true" or "false".
- "Matching" - users pair objects/text on the left with the objects/text on the right side.
- "Matrix" - questions are displayed in a grid format. The rows present the questions, and the columns offer a set of predefined answer choices that apply to each question.
- "Open-ended" - blank spaces need to be filled in with the correct answer. The system will automatically grade this question by comparing the answer with the predefined correct answer.
- "Hot Spot" - users are required to mark "spots" on an image as an answer.
Hover over each question type to view a short example of it.
You can see detailed instructions on how to create different question types at the question types page.To add questions to a test from an existing question pool, follow the steps below:
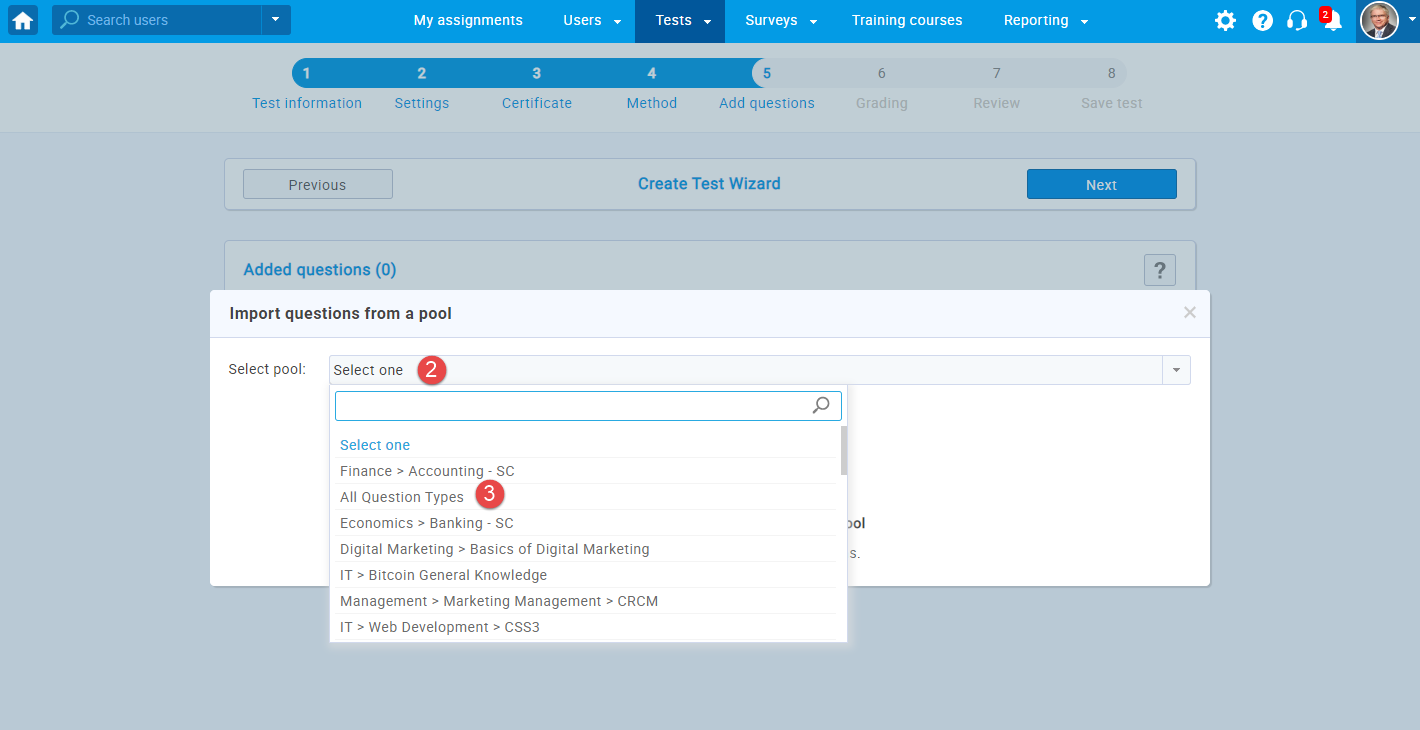
- Select the"Import from pools" option
- Click on the drop-down menu to view all available pools. You can choose only the pools you created or manage.
- Select the desired question pool.
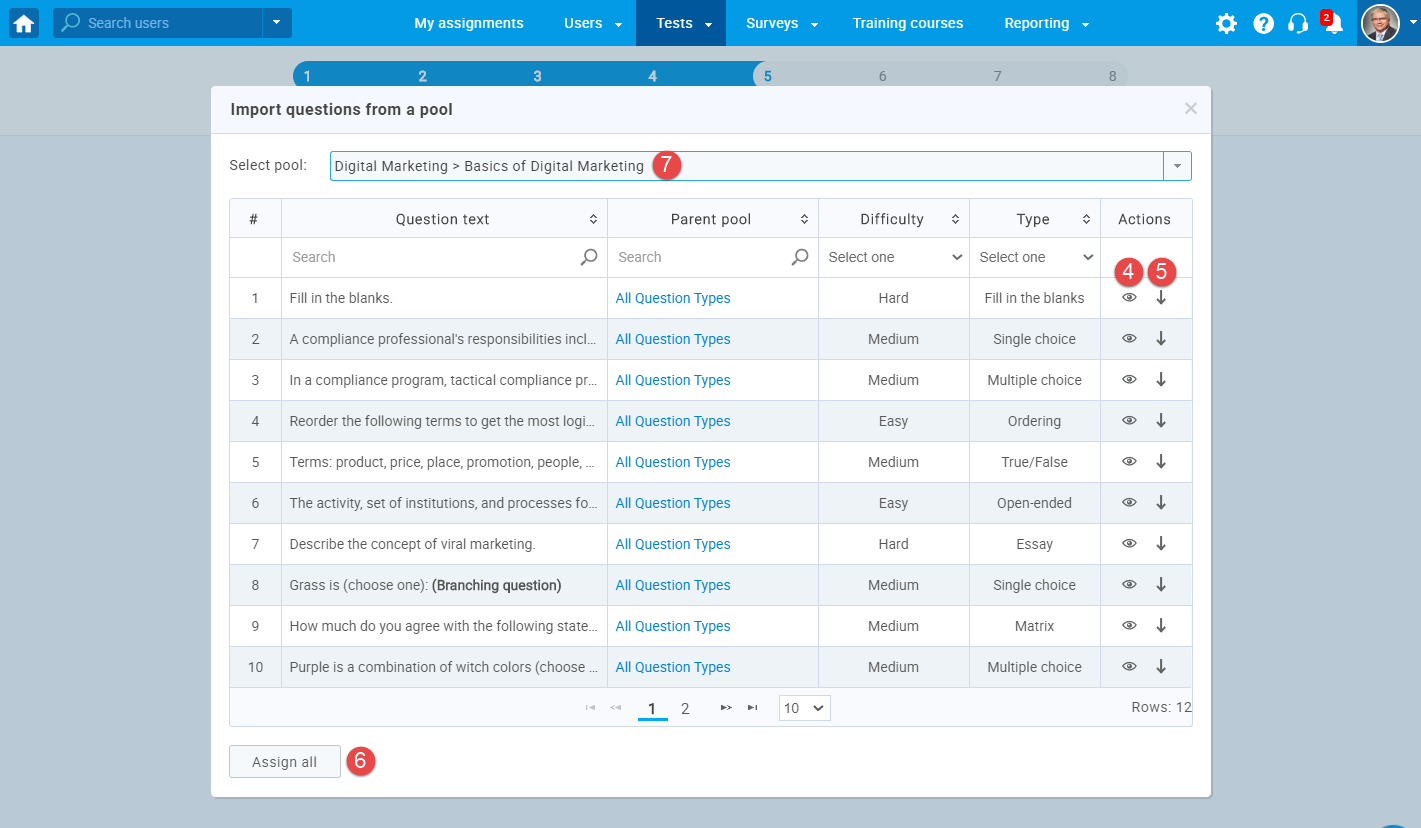
- Preview each question.
- Import a single question from the selected pool.
- Import all questions from the selected pool.
- Change the question pool. All questions assigned from the previously selected pool remain in the test.
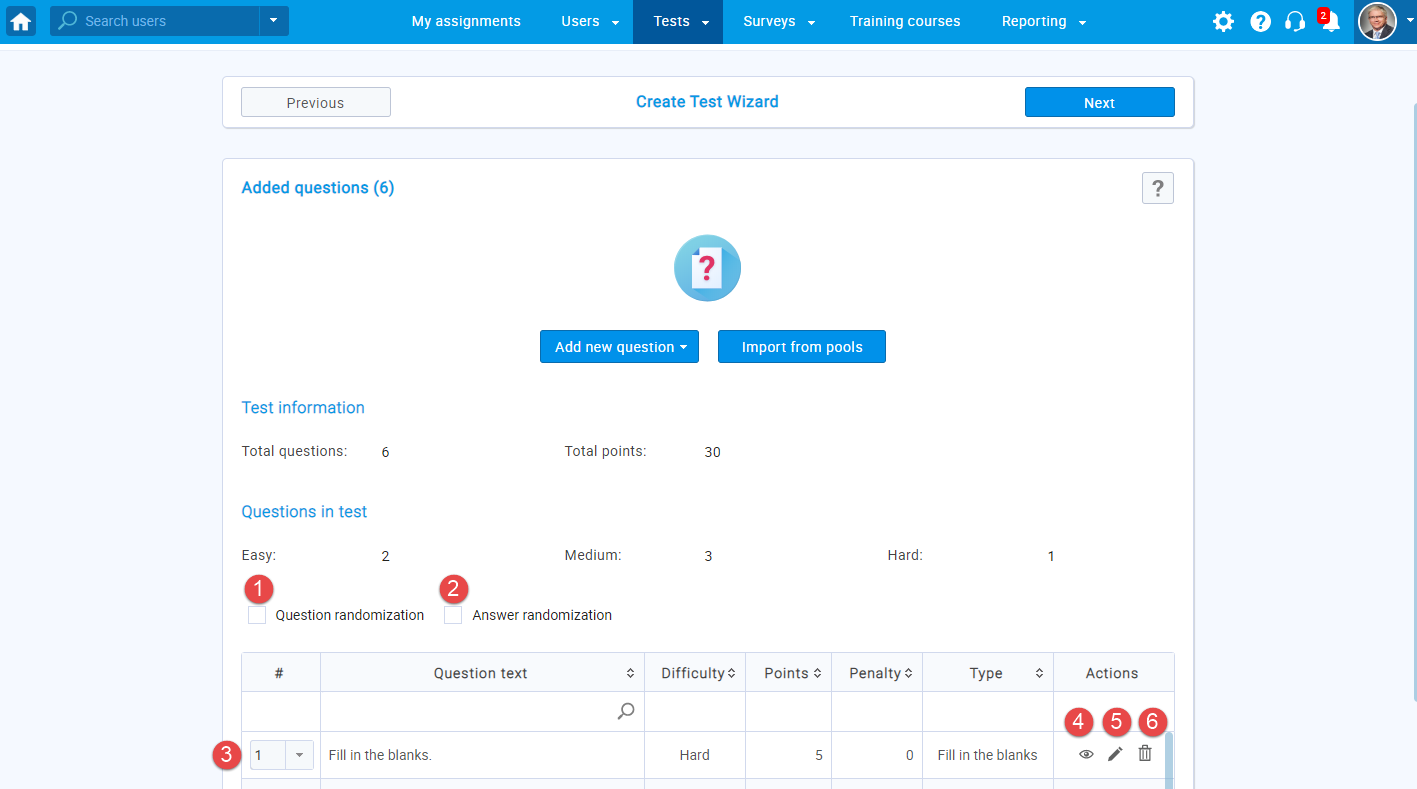
Once you choose a pool, you can:
- Randomize the order of questions. Each user will get questions in a different order.
- Randomize the answers for each question. Each user will get a different answer order for the same question.
- Change the order of questions.
- Preview each question.
- Edit each question.
- Remove a question from the test.
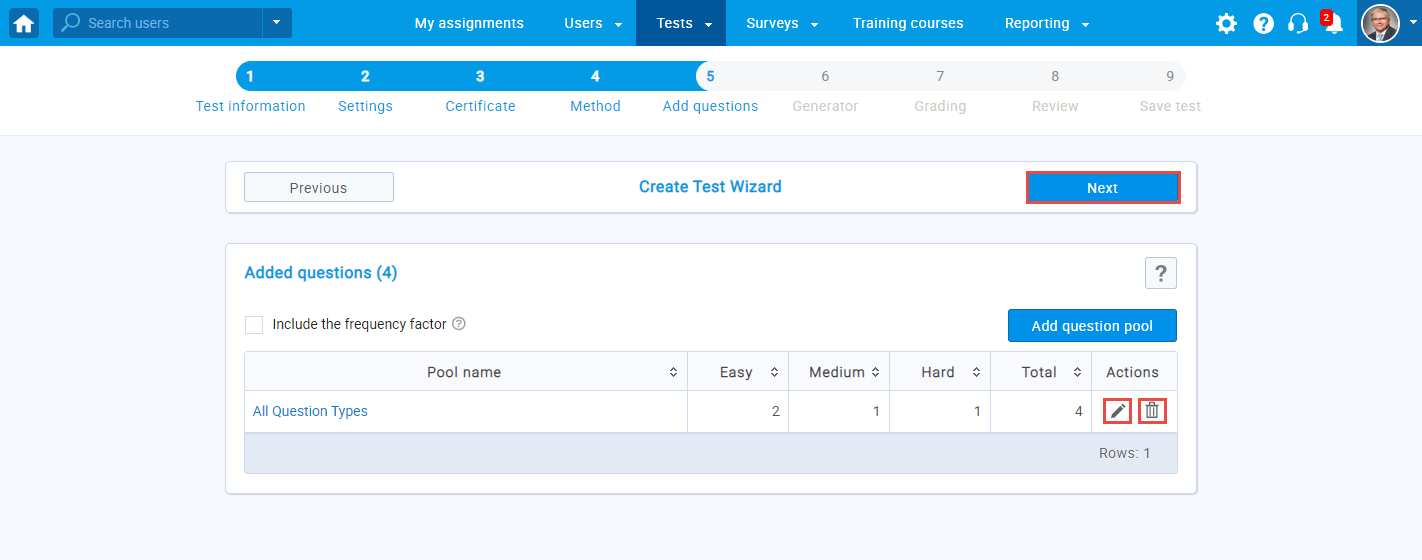
Once you have added questions to the test from the pools and/or manually, you can:
- Use the test generator
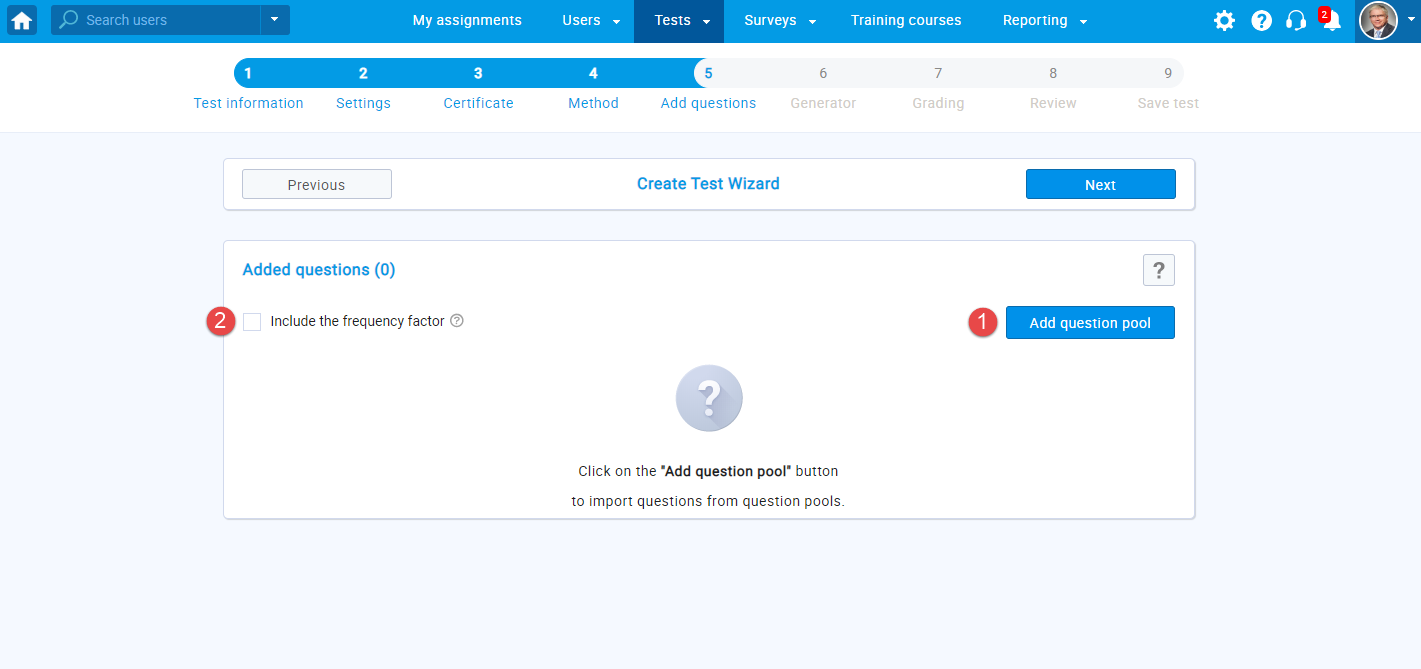
If you choose this method of test creation, the test generator will import questions from question pools and allow the creation of an unlimited number of test versions of the same test. This method does not allow manual creation of questions.
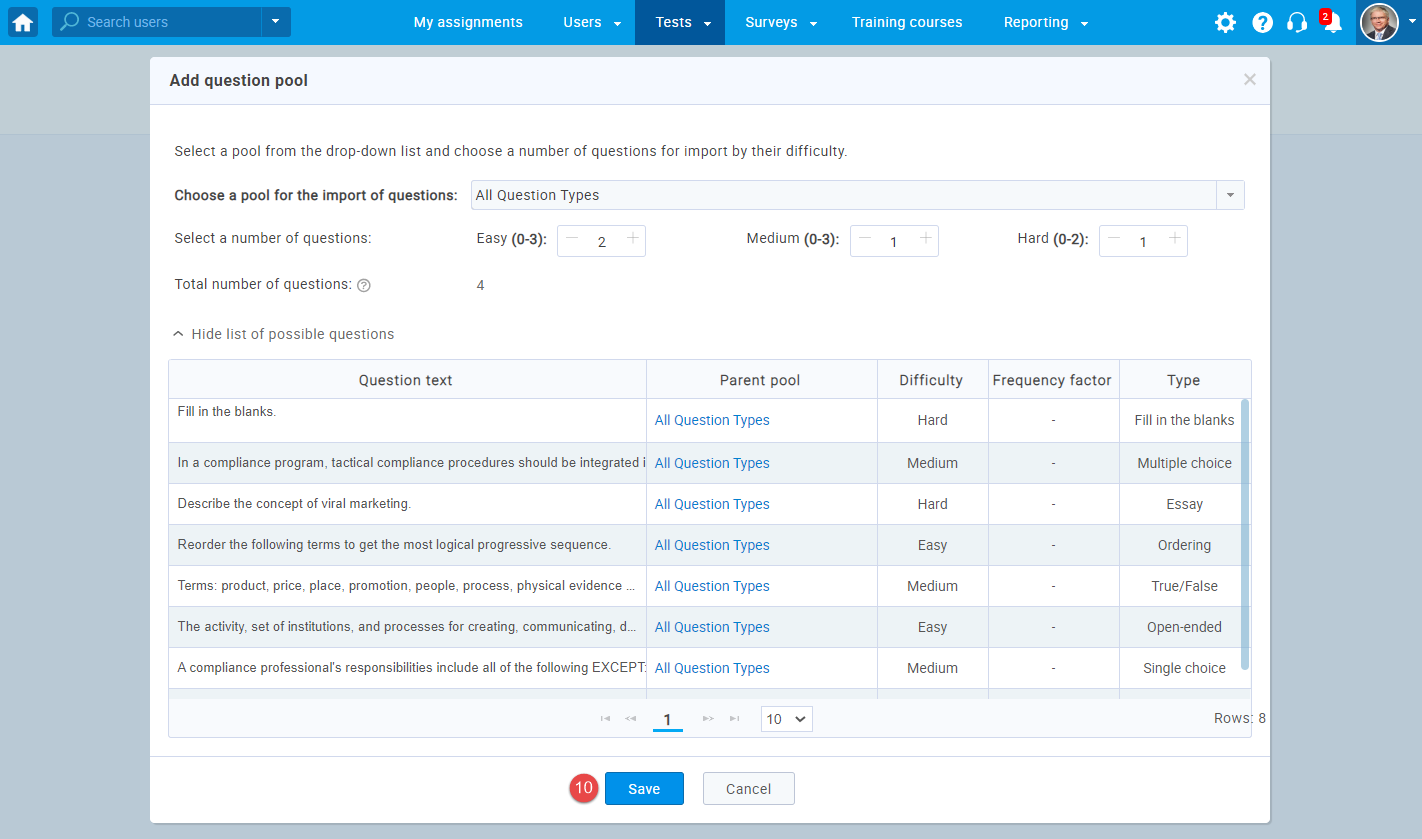
- "Add question pool" - add as many question
pools as you wish. The system will use questions from selected
pools to generate different versions of the test.
Note! The test generator does not work with branching questions, matrix questions, and questions that have a scoring type by weight. In case the selected pool contains these types of questions, they will not be displayed. - "Include the frequency factor" - represents how likely it is for the question to appear in the test. The attributes that can be assigned are "Never," "Rarely," "Normal," "Often," and "Always."
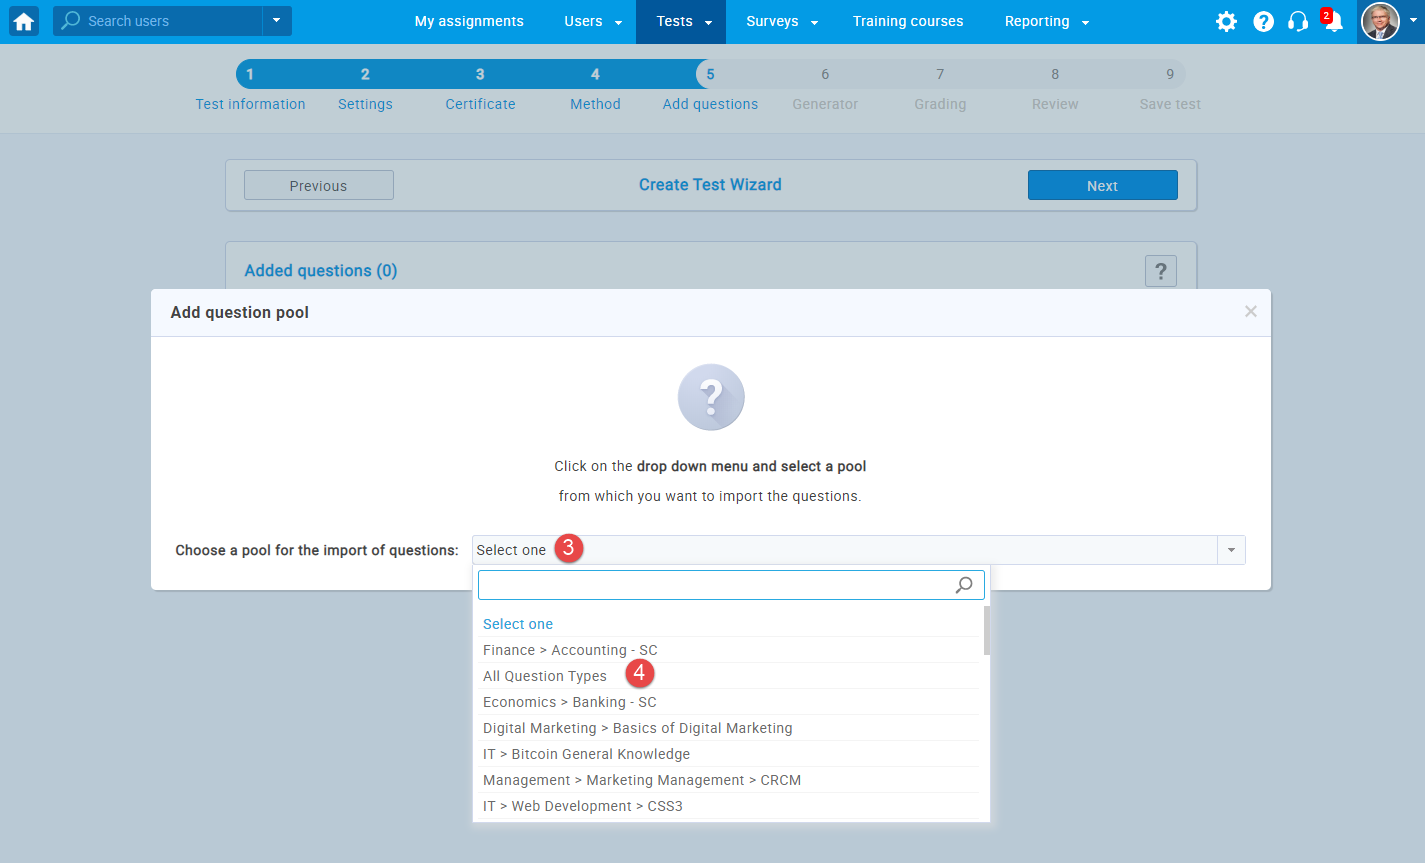
- Click on the drop-down menu to view all available pools. You can choose only pools you created or manage.
- Select the desired question pool.
- Change the question pool.
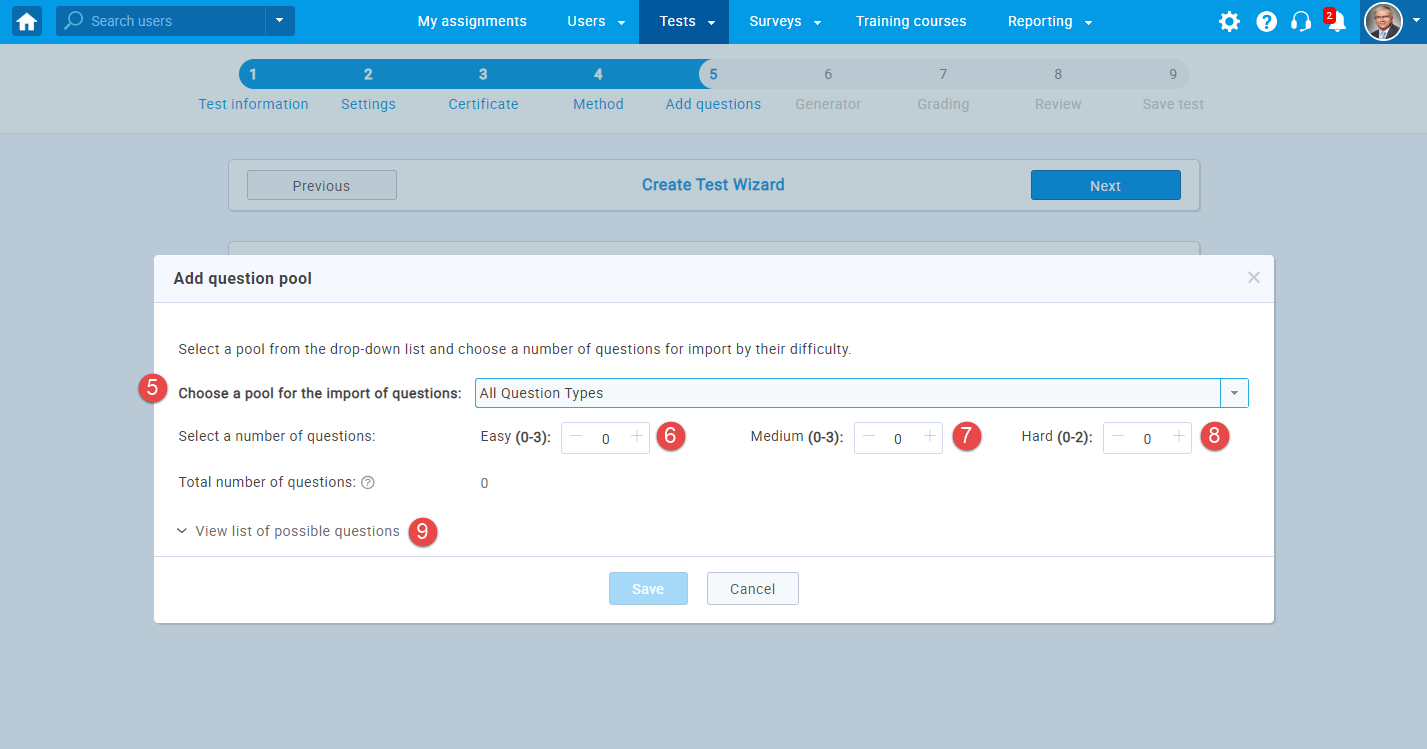
- Set the number of easy questions in the test.
- Set the number of medium questions in the test.
- Set the number of difficult questions in the test.
- View the list of possible questions.
- Once you set everything, click the "Save" button.
To see how to add a new question to the question pool, please refer to Question pools.
You can edit your settings or delete added question pools. Click "Next", to proceed to the next step of the "Test Wizard".
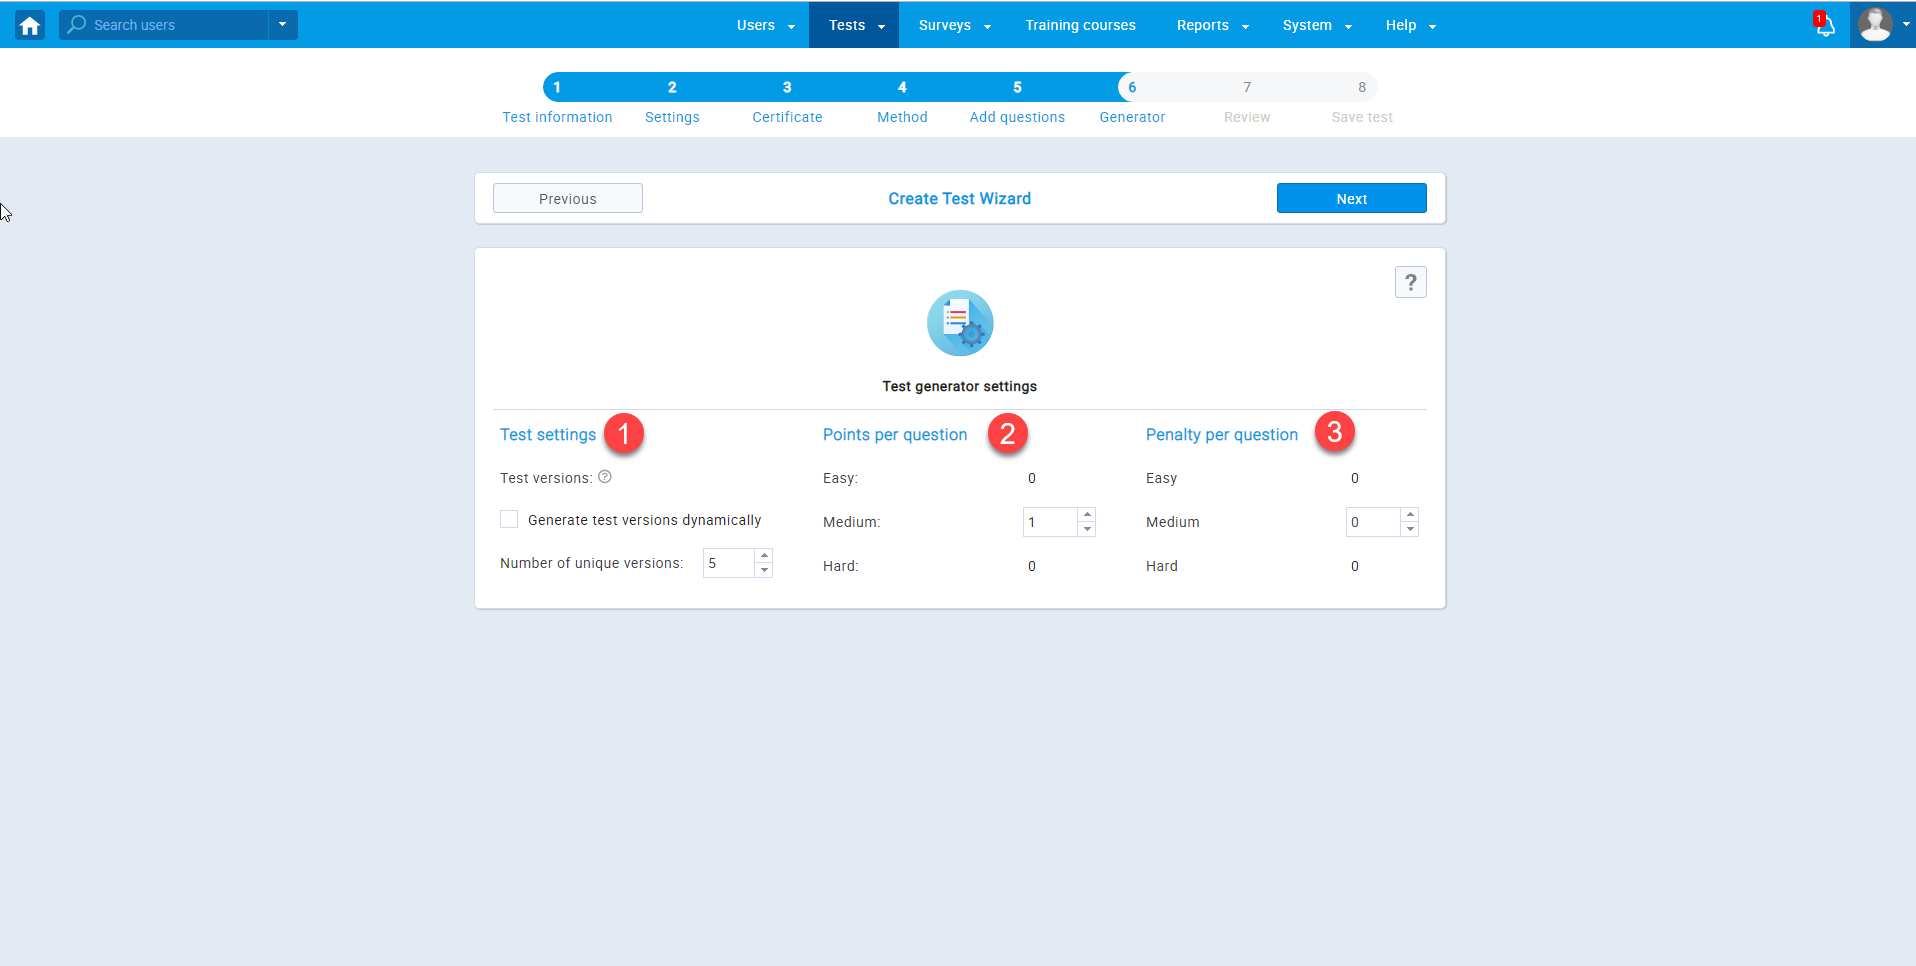
The next step is the "Generator", and here you can:
- Define the number of different versions that will be created for this test. There can be an unlimited number of dynamically generated versions, or you can predefine the number of versions.
- Set the number of points for the correct answer per question difficulty category.
- Set the number of negative points for the incorrect answer per question difficulty category.
- "Add question pool" - add as many question
pools as you wish. The system will use questions from selected
pools to generate different versions of the test.
- Upload test from Excel
Another way for adding questions is through an Excel file. You can add as many questions as you want to our Excel template and define each question's settings.
Press the "Select" button for the "Upload test from Excel" option in the "Method" step.
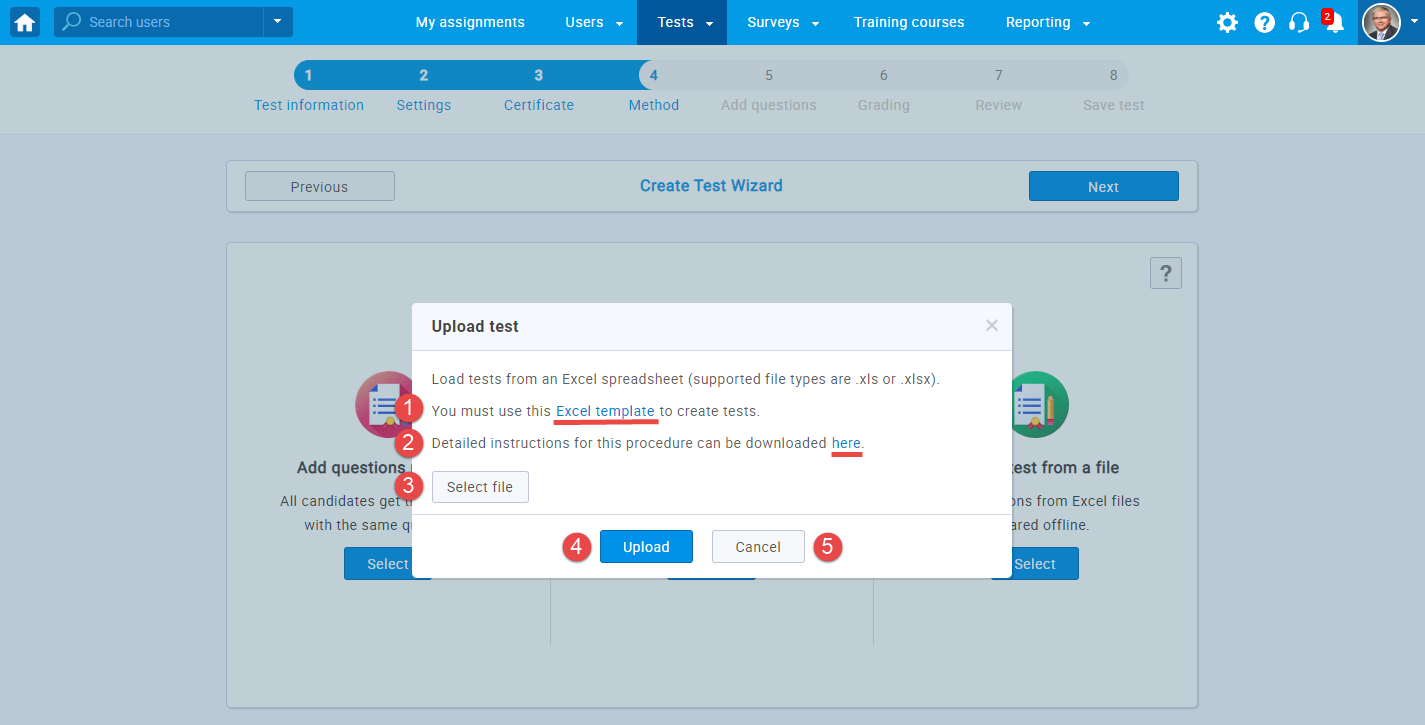
In the pop-up window, you should:
- Click the hyperlink "Excel template" text to download the predefined Excel template you should fill in with the necessary data.
- Download the detailed instructions on how to enter the data into the template by clicking the hyperlink "here."
- Once you fill in the template, click the "Select file" button to add the Excel file.
- Click the "Upload" button to add the questions from the Excel file to the test.
- If you don't want to upload the selected file, click the "Cancel" button.
Note! You will be able to edit the questions and settings in the test wizard after uploading.
- Grading test
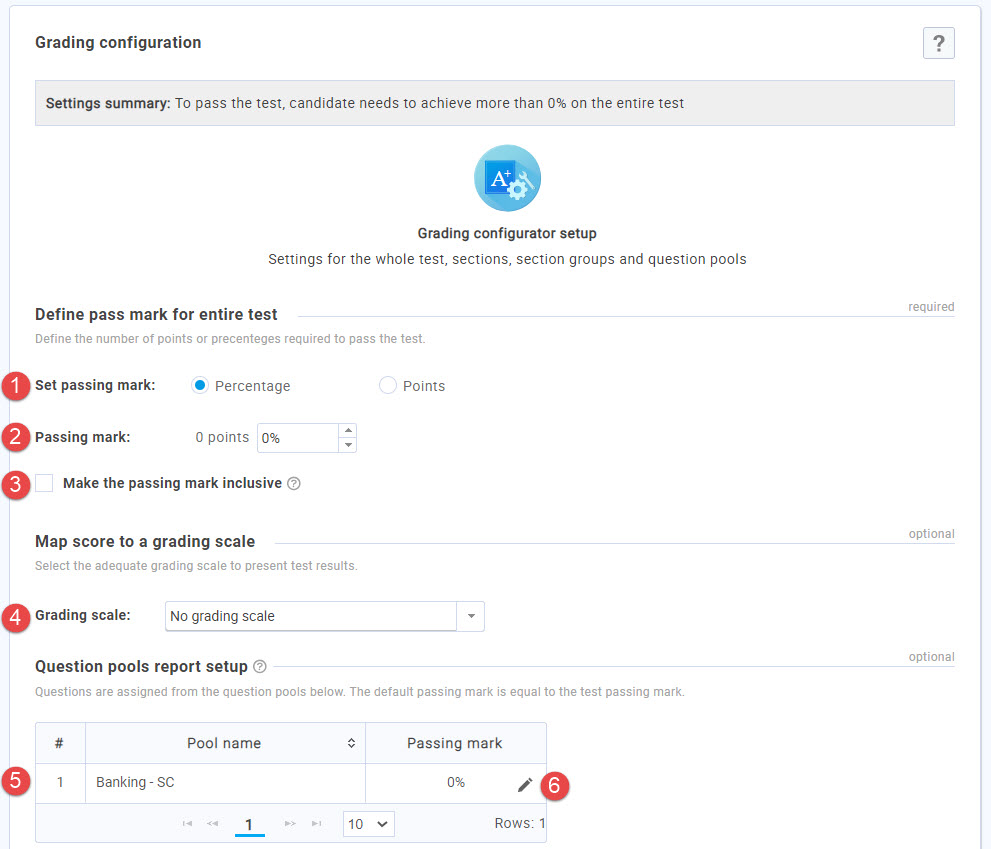
The "Grading configuration" step allows you to set the grading options for the test.
Here you can:
- Choose whether the passing mark will be expressed in points or percentages.
- Set the value of the passing mark.
- If the "Make the passing mark inclusive" option is checked, users will pass the test if they gain a score equal to or higher than the passing mark.
- From the dropdown menu, you can select one of the previously created grading scales. For more information, please visit Grading scales
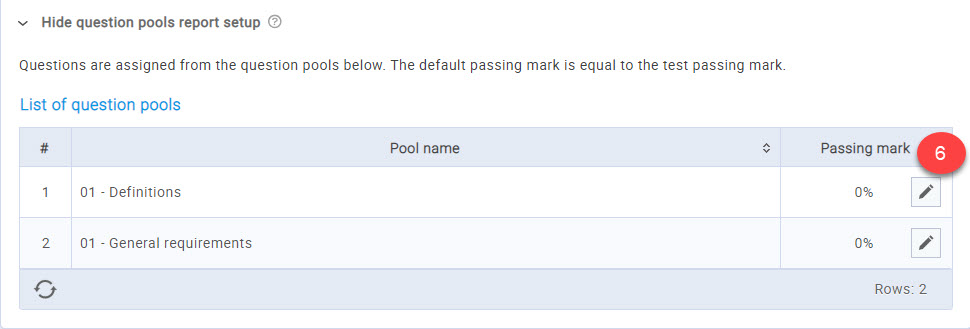
- See the list of all question pools used in the test.
- Edit the passing mark for each question pool separately.
Note! This passing mark will not affect the test passing mark and is used mainly for organizational and reporting purposes.
- Review test
The "Review" step contains a summary of the test settings and a list of question pools used.
After you have checked everything, you can press the "Next" button to continue with the test creation process. If you want to make any changes to the test, you can still go back to any test creation step.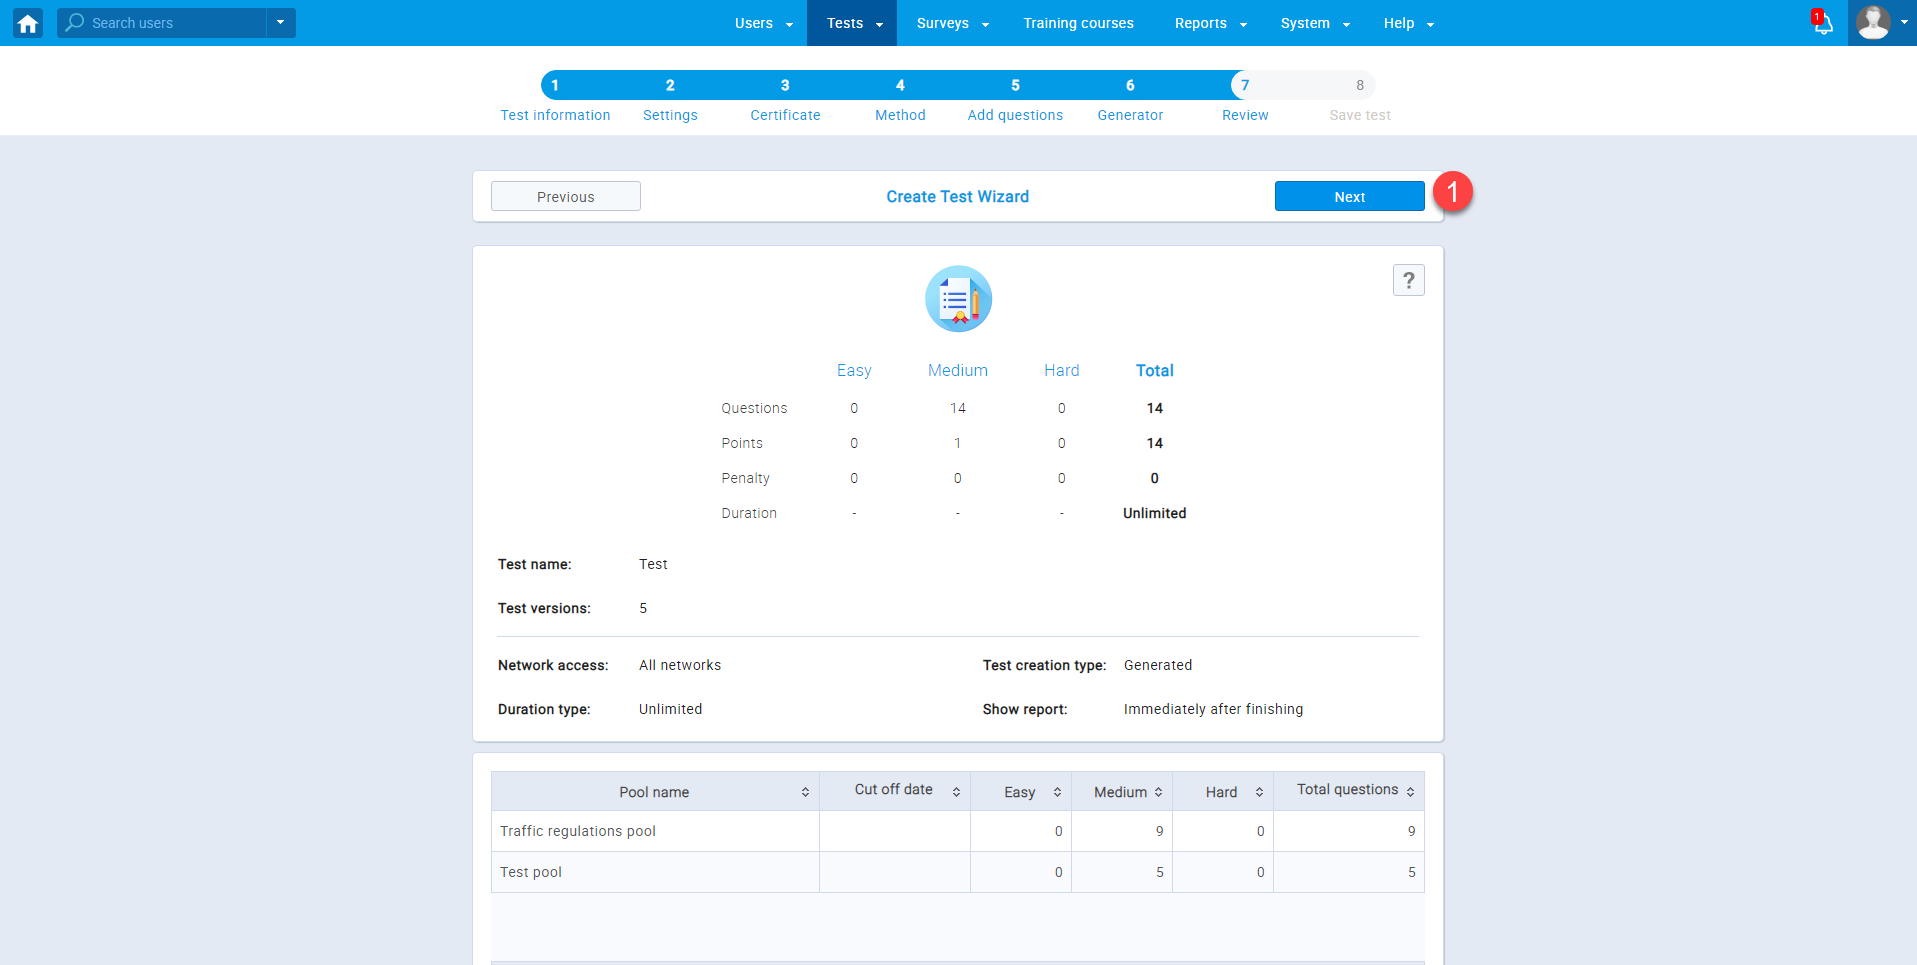
- Save test
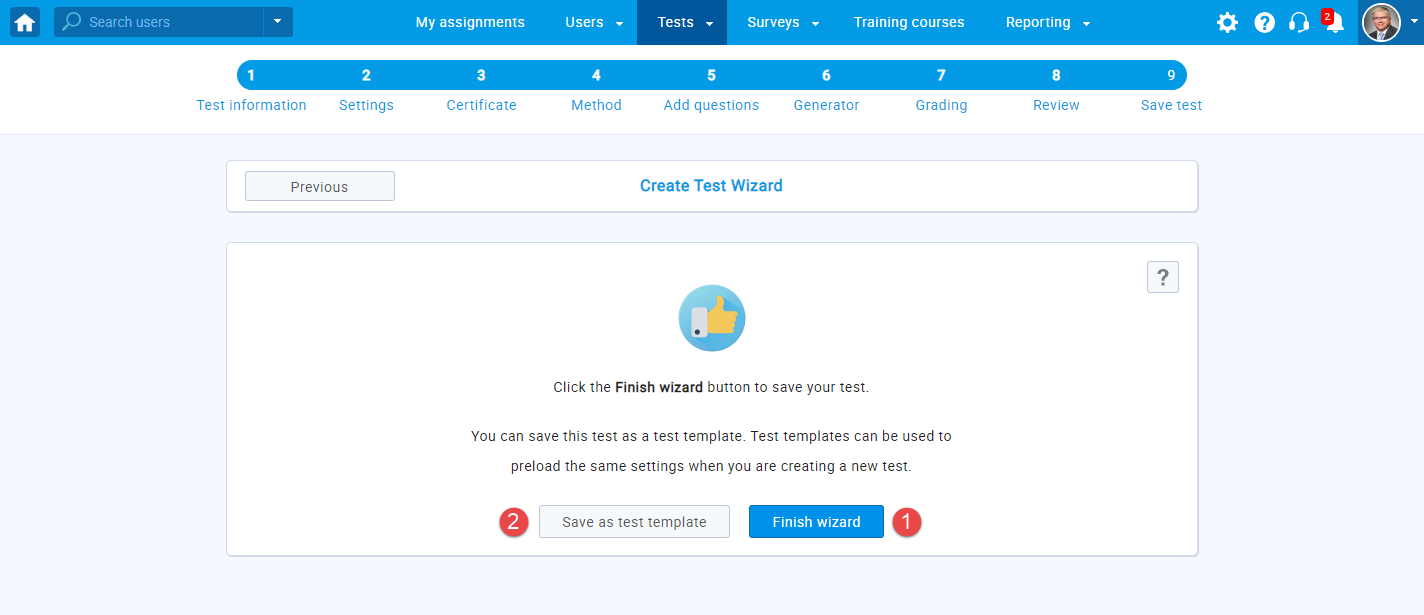
This is the last step in the "Test wizard" where you can:
- Save the test by clicking the "Finish wizard" button.
- Save the test settings and pool configuration as a test template for later use.
To save your test settings as a template:
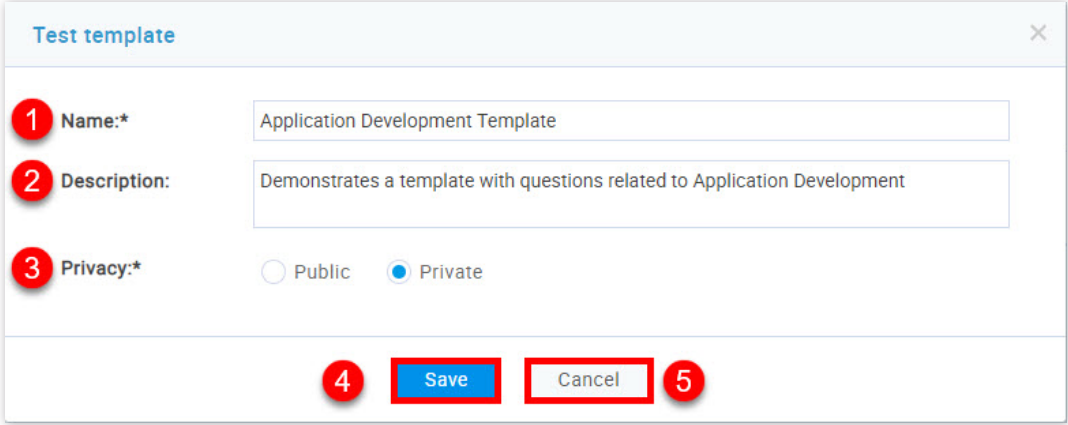
- Set the name of the template.
- Add a description. This field is optional
- Set the privacy of the template ("Public" - the test template is available to all users with the adequate permissions, "Private" - the test template is available only to the user who created it).
- Click the "Save" button to save the template.
- Click the "Cancel" button to go back.
If you need help with organizing testing sessions and publishing the test go to Manage tests
Sections can be used to represent different areas of knowledge or topics the test covers (e.g. Math, Physics etc.). Each section can have different settings.
- Test information
To start creating a test with sections, check the "Test with sections" checkbox:
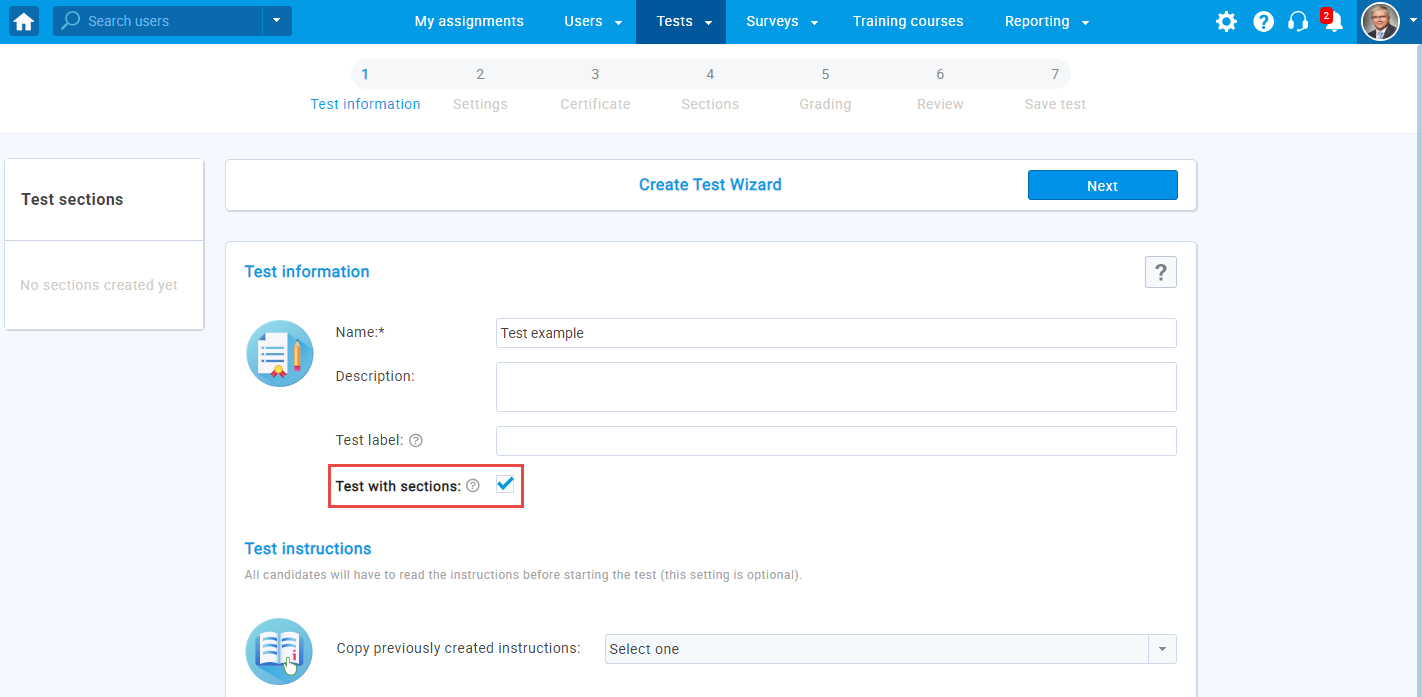
If you need assistance with filling in the rest of the page, visit Test information
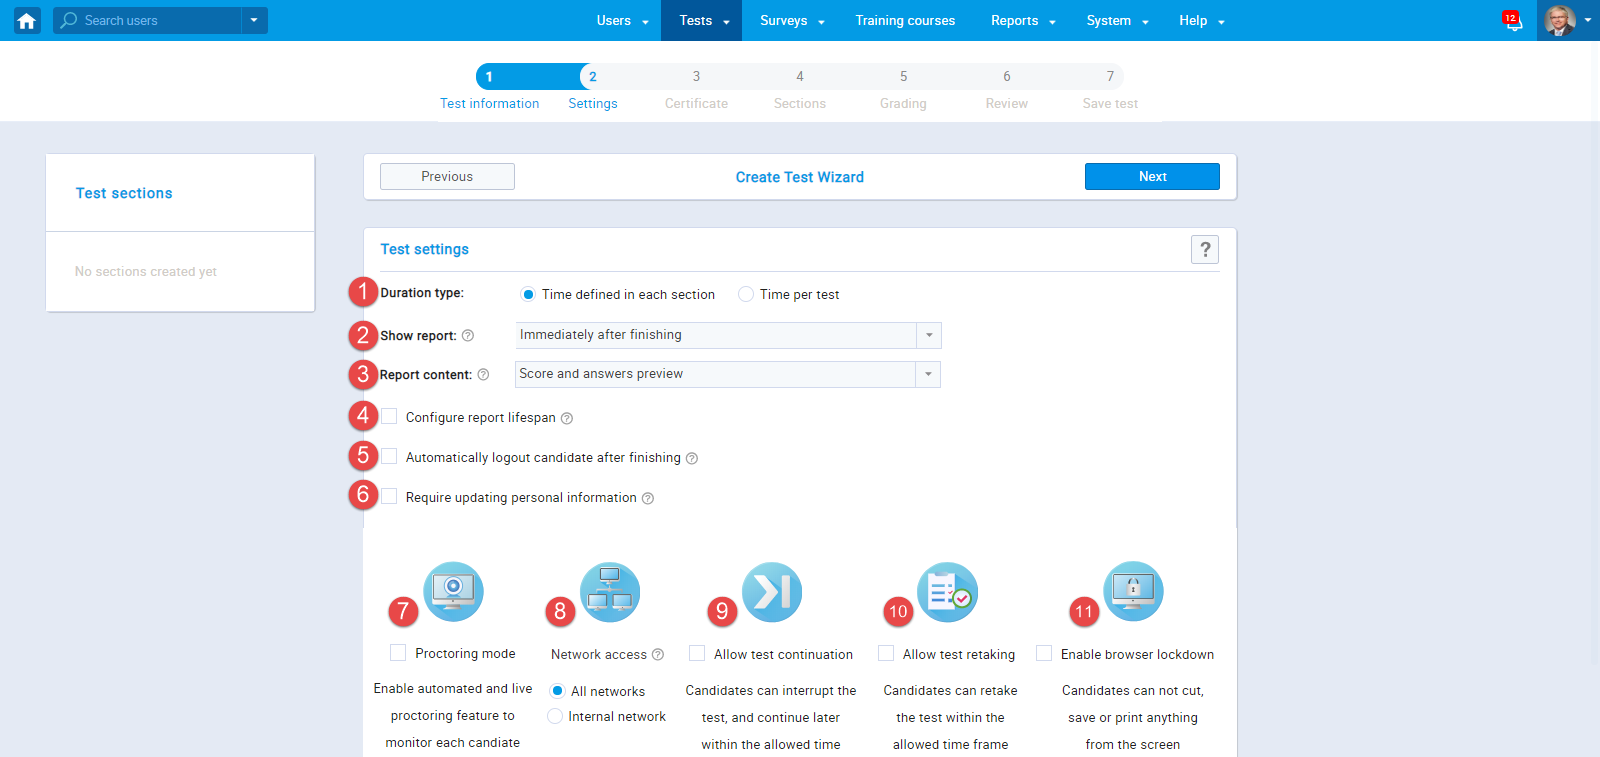
- Test settings
- "Duration type": - choose how will you
time-limit your test by setting:
- "Time defined in each section" - define the time limit for each section separately.
- "Time per test" - set the time limit for the whole test.
- "Show report" - decide when will the report
be available to users:
- "Real time grading" - during the test-taking process, users will see the changes in their test score after submitting each answer.
- "On manager's approval" - users will see the report after the test manager approves it.
- "Immediately after finishing" - users will
see the report immediately after completing the test.
Note: Some question types, such as essays, require manual grading by an instructor. Thus, the results of tests that contain this type of question cannot be immediately displayed.
- "Report content" - define the content of the
report the user will receive. You can choose between two options:
- "Score and answers preview" - the user will see his score and all question and answer details - e.g. his answer and the correct answer.
- "Score only" - the user will see only the score.
- "Configure report lifespan" - set how long the question details are visible to the users after they open their personal report for the first time.
- "Automatically logout candidate after finishing" - the application will automatically logout the candidate upon completing the test
- "Require updating personal information" - when initiating the test, a screen with the user's personal information will appear. The user can confirm the validity of the information or make necessary changes in order to start the test.
- "Proctoring mode" - if enabled, the system will receive the information from the user's web camera microphone and screen. flag suspicious behavior (e.g. background noise, unauthorized faces in front of the camera). You can also examine the video recording afterwards or live monitor the users. The whole session process will automatically be available to you in a PDF report generated by the system.
- "Network access" - you can limit the access to the test only to people within your local (internal) network. For more information on how to define the internal network, please see the internal network.
- "Allow test continuation" - by enabling this
option you will allow users to save their answers, take a pause
and continue the test within the tests' availability period.
Availability period is set later in the testing
session creation process.
Note: This option can not be combined with with the option "enable browser lockdown." - "Allow test retaking" - by checking this option, users will be able to retake the test during the test availability period. You can limit this option by setting the options 11. and 12.
- "Duration type": - choose how will you
time-limit your test by setting:
- "Test attempts" - you can choose between:
- "Unlimited" - the users can repeat the test an unlimited number of times.
- "Limited" - the users can repeat the test as many times as you allow them.
- "Time between attempts" - set the time required to pass between each retake attempt.
- "Enable browser lockdown" - the users will not
be able to cut, copy, save or print anything from the screen during
the test-taking process. Also, the web browser will be in the
full-screen mode, and if the users try to minimize it, the test
attempt will be terminated.
Note! This option can not be combined with the option "allow test continuation."
For detailed instructions for this step, please visit Certificate.
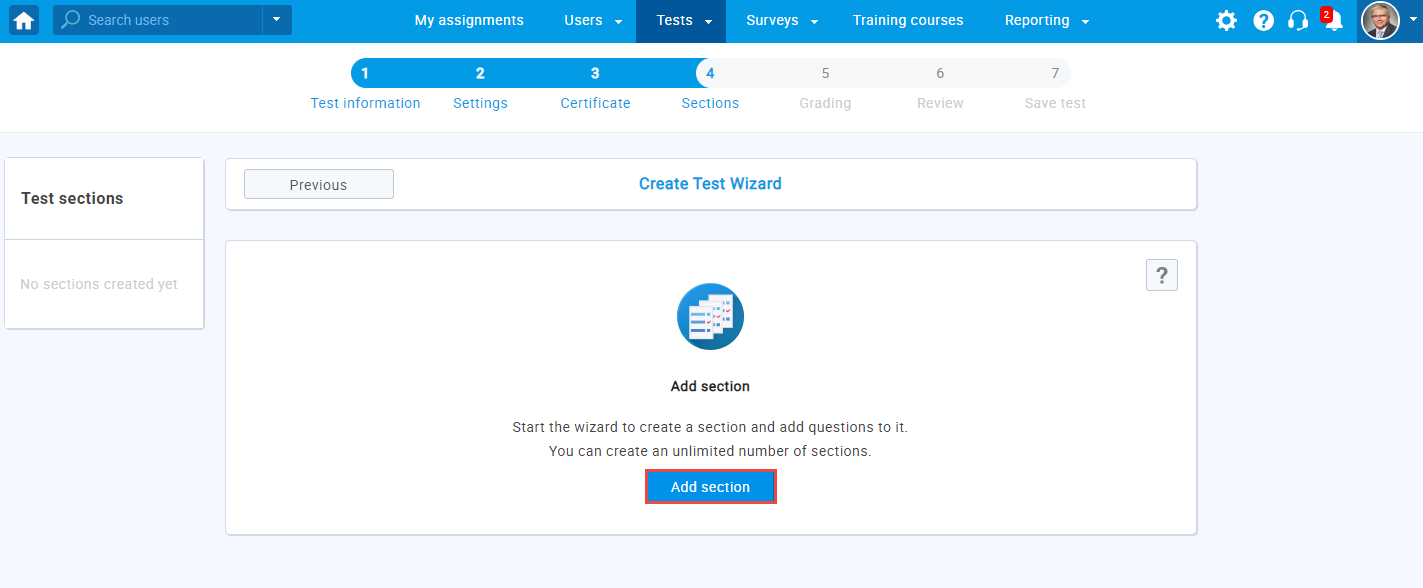
To start adding sections, click the "Add section"button.
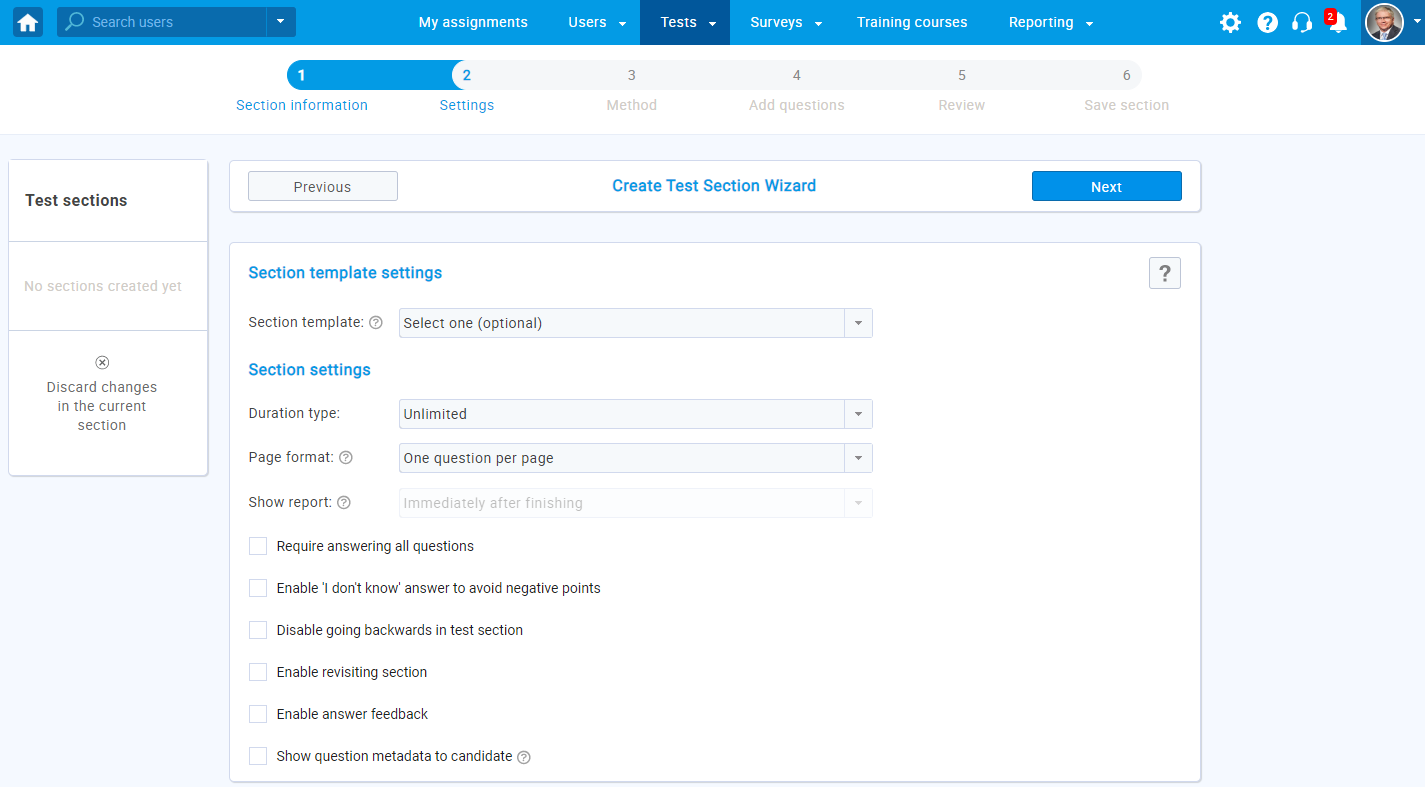
To fill out "Section information", follow the instructions described at Test information.
Configuring "Section settings" is described in detail at Test settings.
Methods used for adding questions are the same as for the tests without sections. Please visit Method.
Adding questions is done the same way as for the tests without sections. Please visit Add questions.
Reviewing sections is the same as reviewing tests without sections. Please visit Review test.
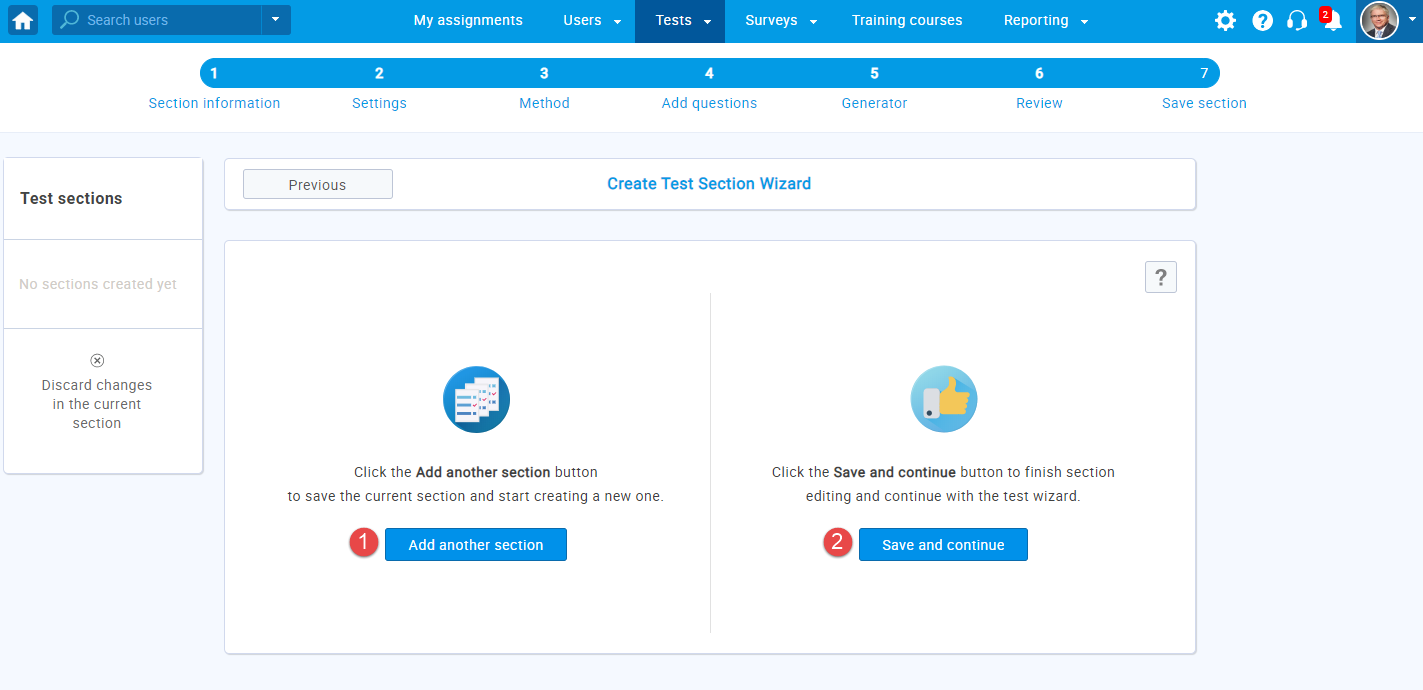
In this step you can choose to:
- Continue with adding new sections by clicking on "Add another section."
- Save the section and continue with the Test wizard if you are done with adding the sections.
The "Grading" step allows you to set the grading options for the whole test, each section separately, and section groups.
You can see a detailed explanation of the available options below.
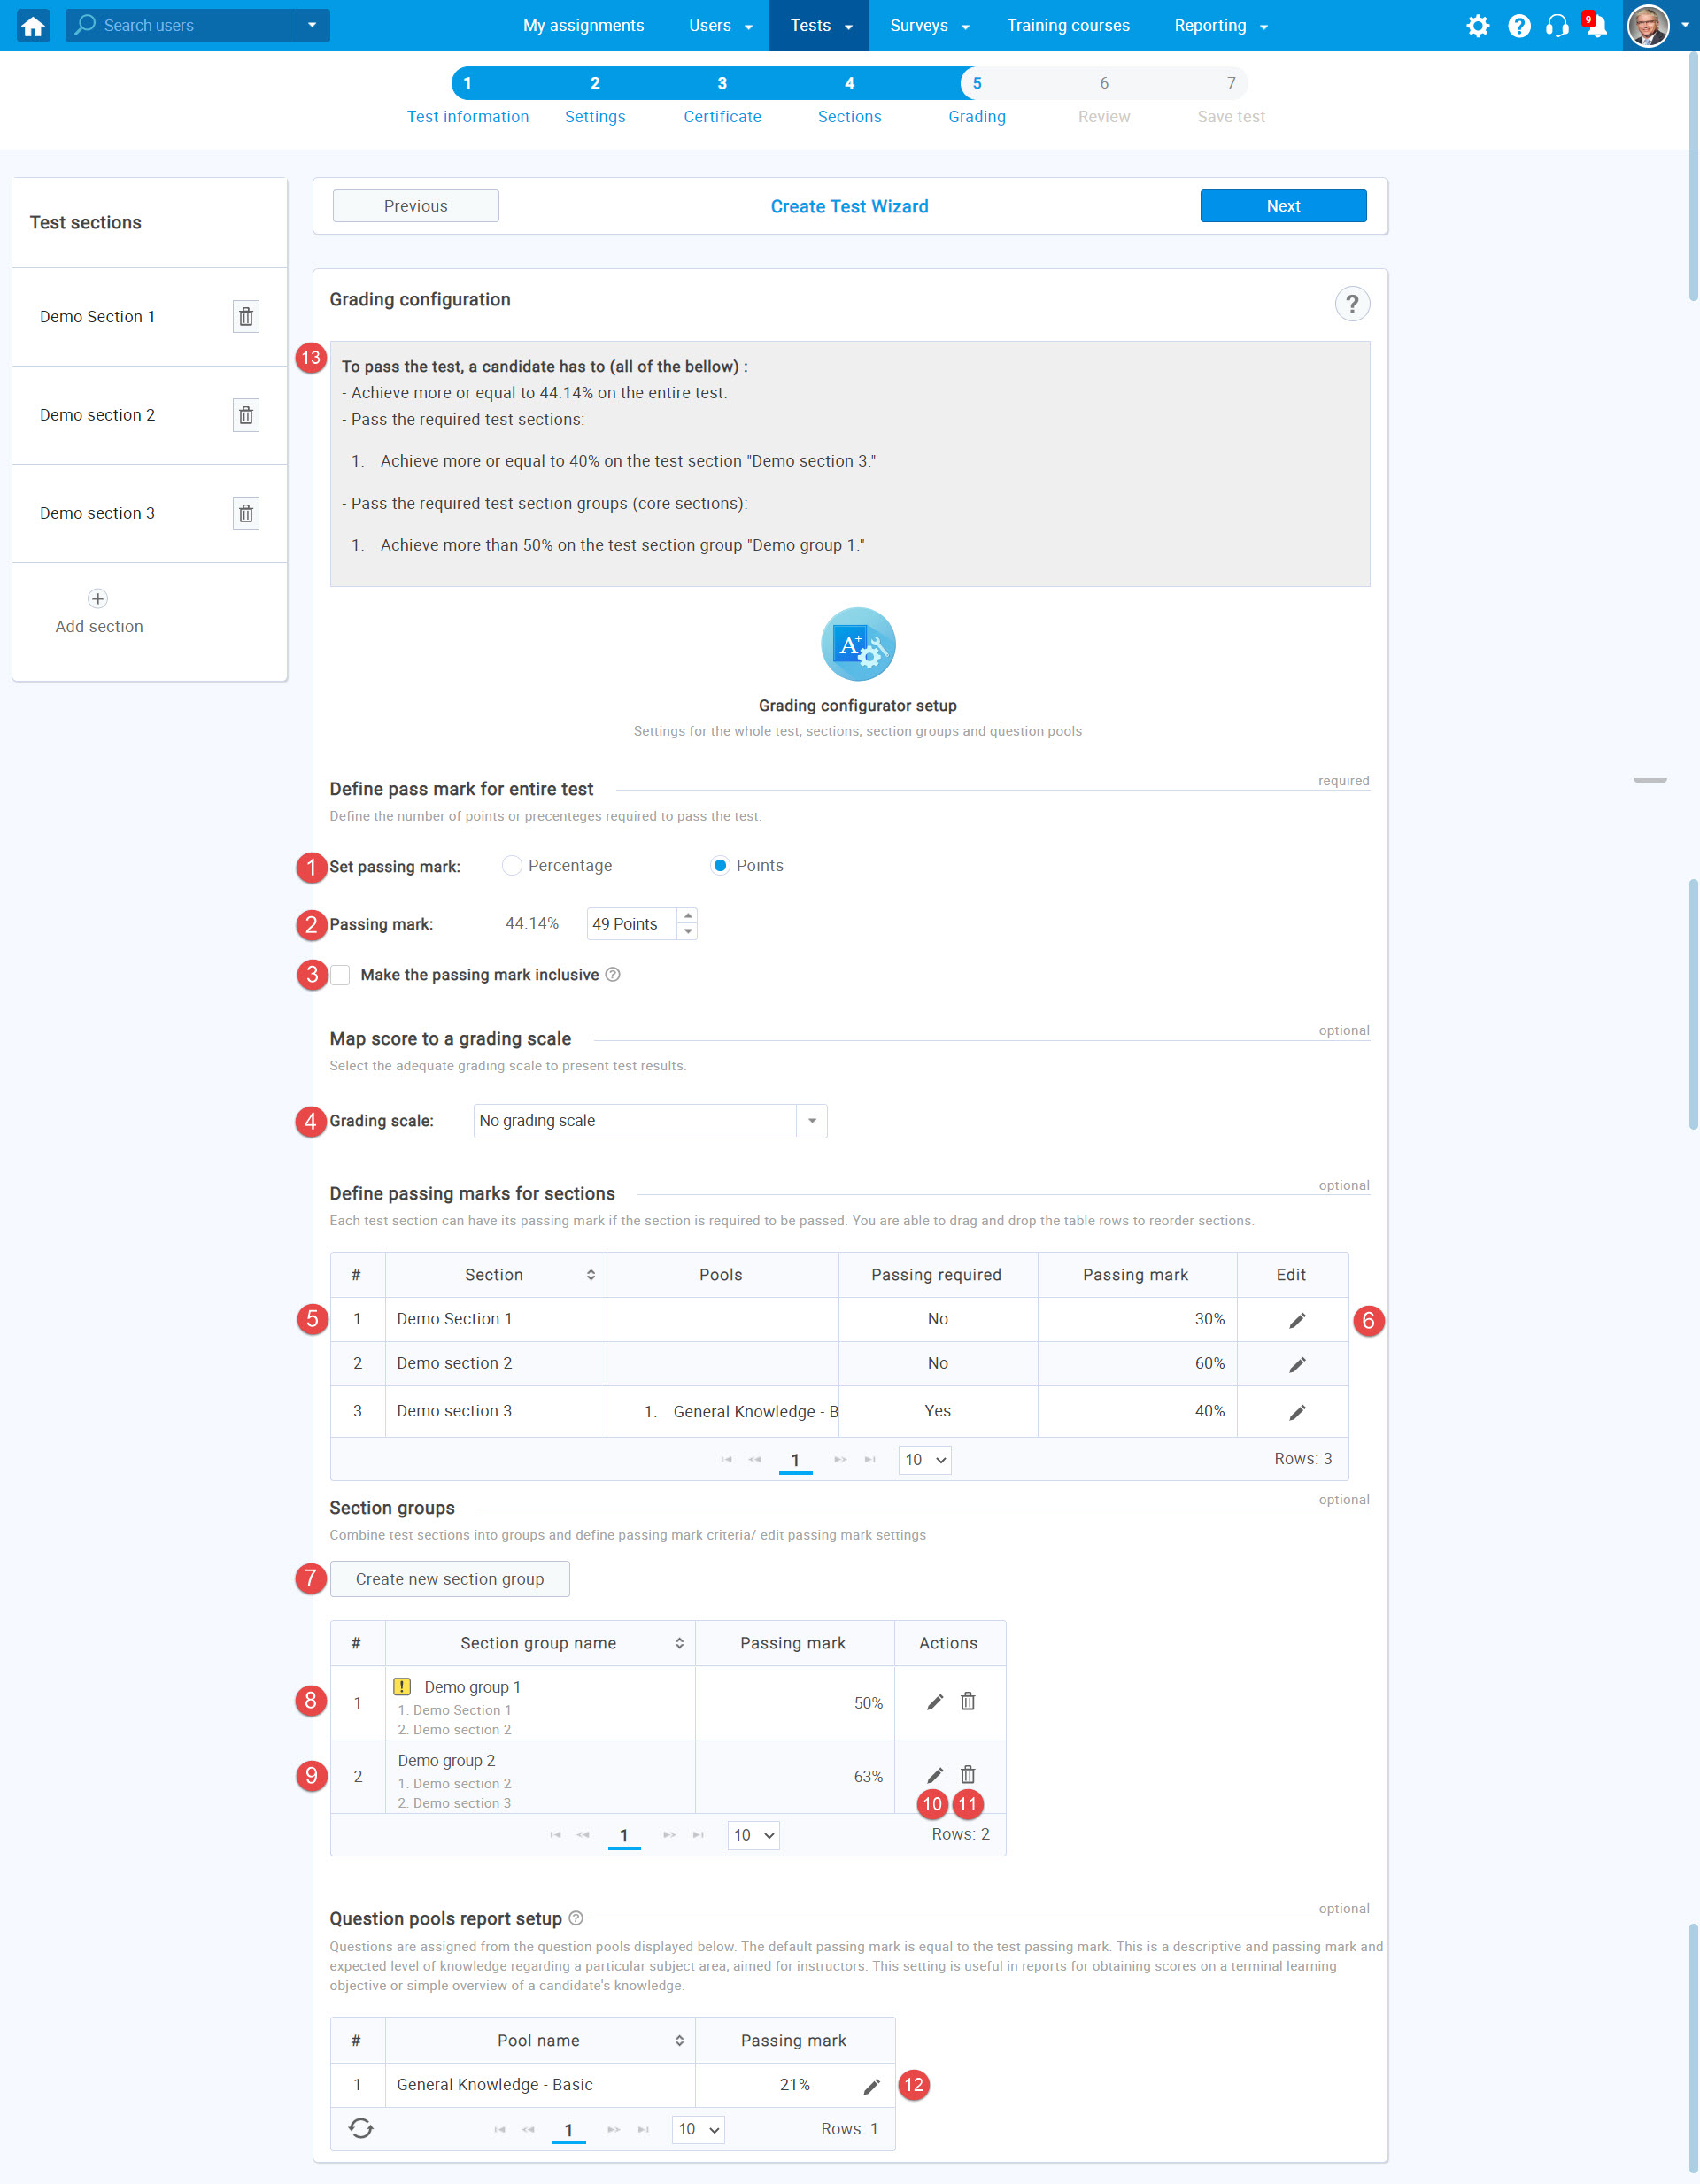
- Choose whether the passing mark for the whole test will be expressed in points or percentages.
- Set the value of the passing mark for the whole test.
- If the option "Make the passing mark inclusive" is selected, users will pass the test if they gain a score equal to or higher than the passing mark.
- From the dropdown menu, select one of the previously created grading scales. For more information, please visit Grading scales.
- Drag and drop the table rows to reorder the sections.
- Edit the passing mark for each section separately and check the box "Passing required" if the passing of the section is required for passing the test.
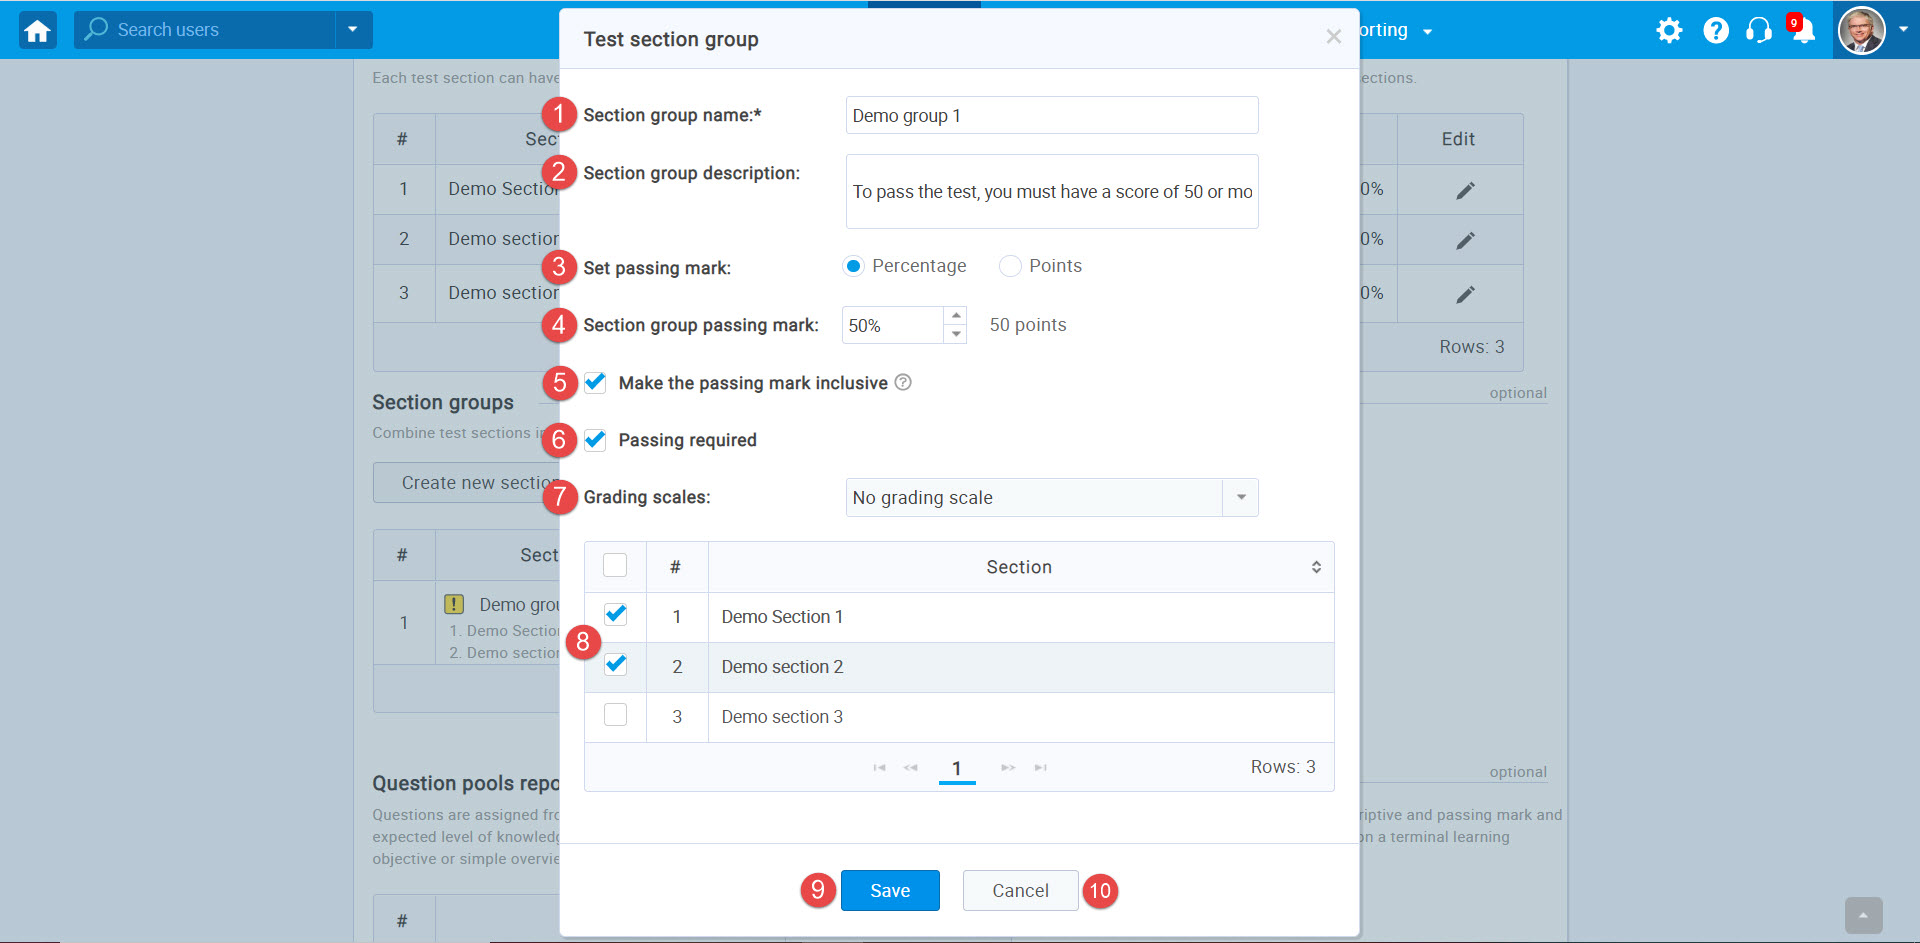
- Creating section groups allows you to configure the grading
options for that group collectively. When you click the "Create
new section group" button, a new window will pop up where you can:
- Set the section group name.
- Set the section group description.
- Choose the passing mark to be in percentages or points.
- Set the value of the passing mark
- If the option "Make the passing mark inclusive" is checked, users will pass the section group if they gain a score equal to or higher than the passing mark.
- Check the box if the passing of the section group is required for passing the test.
- From the dropdown menu, select one of the previously created grading scales. For more information, please visit Grading scales.
- Select which sections to include in the section group.
- Click "Save" to create the section group.
- Click "Cancel" to discard the section group.
- See the section groups whose passing is required - marked with the yellow icon.
- View the section groups whose passing is not required.
- Edit the section groups.
- Delete the section groups.
- Edit the passing mark for each question pool separately.
Note: This passing mark will not affect the test passing mark and is used mainly for organizational and reporting purposes. - Preview of all configured grading settings.
Define pass mark for entire test
Define pass mark for sections
Define pass mark for section groups
Once the section group is created, it will appear in the section group table where you can:
Question pool report setup
Grading configuration summary
Reviewing a test with sections is done the same way as for the tests without sections. Please visit Review test.
To save a test with sections, please follow the same instructions as for saving a test without sections at Save test.
