User manual
New Survey
Create a GetCertified survey to conduct a research on a specific topic, assign users to participate in it and collect its results easily.
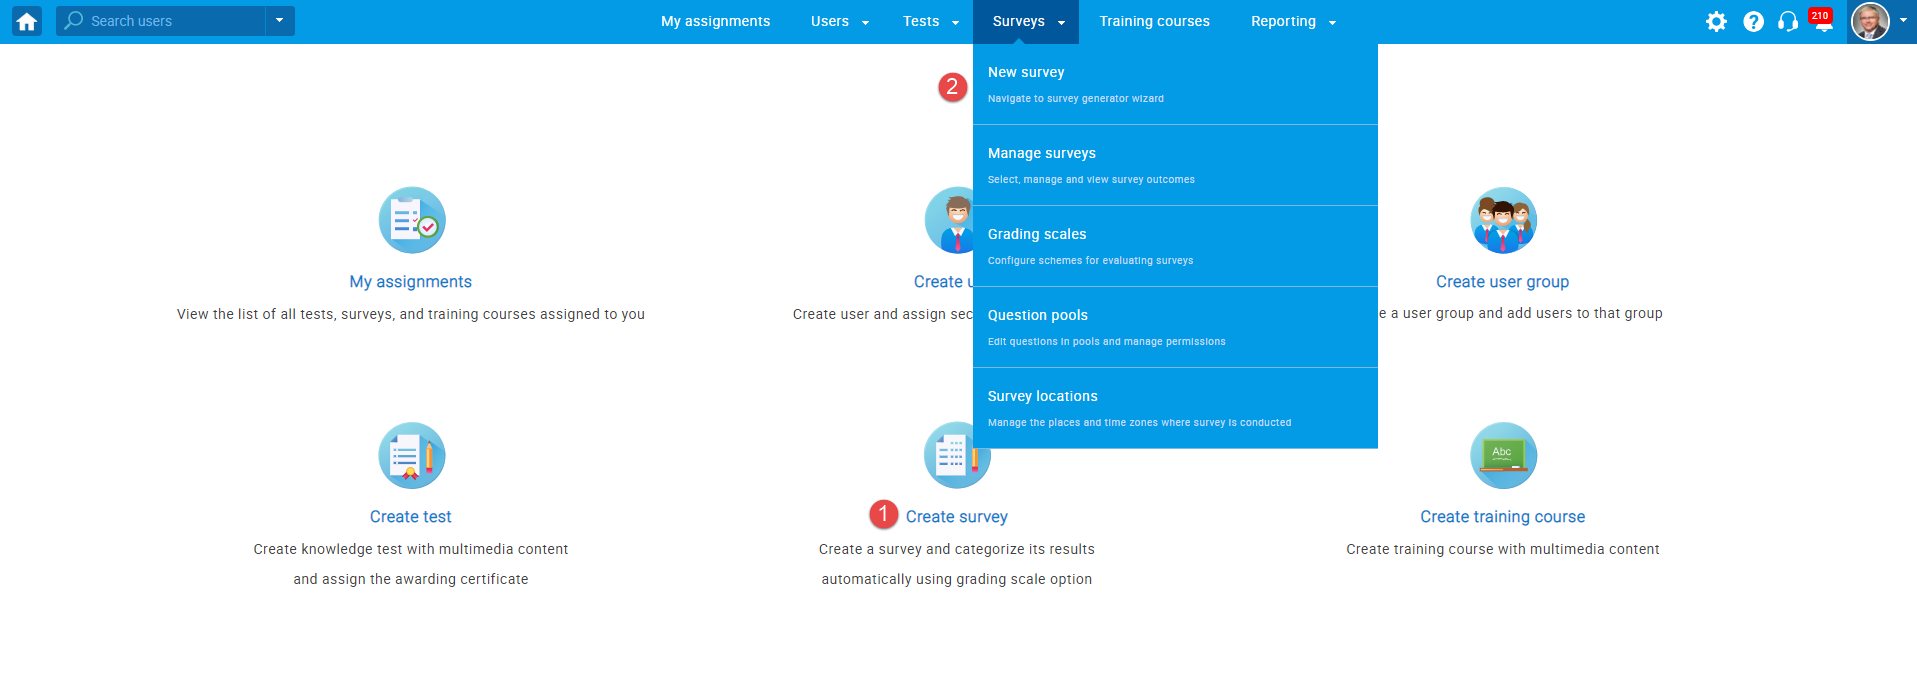
- Accessing the page
To access the "New survey" from the homepage by:
- Clicking the "Create survey" quick action button or
- Click on "Surveys" in the application's toolbar and then choosing "New survey".
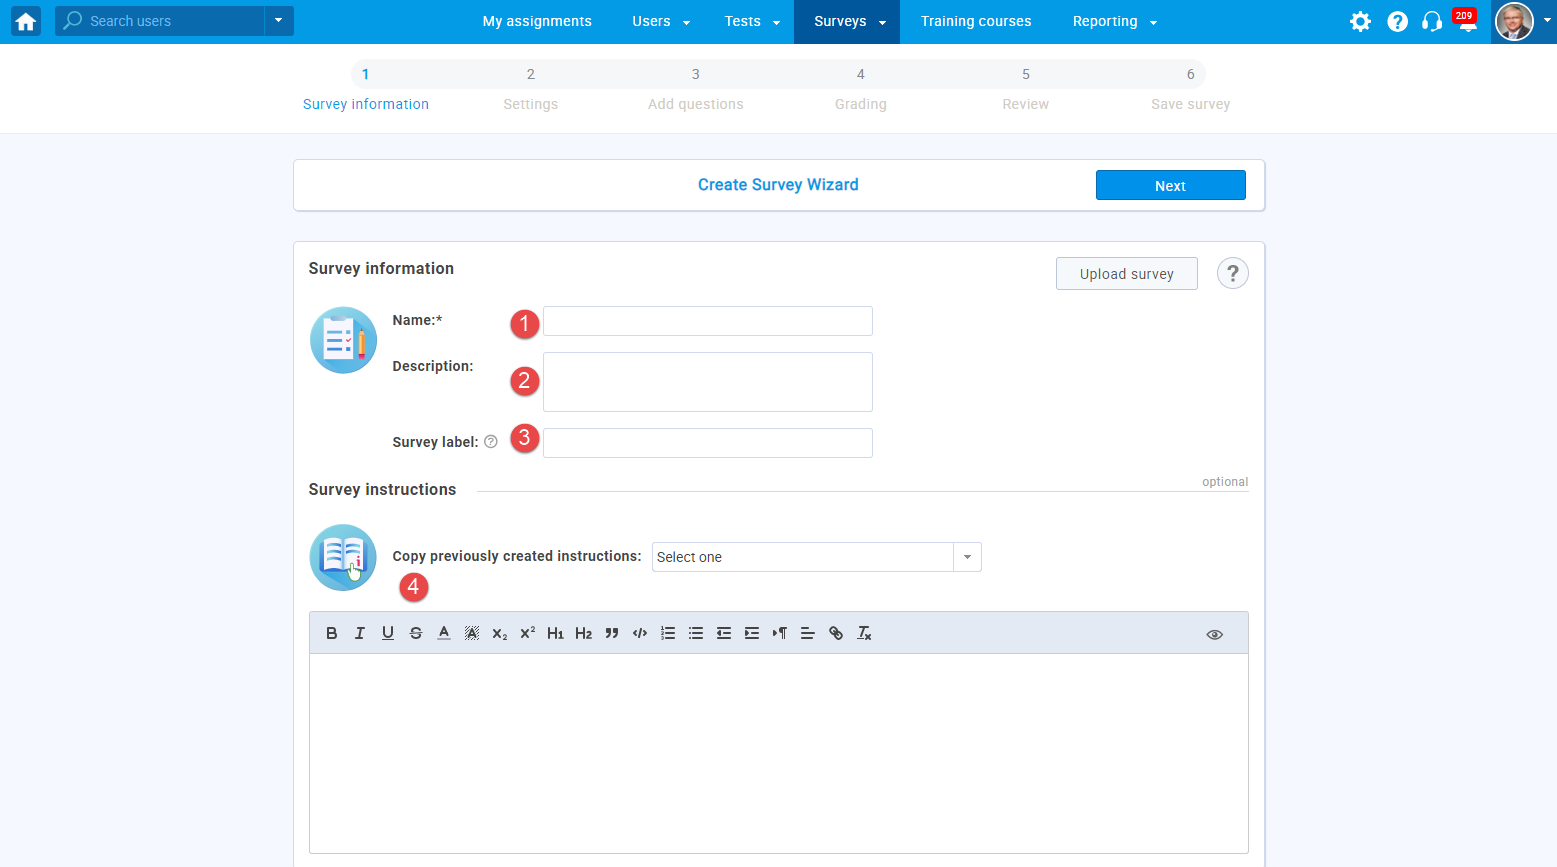
- Survey information
On this page, you can:
- "Name"- Enter the name of the survey you want to create.
- "Description"- Enter a description of the survey to give some more details about the purpose of the survey.
- "Survey label"- Add the survey label for additional classification that will be displayed alongside this survey on every page and every exported report, e.g., "Classified", "Confidential"...
- Add instructions (specific rules or guidelines) by clicking on the "Copy from previously created instructions" or manually add instructions that assigned users to need to acknowledge in a pop-up dialog before they start the survey.
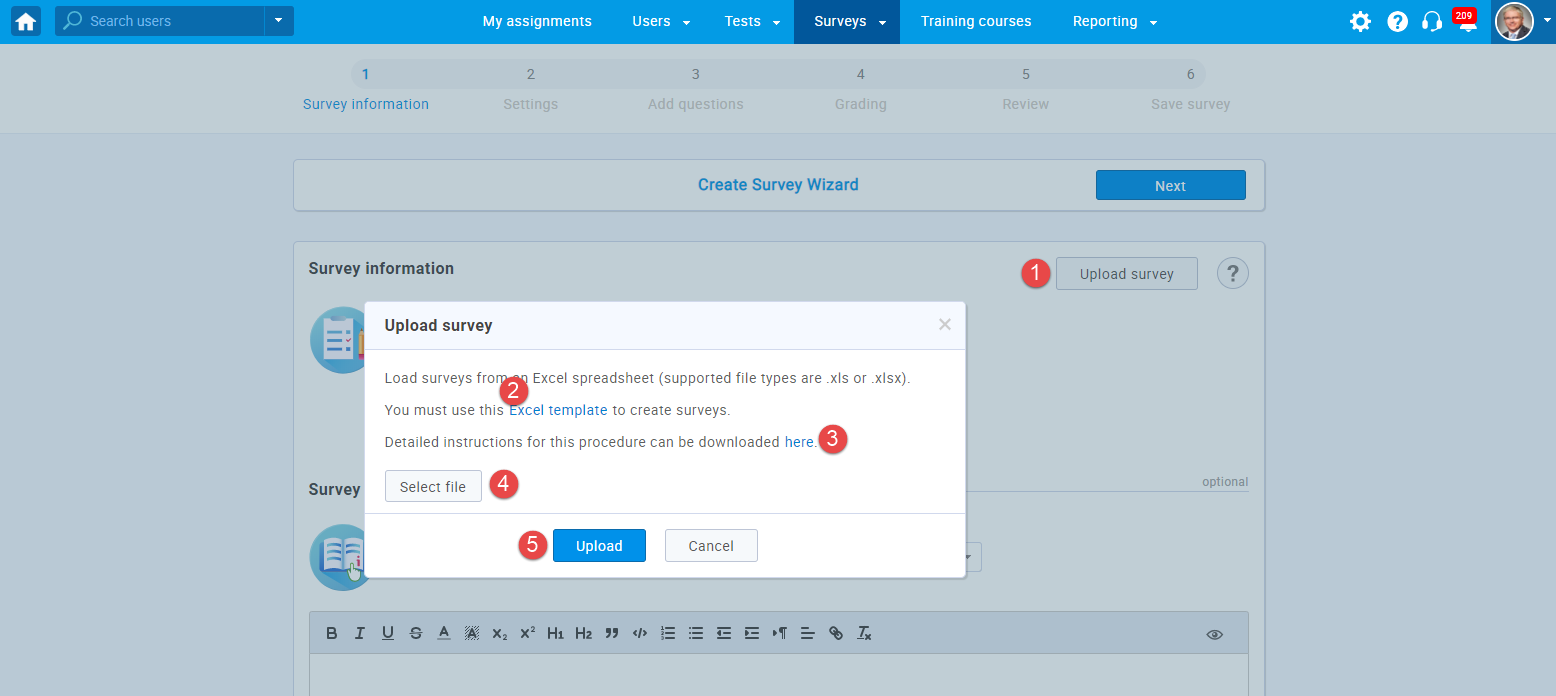
Also, you can upload a survey using an Excel template. To do so, follow these steps:
- Click the "Upload survey" button.
- Download the hyperlink "Excel template" to download the predefined Excel template you should fill in with the necessary data.
- Download the detailed instructions on how to enter the data into the template correctly by clicking the hyperlink "here."
- Once you fill in the template, click the "Select file" button to add it.
- Click the "Upload" button to add a survey into the GetCertified application.
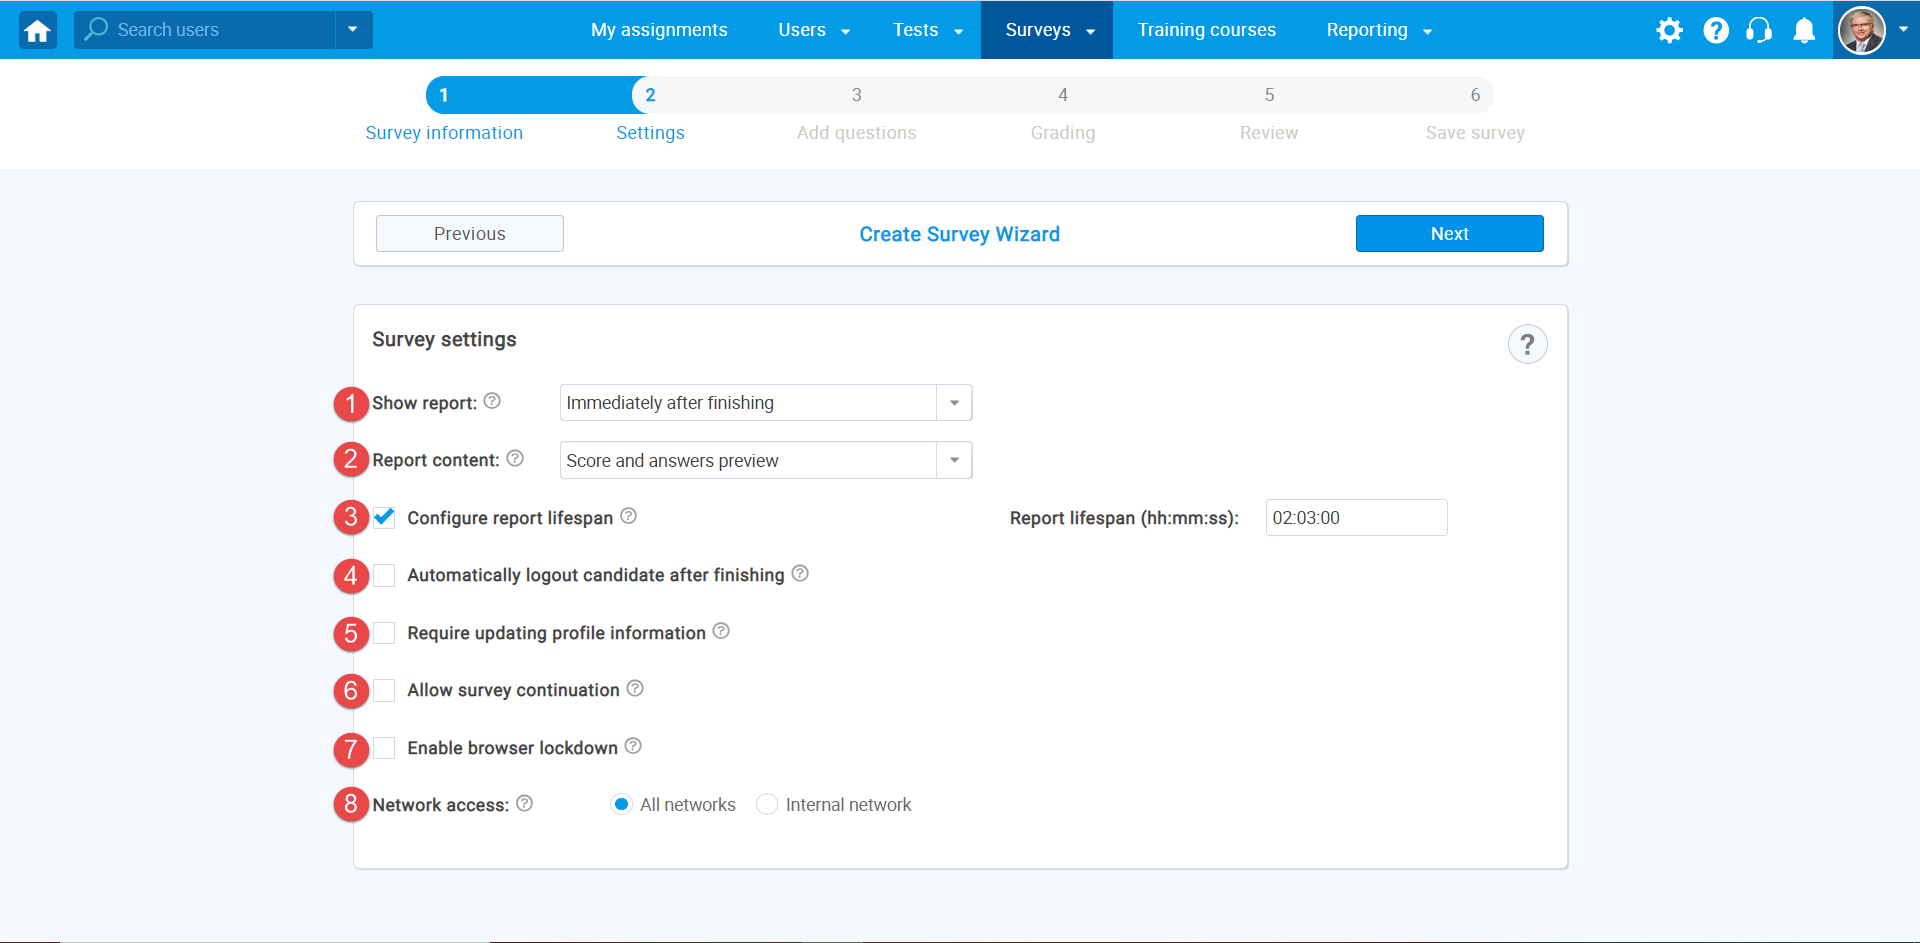
- Survey settings
The "Survey settings" step contains the following options for configuring your survey:
- "Show report"- decide when will the report be available to users:
- On manager's approval- users will see the report after the survey manager approves it.
- Immediately after finishing- users will see the report immediately after completing the survey.
Note: Some question types, such as essays, require manual grading by an instructor. Thus, the results of surveys that contain this type of question cannot be immediately displayed.
- "Report content"- define the content of the report the user will receive. You can choose between two options:
- "Score and answer preview" - the user will see his score and all question and answer details- e.g. his answer and the correct answer.
- "Score only"- the user will see only the score.
- "Configure report lifespan"- set how long the question details are visible to the users after they open their personal report for the first time.
- "Automatically logout candidate after finishing"- the application will automatically logout the user upon completing the survey.
- "Require updating personal information"- when initiating the survey, a screen with the user's personal information will appear. The user can confirm the validity of the information or make necessary changes in order to start the survey.
- "Allow survey continuation"- by enabling this option, you will allow users to save their answers,
take a pause, and continue the survey within the surveys' availability period. The availability period is set later in
the survey session creation process.
Note: This option can not be combined with the option "Enable browser lockdown," and vice versa. - "Enable browser lockdown"- the users will not be able to cut, copy, save or print anything from the screen
during the survey-taking process.
Also, the web browser will be in the full-screen mode, and if the users try to minimize it,
the survey attempt will be terminated.
Note: This option can not be combined with the option "Allow continuation," and vice versa. - "Network access"- limit the access to the survey only to people within your local (internal) network. For more information on defining the internal network, please see the internal network.
- "Show report"- decide when will the report be available to users:
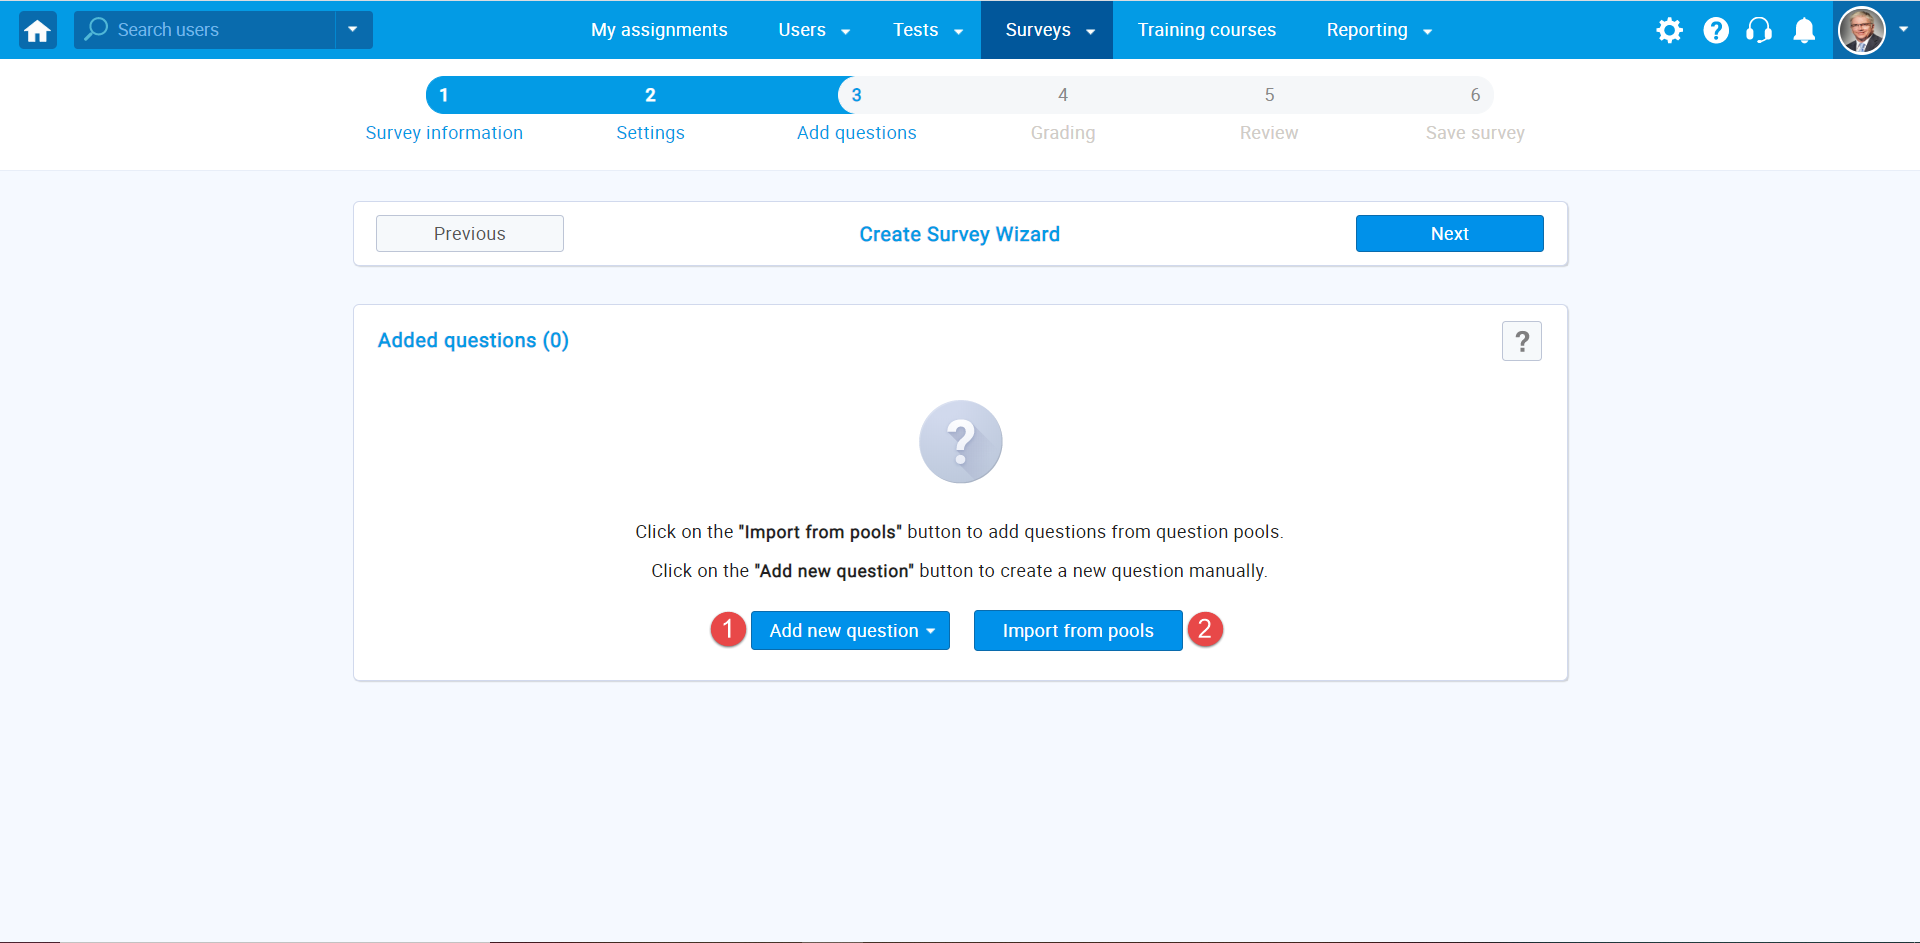
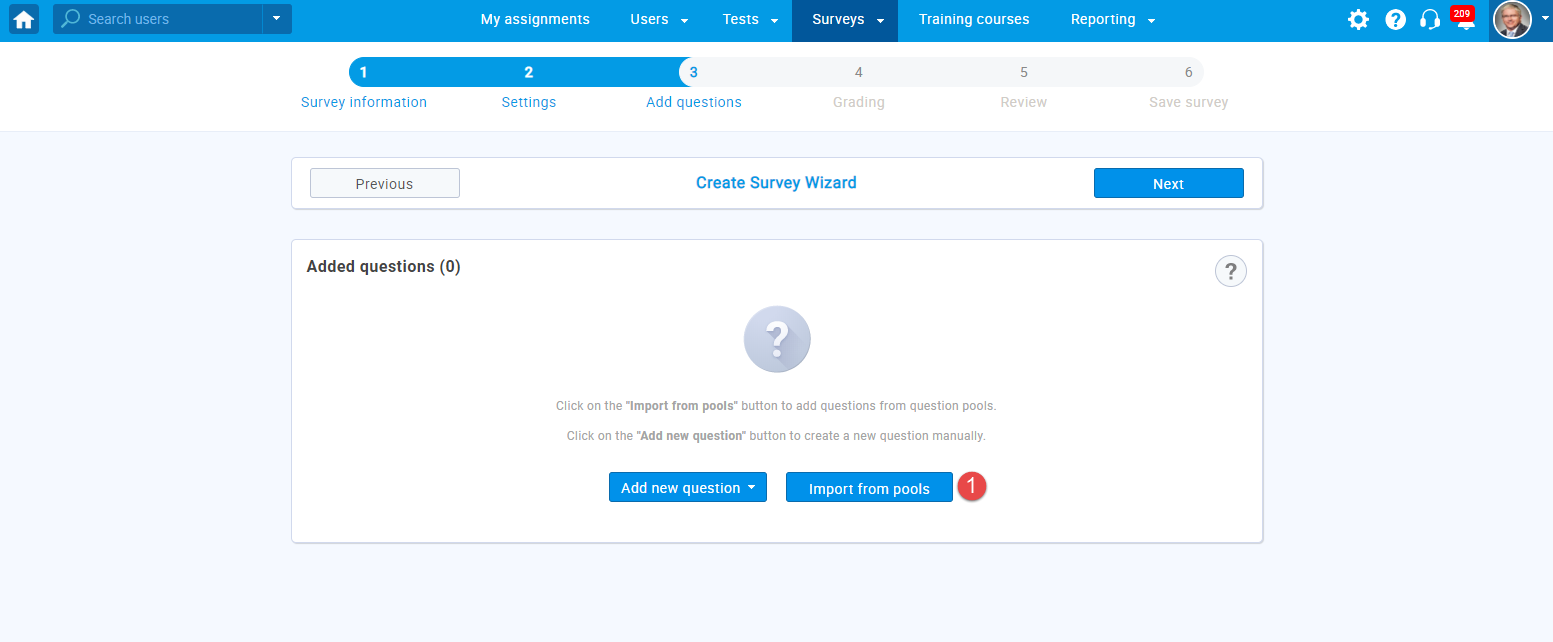
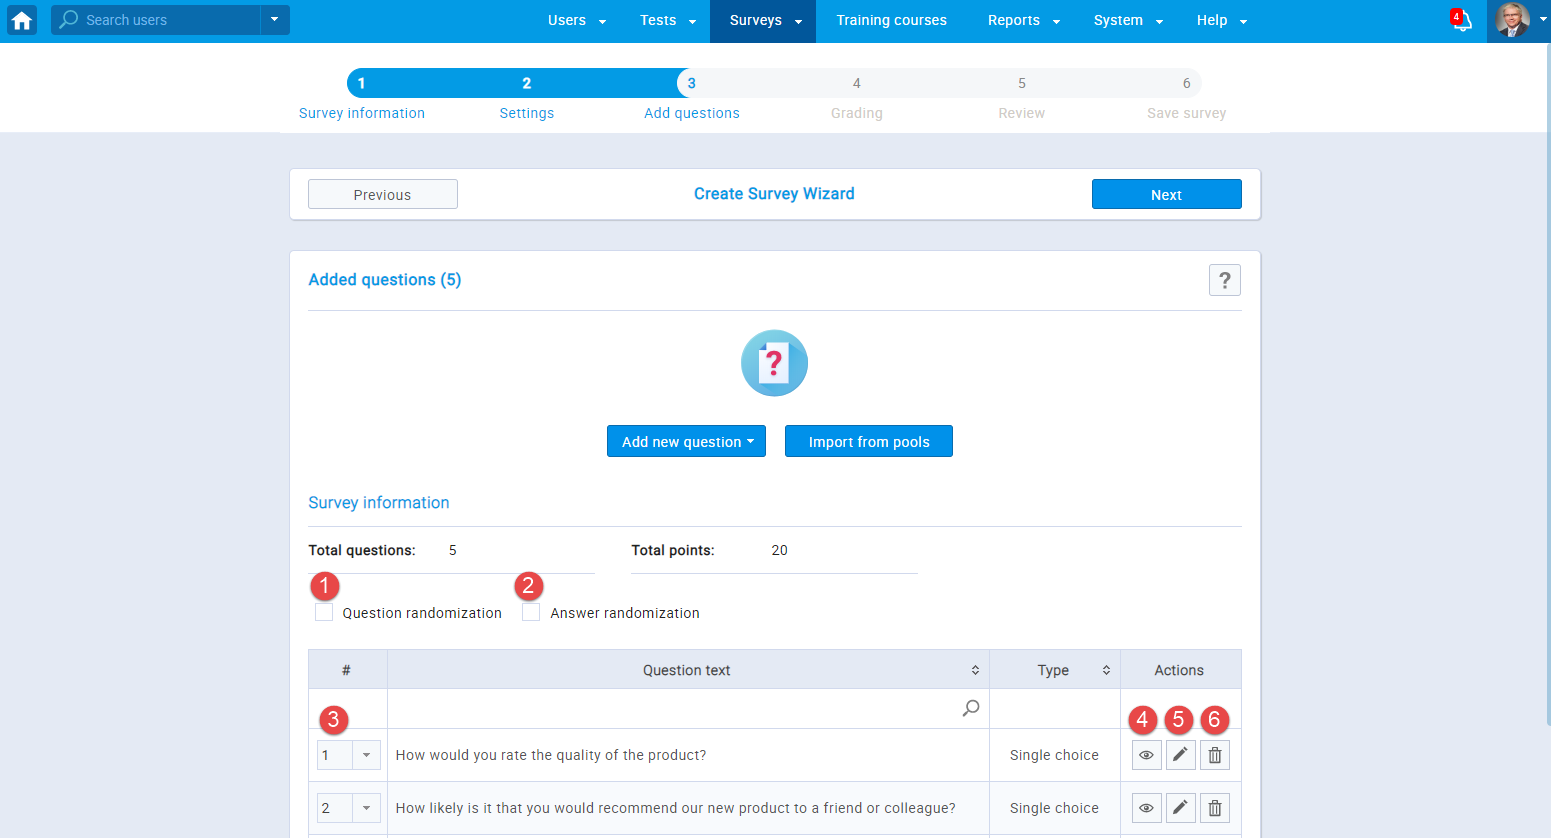
- Add questions
You can choose between the following methods for adding questions to your survey:
- "Add new question"- choose this option to create questions manually, one at a time.
- "Import from pool"- choose this option to add questions from previously created question pools.
You can also combine these options.
- To create a question manually, select "Add
new question," and choose the question type from the drop-down list.

For more information on how to create each question type, please visit question types.
Notice! All question types in surveys have the Scoring method: By answer weight.
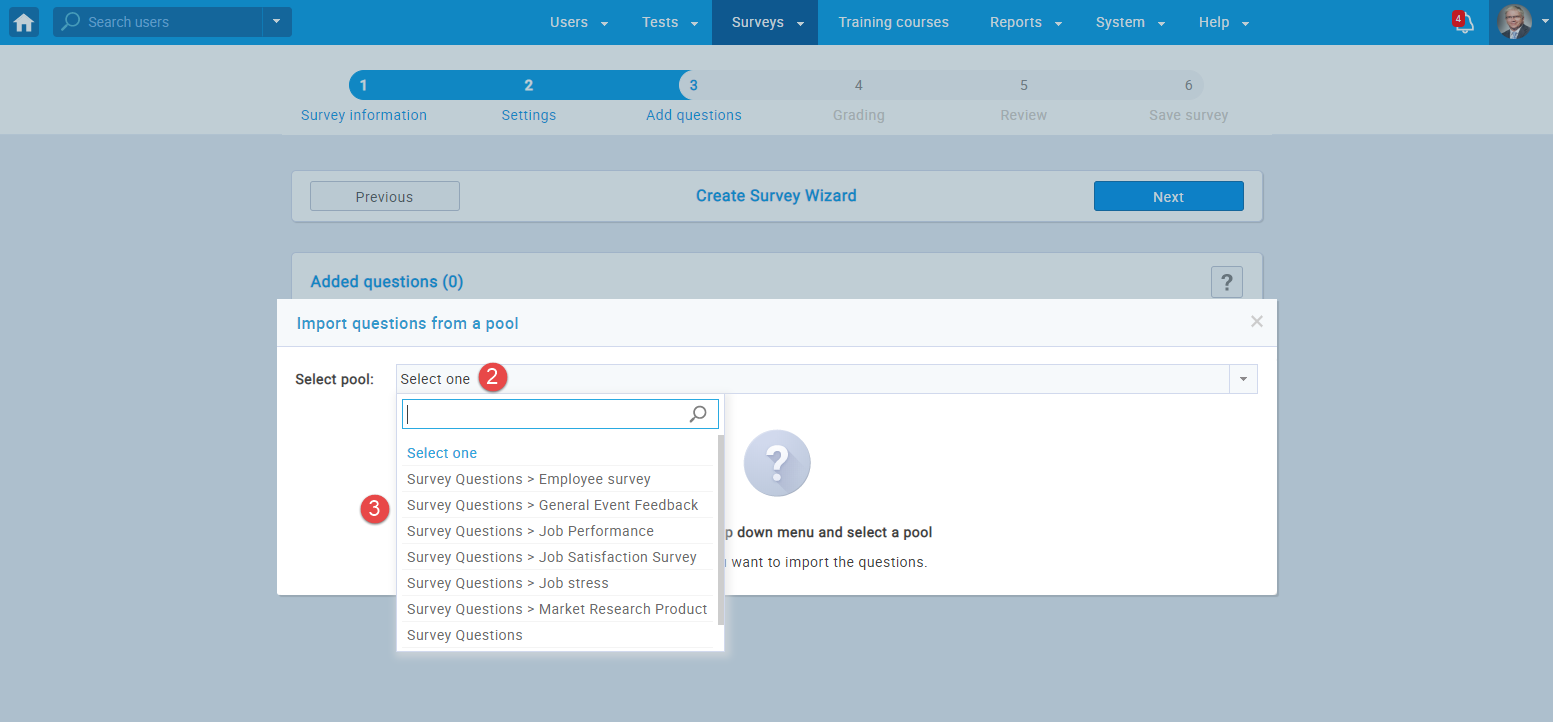
- Another way of adding questions is by importing them
from question pools.
To add questions to a survey from an existing question pool, follow the steps below:
- Select the "Import from pools" option.
- Click on the drop-down menu to view all available pools. You can choose only the pools you created or manage.
- Select the desired question pool.
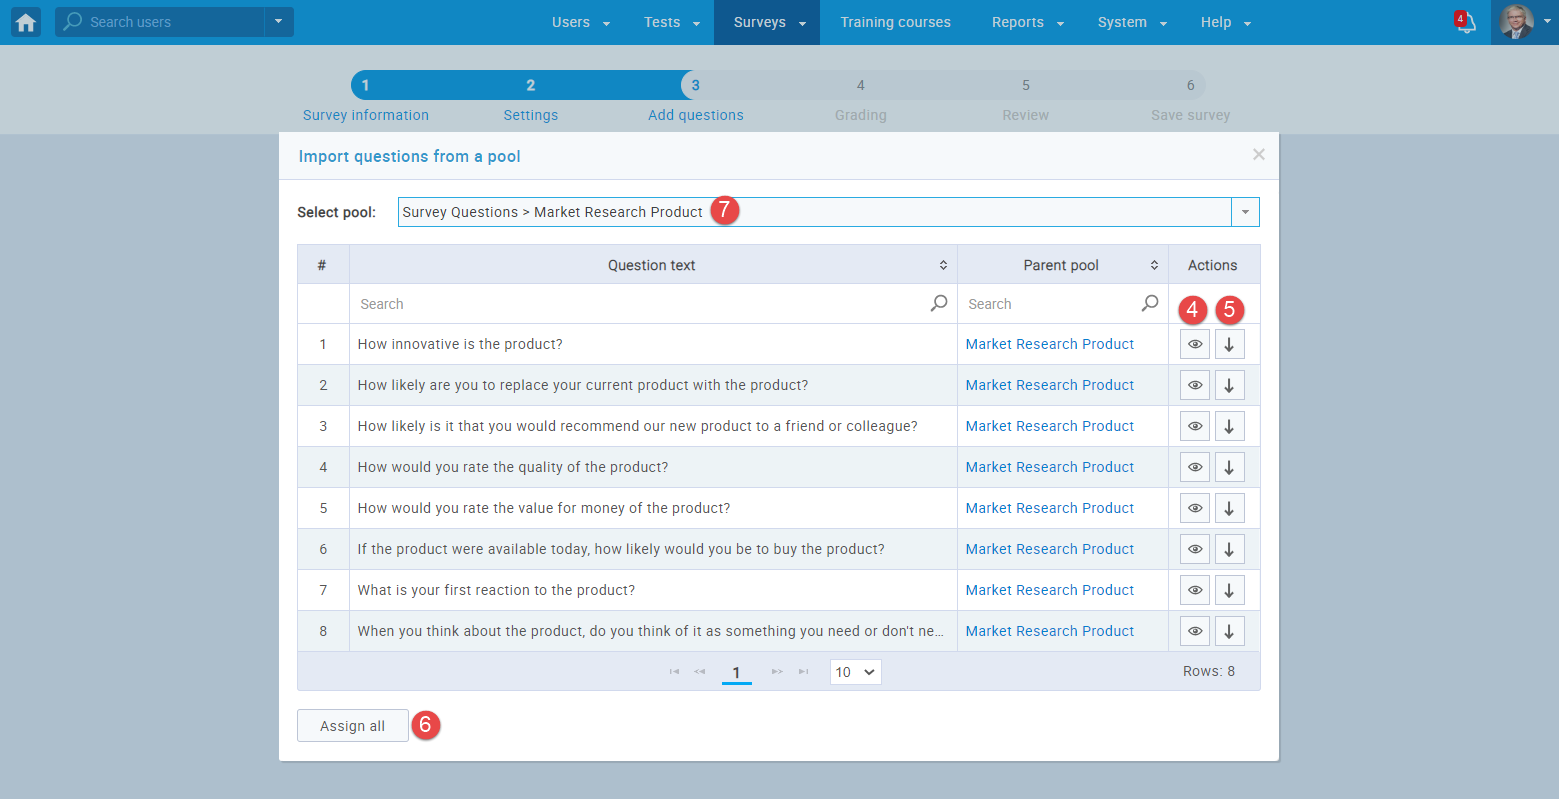
Once you choose a desired pool, you can:
- Preview each question.
- Import a single question from the selected pool.
- Import all questions from the selected pool.
- Change the question pool. All questions assigned from the previously selected pool remain in the survey.
Note: To create a new question pool before the survey creation process, please visit question pools.
Once you have added questions to the survey from the pools and/or manually, you can:
- "Randomize the order of questions"- each user will get questions in a different order.
- "Randomize the answers for each question"- each user will get a different answer order for the same question.
- Change the order of questions.
- Preview each question.
- Edit each question.
- Remove a question from the test.
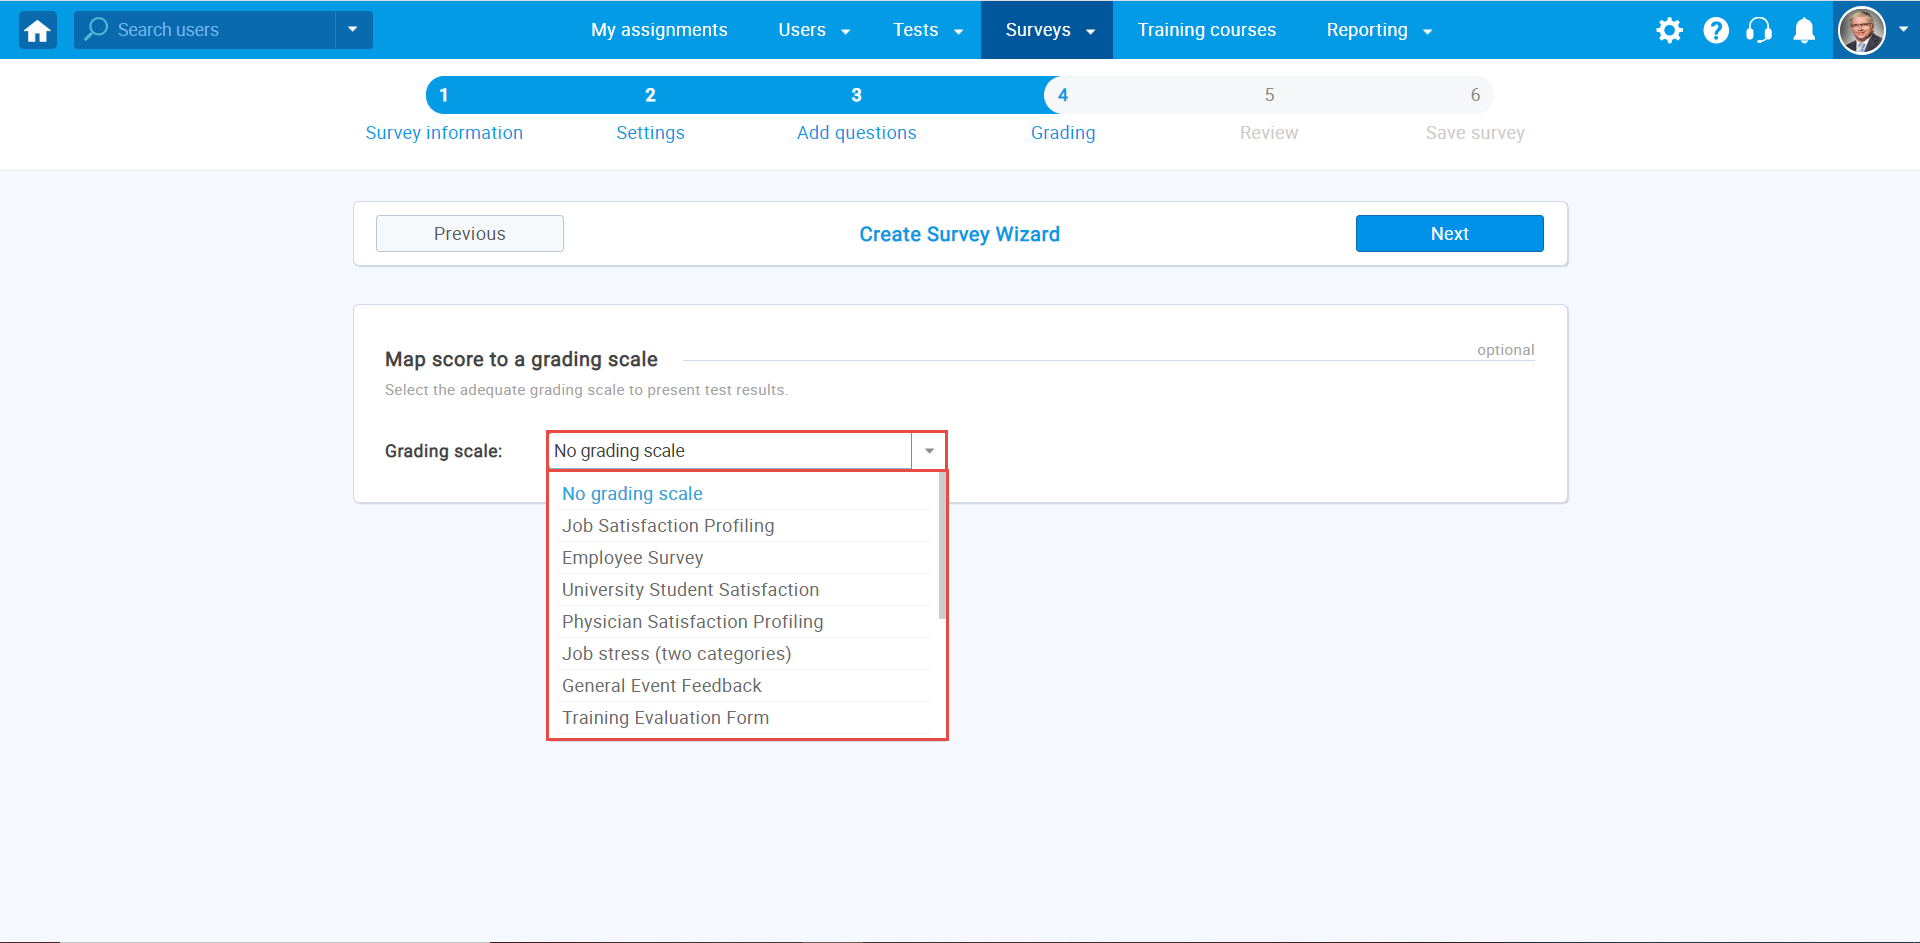
- Grading
The "Grading" step allows you to select the appropriate grading scale for the survey. For example, you can set a standardized scale from A to F for answering the survey and presenting its results. For more information on how to change the existing and create new grading scales, please visit Grading scale.
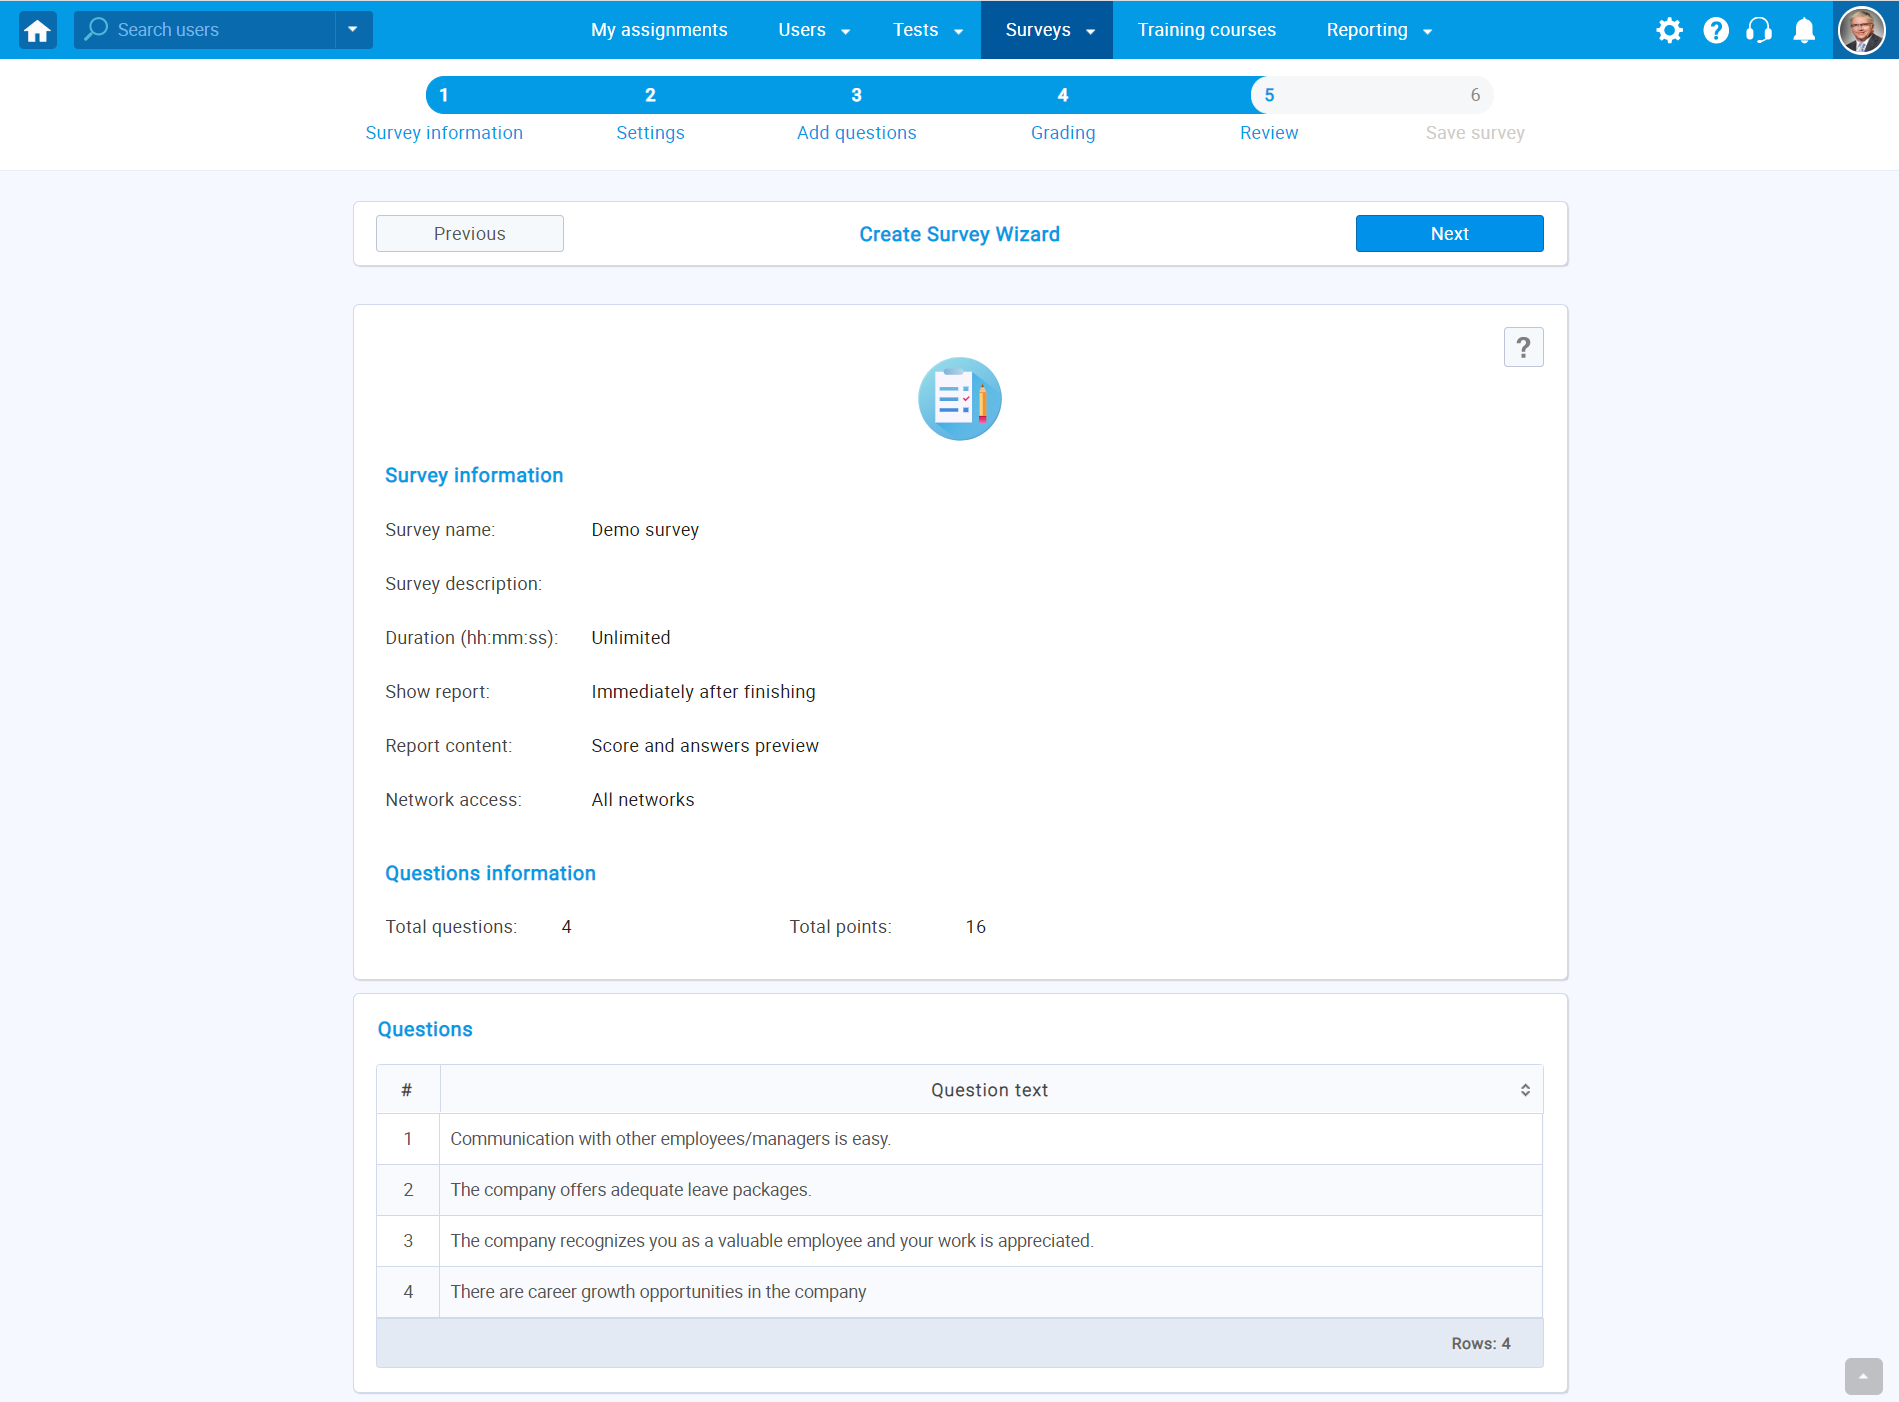
- Review
In the "Review" step, you can check your survey settings and its questions once again . You can also return to the previous steps and make necessary changes by clicking the"Previous" button. Click the "Next" button to proceed to the final step of the survey creation process.
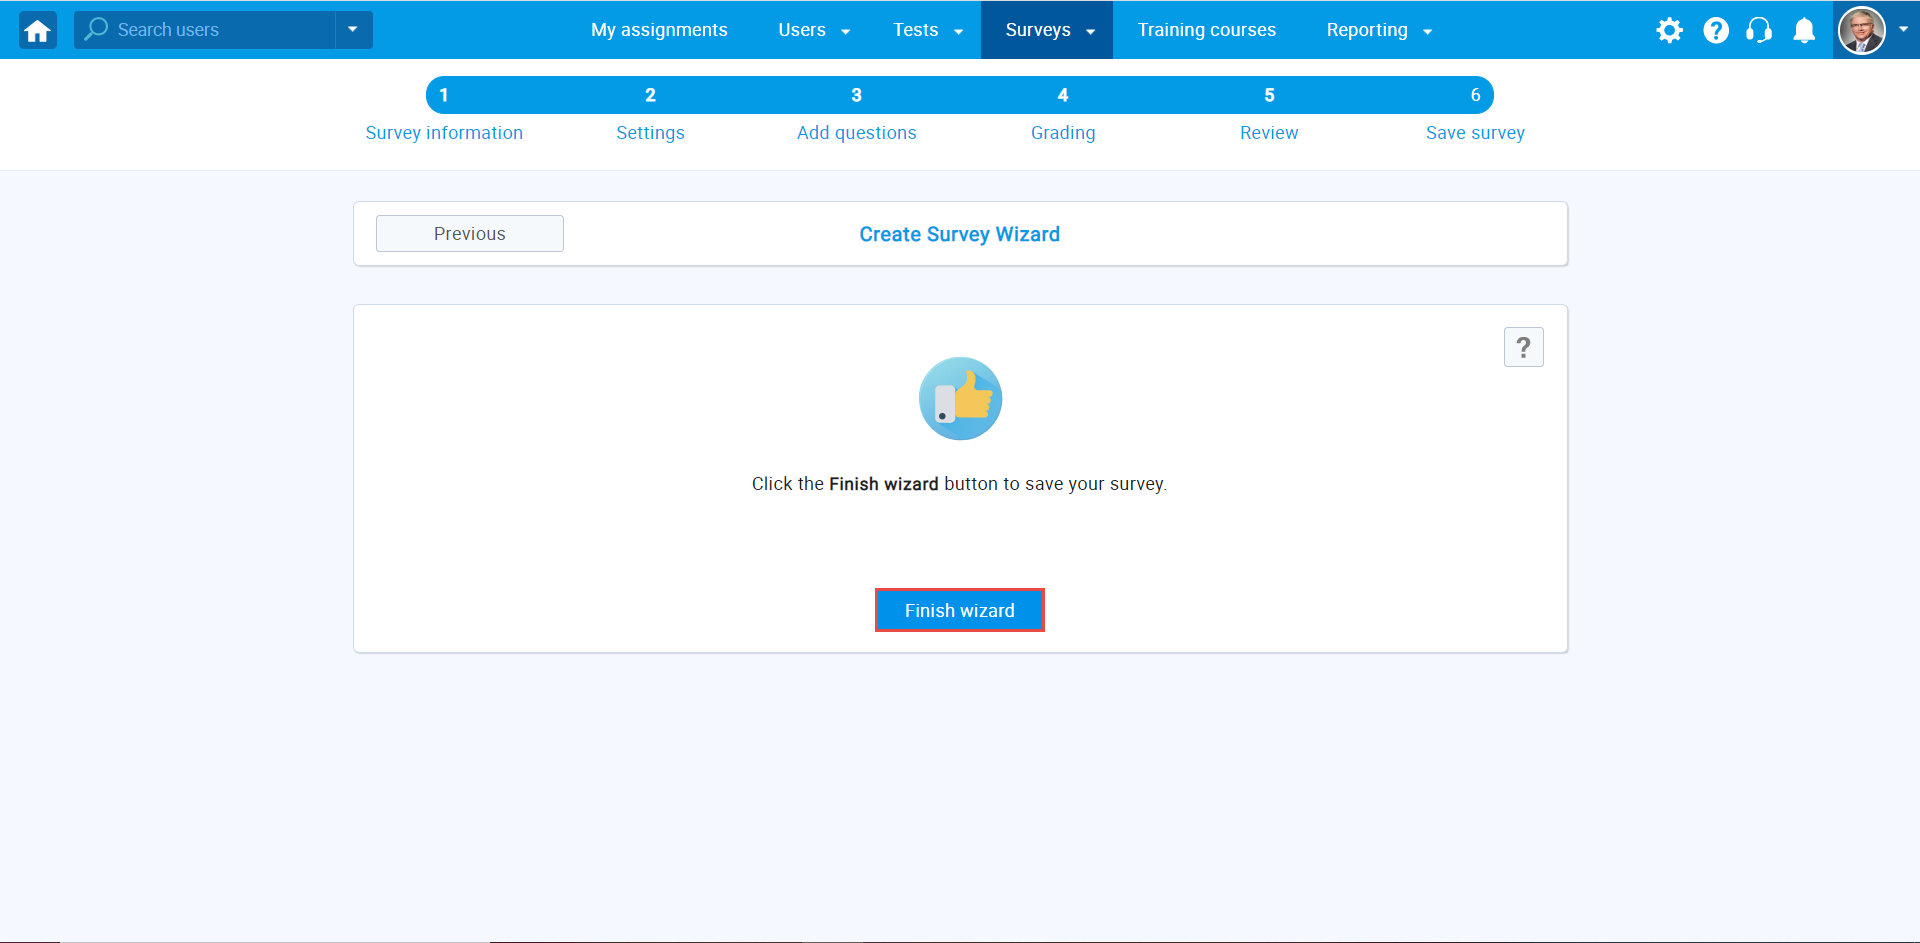
- Save survey
The next step in the survey creation process is saving the survey. Click the "Finish wizard" button to save your survey.
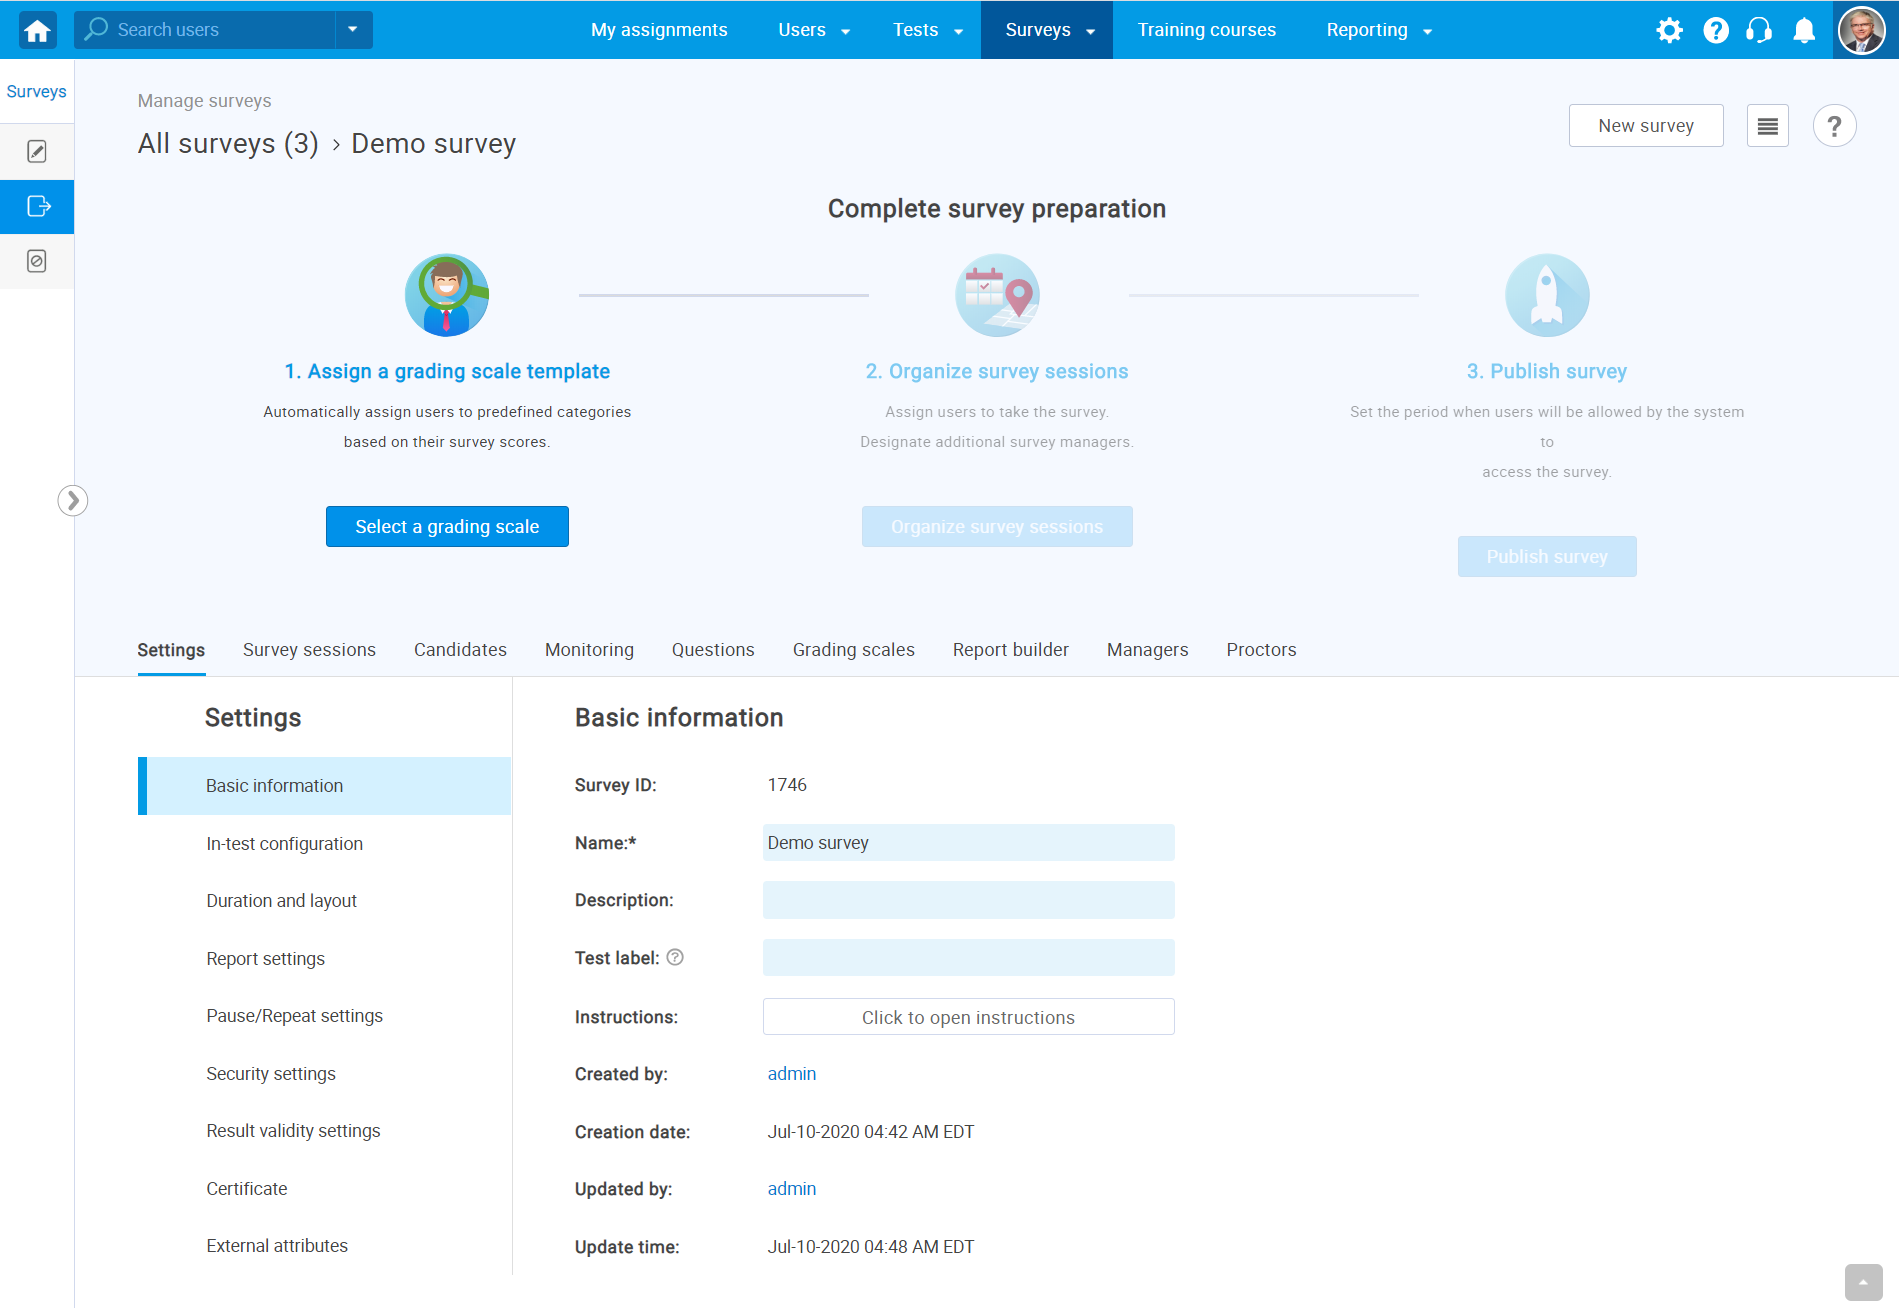
- Completing survey
preparation
To finish the survey preparation process, you should define a survey session, and add users to it. Once you do so, you can publish the survey by clicking the "Publish survey" button. For detailed instructions on how to define a survey session, please visit Surveys sessions. For instructions on how to add users to the survey, please visit the Candidates help section.
Below are step-by-step instructions on how to create a new survey.
Once you publish the survey, all assigned users will receive an email notification that they can start the survey.
