User manual
Report Builder
The "Report builder" page allows you to obtain a detailed insight into test/survey statistics and create flexible and unique reports by applying advanced search filters. It also enables the efficient comparison of tests/surveys and analysis of individual test/survey items.
- Accessing the page
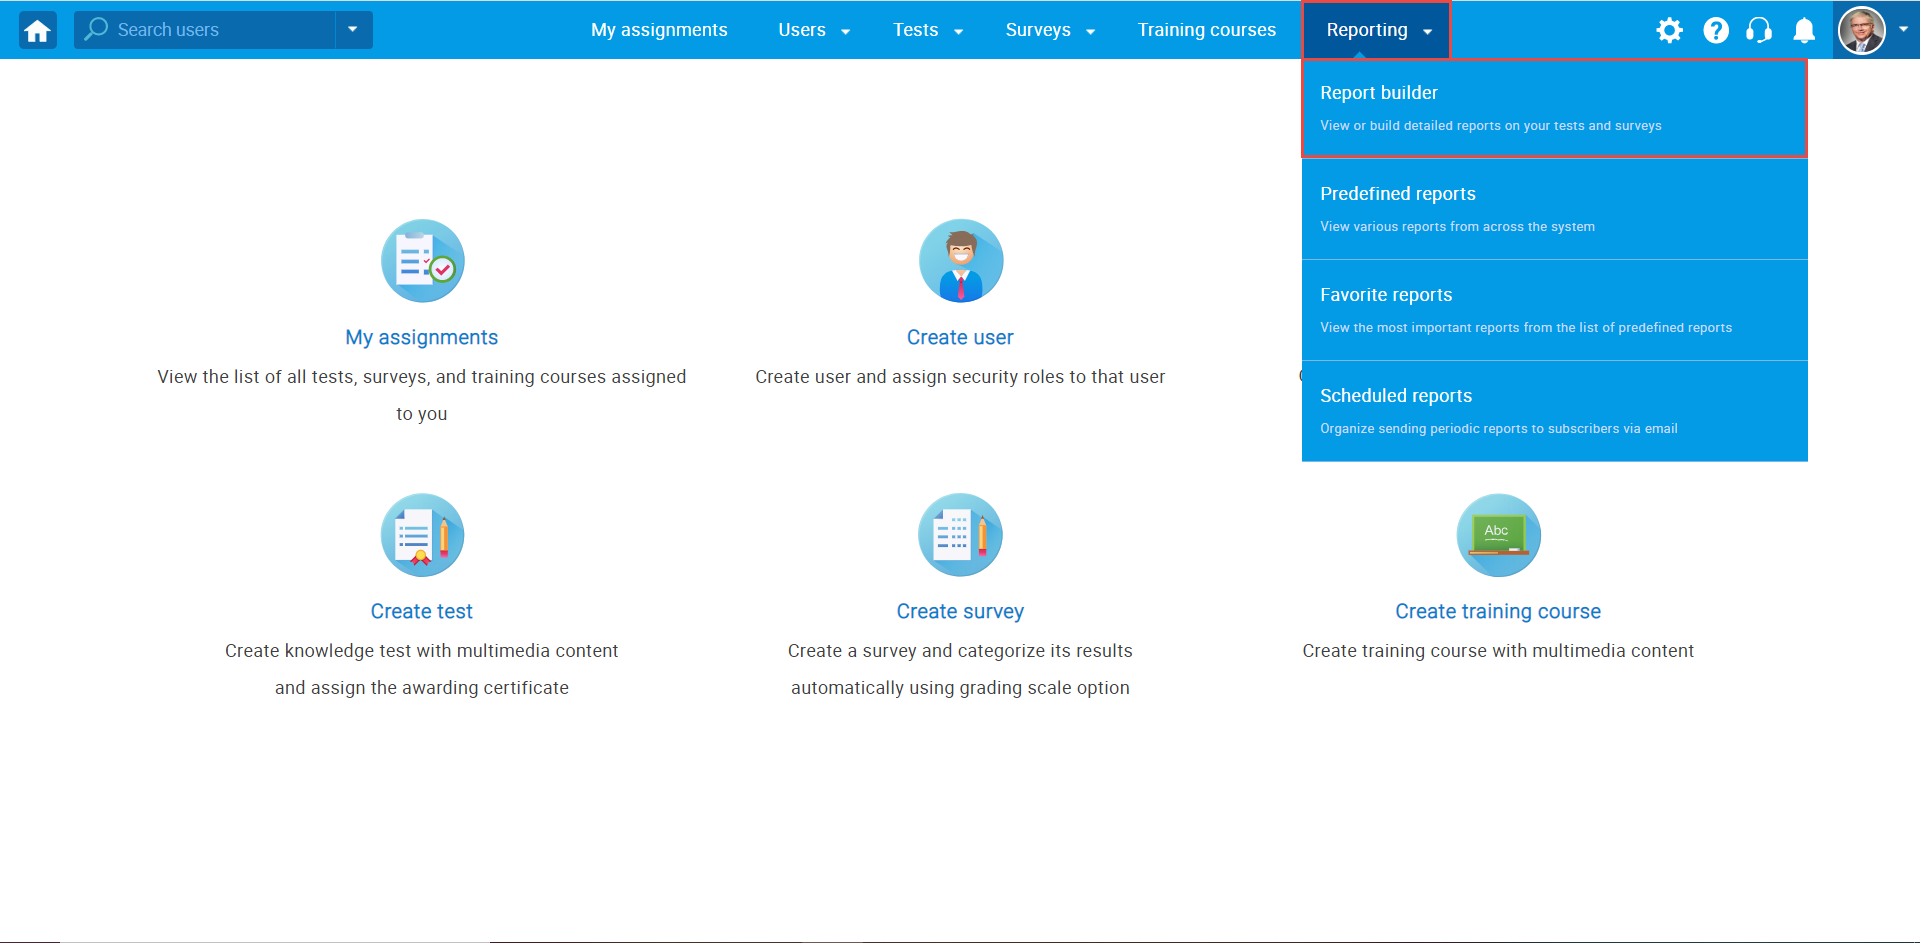
To access the "Report builder" page, click the "Reporting" option in the main menu, and select "Report builder."
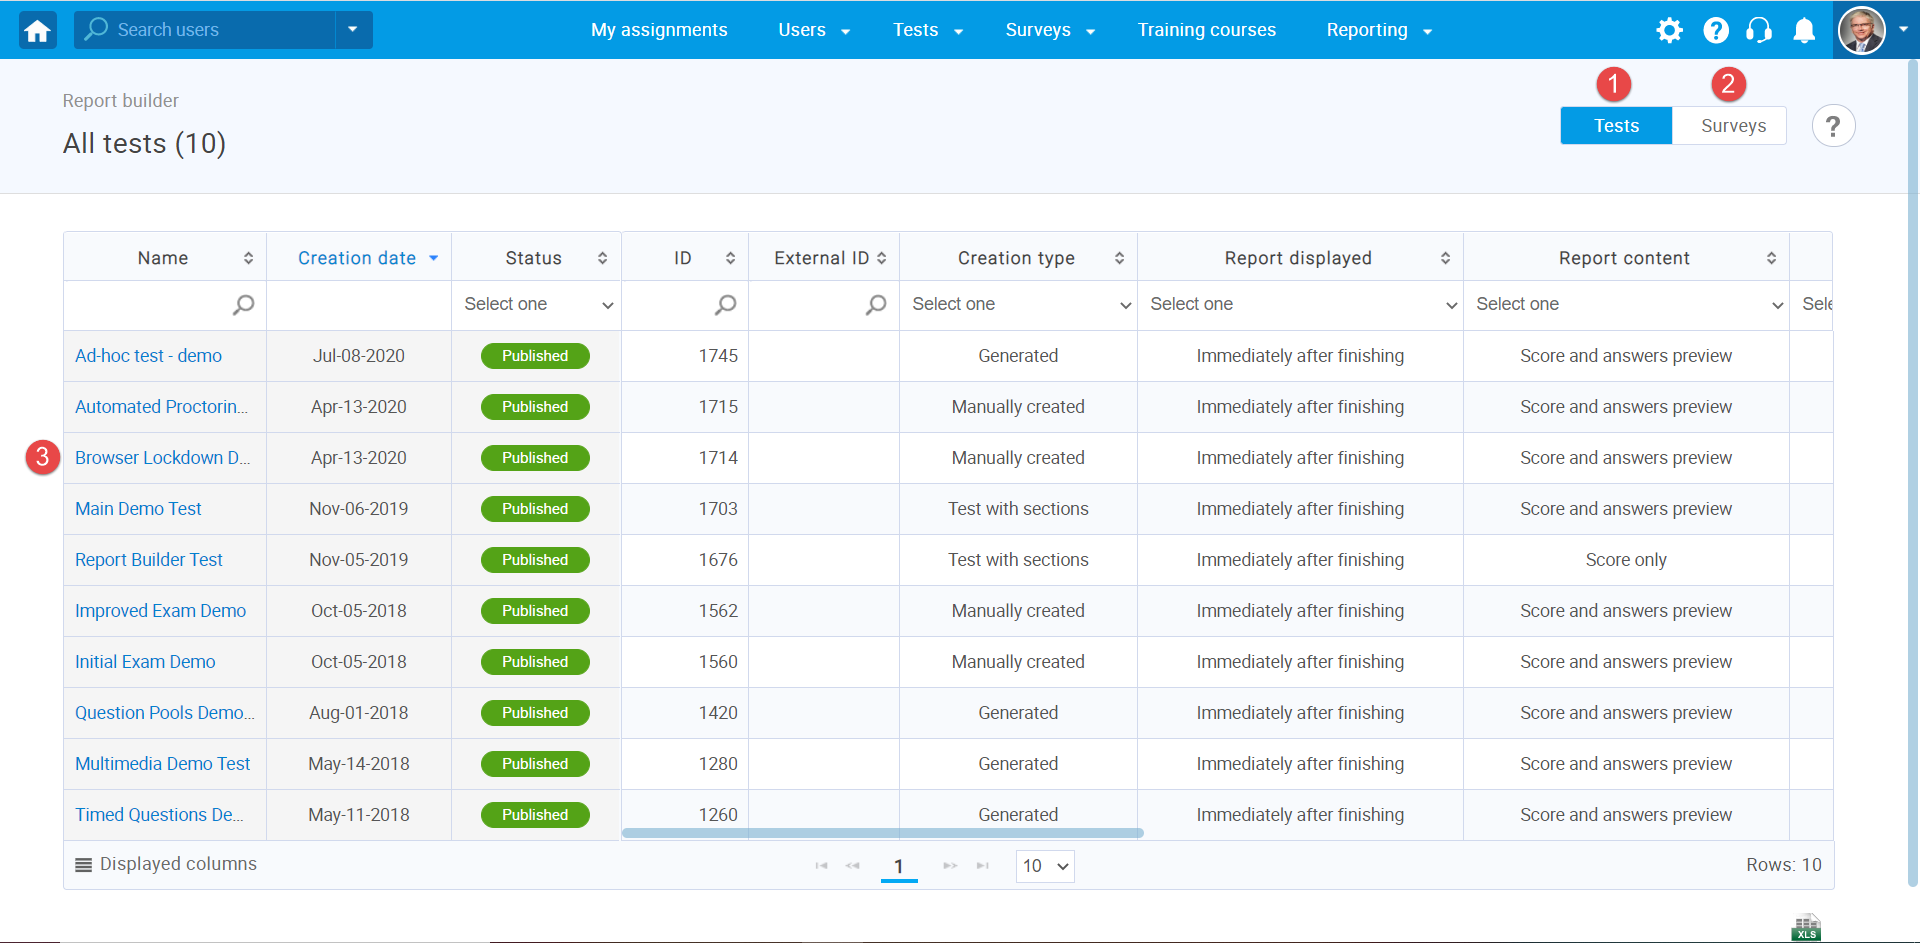
You will be redirected to a new page where you can:
- Click the "Tests" button to to see the list of tests you can create the report for.
- Click the "Surveys" button to to see the list of surveys you can create the report for.
- Select the test or survey from the table.
- Page layout
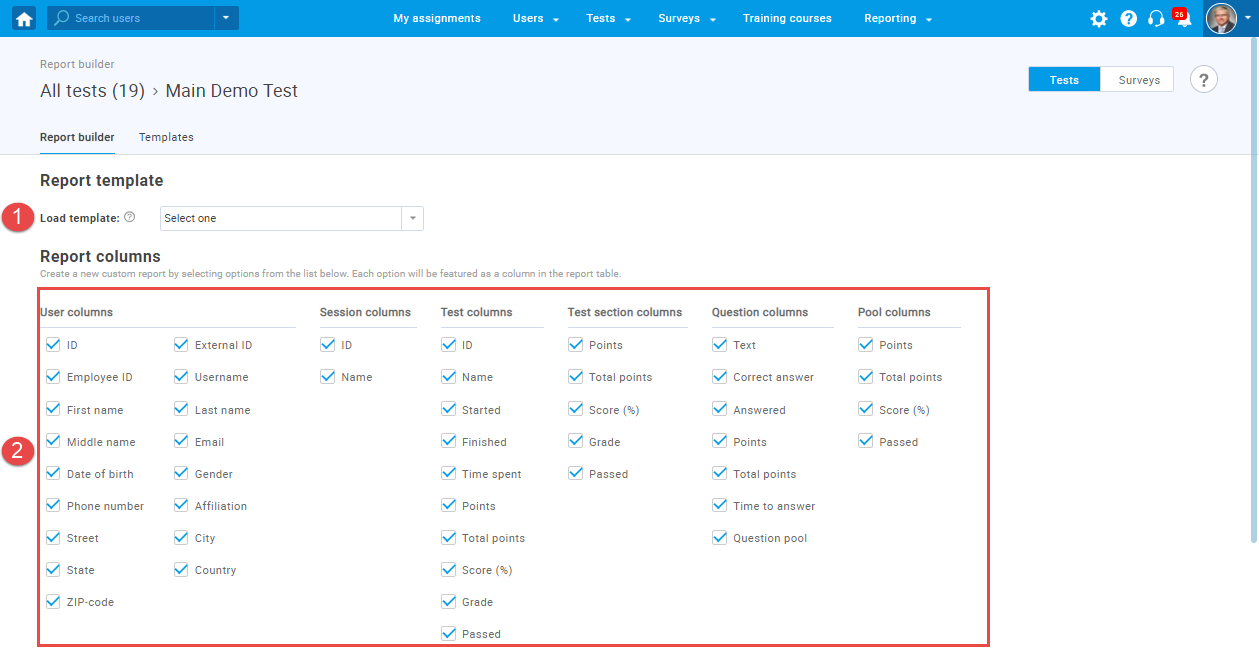
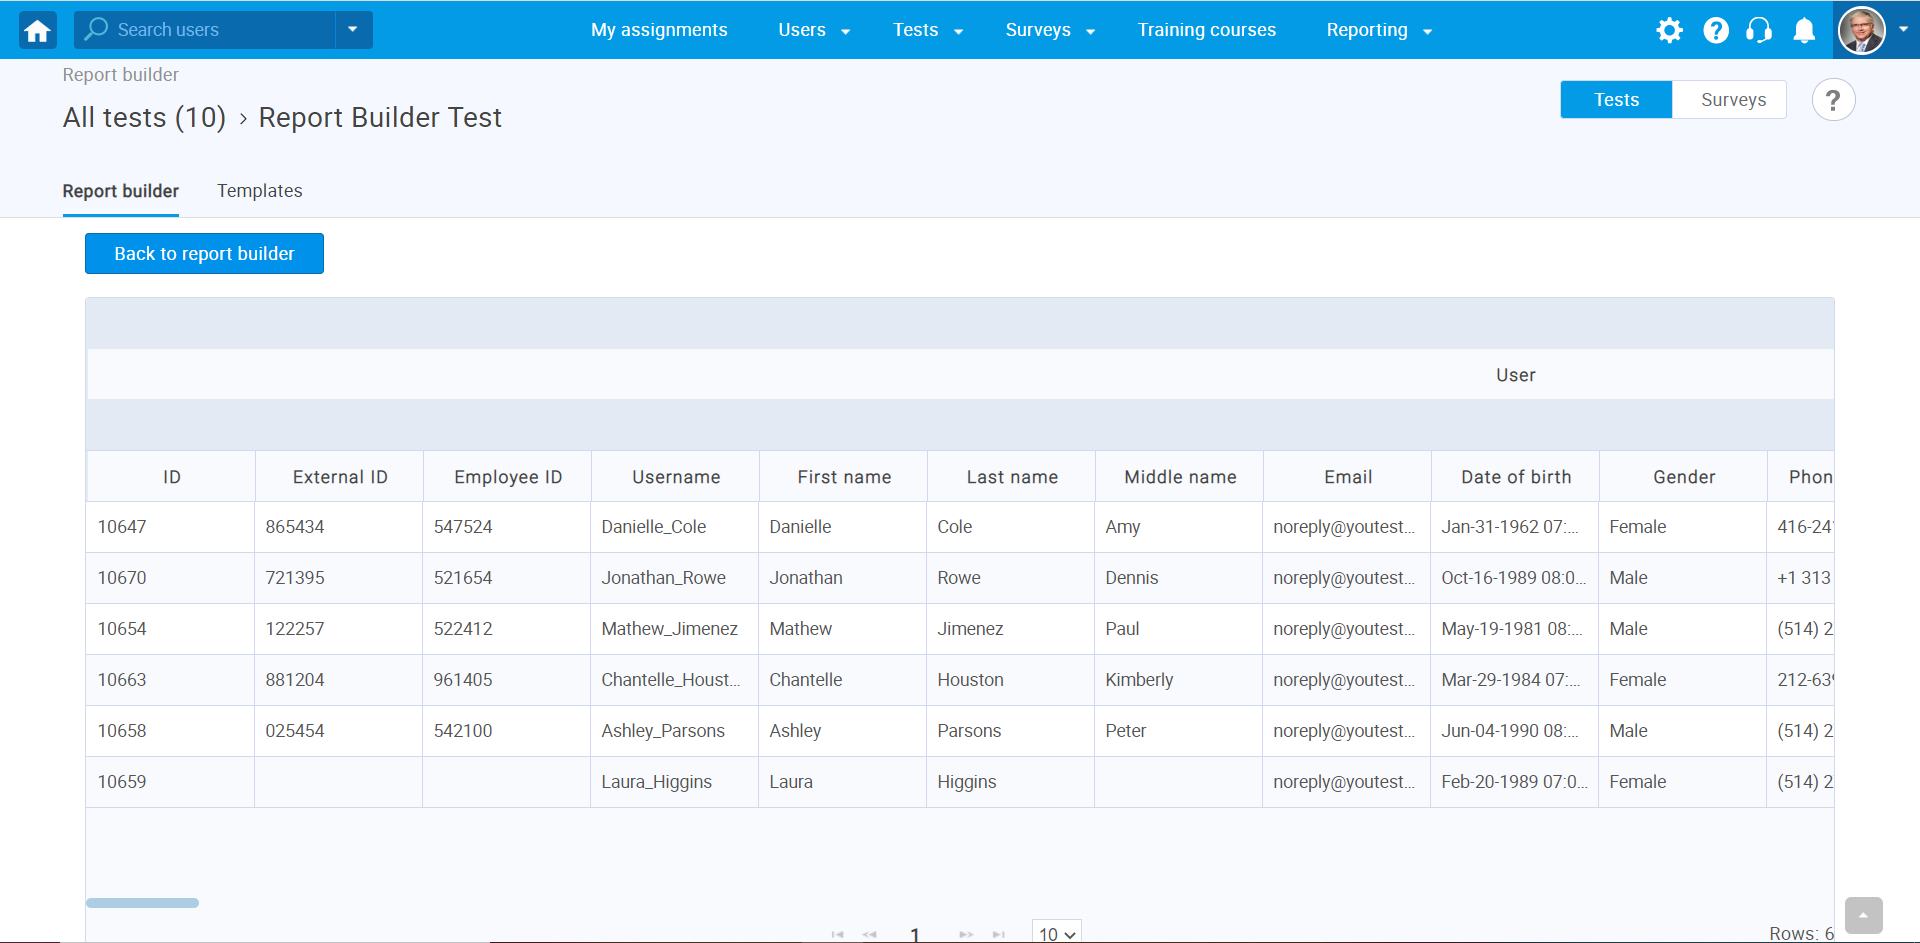
To preview the report for the selected test/survey, you can:
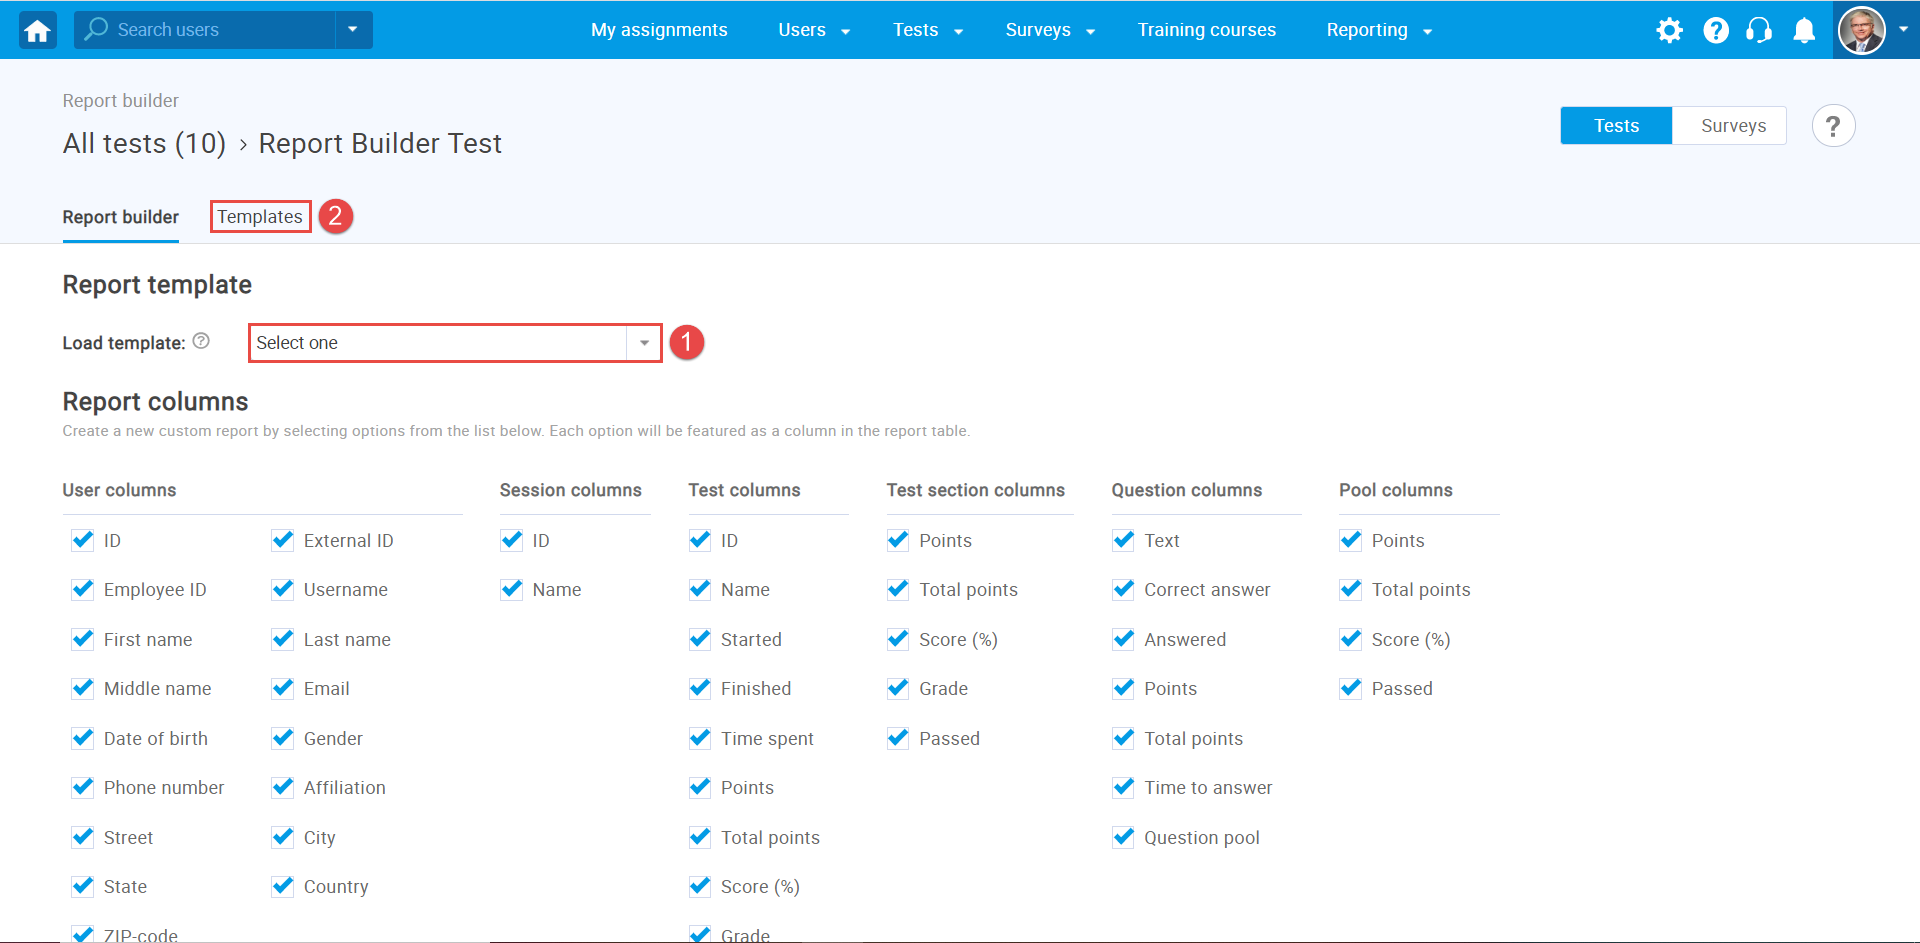
- Load the existing report template.
- Create a new custom report by selecting options from the list. Each selected option will be featured as a column in the report table.
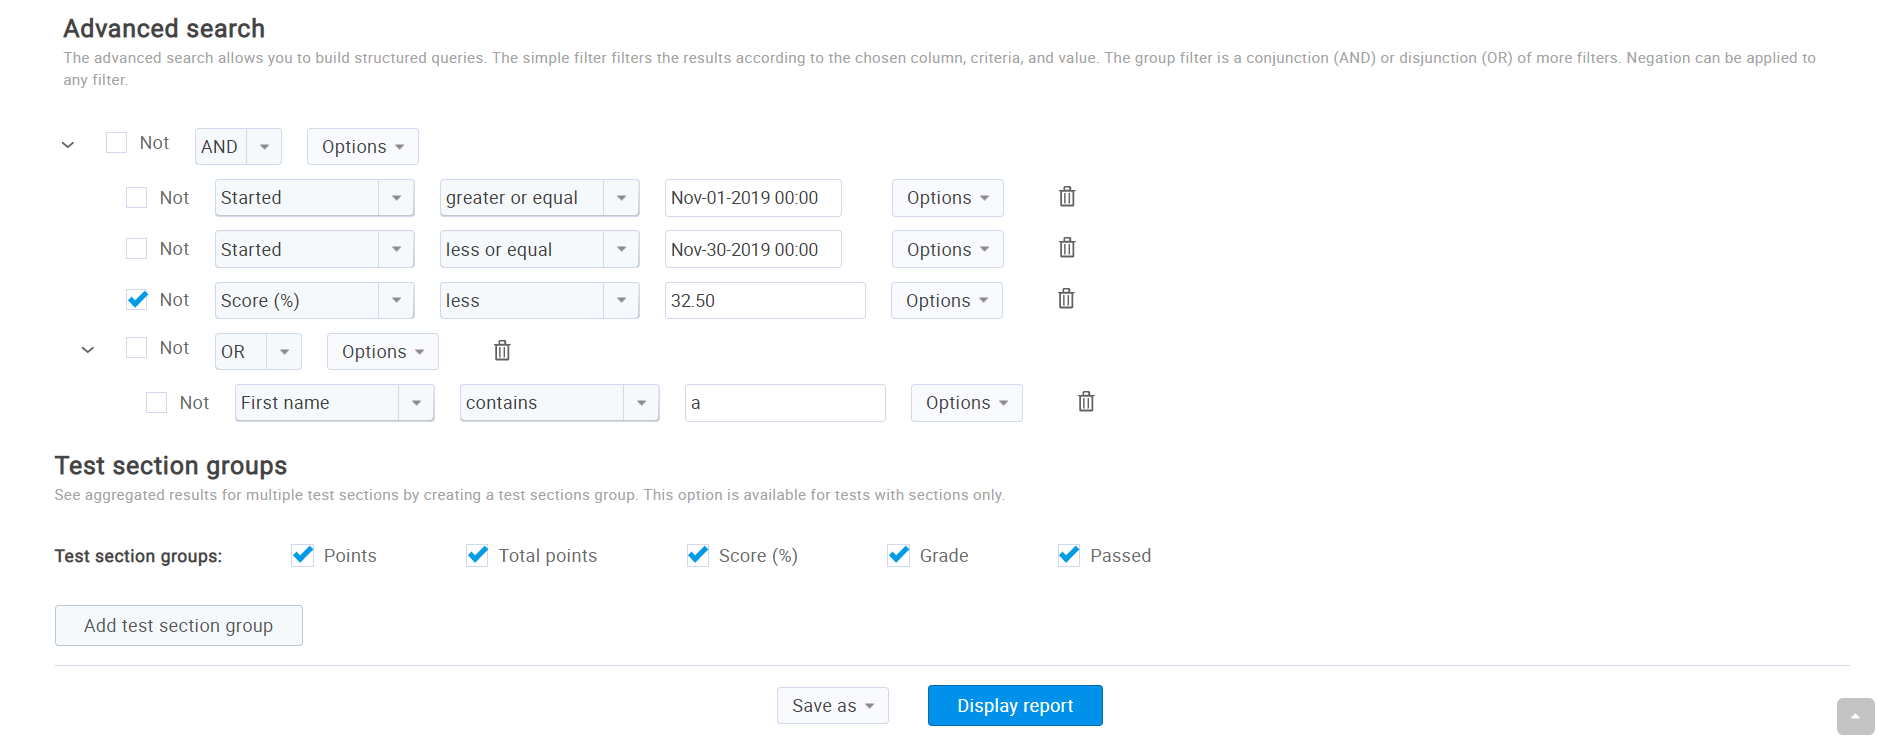
The advanced search allows you to build structured queries. The simple filter displays the results according to the chosen column, criteria, and value. The group filter represents a conjunction (AND) or disjunction (OR) of more filters. Negation can be applied to any filter.
 For example, the query from the picture above will produce the
report which will include all test/survey attempts taken between 1st
and 31th March 2020, having scores not less than 25%
(greater than 25%) and whose takers either have the
first name Daisy or are not born after 7th
March 1998.
For example, the query from the picture above will produce the
report which will include all test/survey attempts taken between 1st
and 31th March 2020, having scores not less than 25%
(greater than 25%) and whose takers either have the
first name Daisy or are not born after 7th
March 1998.
- This option is available only for tests with sections. You can see the aggregated results for multiple sections by creating a section group. To create a new section group, click the Add section group button. Enter the group’s unique name and choose the sections you want to see the aggregated results for. For every section group, you can select a grading scale to calculate its grade.
- You can save the report settings as a new report
template or update the existing report template. To do so, click the "Save
as..." button.
Note: Only columns will be saved, excluding the advanced search (queries).
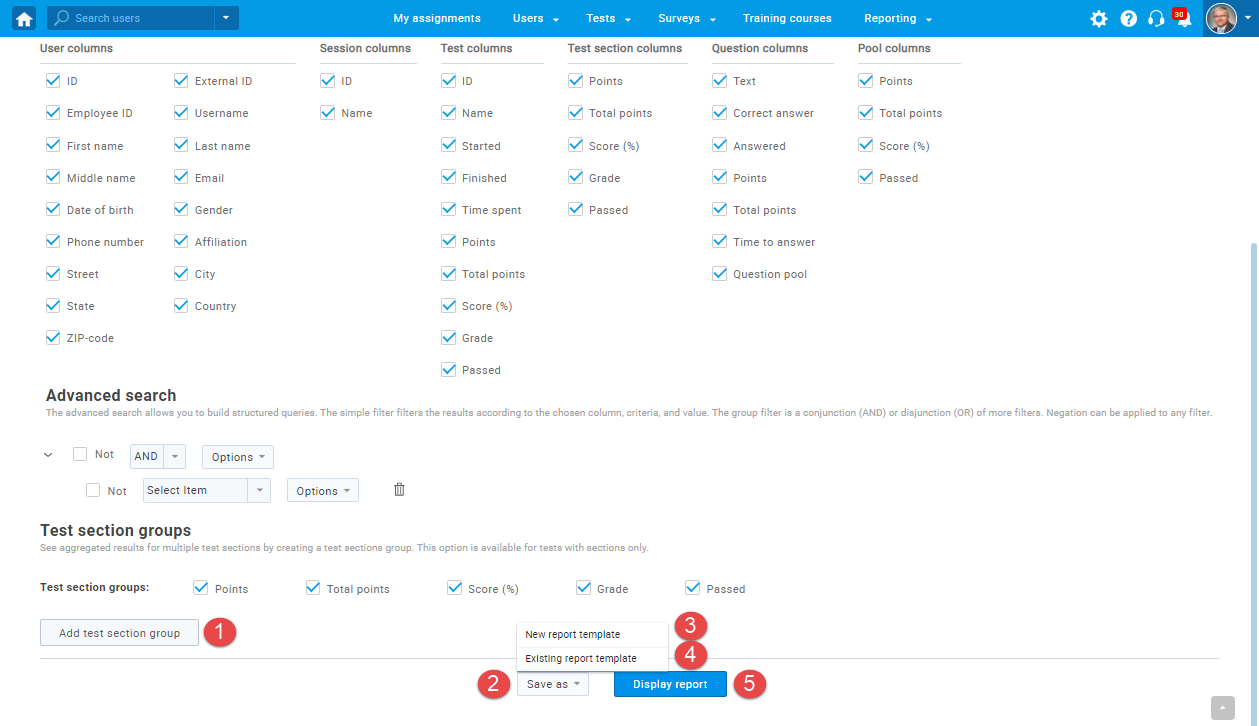
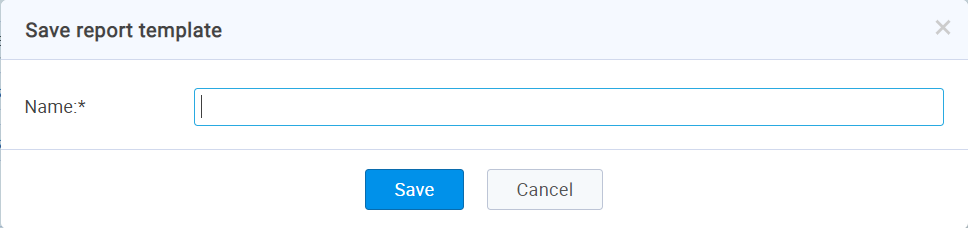
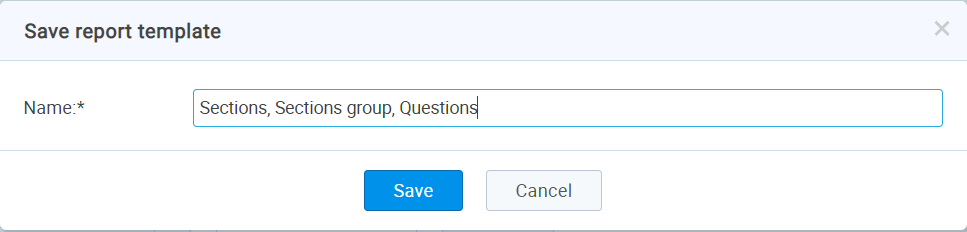
- Click the "New report template" to save the report settings as a new template. Enter the name of the template in a dialog box. To confirm the input, click the "Save" button or discard it by clicking the "Cancel" button.
- Click the "Existing report template" to save the report settings to the existing report template. Choose the desired report template you want to update in the dialog box. If the selected template is already loaded (see 1. step), that template will be chosen by the default. You can change the name of the selected template by editing the "Name" field. To confirm the input, click the "Save" button or close the dialog by clicking the "Cancel" button.
- After you configure the report settings, click the "Display report" button to see the report you have made.
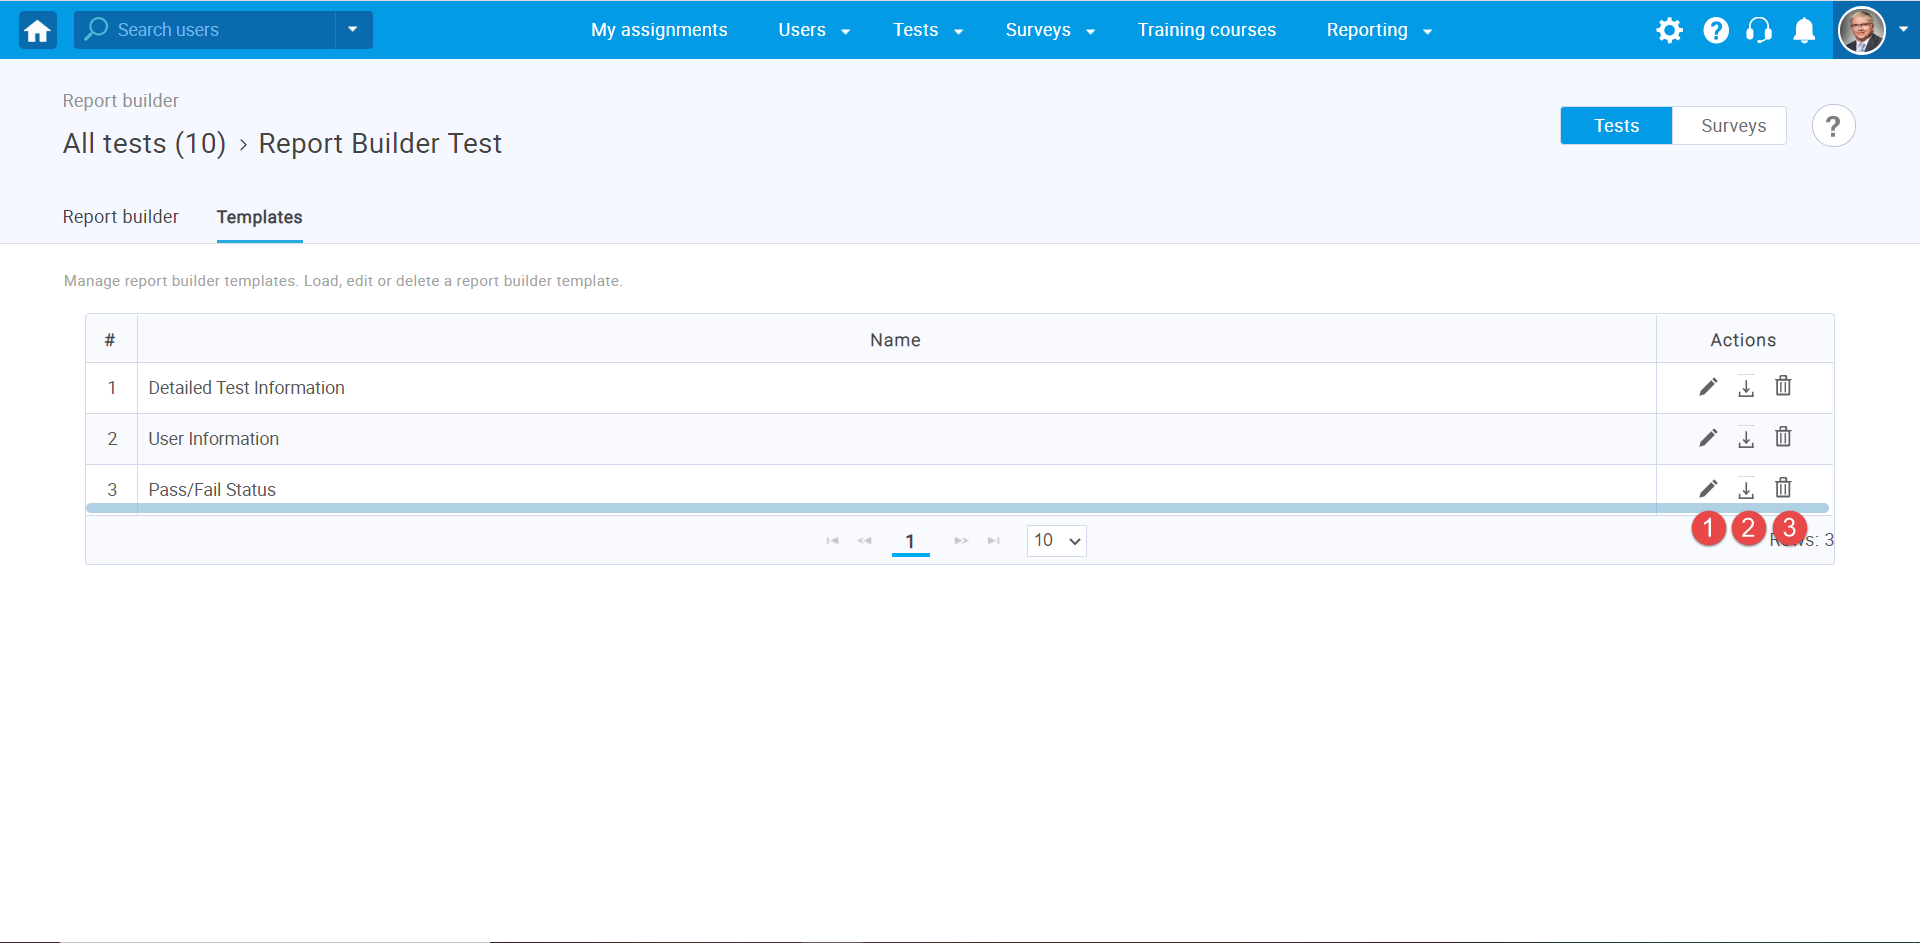
- Templates
- You can load the existing report template by selecting it from a "Dropdown menu".
- To see the detailed list of all report templates, open the "Templates" tab.
In the "Templates" tab, you can see the table of all report templates in the system.
The following actions can be performed on each report template:- "Edit" - change the name of the report template.
- "Load" - load the report template into the report builder.
- "Delete" - erase the report template from the system.