User manual
Scheduled Reports
The report scheduling feature enables sending reports to the subscribers’ email addresses at a defined time or interval. This allows the subscribers to preview their report without logging into the application. The subscribers do not need to be registered application users.
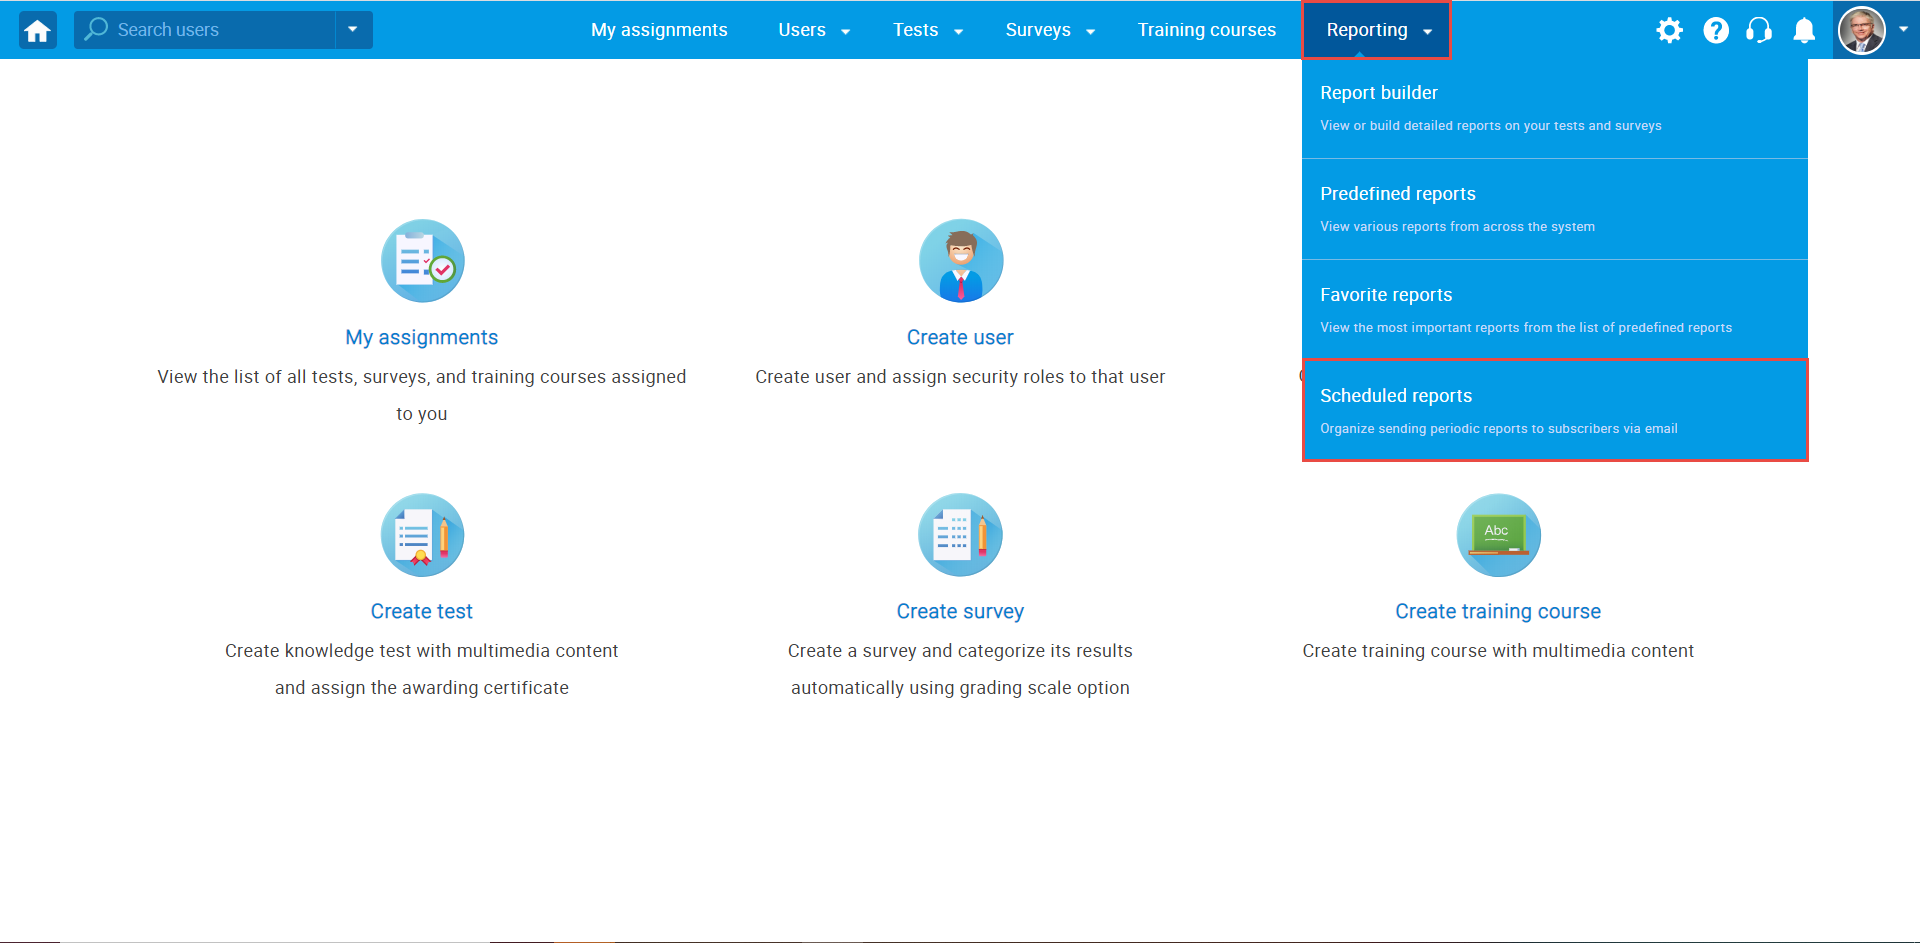
- Accessing the page
To access the "Scheduled reports" page, click the "Reports" option in the main menu and select the "Scheduled reports".
- Accessing reports
On this page you will see a list of all scheduled reports, with their names, descriptions, and other relevant data.

- Available scheduled reports actions
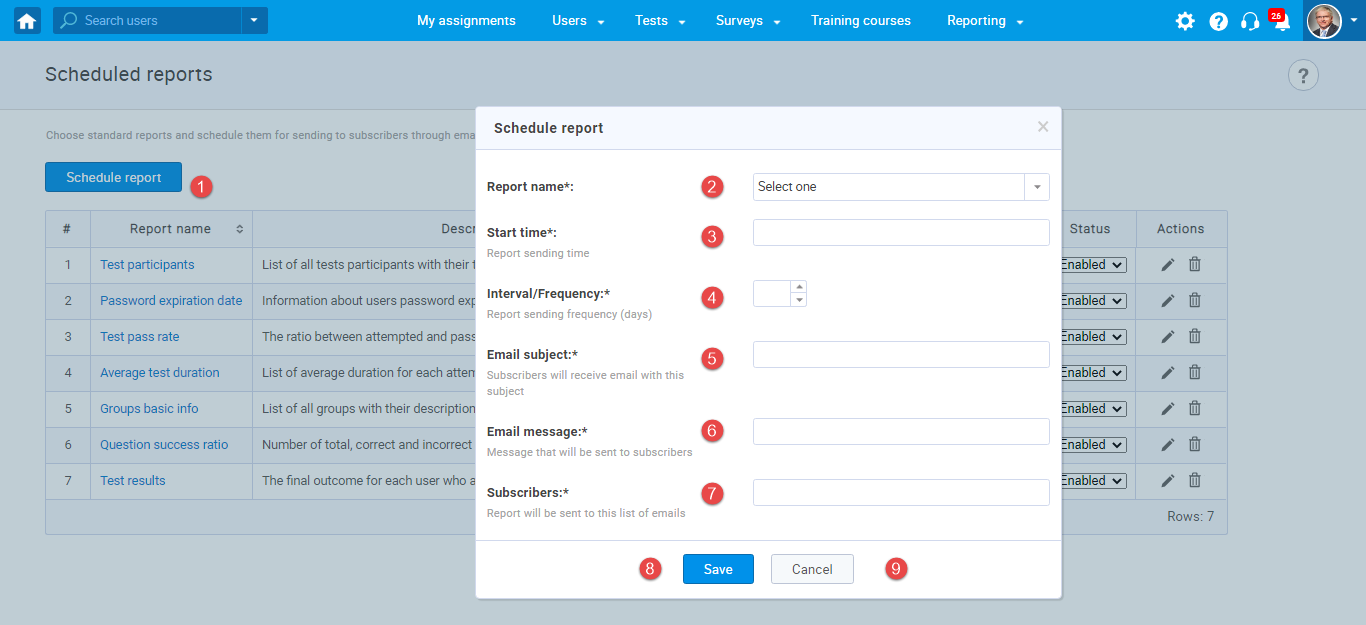
- Add new report
To add a report to the scheduled reports list:
- Click the "Schedule report" button.
- Select the report you want to schedule, from the drop-down list.
- Define the report’s initial sending date and time.
- Specify the interval/frequency of the report’s sending.
- Define the email subject the subscribers will see when they receive the email.
- Define the email message sent to the subscribers.
- Enter the subscribers’ email addresses.
- Click the "Save" button to confirm new scheduling configuration.
- Click the "Cancel" button to annul settings you have made.
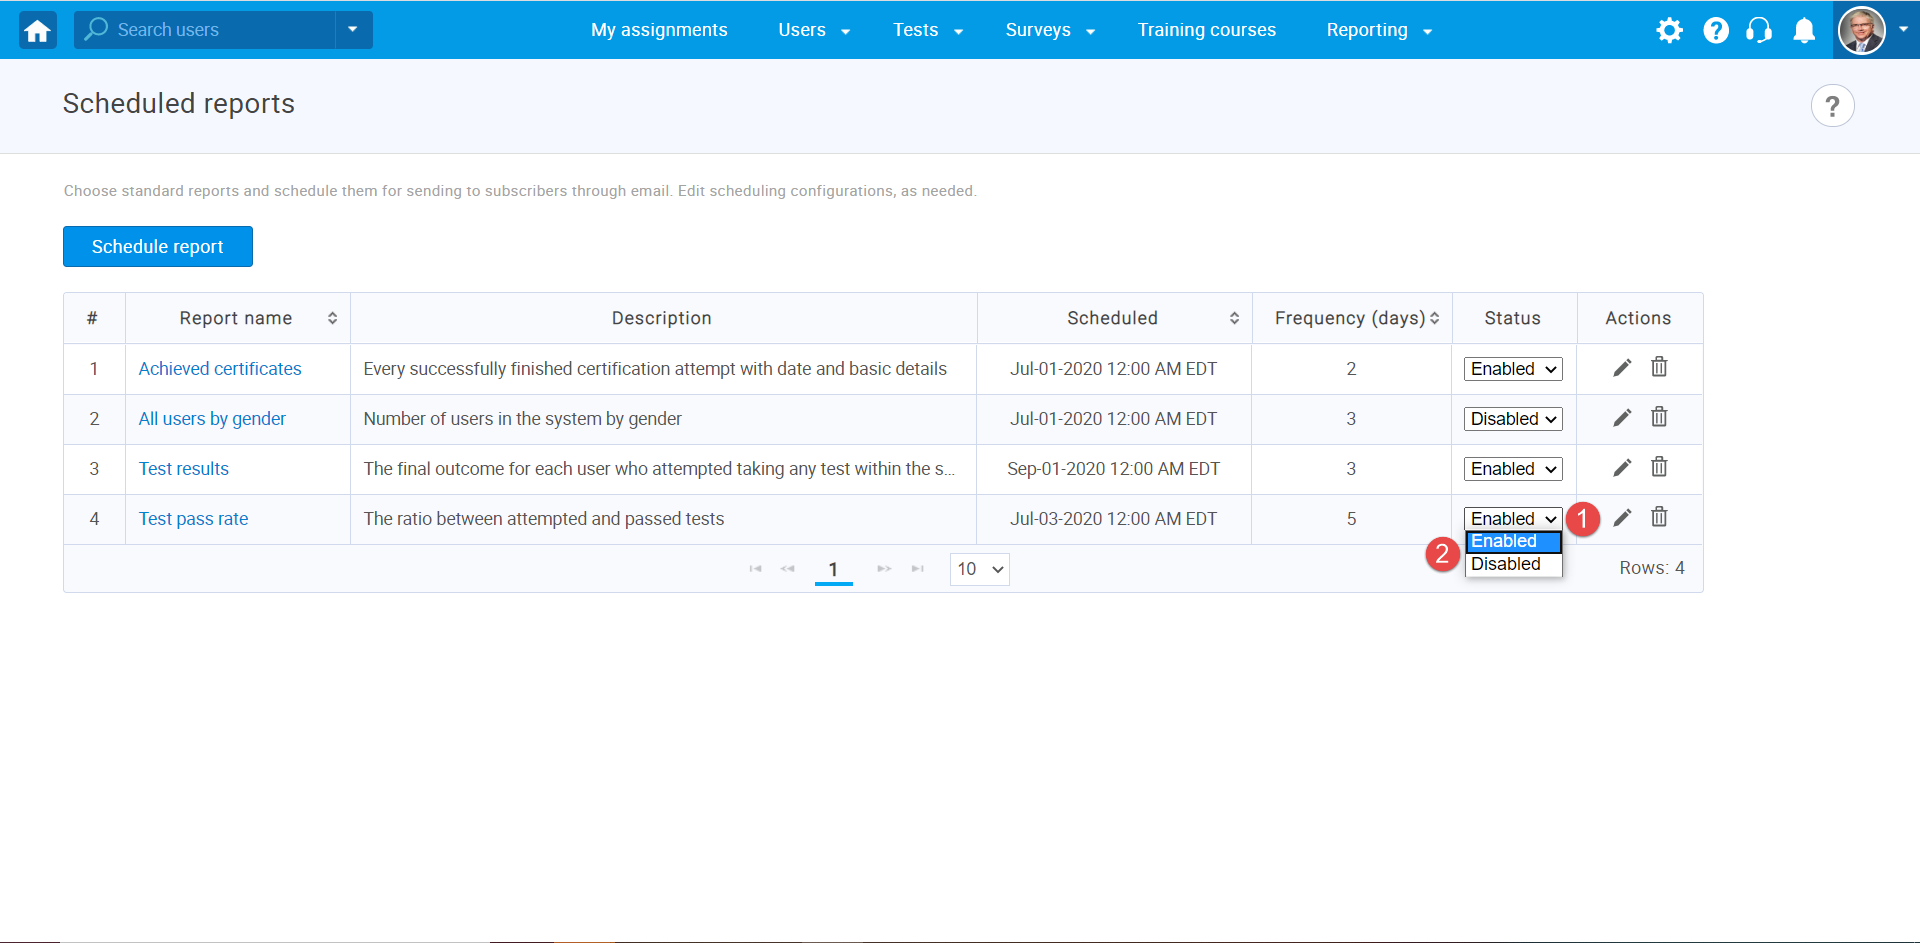
- Enable/disable scheduled reports
To enable/disable a report’s scheduling configuration:
- Click the drop-down list and select the report you want to change the status of.
- Select the "Enabled" option to enable the report’s scheduling configuration and the report will be sent to the subscribers as defined. Select the "Disabled" option to turn off the report’s scheduling option. The report will not be sent to the subscribers until its status is set to "Enabled" again.
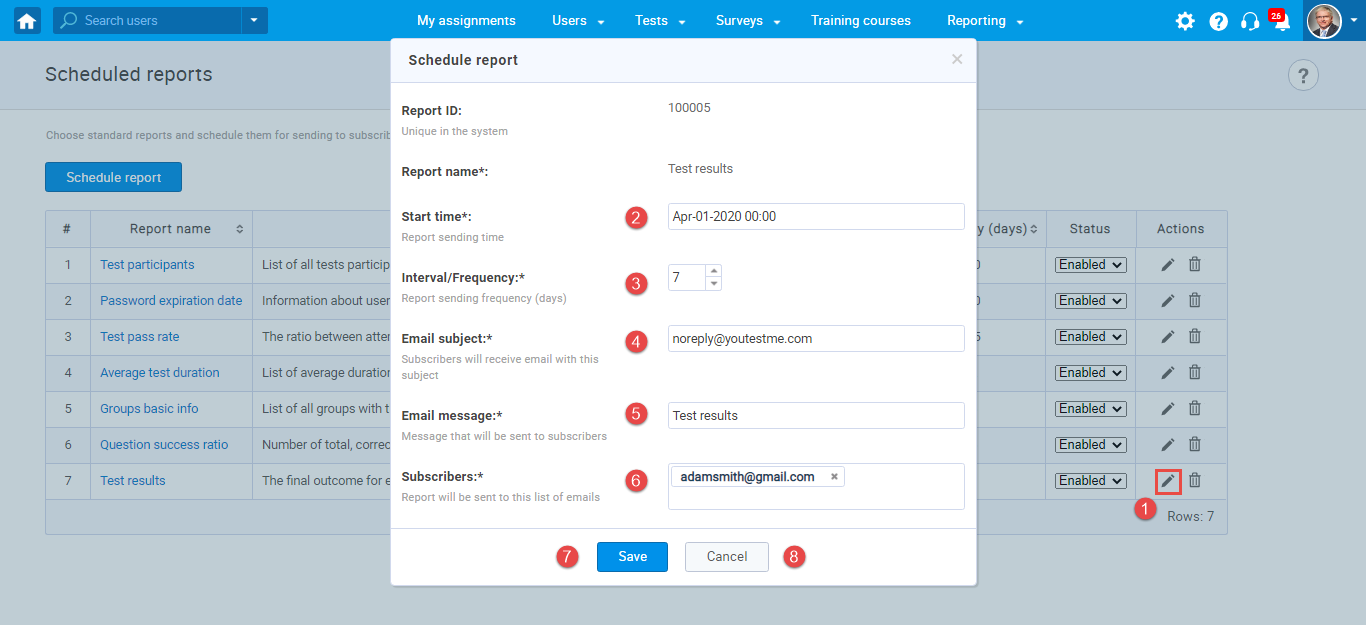
- Update scheduled reports
To update the scheduled report’s settings:
- Click the "Pencil" icon in the "Actions" column..
- Edit the report’s initial sending (Optional)
- Edit the interval/frequency of the report’s sending.(Optional)
- Edit the the email subject the subscribers will see when they receive the email. (Optional)
- Edit the email message sent to the subscribers. (Optional)
- Edit the subscribers’ email addresses. (Optional)
- Click the "Save" button to apply the changes you have made.
- Click the "Cancel" button to annul the changes you have made.
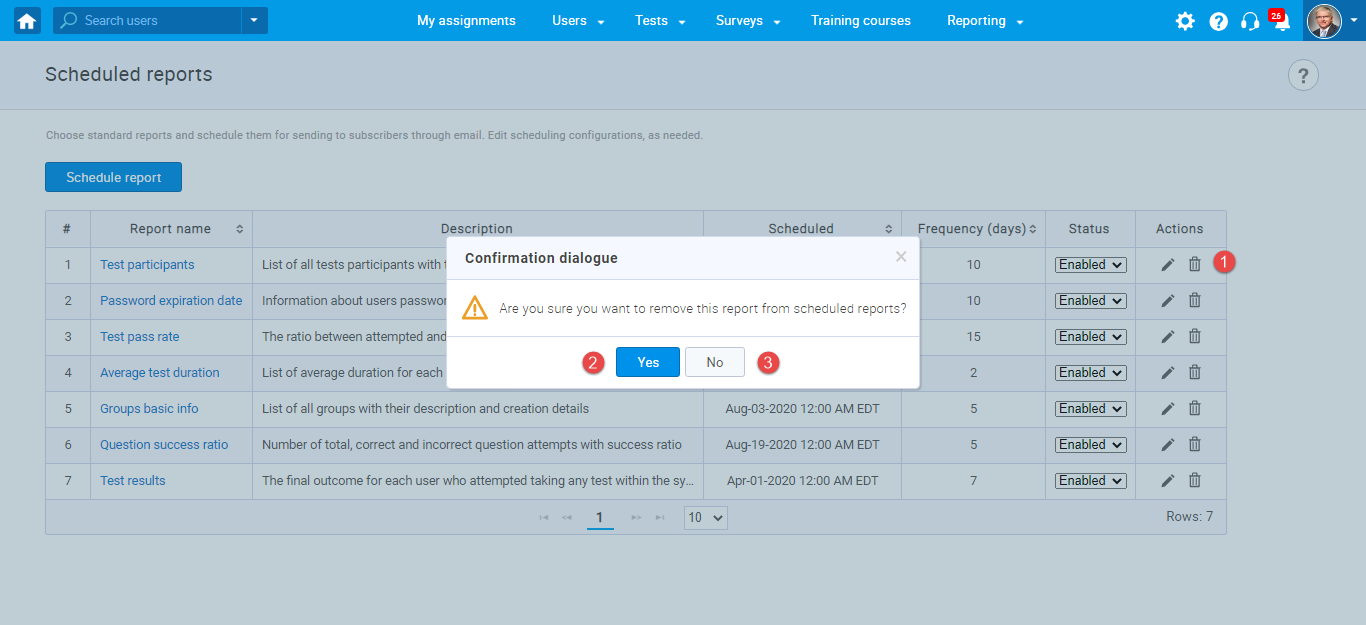
- Delete scheduled reports
To delete a report from the scheduled reports list:
- Click the "Trash can" icon in the "Actions" column.
- To confirm the report deletion, click the "Yes" button.
- To cancel it, click the "No" button.
- Add new report
