User manual
Manage certificates
-
Introduction
On the Manage certificates page, you can create custom-branded certificates that can be assigned to tests and awarded to candidates upon successfully passing tests or meeting specifically defined completion conditions. Candidates have the option to download the certificate in PDF format, as an image, or share it via a link.
To manage certificates, navigate to the Tests panel in the left side menu, and select Manage certificates.
On the left side of the screen, you will find a sidebar where you can:
-
Search for a specific certificate.
-
Access and edit certificate by clicking on its name.
Additionally, at the top of the page you can click the New certificate button to create new certificate (The fields are similar to those for managing existing certificates).

-
-
Manage certificates
-
Information
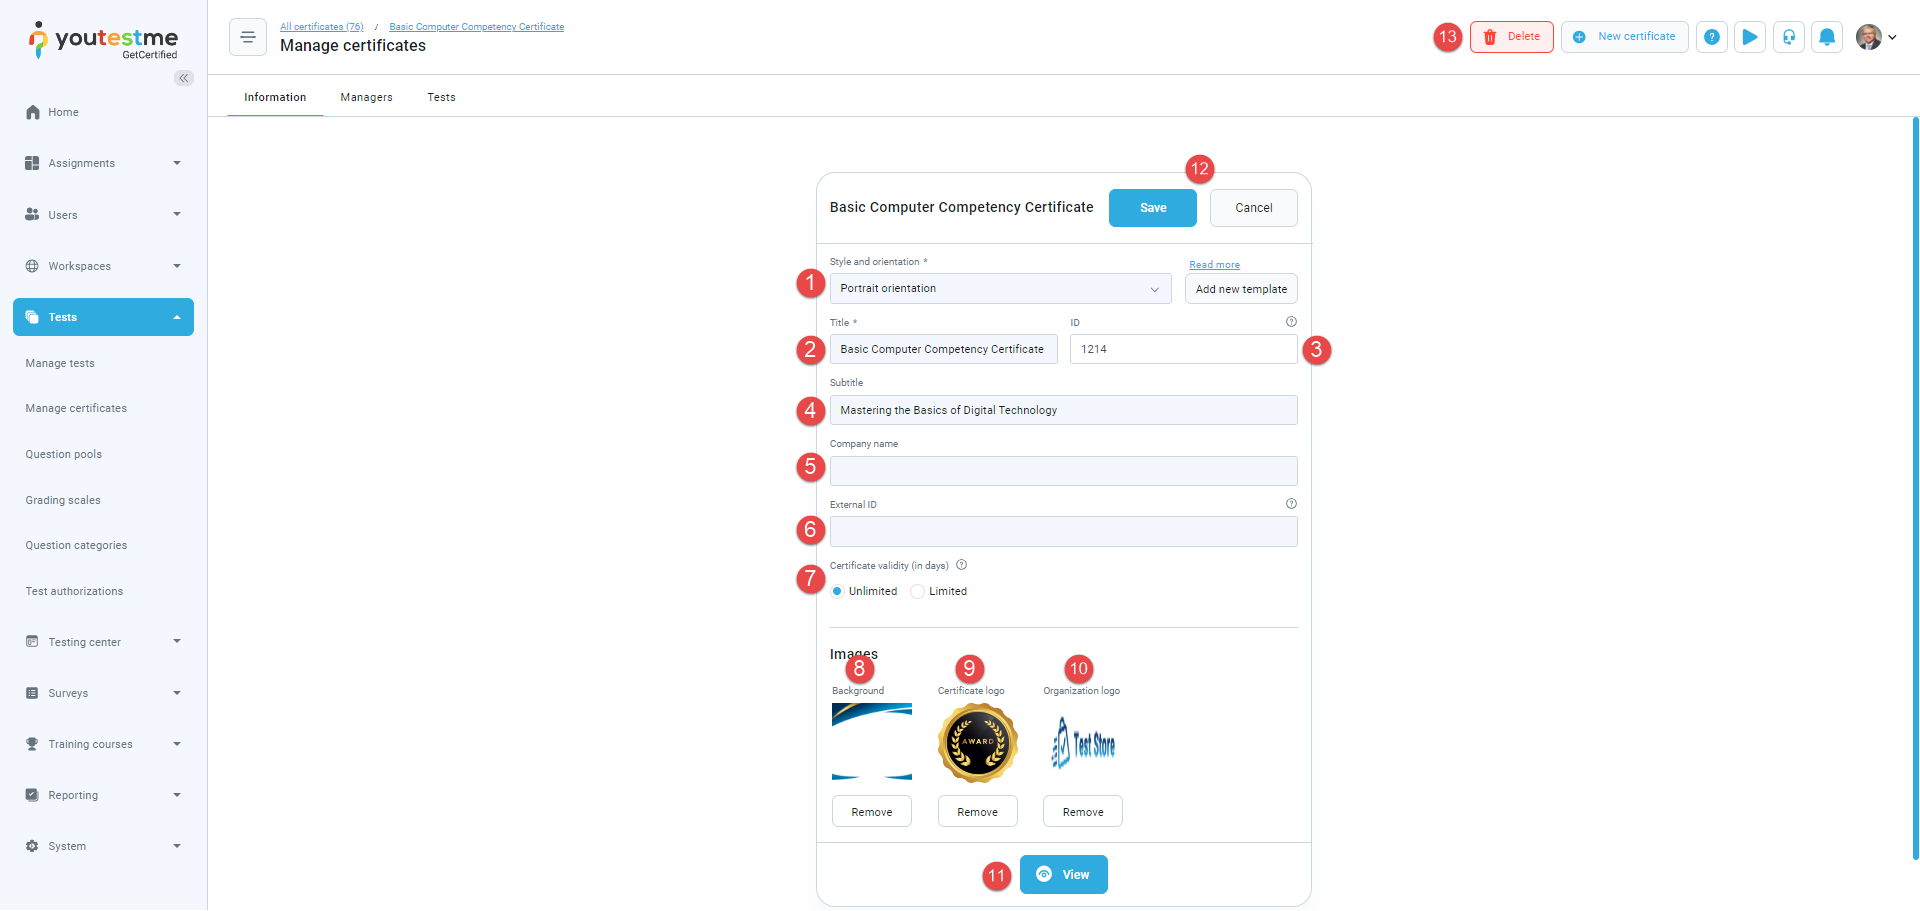
The Information tab displays all certificate settings, which can be modified.
On this tab, you can:
-
Choose certificate Style and orientation. Default styles are available, but new templates can be added as needed. For instructions on creating certificate templates in .jasper format and uploading them to the application, please refer to the following article. If necessary, you can contact the YouTestMe support team for assistance.
-
Define the Title of the certificate.
-
Check the ID of the certificate. It is a unique value generated automatically once the certificate is created.
-
Optionally, add a Subtitle to the certificate to further clarify its purpose.
-
Enter the Company name that issued the certificate.
-
Enter the External ID, a unique identifier used for integration with external systems. This field allows connecting certificates from this system to objects in external systems. For instance, when integrating with Credly, set the template ID of the Credly badge as the external ID for the YouTestMe certificate.
-
Specify the Certificate validity period. Make the certificate valid for an unlimited period of time or set the validity period after which the candidate will need to retake the test to obtain the certificate again. The expiration date will be shown on the certificate and the candidate's report.
-
Upload or remove the certificate Background.
-
Upload or remove the Certificate logo.
-
Upload or remove the Organization logo.
-
Click the View button to check how the certificate looks.
-
Click the Save button to save the certificate or the Cancel button to discard changes.
-
Permanently Delete the certificate. A certificate cannot be deleted if it has been added to any test.
-
-
Managers
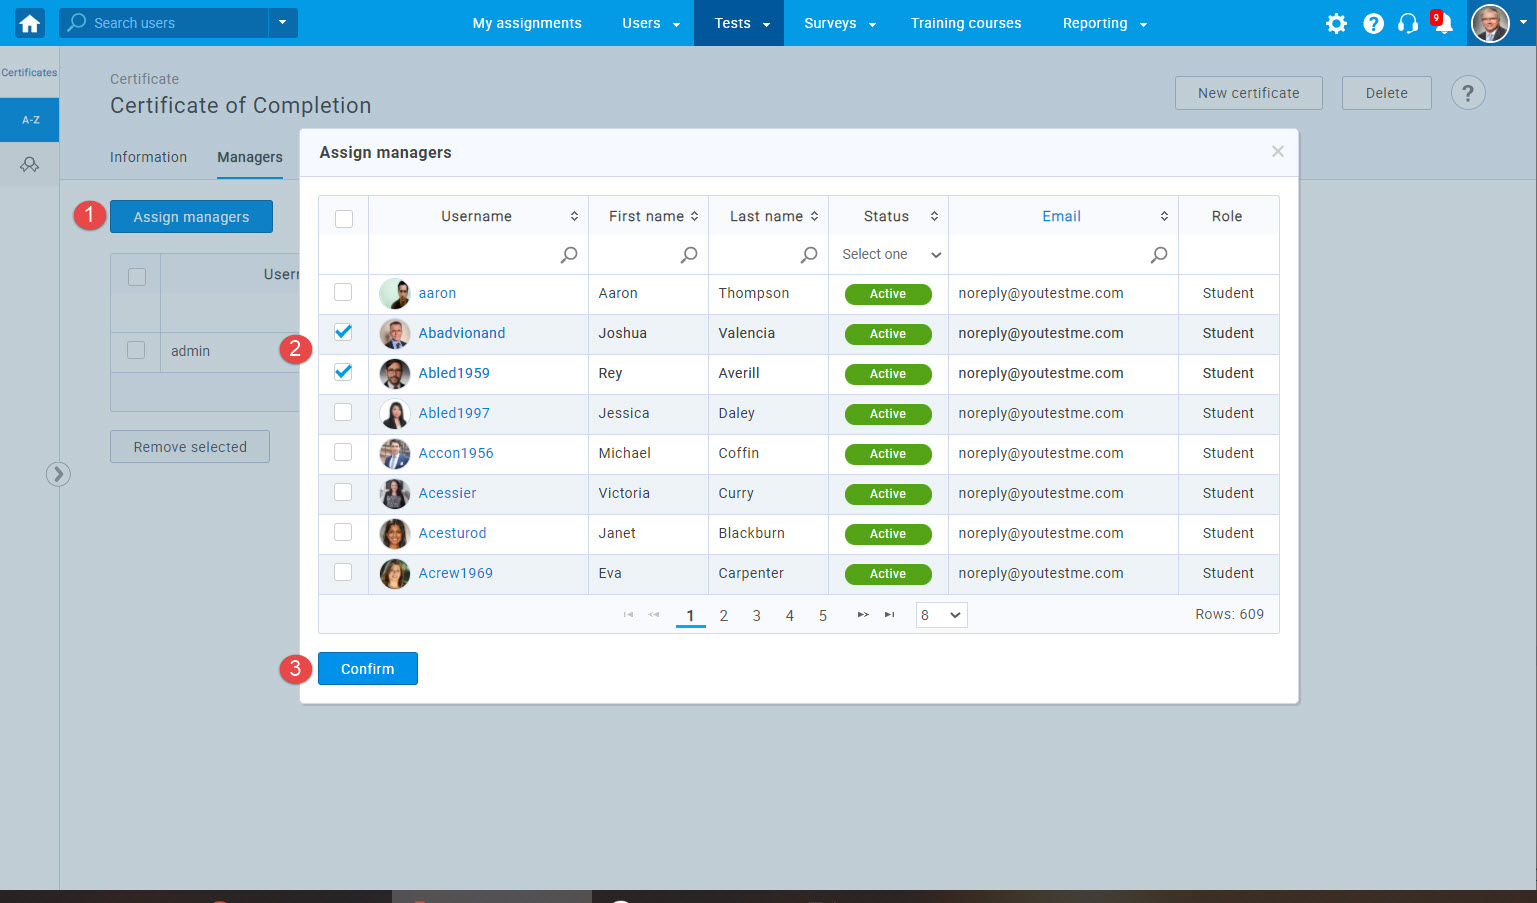
The Managers tab contains a list of users who have been granted permission to edit the certificate and use it in tests they manage.
On this tab, you can:
-
Present a list of managers in tabular format.
-
Assign users as certificate managers. Select the users you want to assign as certificate managers and click the Confirm button.
-
Remove existing users as certificate managers. In a tabular format, you can select multiple users, click the Remove selected button, and remove them all at once.
-
-
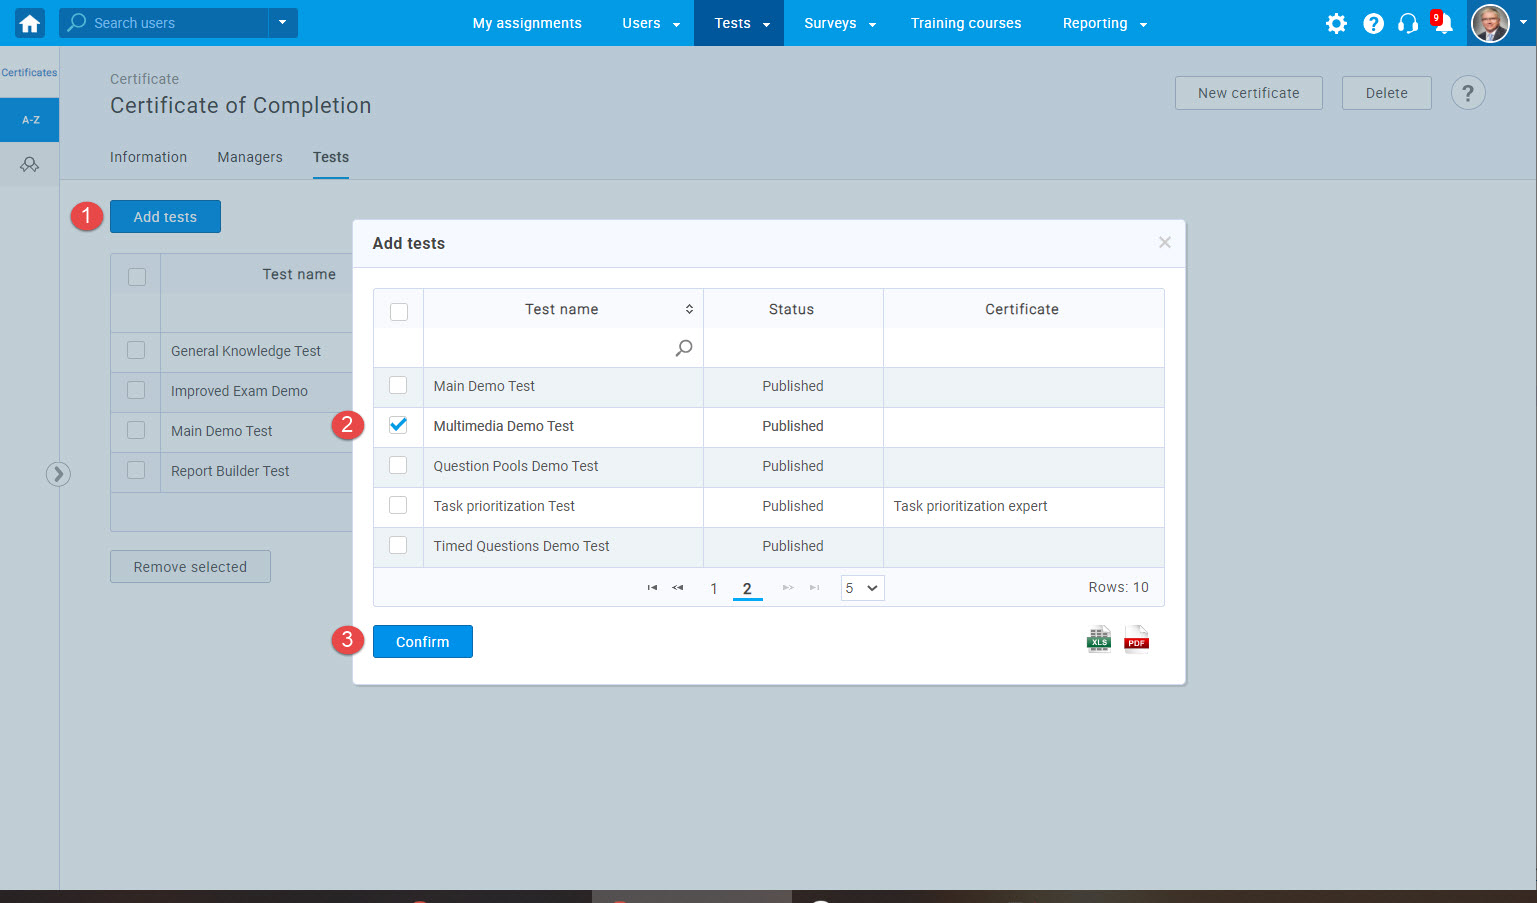
Tests
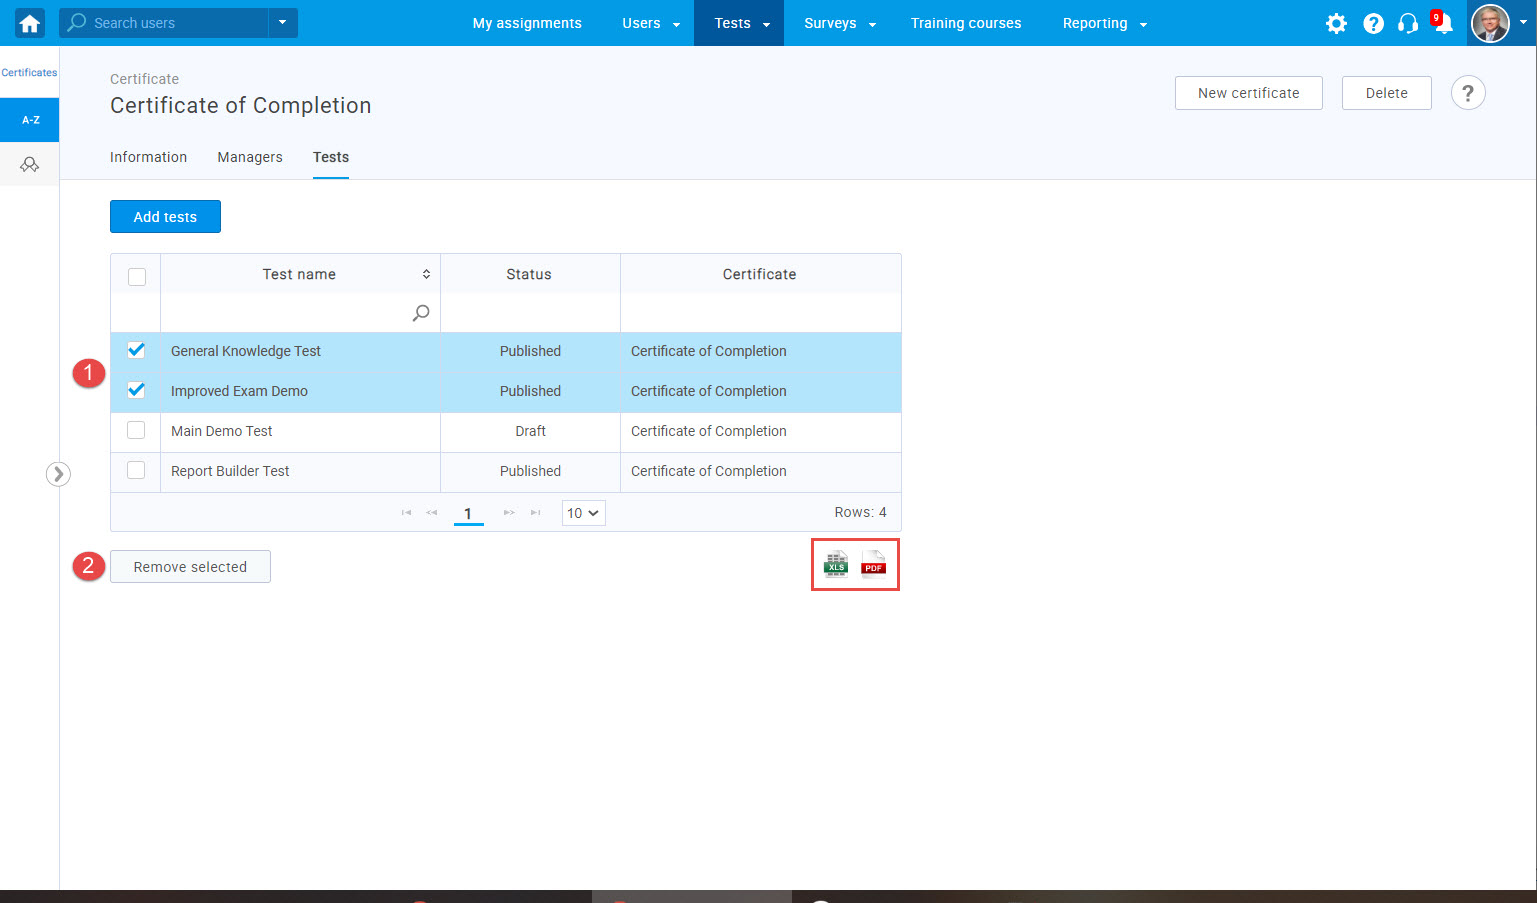
The Tests tab displays a list of all tests to which the certificate is assigned. This means that the certificate will be awarded to users upon successfully completing or meeting specifically defined completion conditions of any of the listed tests. You can associate the certificate with new tests or remove it from existing tests. One test can have multiple certificates.
To link tests to the certificate:
-
Click the Link tests to this certificate button.
-
Select the tests to which you wish to assign the certificate.
-
Click the Confirm button.
To remove existing tests, select the test you want to remove and click the Remove selected button.
Additionally, you can download the list of tests to which the certificate has been assigned as an Excel or PDF file by clicking the corresponding button.
-
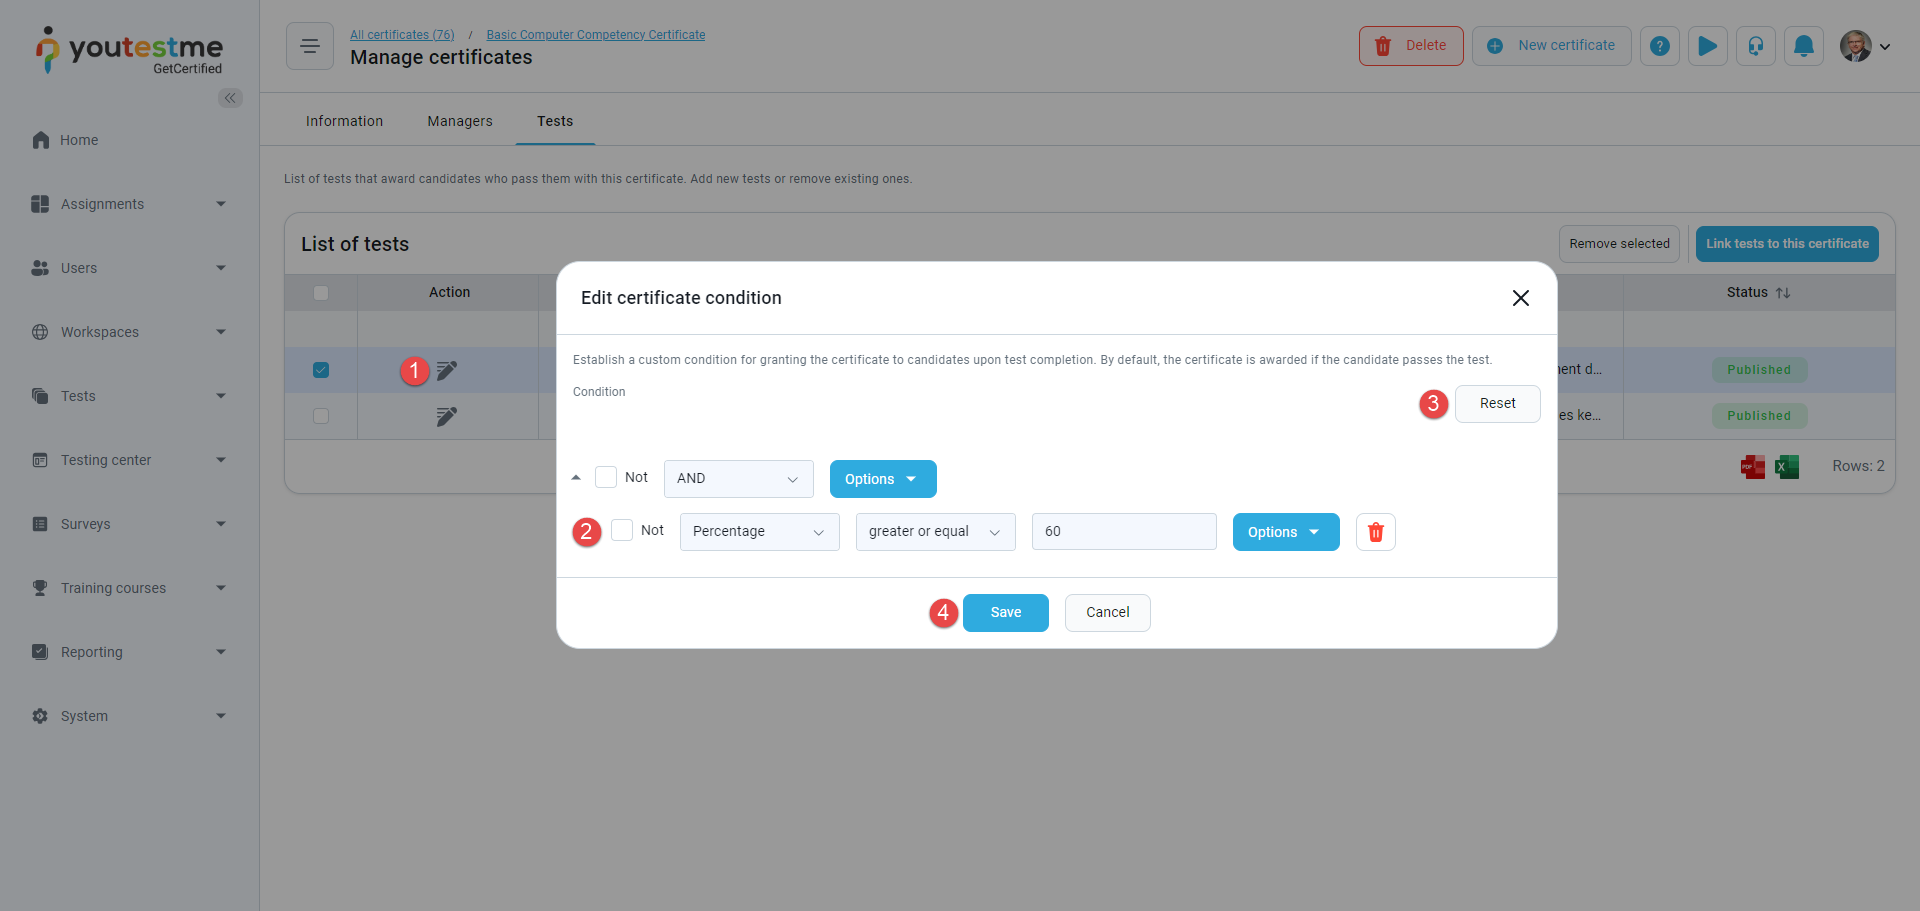
To establish a custom condition for granting the certificate to candidates upon test completion:
-
Click the Edit condition button.
-
Set a custom condition for awarding the certificate to candidates upon test completion. Choose the property, criteria, and value. For instance: [Percentage], [greater than or equal], [60]. Using this condition, certificates will be granted to candidates who achieve a percentage greater than or equal to 60%. By default, the certificate will be assigned if the candidate passes the test.
-
If needed, click the Reset button to revert the condition to a state that assigns the certificate when the user passes the test.
-
Click the Save button.
-
