User manual
Test results
In this page you can:
- manage when and how the test results will be verified.
- manage non-verified test results.
- enable and disable auto, on-demand, and one-by-one verification.
- configure the hold conditions for the auto and on-demand verification.
- manage the non-verified test results by changing their statuses.
- marking test results for review with the review notes.
- manually verify test results.
You can also import test related data.
The Test results page can be accessed from the Testing
sessions section in the left side menu. 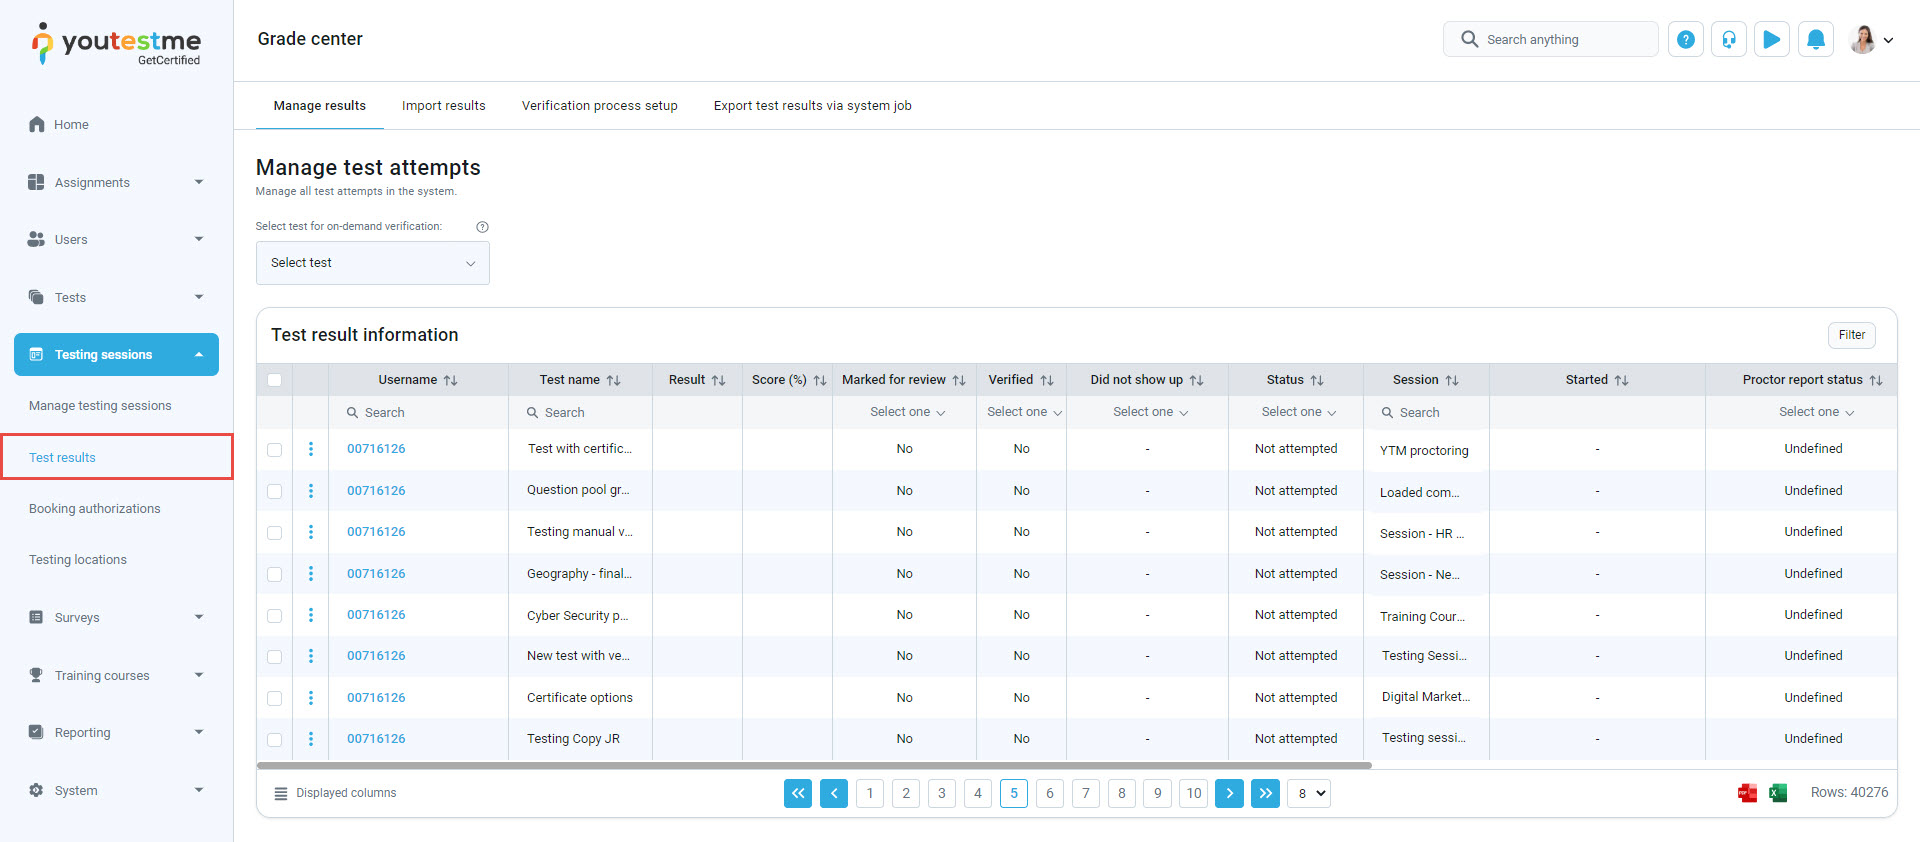
-
Test results page
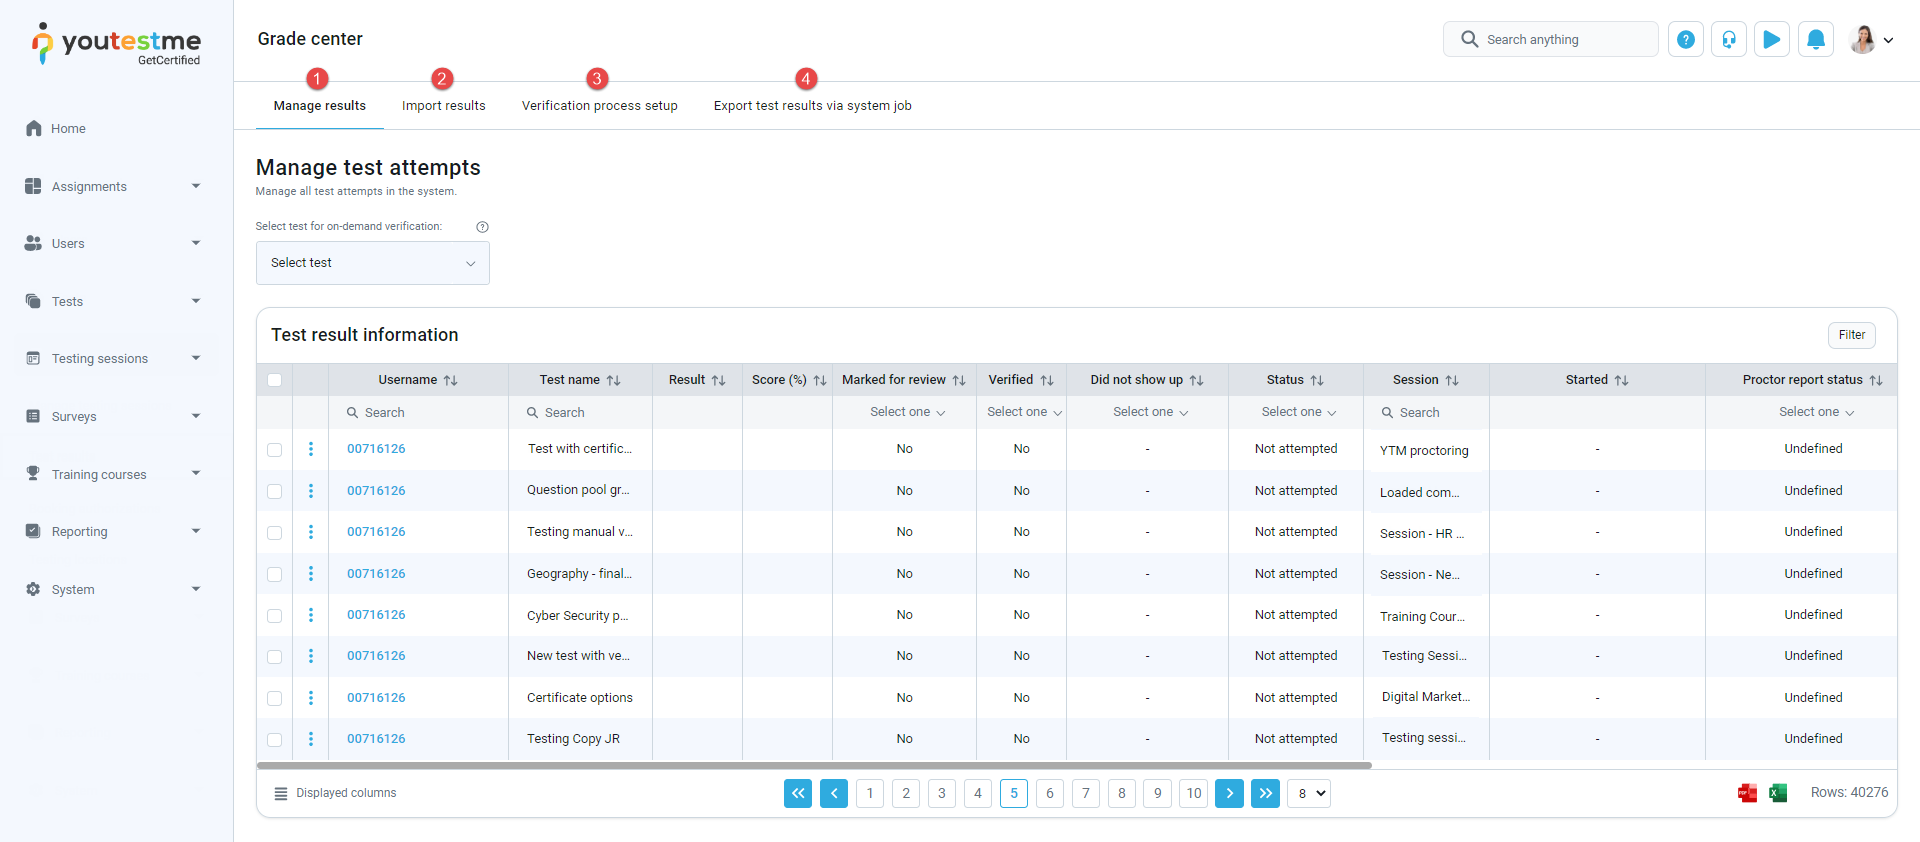
This page is separated into the following parts:
-
Manage results - Manage all test attempts in the system. For more information about it, please visit Manage results.
-
Import results - See all staged batches, manage batch processing and see the logs of the processed batches. For more information about it, please visit Import results.
-
Verification process setup - Test results verification is the additional step upon test completion often needed to certify that results have been checked by humans or a specifically configured system process. For more information about it, please visit Verification process setup.
-
Export test results via system job - Export test results via the system settings. Only authorized and verified results will be sent. For more information about it, please visit Export test results via system job.
-
-
Manage results
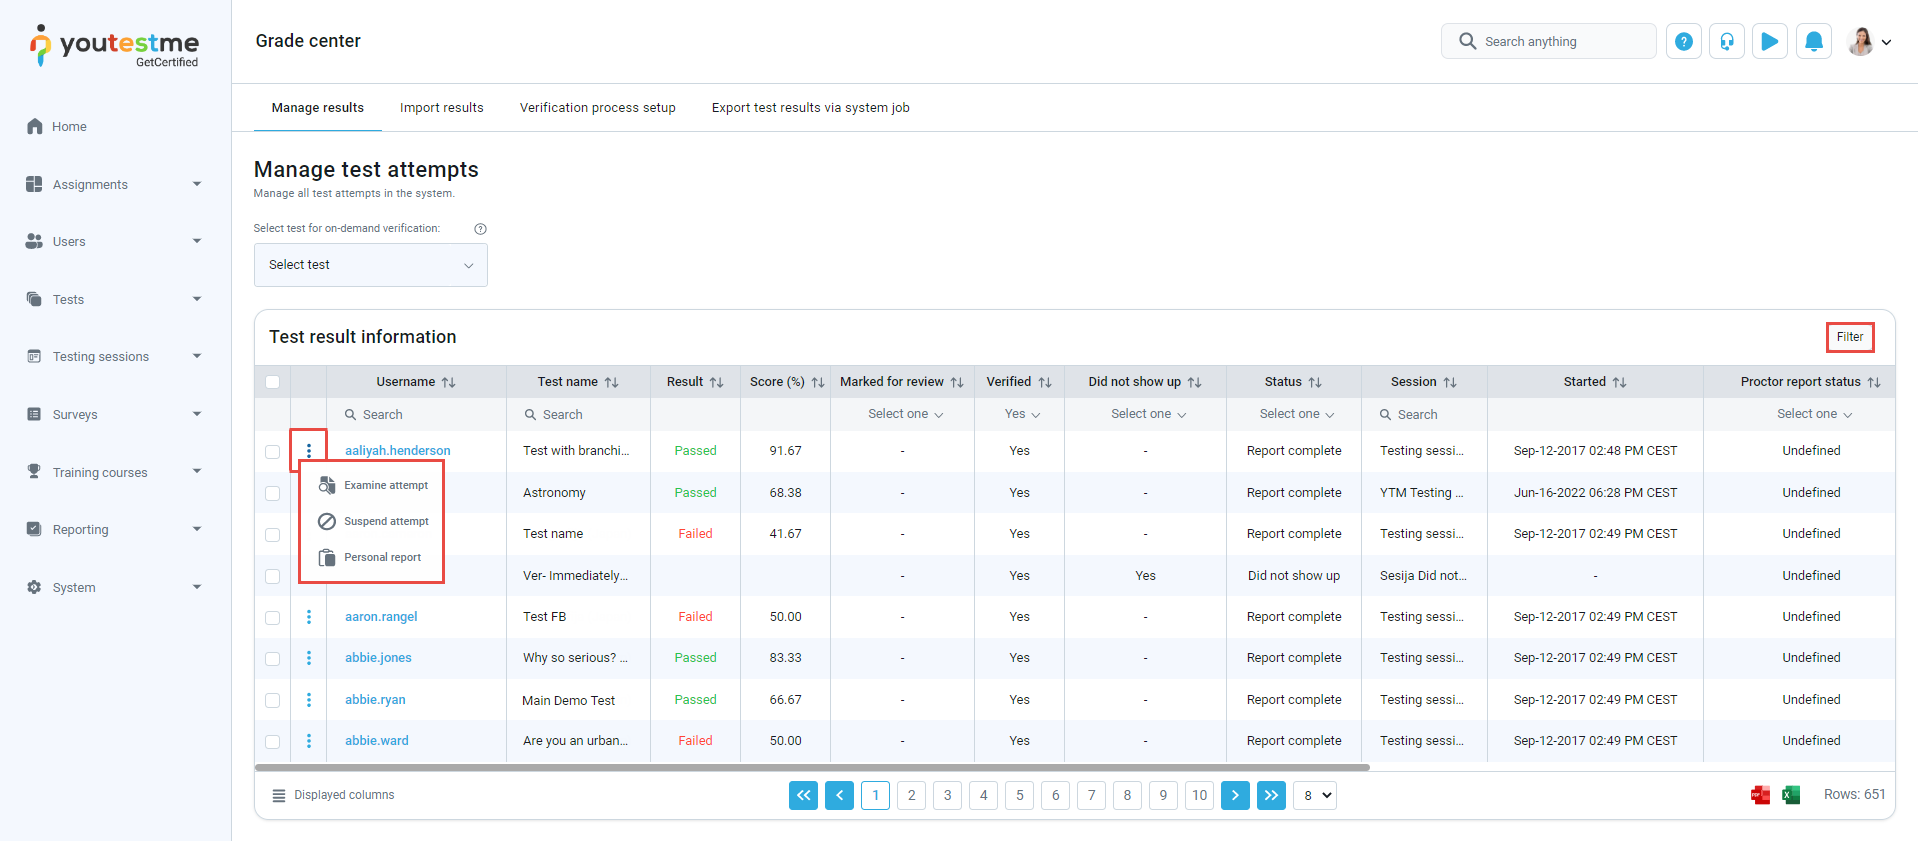
Manage all test attempts in the system.
-
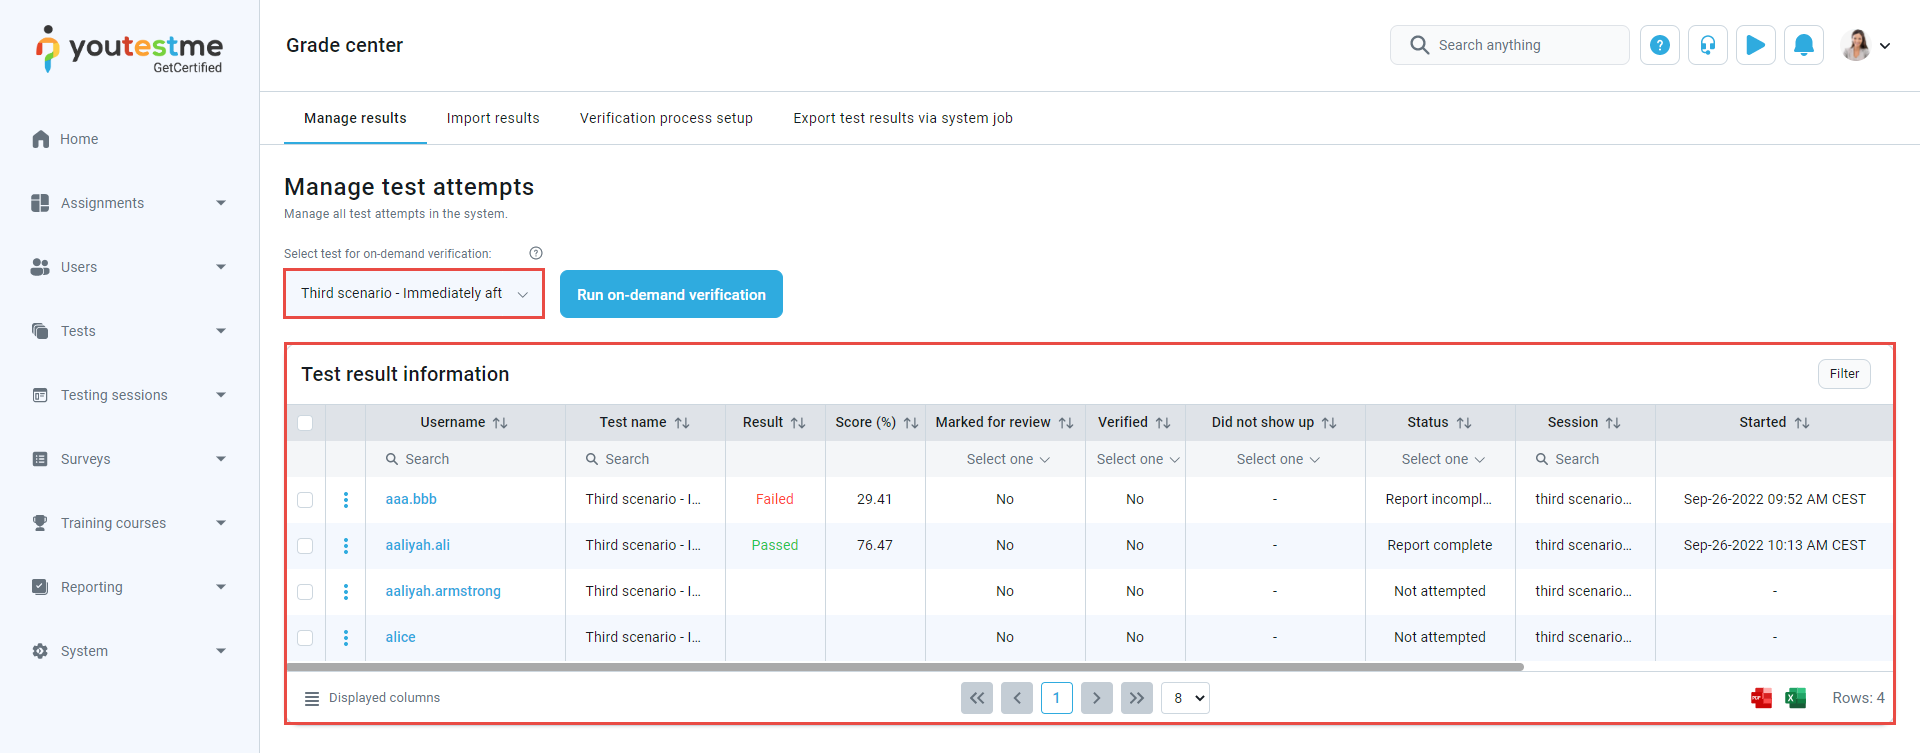
On-demand verification
Select the test and execute the on-demand verification by hold criteria for all non-verified attempts on the selected test. By selecting the test, the candidates' table will be filtered to the test attempts on the selected test.
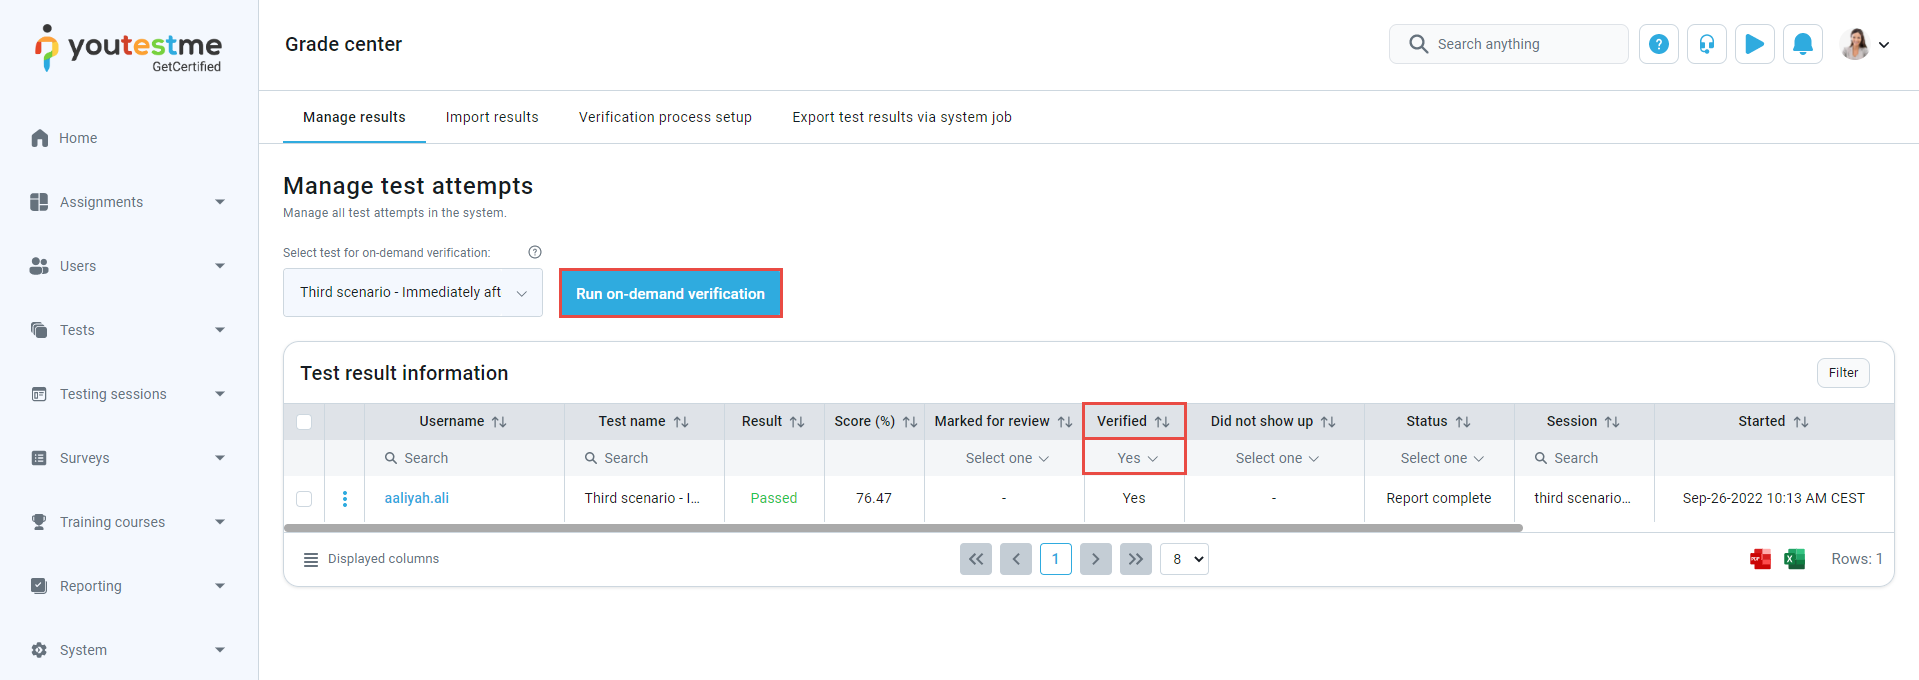
By clicking the Run on-demand verification, the non-verified attempts will be verified by hold criteria. When the process is finished, the verified candidates will not be visible in the table. To see them, click in the drop-down menu Yes option in the Verified column.
-
Manage candidates
Manage the non-verified candidates by examining their data, changing their statuses, or manually verifying them.
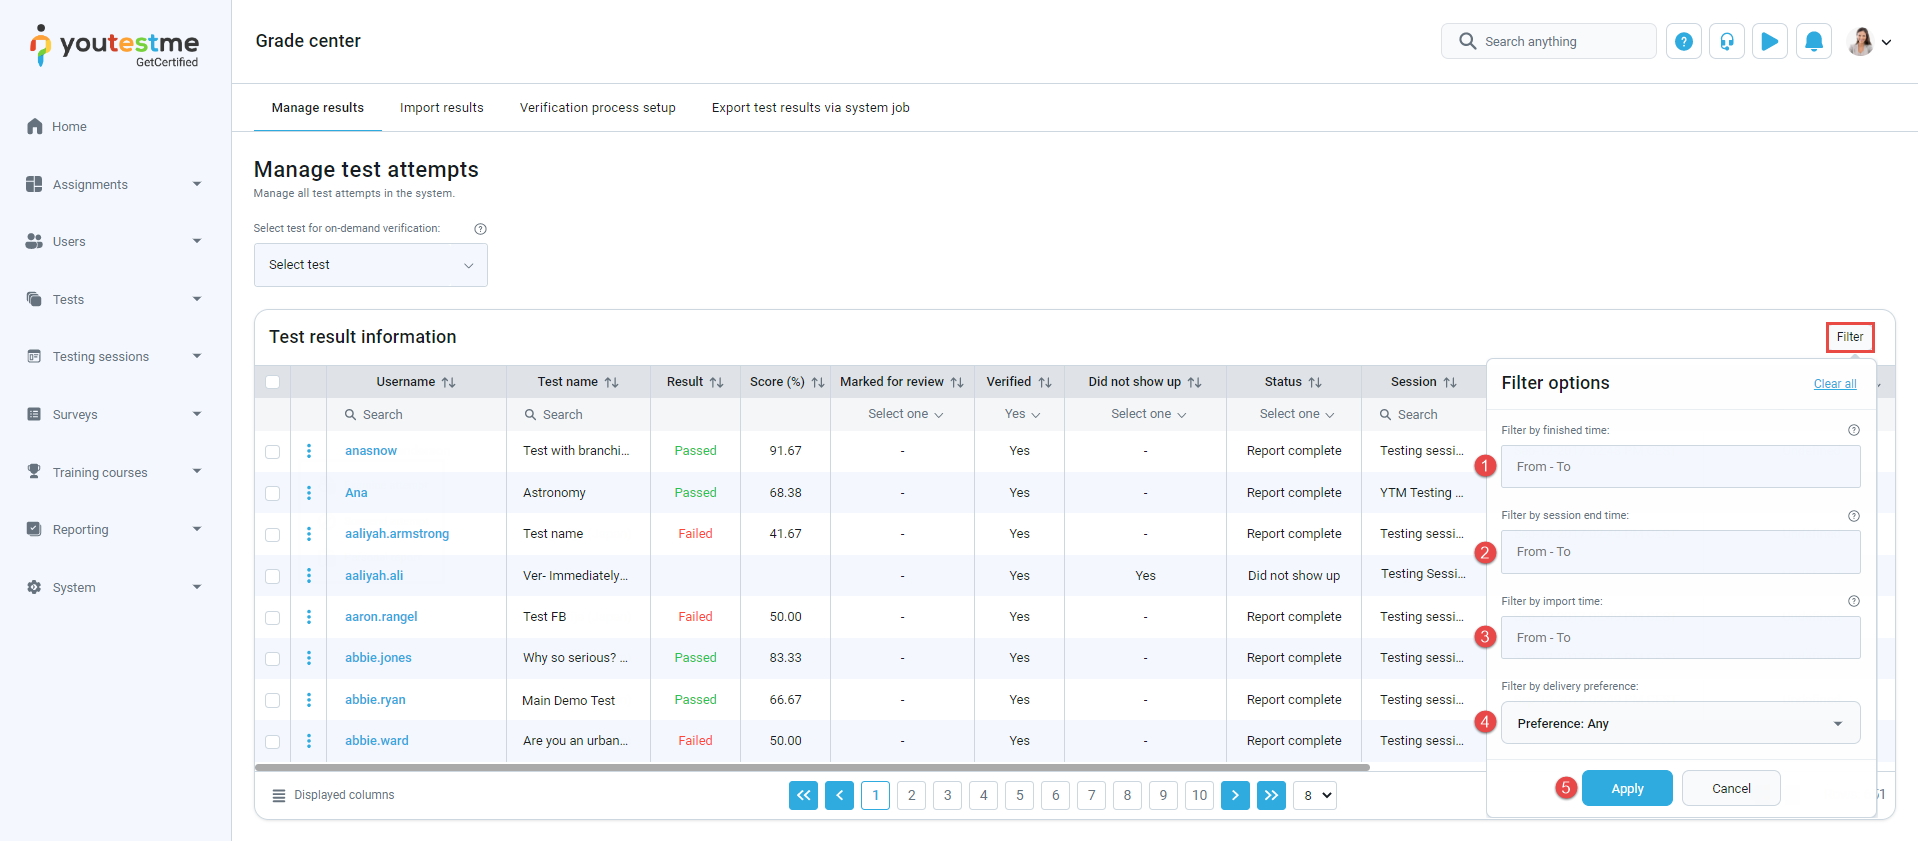
Filter options - Specify the date range when the attempt result is imported and its results are processed. Only From or only To can be specified.
-
Filter by finished time - Filter by the time range when the candidate finished the test.
-
Filter by session end time - Filter by the time range when the testing session ends.
-
Filter by import time - Filter by the time range when the candidate result was imported from the external system and processed.
-
Filter by delivery preference - The delivery preference allows test creators to plan the organization of the test under different locations and conditions. It filters and highlights immediate actions for different types of test distributions. The option favors specific ways but doesn't prevent other styles of deliveries if the configurations allow it. The most common way to take the test is via the application. You can choose the following options:
-
Online.
-
Paper-based.
-
Pearson VUE testing center.
-
Online AI-proctored.
-
Online live-proctored.
-
-
Click the Apply button to apply the filter.
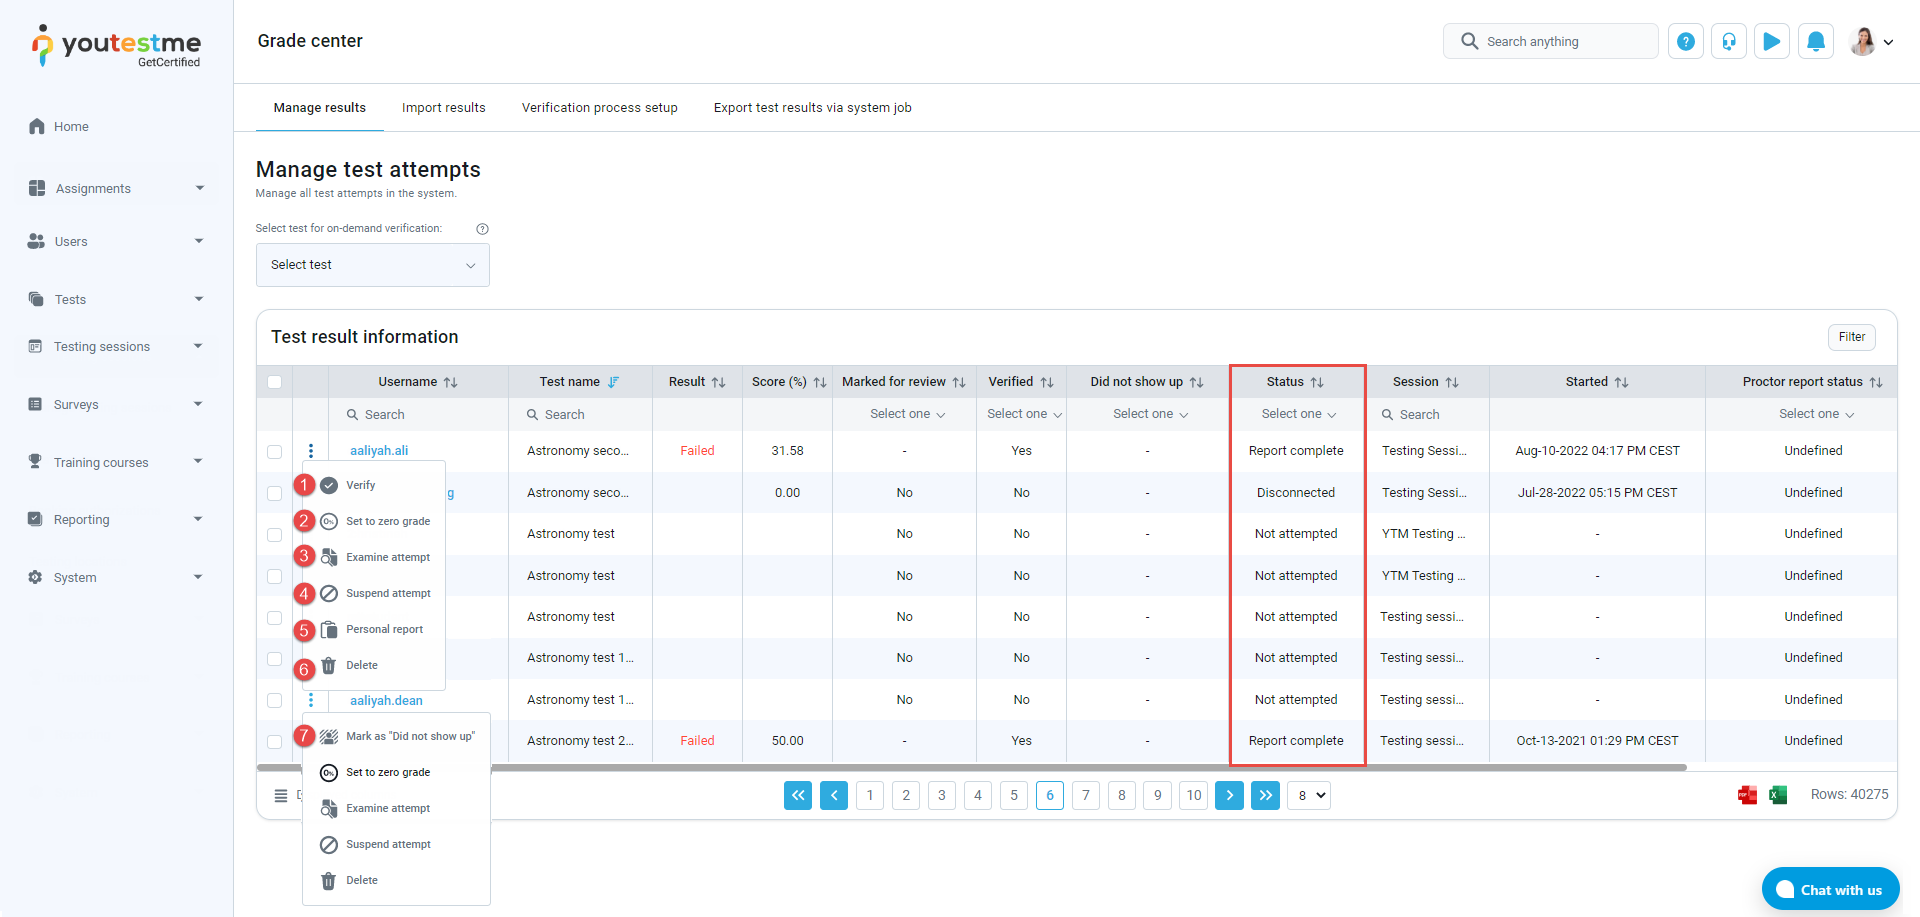
Select a candidate and click on the Action column, and depending on the test status, the following options will be displayed:
-
Verify - Verify the attempt for this candidate.
Note: Once the candidate's report is verified, changing the grading setting will not affect the candidate's score.
-
Set candidate's grade to zero - Overwrite the candidate's current score and set it to zero.
Note: This action cannot be undone, so be careful when setting the rating to 0.
-
Examine attempt - See the candidate's attempt details and examine the attempt if needed. For more information, please visit Examine candidate's attempt.
-
By clicking on the Suspend attempt button, the status of the attempt will be changed to Suspended, meaning that the attempt is archived for historical purposes, and the new attempt can be assigned to the candidate, or the candidate can book a new attempt.
-
Personal report - Open personal report for this candidate.
-
Delete the attempt.
Note: This action cannot be undone, so be careful when deleting the attempt.
-
Mark as "Did not show up" - Set candidate's status as Did not show up. That way, the candidate who did not attempt the test can be verified.
-
-
Examine candidate's attempt
To examine a candidate's attempt, click on the following action in the candidates table.

The dialog will appear with the following information:
-
First name of the candidate.
-
Last name of the candidate.
-
Username of the candidate.
-
The name of the test.
-
Test external ID - External ID represents the external system's unique identifier for this test.
-
Passed - Shows whether the candidate passed or failed the test.
-
Score - Achieved score on the test.
-
Enabled from/Enabled to - Start date, end date, and time the session is available to the user.
-
Started/Finished - The time when the user started and completed the test.
-
Import time when the candidate result was imported from the external system and processed.
-
Update time for the latest changes.
-
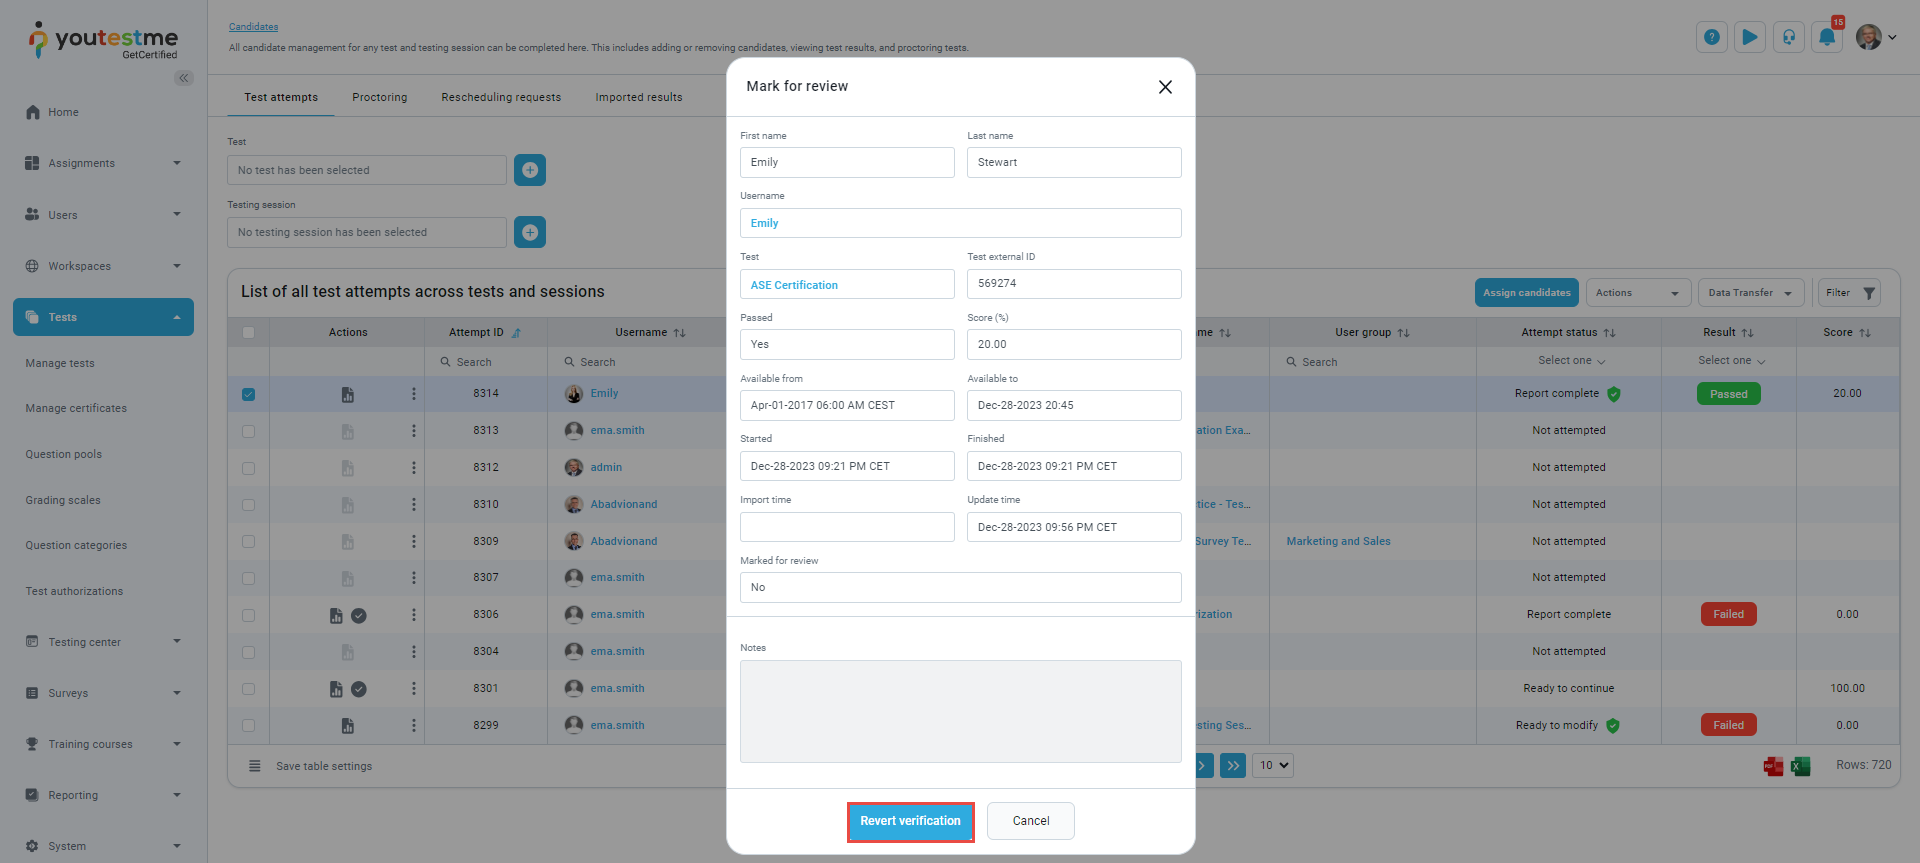
Marked for review - Shows whether the attempt is marked for review.
-
Mark for review - Set the attempt to be Marked for review and optionally specify the review notes so that other managers can see the details of the attempt analysis.
Note: After making for review, the attempt is no longer able to be automatically verified.
-
"Verify" - Verify the candidate's attempt.
Note: Manual verification is not affected by hold criteria.
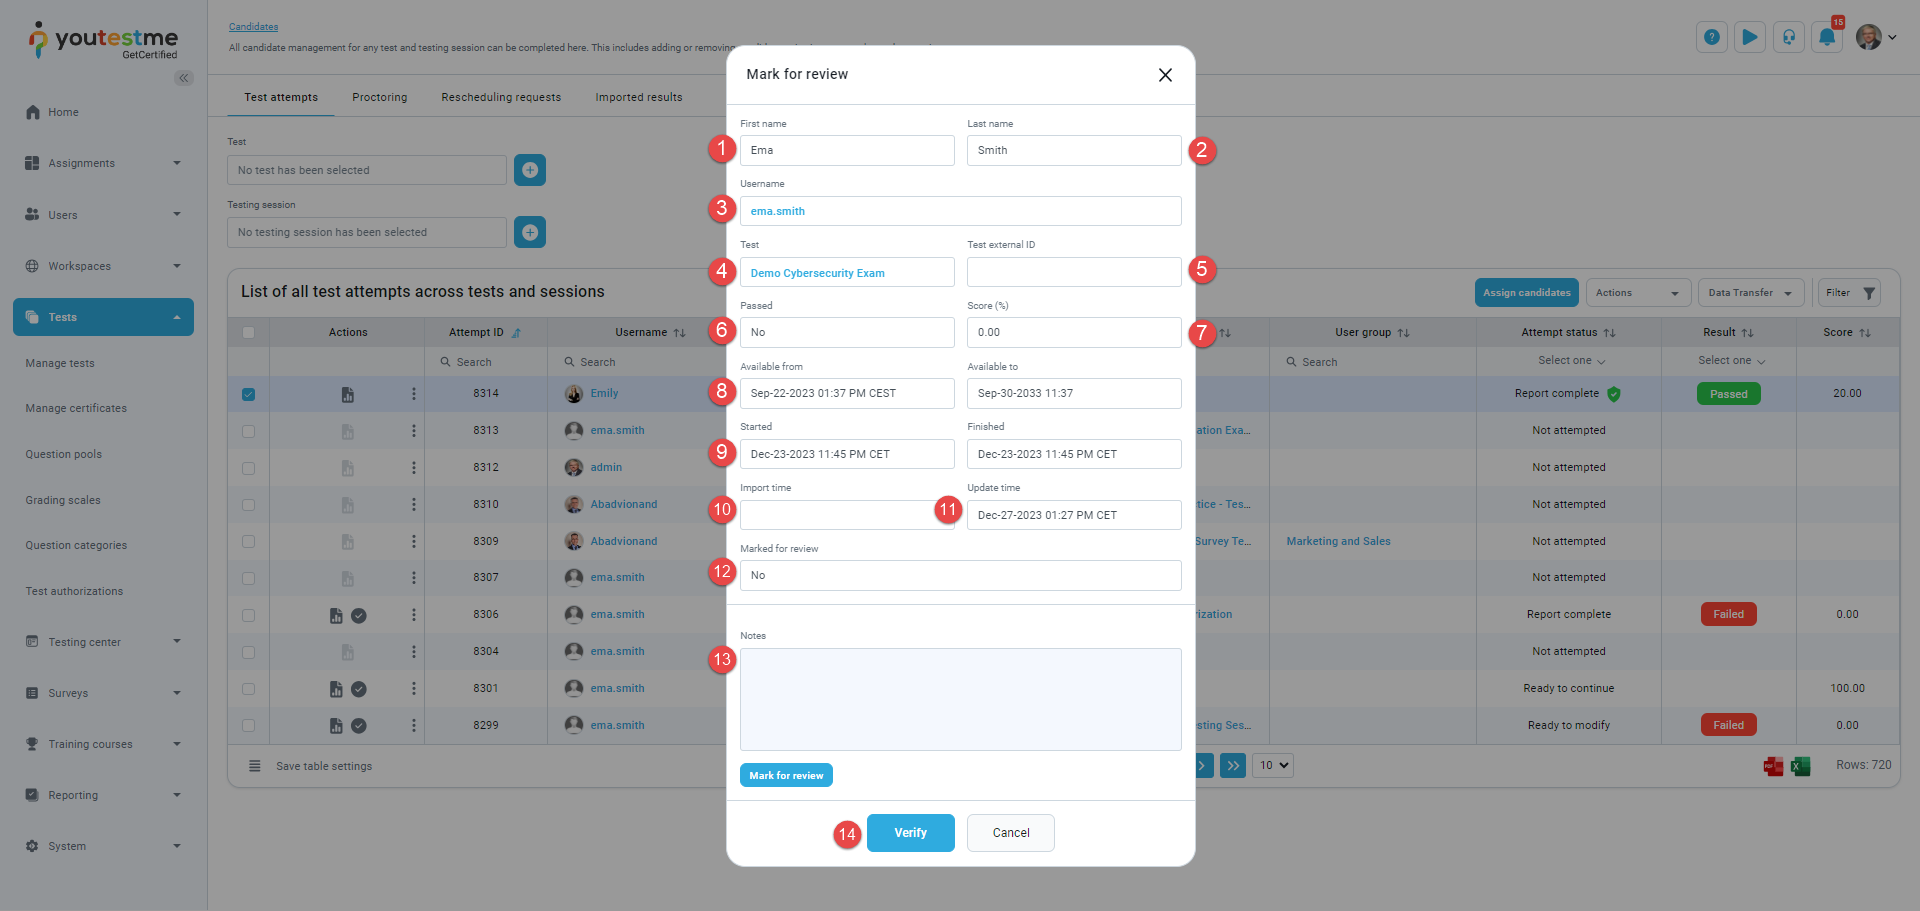
Once the attempt has been verified, you will be able to revert the verification by clicking on the button Revert verification, and after that, the attempt will become changeable again and be affected by the latest grading setup on the test.
-
-
-
Import results
Note: This feature is only for Pearson VUE testing center and Paper-based delivery preference.
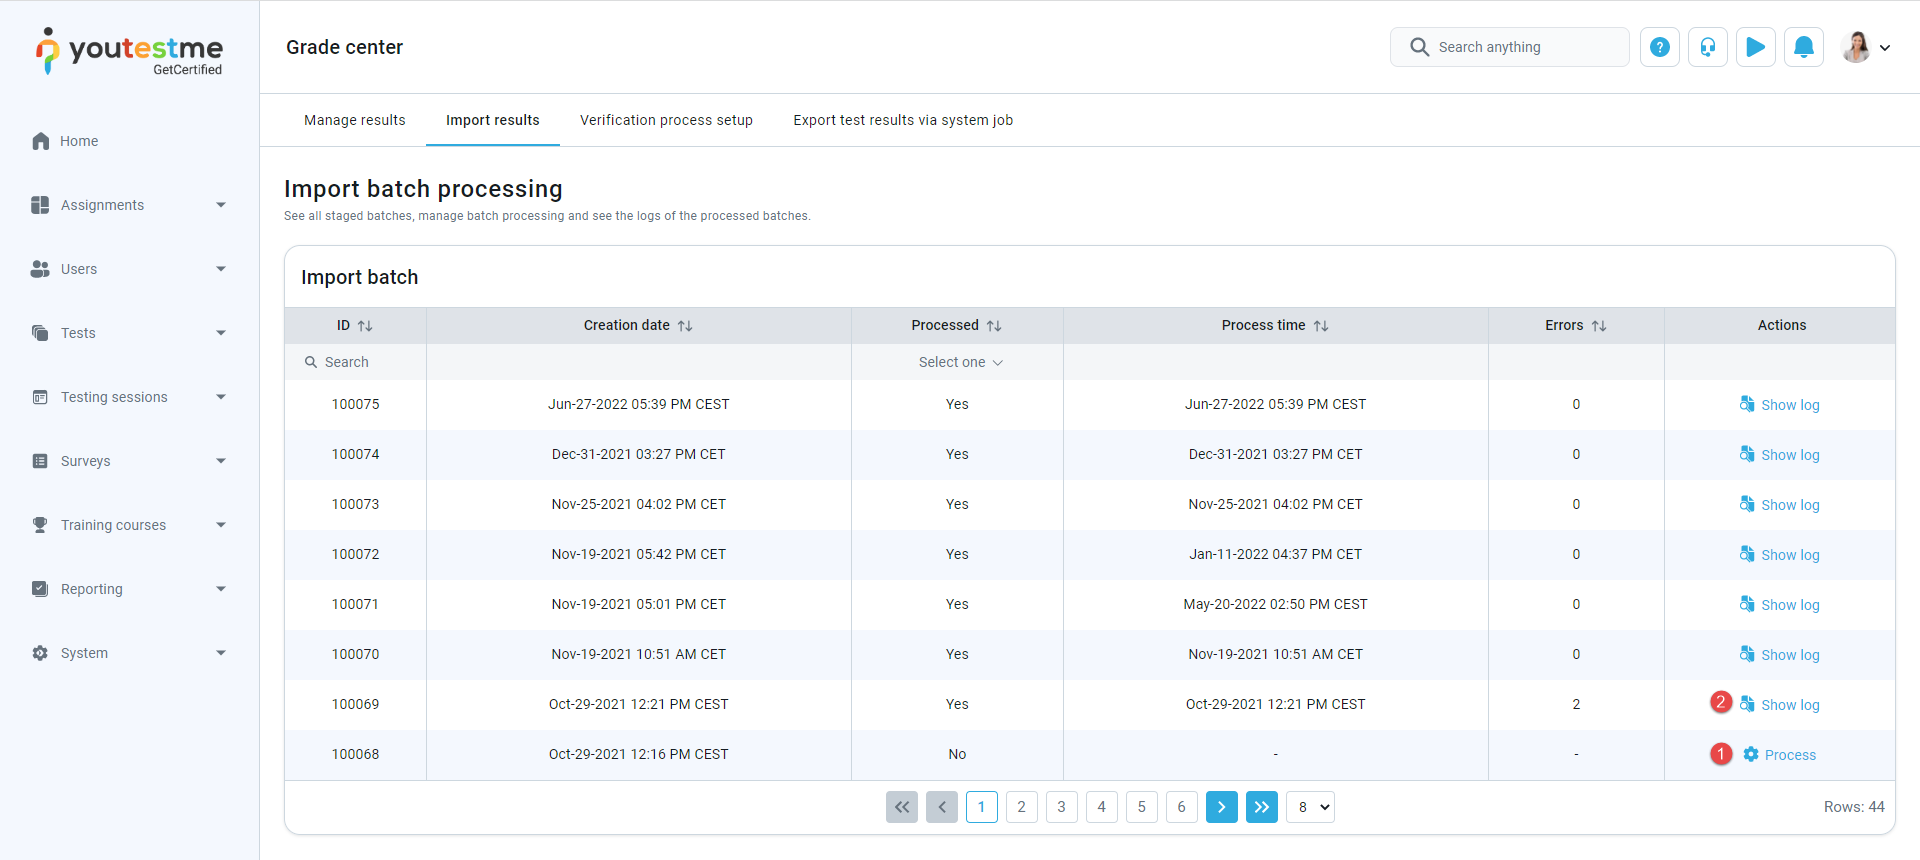
See all staged import batches and process them. The imported batches are initially sorted by the creation date. The most recent one is at the top of the table.
In the Actions column, you can see the following options:-
Process - Start the batch processing. After the batch processing is finished, the candidate's test results will be imported, and the log of the processed batch will be stored.
-
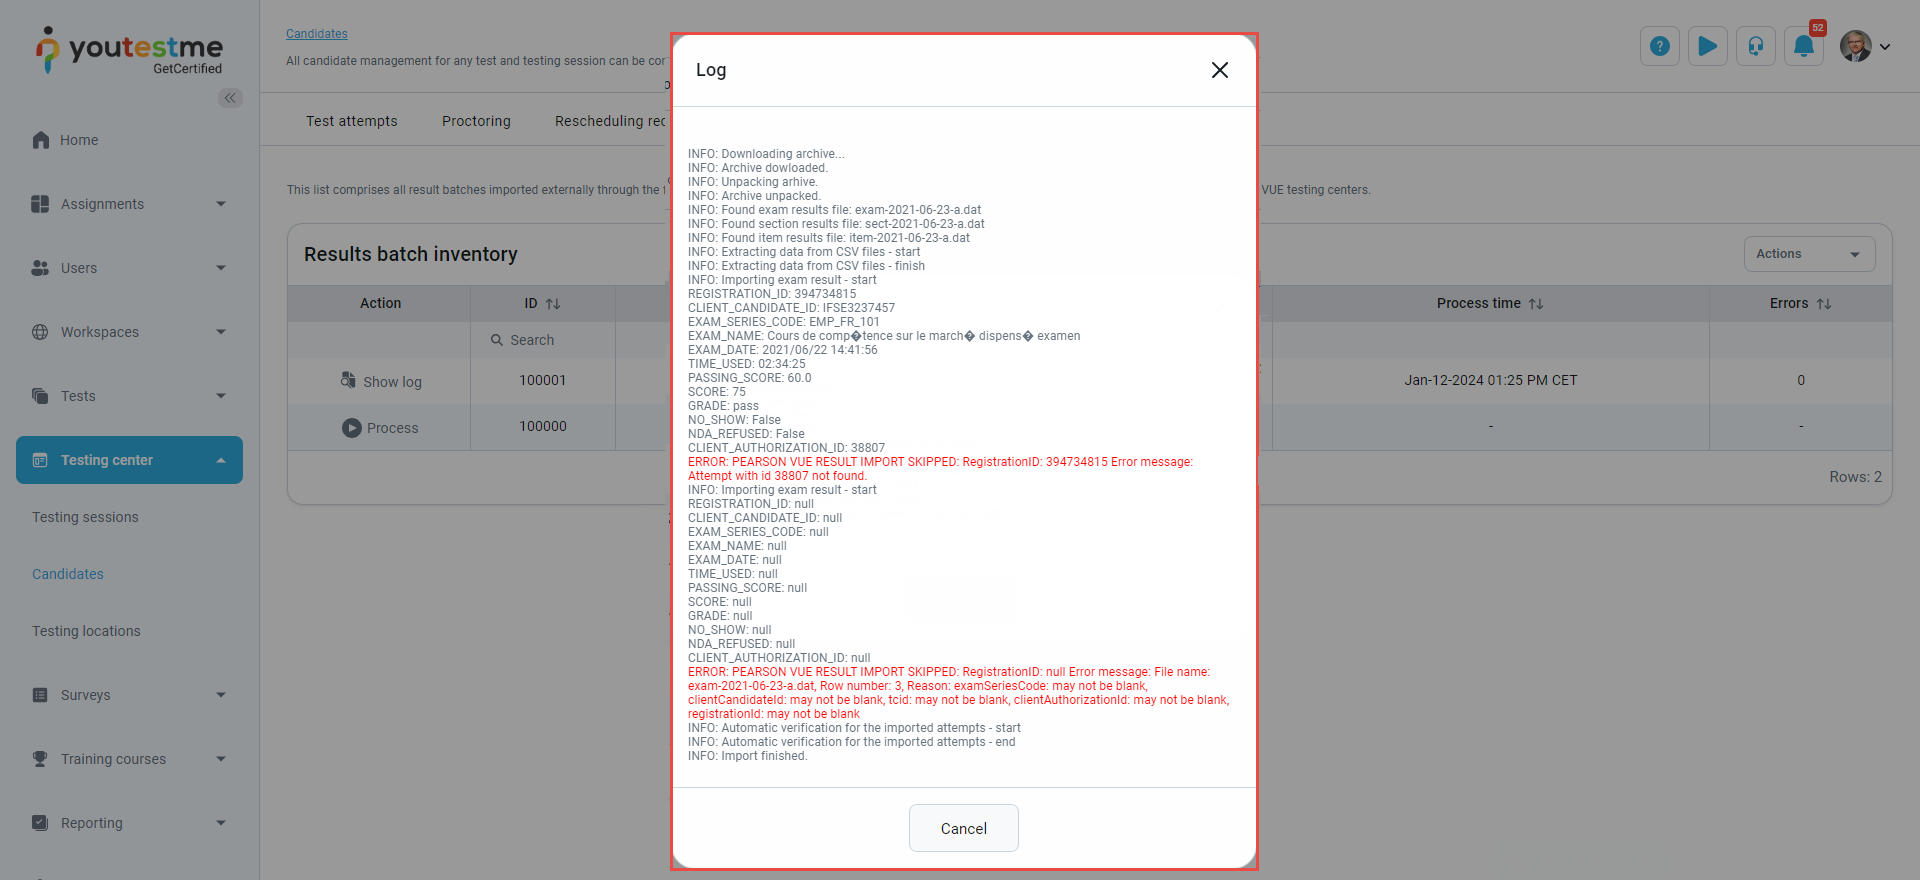
Show log - See the log of the processed batch. The log usually contains information about the import process, imported result, results that failed validation and are skipped from import, and errors happened while importing and is abnormally interrupted.
When you click Show Log, a pop-up window will appear with information about the import process, import result, and errors.
-
-
Verification process setup
Select the delivery preference for which type of tests you want to manage the verification and click the Setup verification process button in the Action column.
-
Online tests.
-
Remote AI-proctored tests.
-
Remote live-proctored tests.
-
Pearson VUE tests.
-
Paper-based tests.
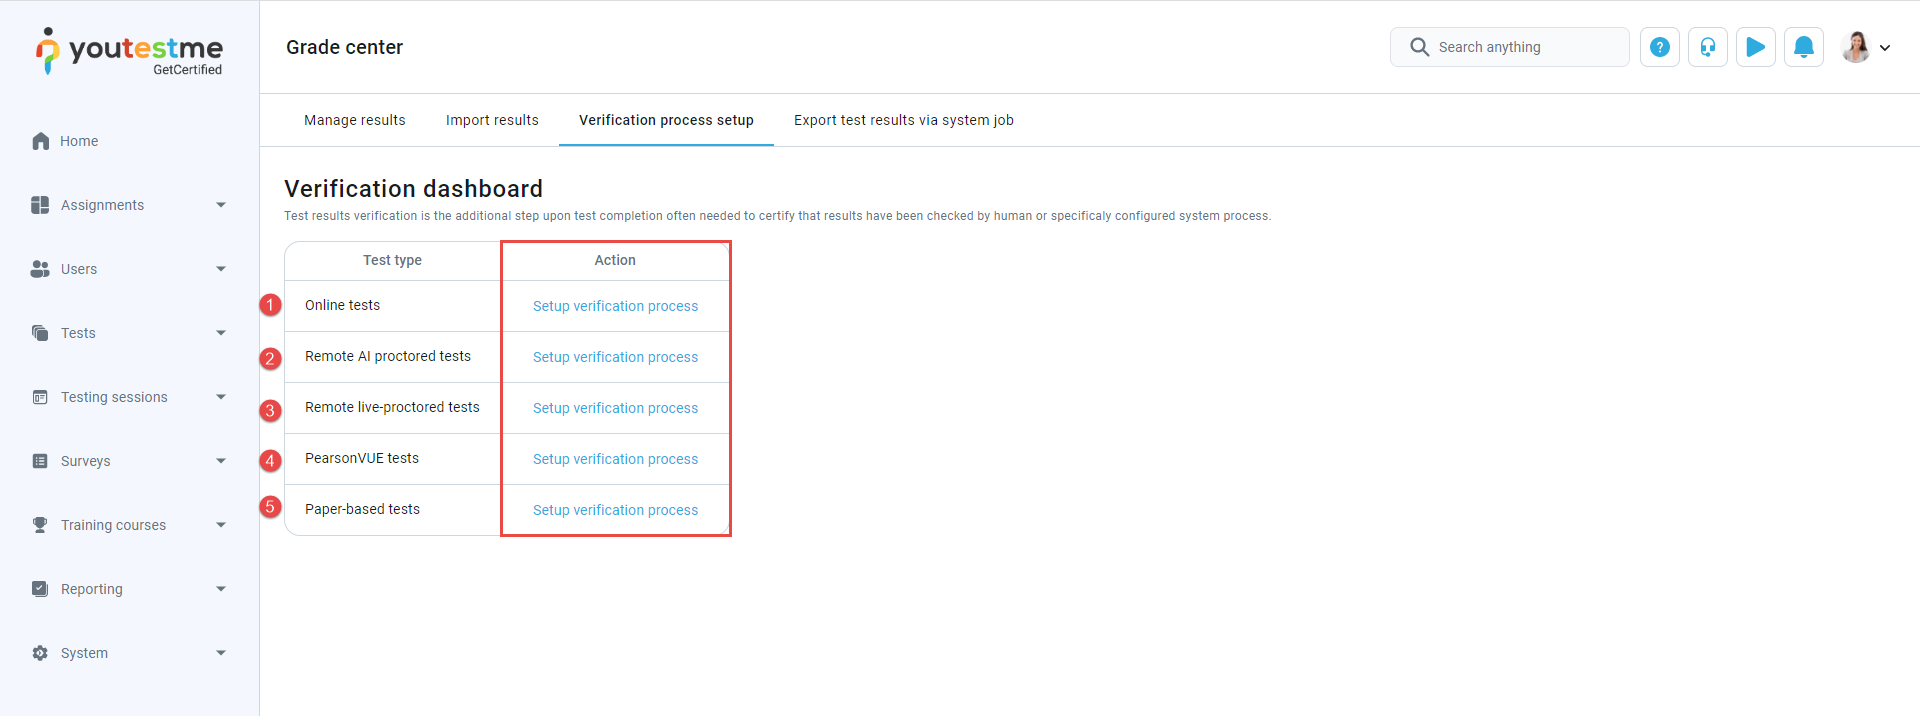
Types of tests:
For example, by selecting the Online tests delivery preference, manage the verification for all candidates on the tests with the delivery preference set to Online tests.
-
Immediate verification by hold criteria after the test - If this option is enabled, each time when candidate finishes the test, the test attempt will be verified by hold criteria. The test results imported through the Pearson VUE or Remark package will also be verified by hold criteria.
-
On-demand verification by hold criteria - Enable the option to verify by hold criteria on click for the selected test. The Start auto-verification for the selected test will not be available by disabling this option.
-
Percent scored below - The candidate scored percent below the specified value.
-
Report needs grading - Some questions need manual grading, and/or the proctor report is not graded if the proctor report is required.
-
Not finished - The candidate did not finish the test yet.
-
Time used below - Candidate finished the test below the specified time.
-
Refused NDA - This condition is Pearson VUE specific. The condition is met if the candidate is marked as NDA Refused in the Pearson VUE result.
-
Did not show up - The candidate did not take the test within the allotted time and is marked as Did not show up by the manager.
-
Click on the Save button to save changes.
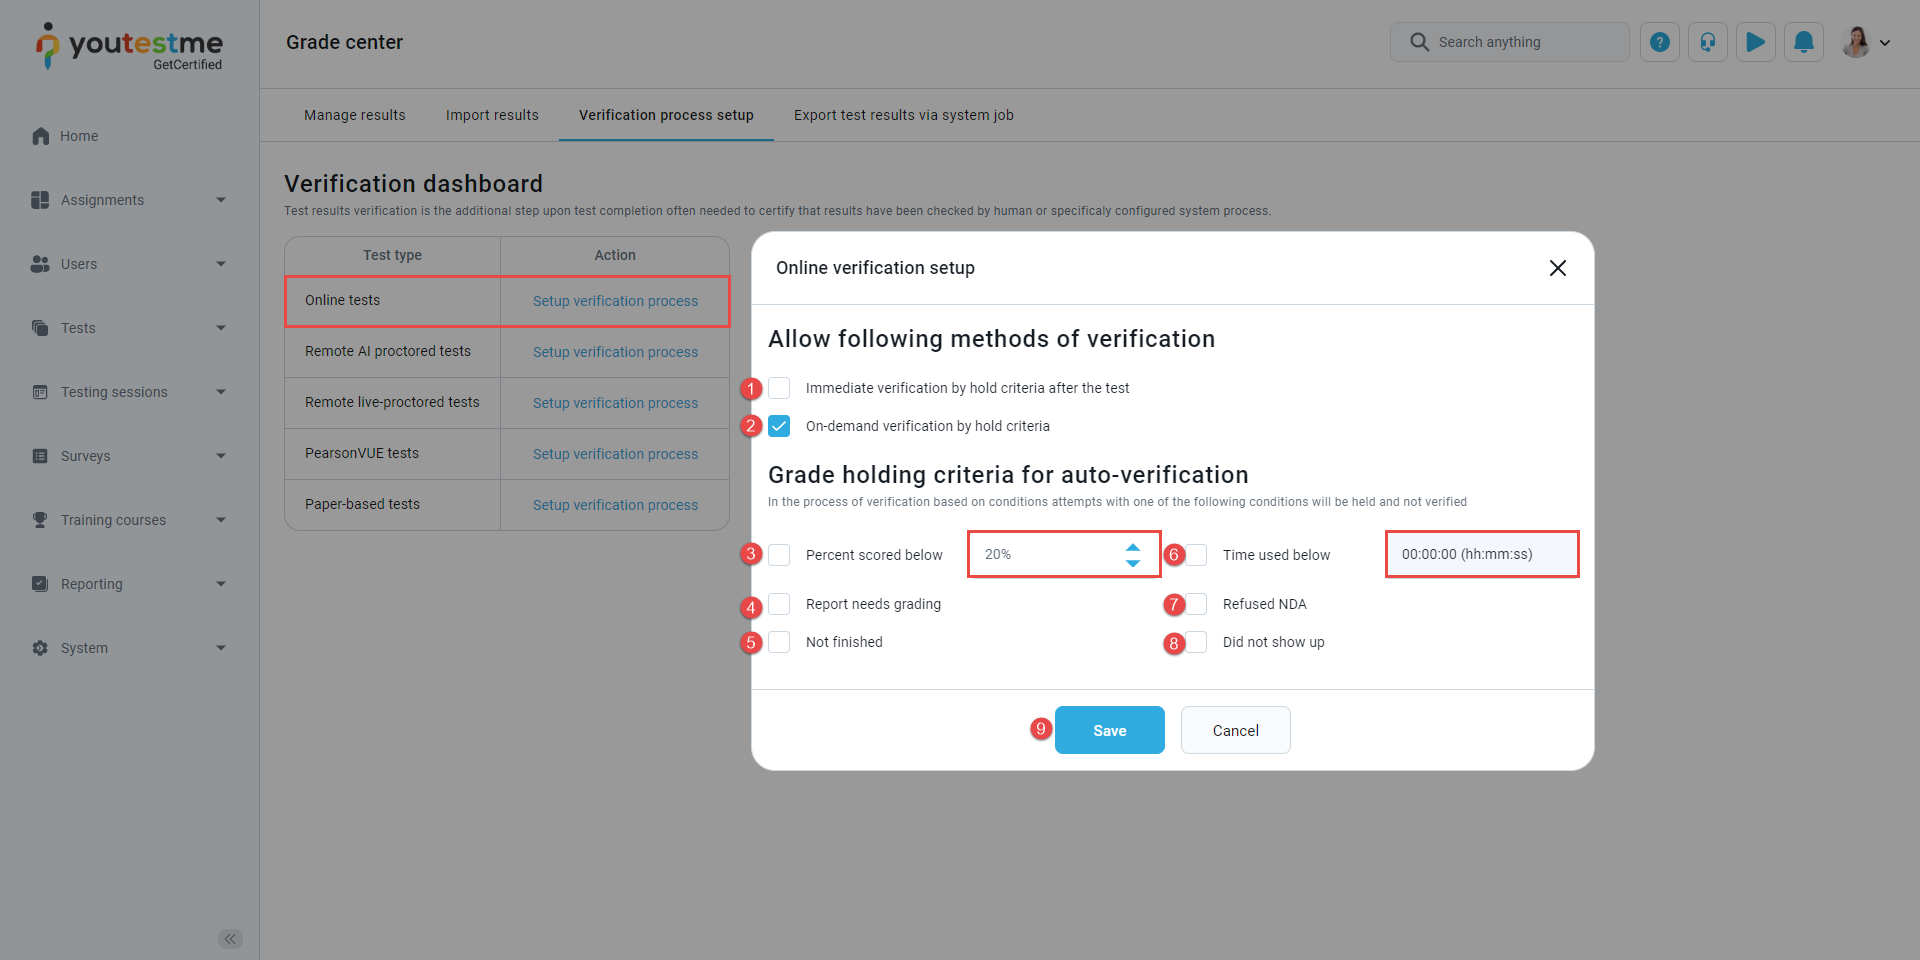
Here, you can Allow following methods of verification when and how the verification will happen.
Grade holding criteria for auto-verification - In the verification process based on conditions, attempts with one of the following conditions will be held and not verified.
-
-
Export test results via system job
Export test results via the system settings. Only authorized and verified results will be sent.
Select the Export test results job from the dropdown menu and execute it.
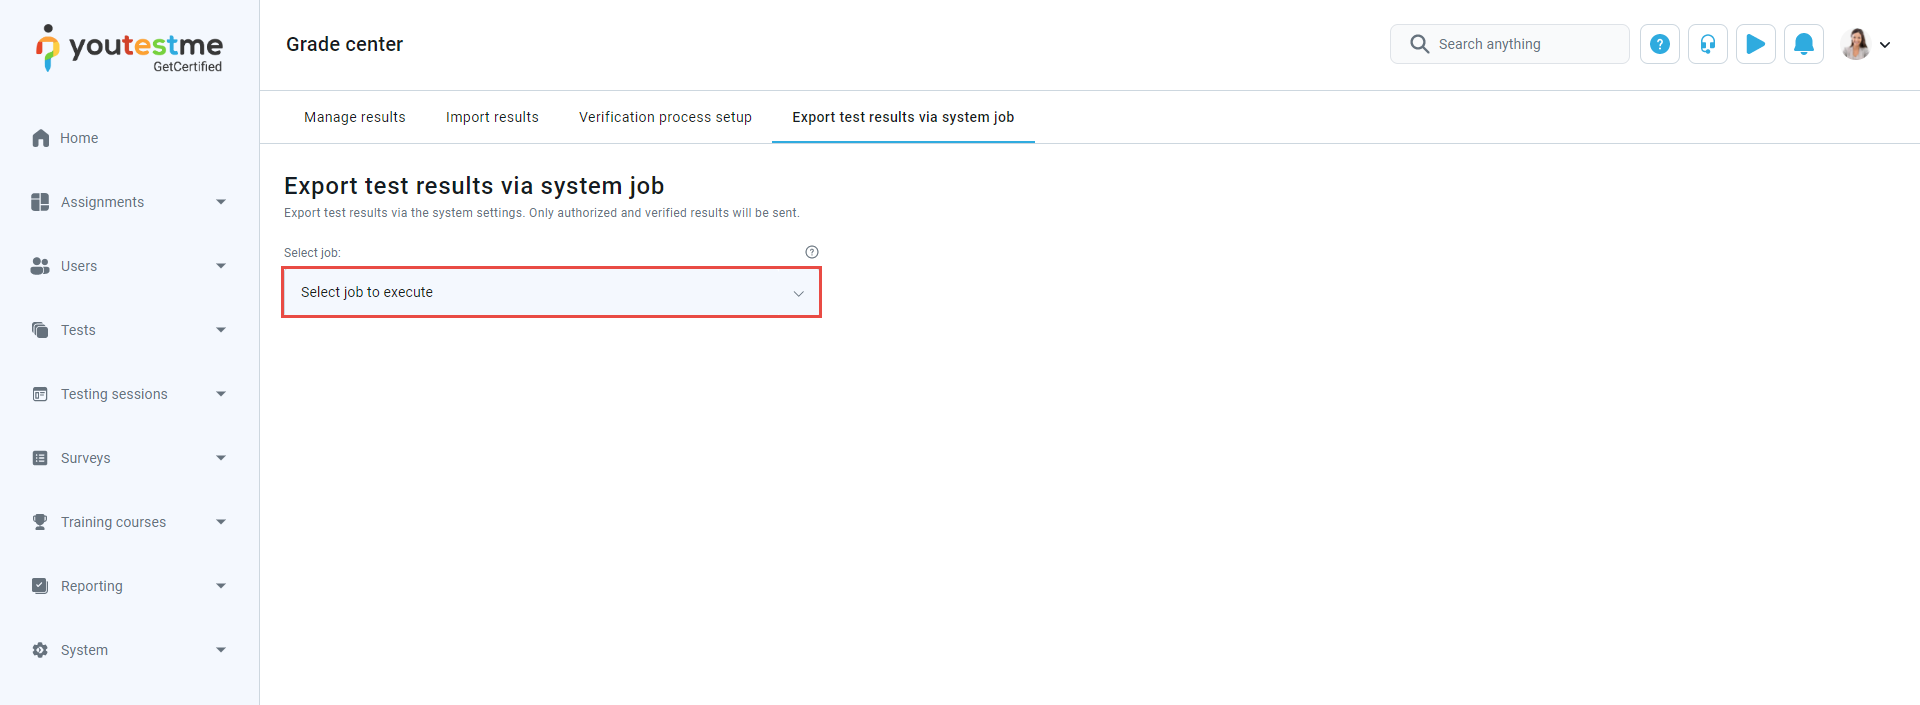
For more information about system job, please visit Jobs scheduler.
