User manual
Zapier integration
Zaps are services that facilitate connections with various applications integrated with Zapier. Setting up Zapier integration with your chosen application is necessary to create workflows and new Zaps. You can choose from various integration options to create Zaps using the GetCertified application.
You can create a Zap to perform actions such as creating, updating, or deleting users, adding users to training, and creating attempts by selecting integration options available in the YouTestMe application. The most effective way to connect with the application is by using triggers.
The Zap workflow will execute each time a user creates, updates, or deletes a user, and the administrator will receive a notification regarding the event.
-
Sign up for Zapier integration
In this step, we will explain how to create an account on Zapier.
Note: If you already have an account, proceed to the Log in page and enter the required login information.
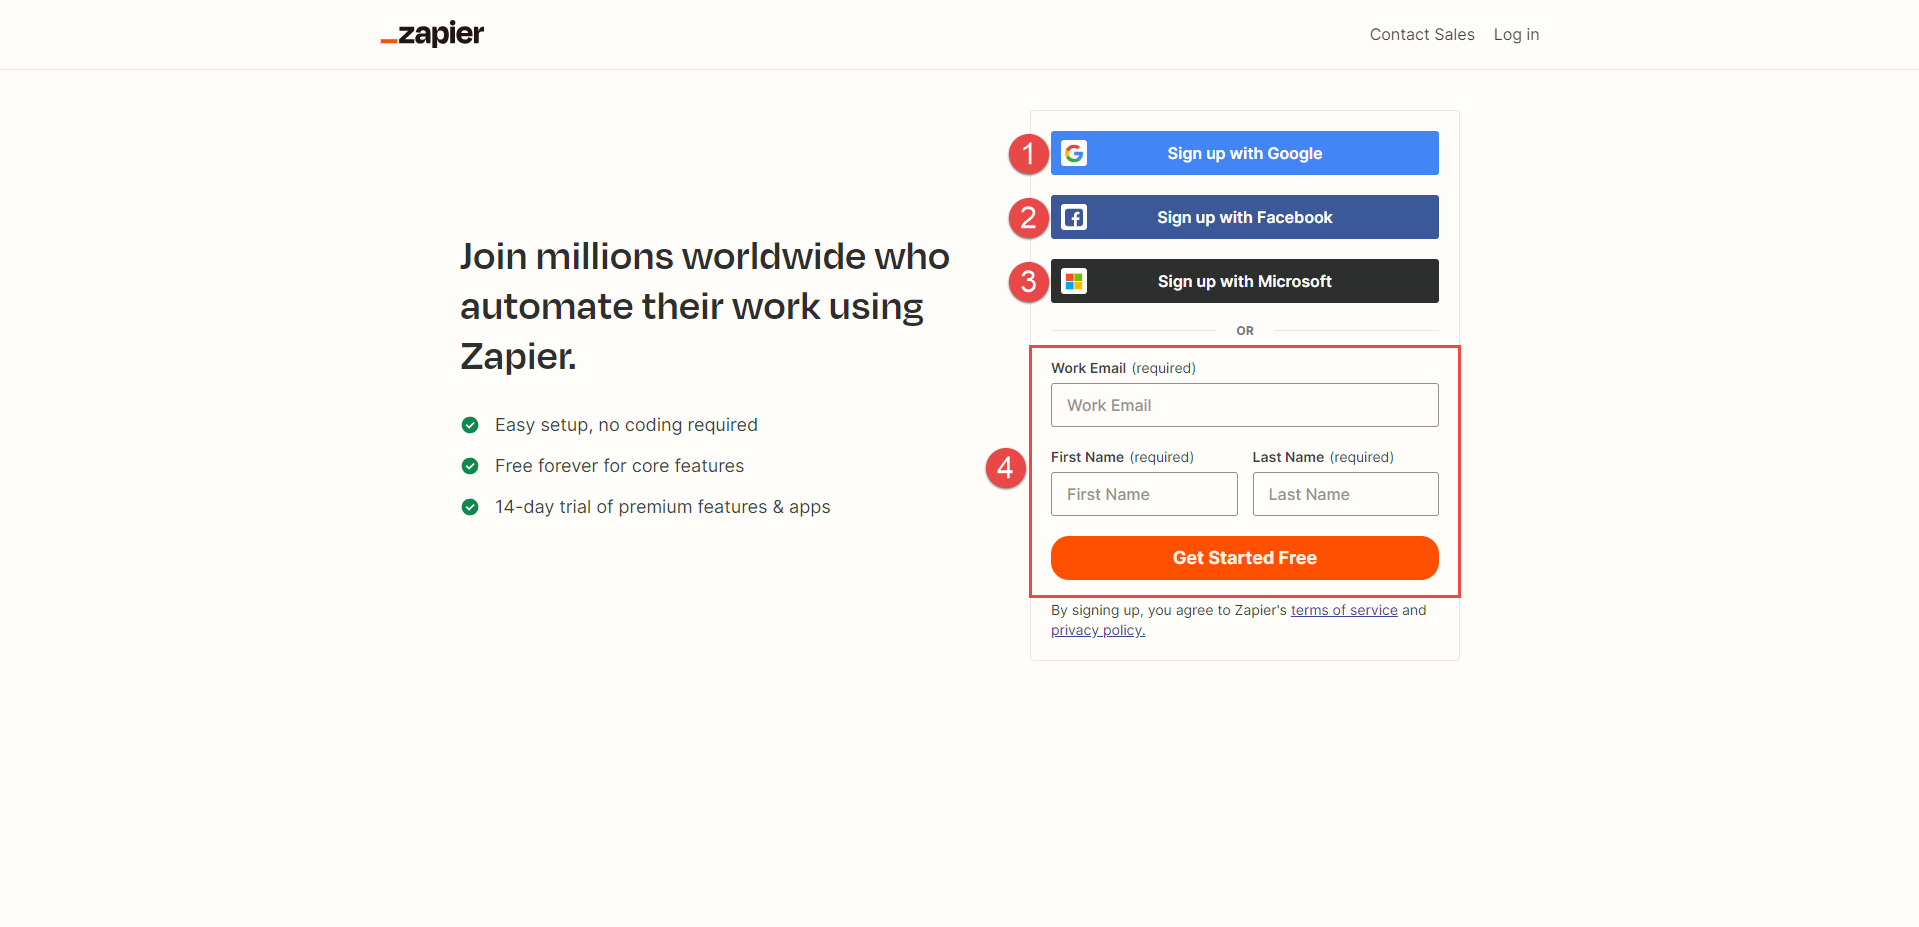
To get started, navigate to the YouTestMe Zapier integration. You can sign up for Zapier using the following methods:
-
Google account.
-
Facebook account.
-
Microsoft account.
-
Work email.
-
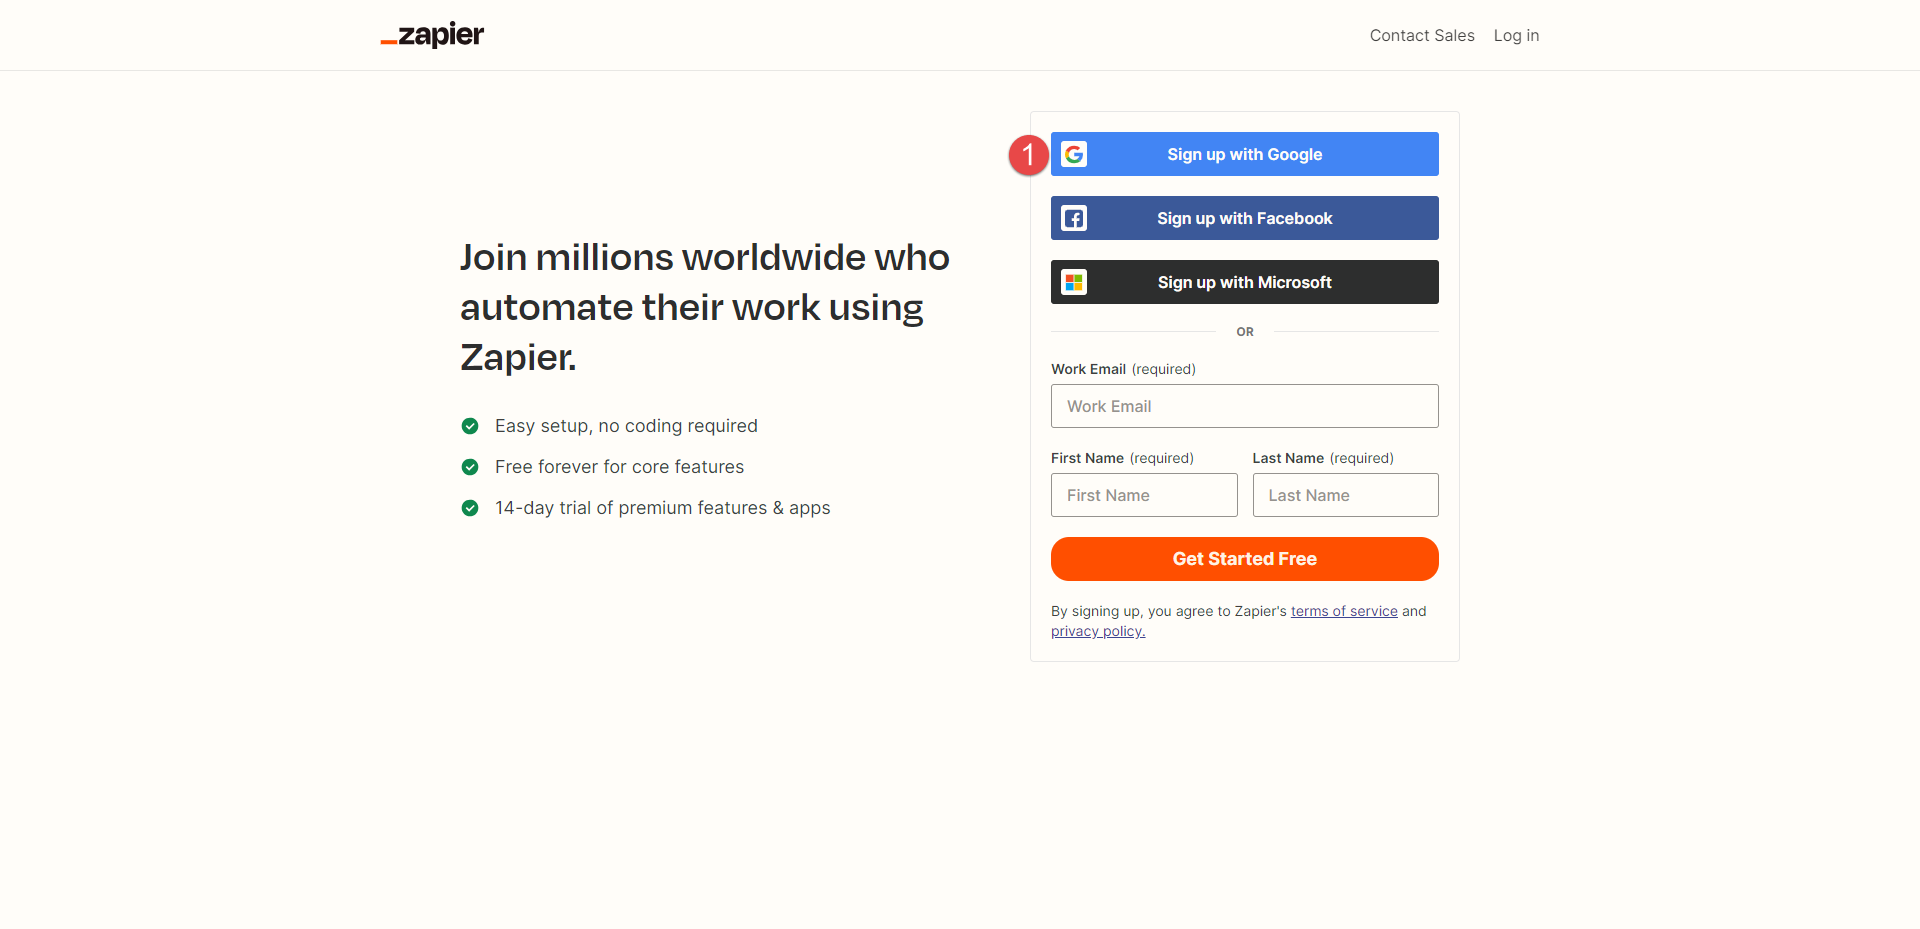
Create an account using the Google account option
In this example, we will demonstrate how to create a new Zapier account using the Google account option.
-
Click the Sign up with Google.
-
Select an account to continue with Zapier integration or use the Use another account option.
-
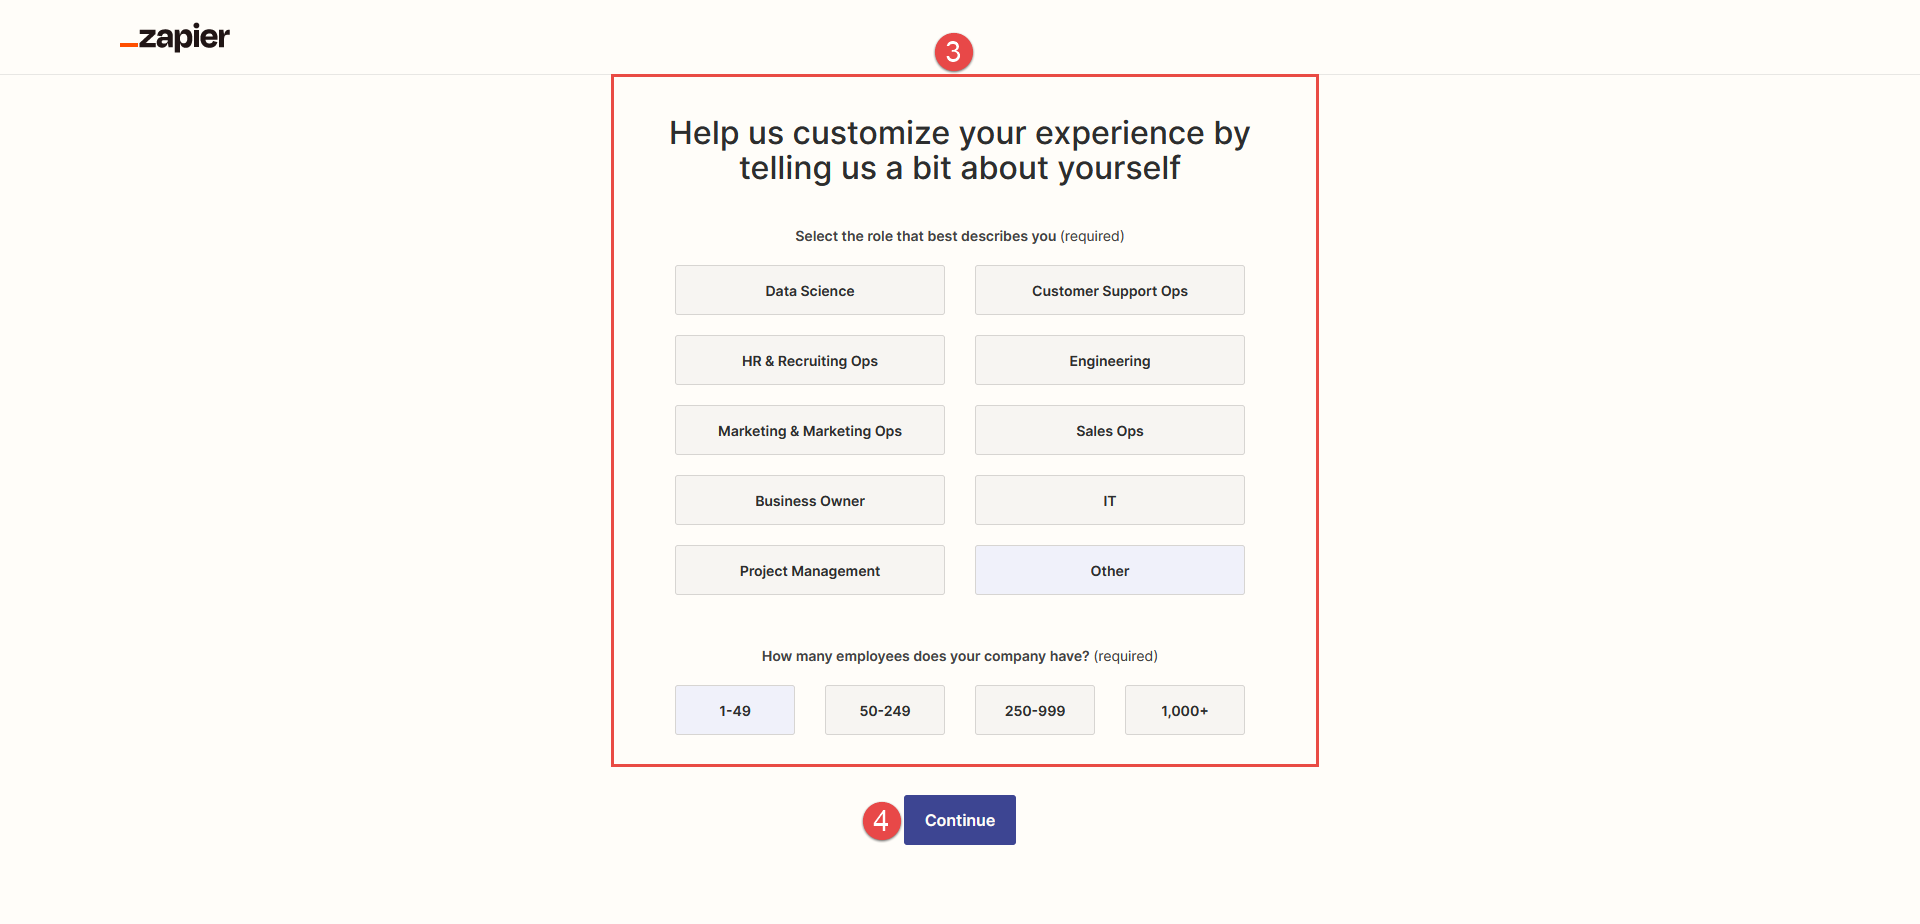
Set up the additional information.
-
Click the Continue button.
-
In this step, you can search for and choose personalized workflow recommendation applications.
-
If you choose a personalized application, click the Finish setup button afterward. Alternatively, you may skip this step by clicking the Skip button.
To create a new Zapier account, follow these steps:

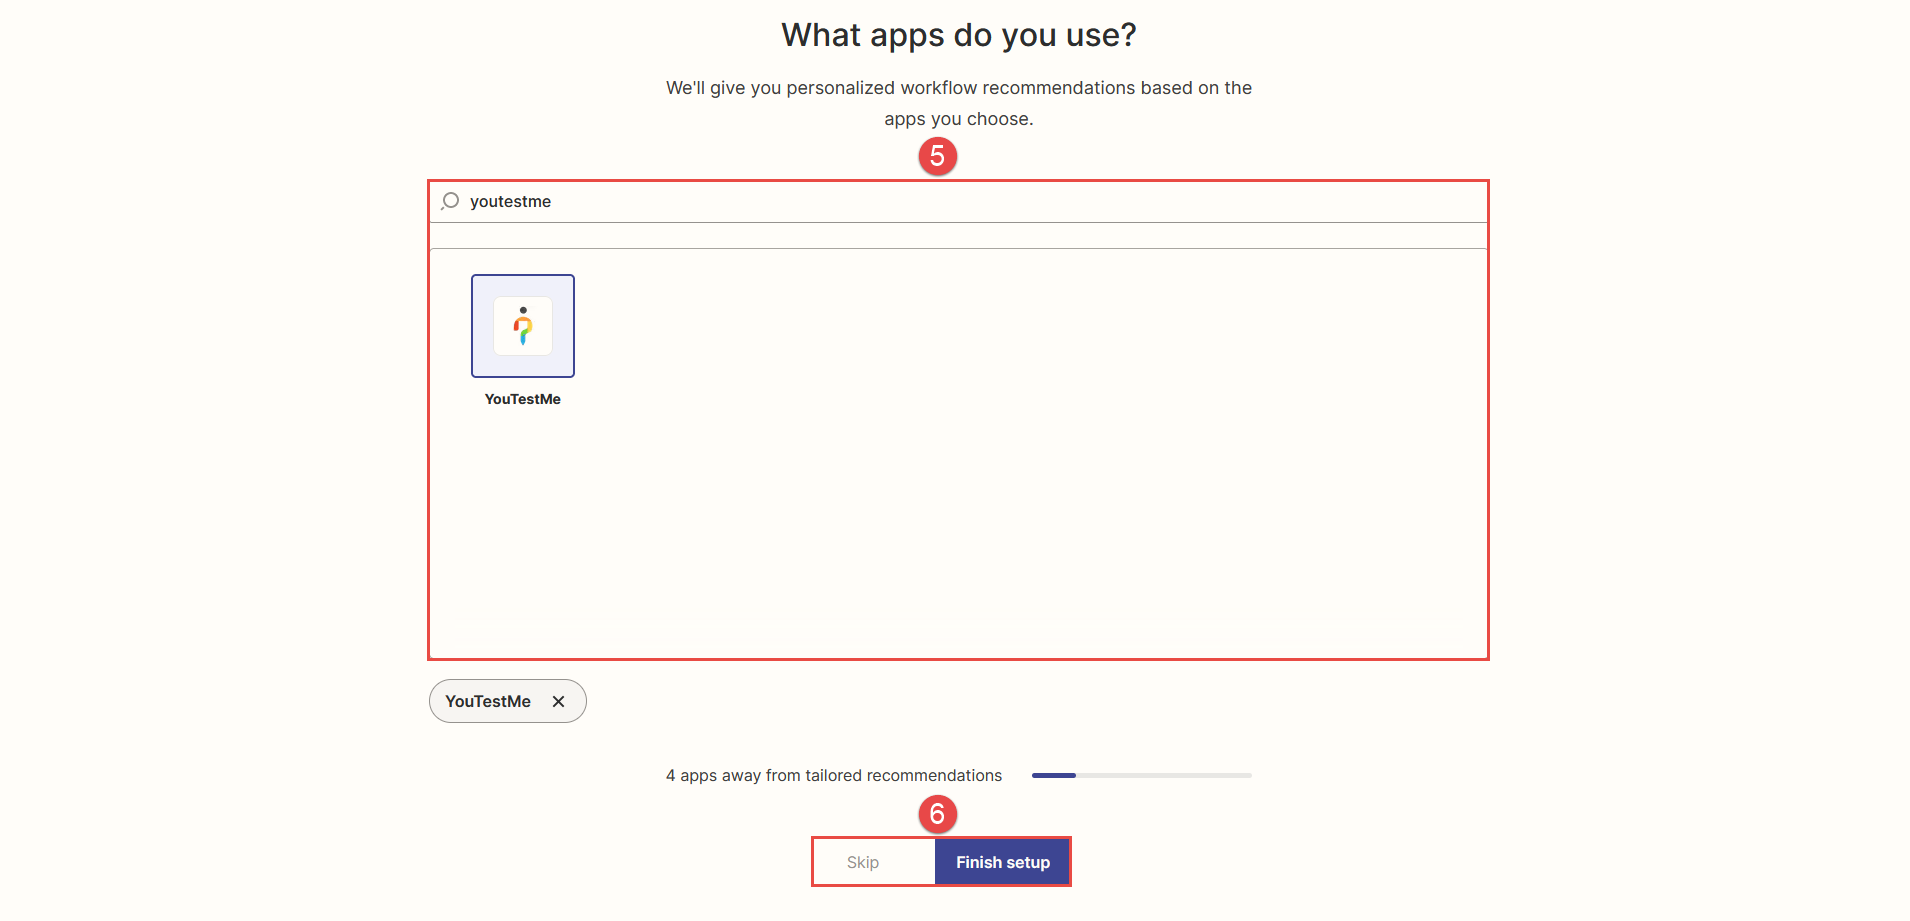
Note: Upon clicking the Finish setup or Skip button, you will be automatically redirected to the Zapier dashboard.
-
-
-
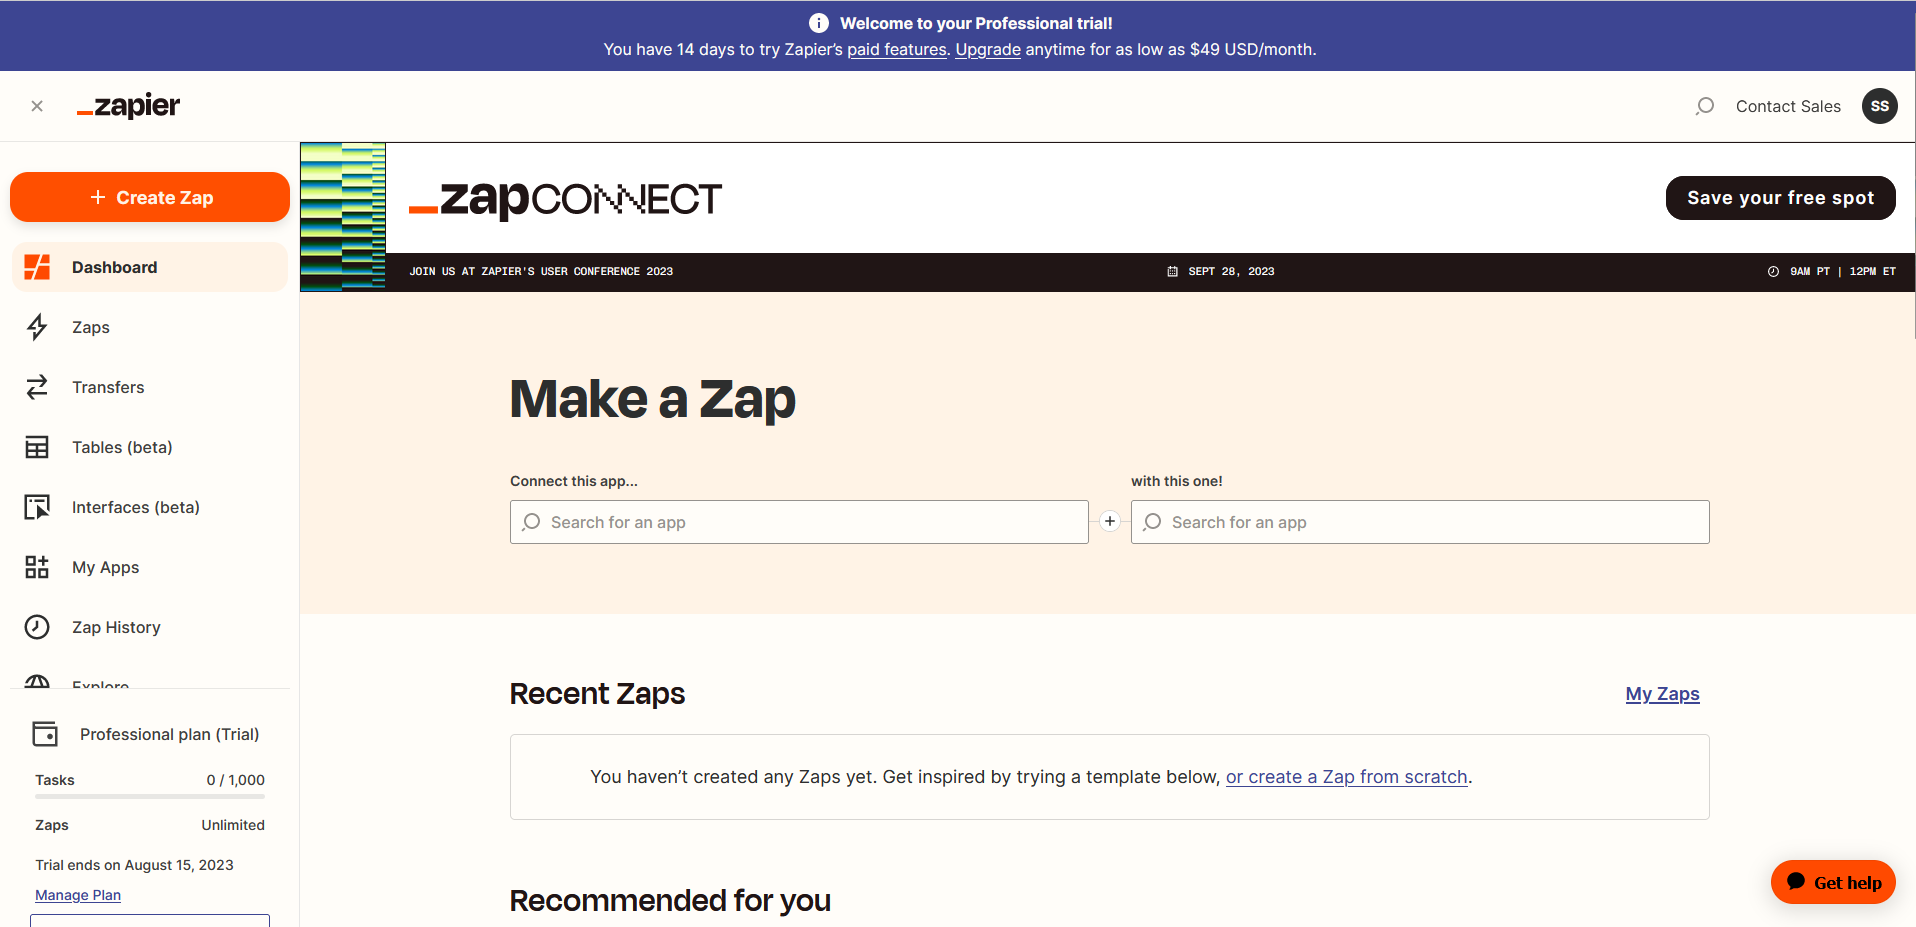
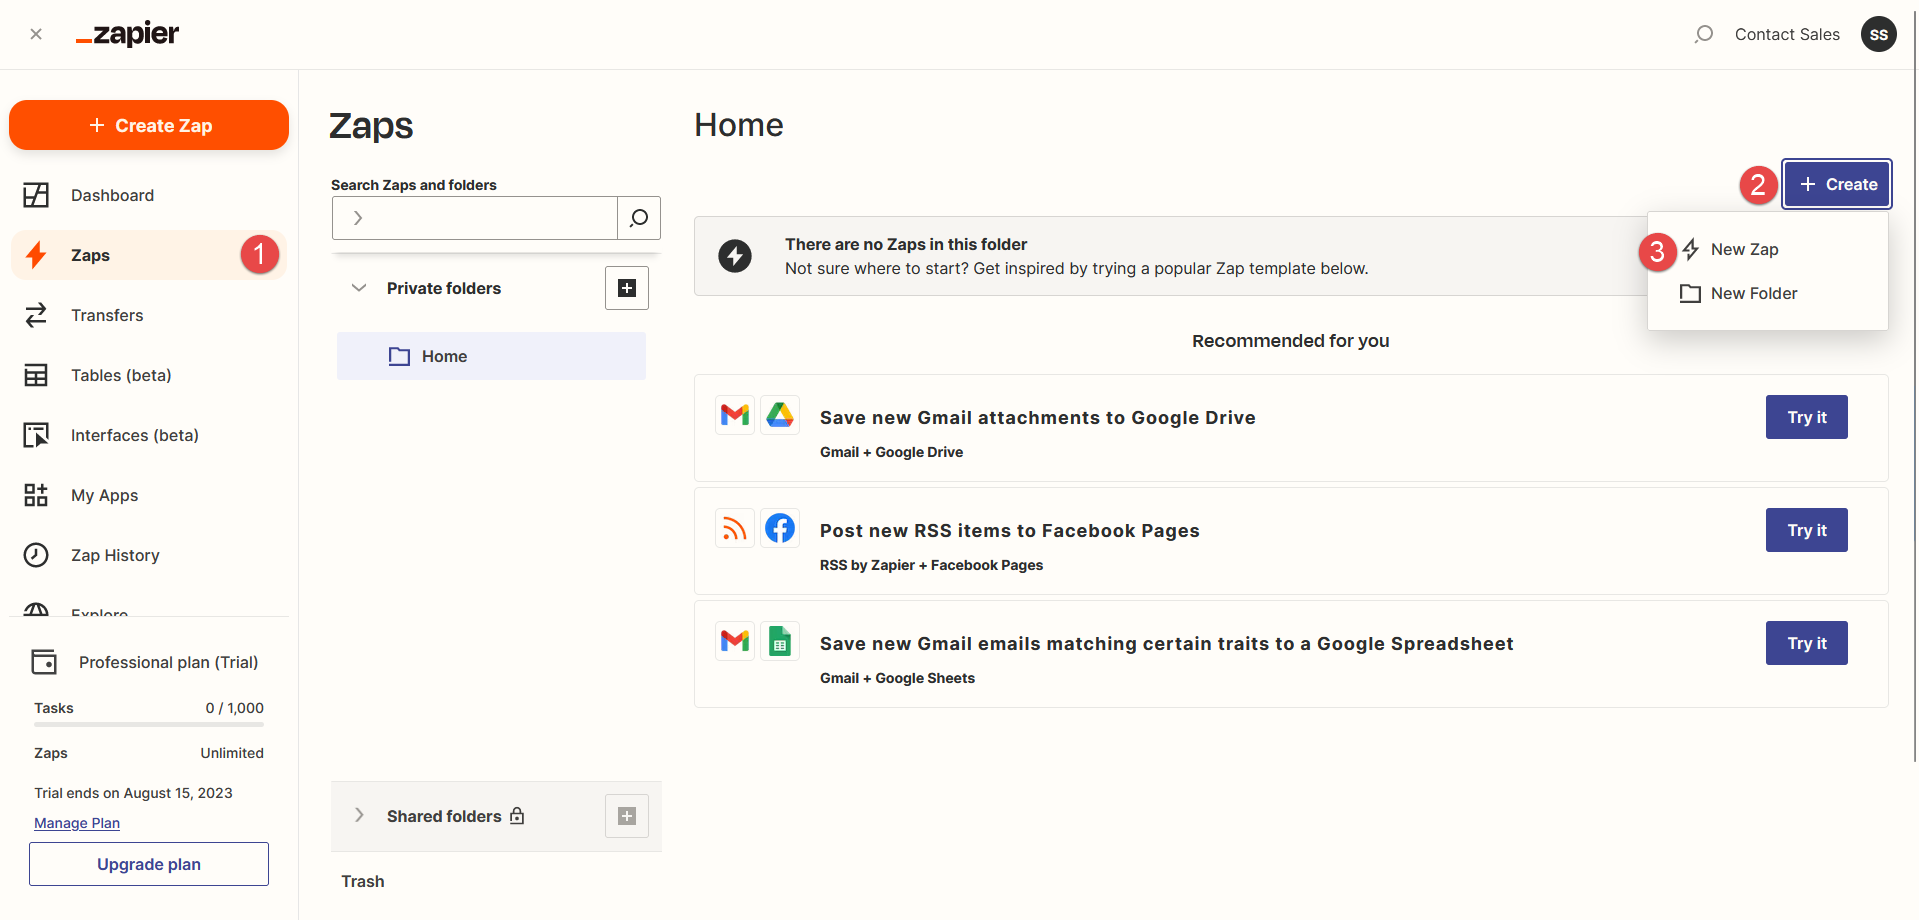
Create a Zap
-
Select the Zaps option on the left side menu.
-
Click the Create button.
-
Click the New Zap button.
To create Zaps, follow these steps:
-
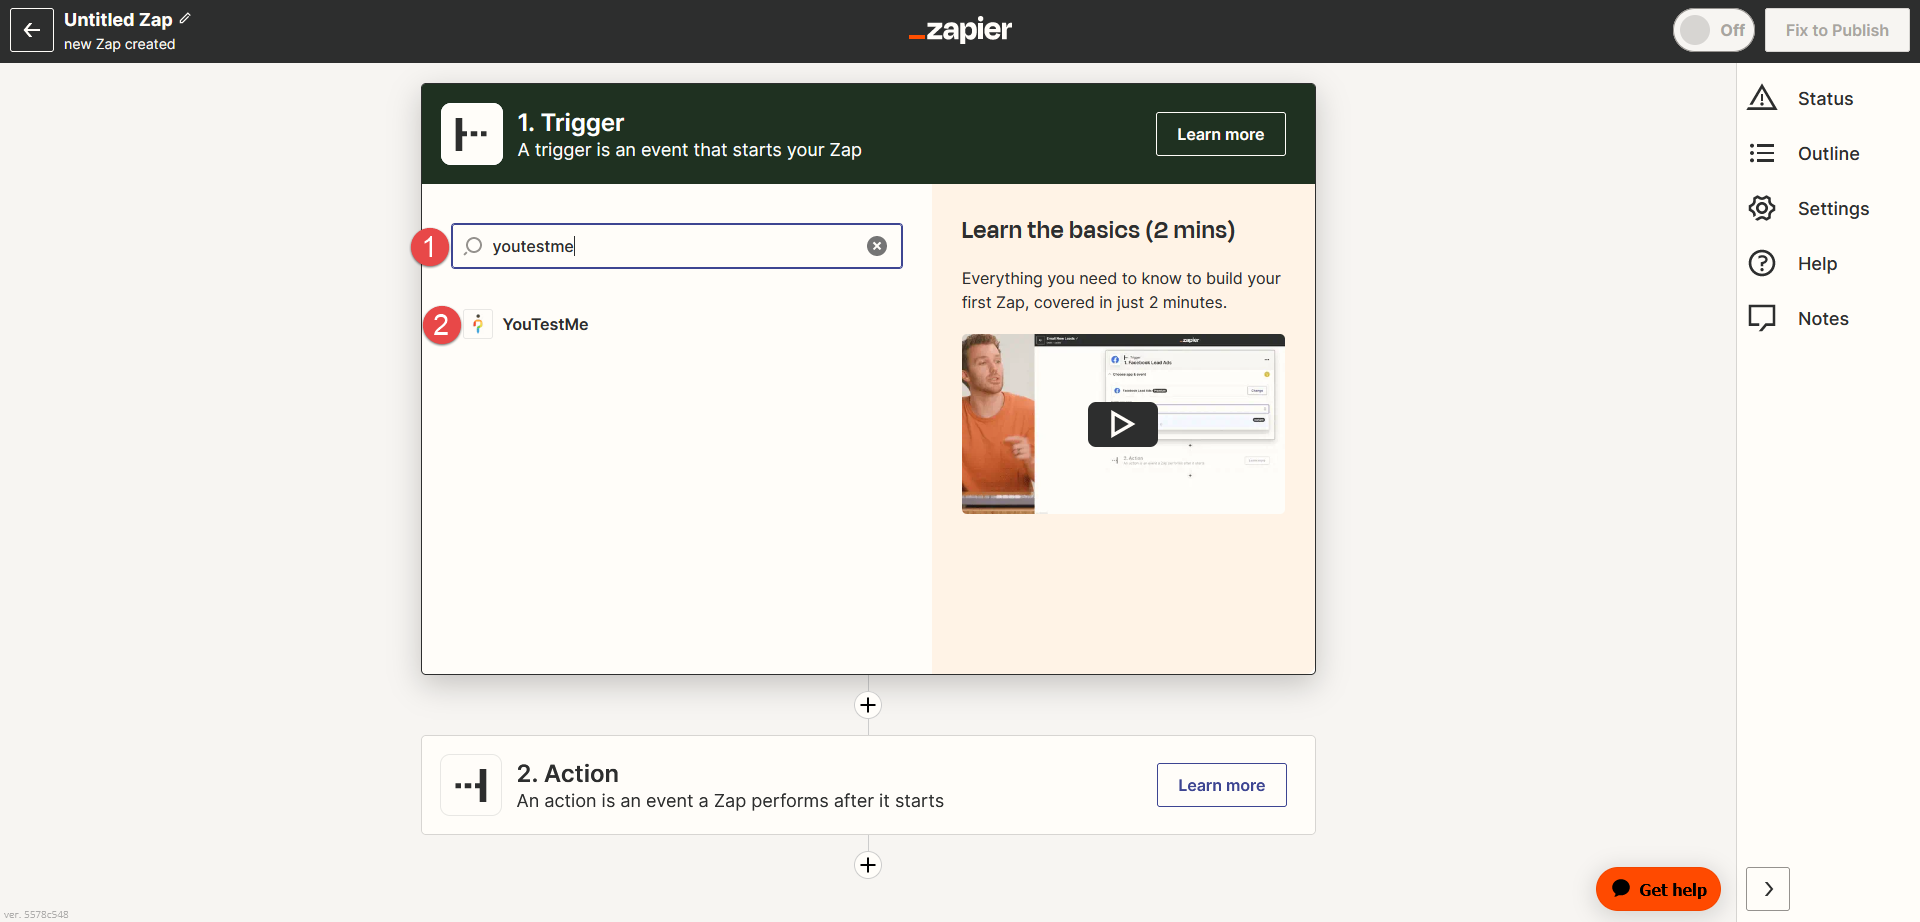
Set up a trigger
-
In the Search bar, locate the YouTestMe application.
-
Select the YouTestMe application.
-
Choose the New user from the dropdown for the trigger Event type.
-
Click the Continue button.
-
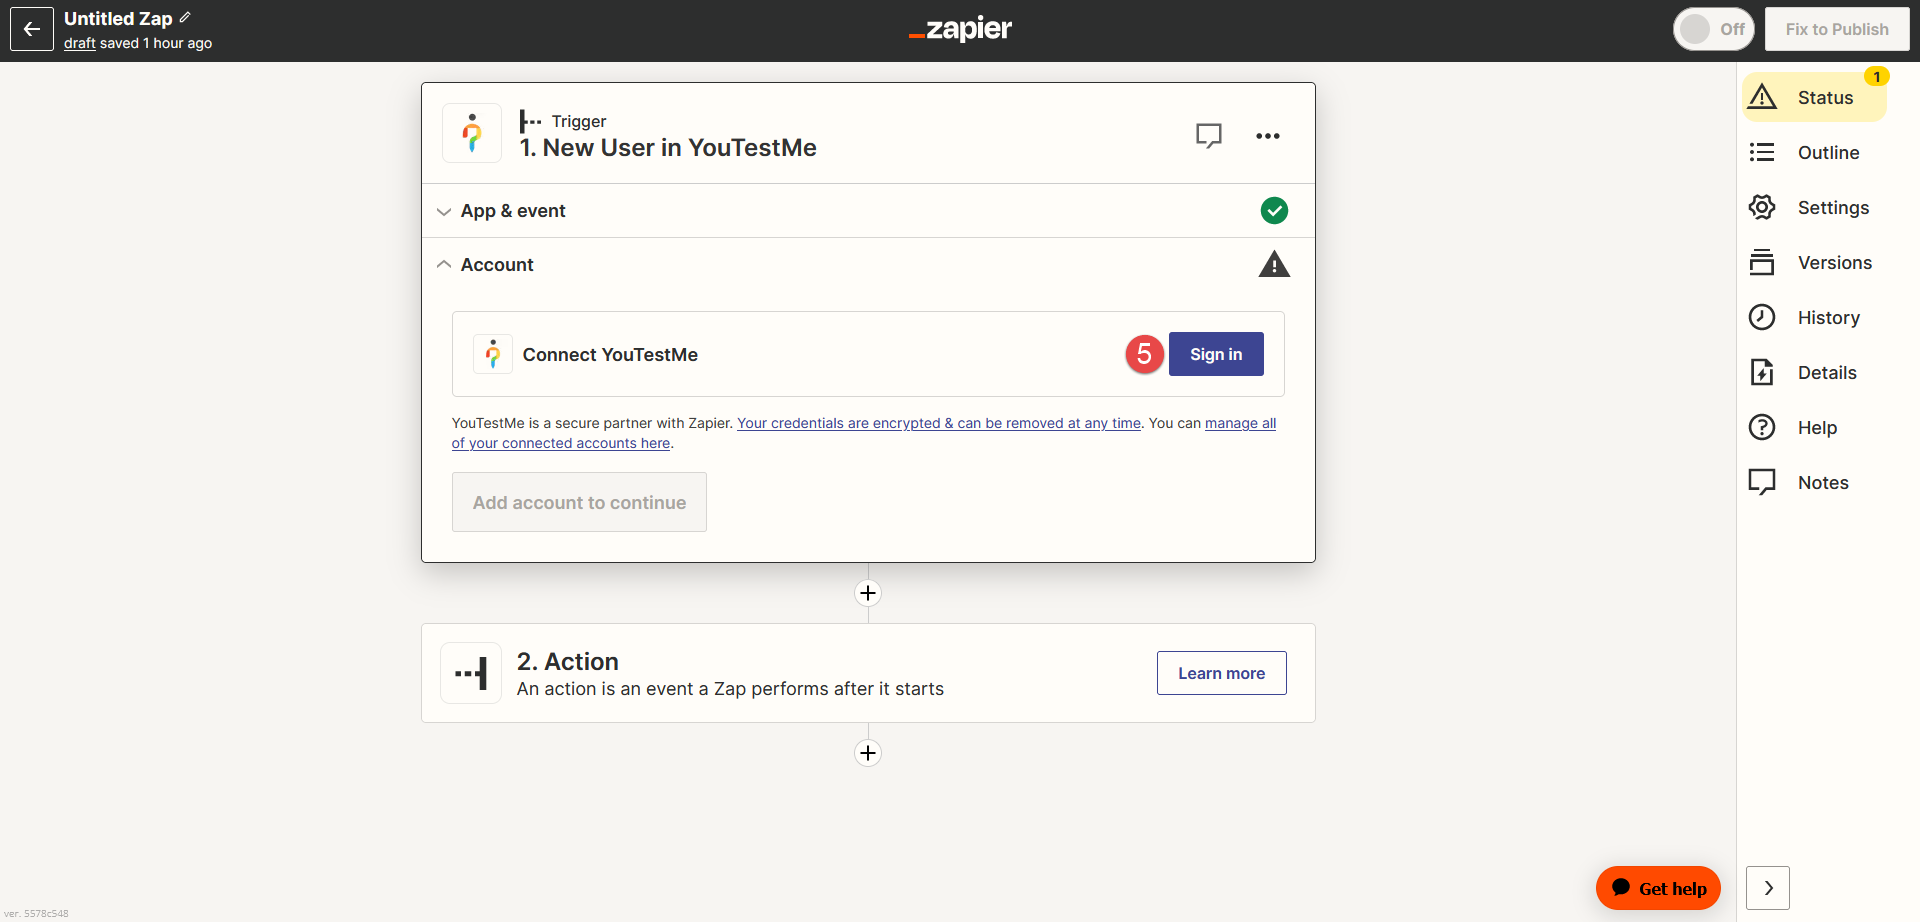
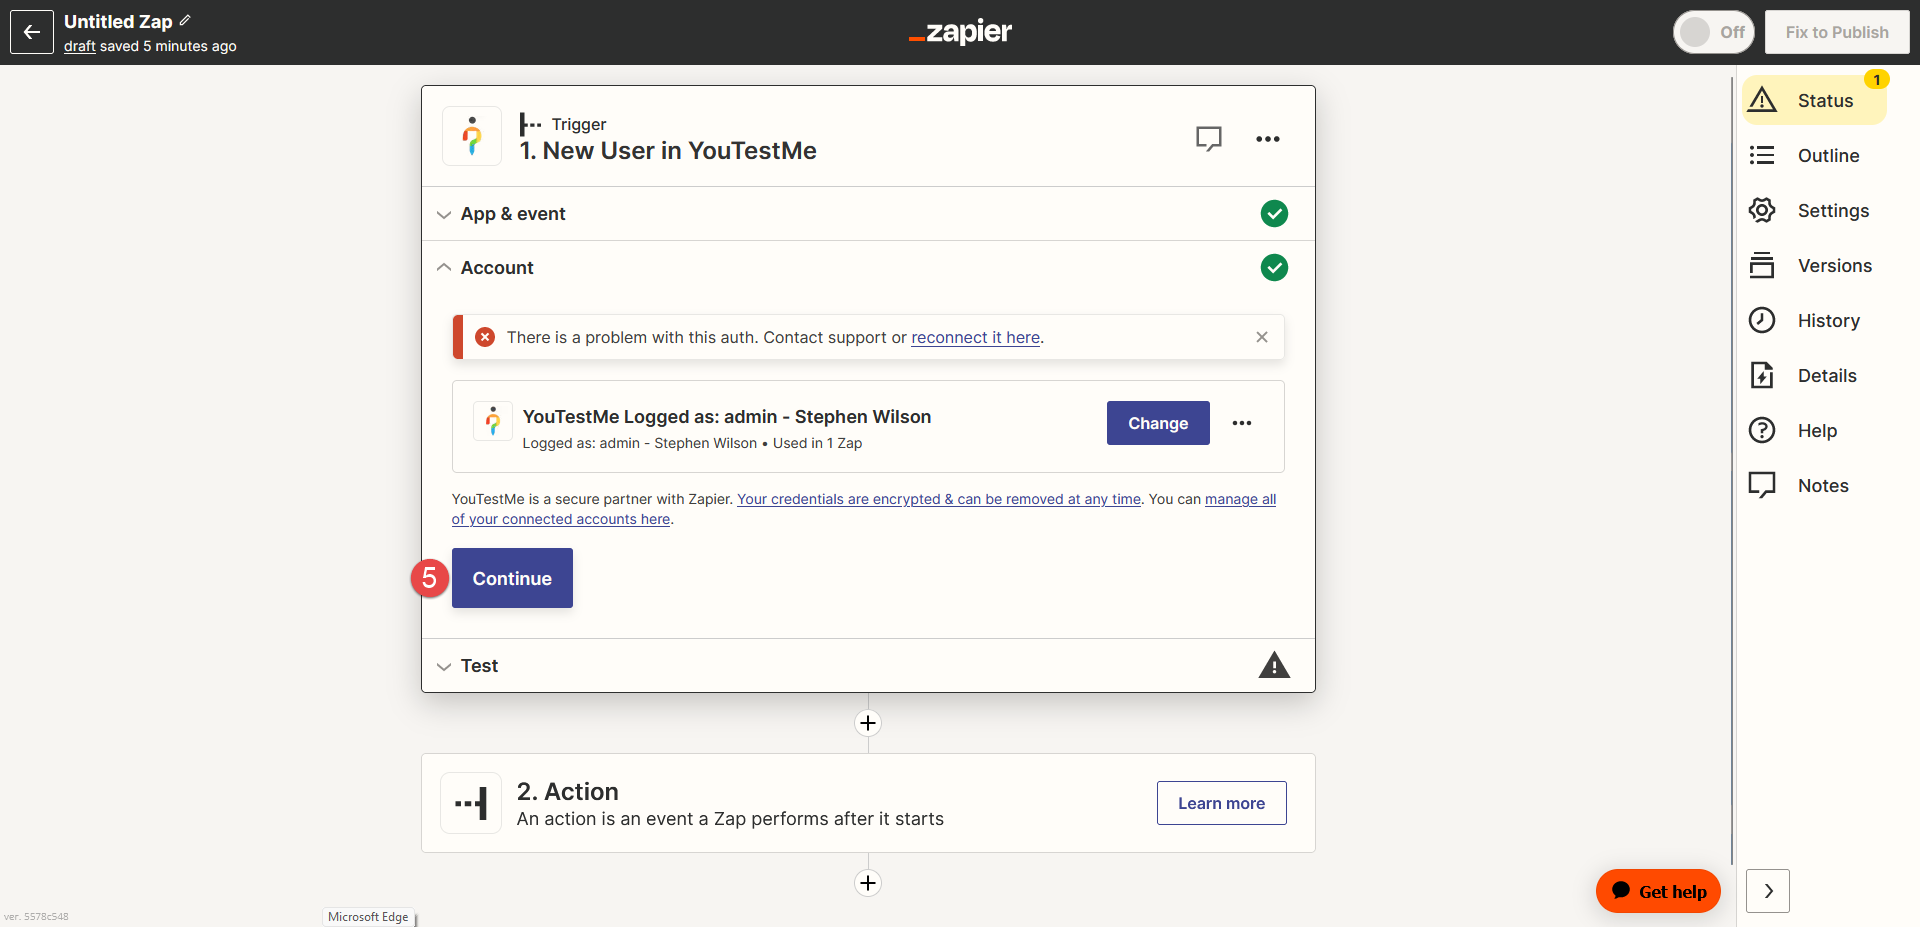
To connect with the YouTestMe application, click the Log in button.
-
Username.
-
Password.
Note: Enter the username and password you use for your YouTestMe application.
-
API URL of your YouTestMe instance.
Note: If you don't have an API URL, please contact YouTestMe Support at support@youtestme.com to enable the API and obtain the URL.
-
Click the Yes, Continue to YouTestMe button.
-
Click the Continue button.
-
Click the Test trigger button.
-
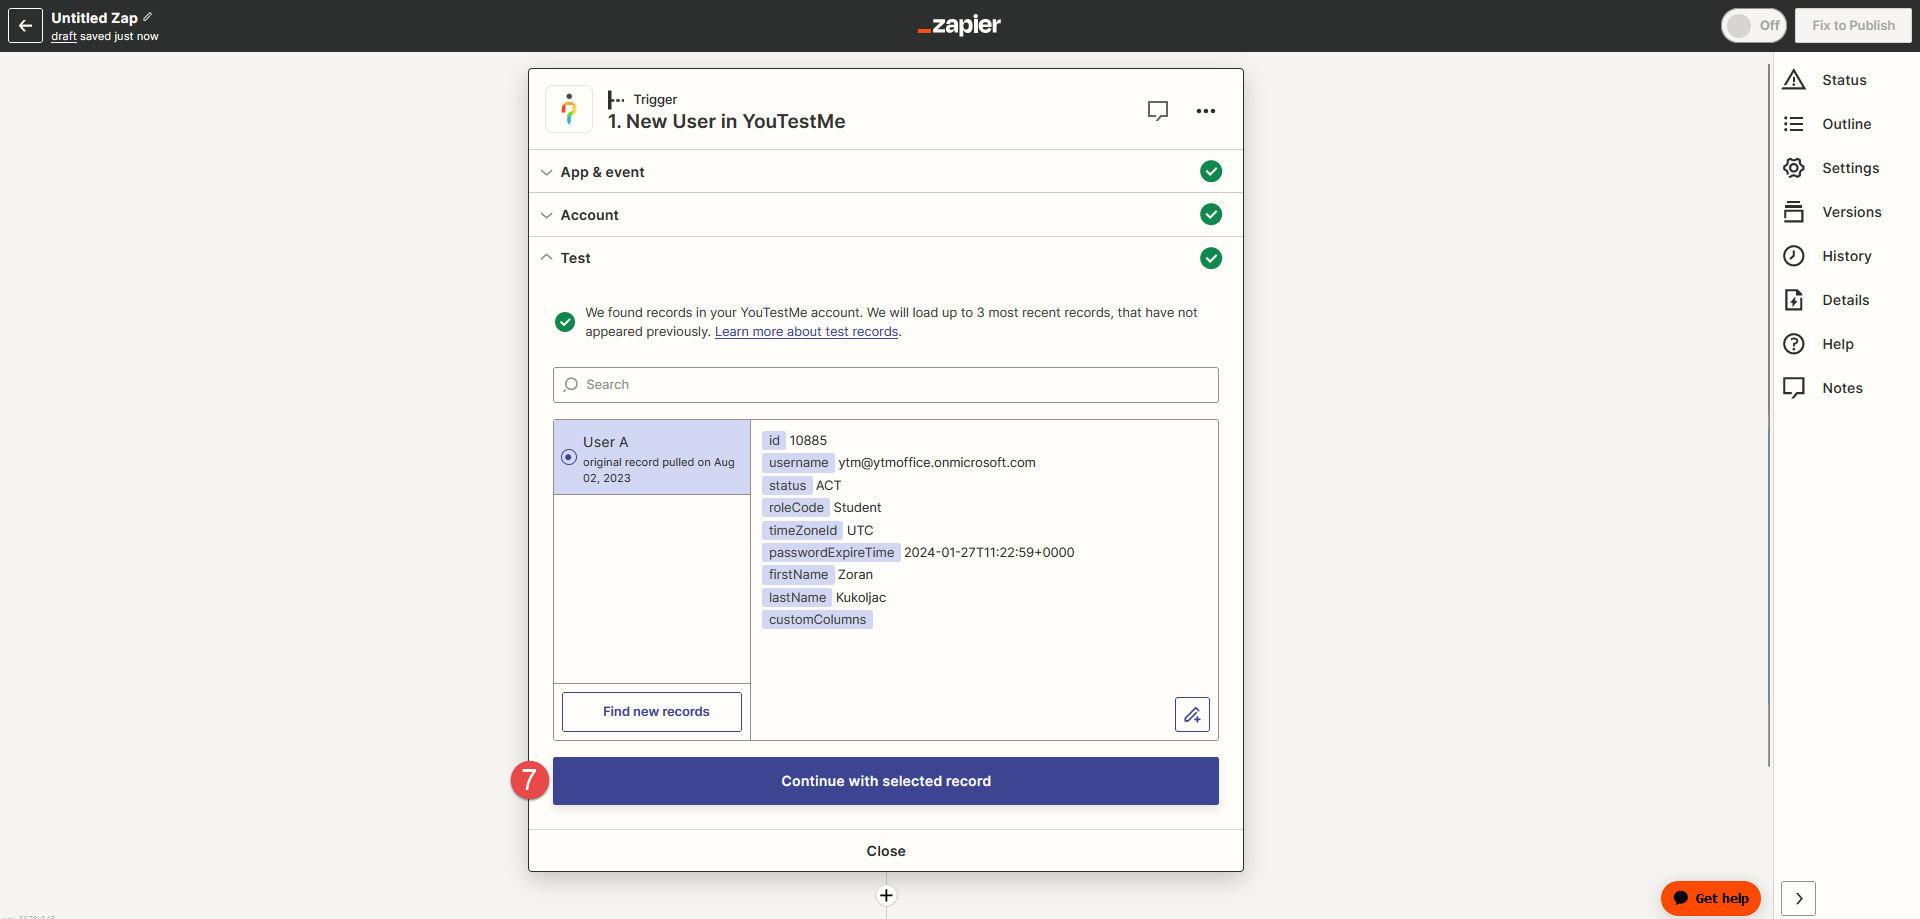
Click the Continue with selected record button to configure the action.
In this step, you will need to set up a Trigger, which is an event that starts your zap. To do that, use the Search bar to find your application.

A pop-up window will appear where you need to enter the following information:

After logging in the YouTestMe application:
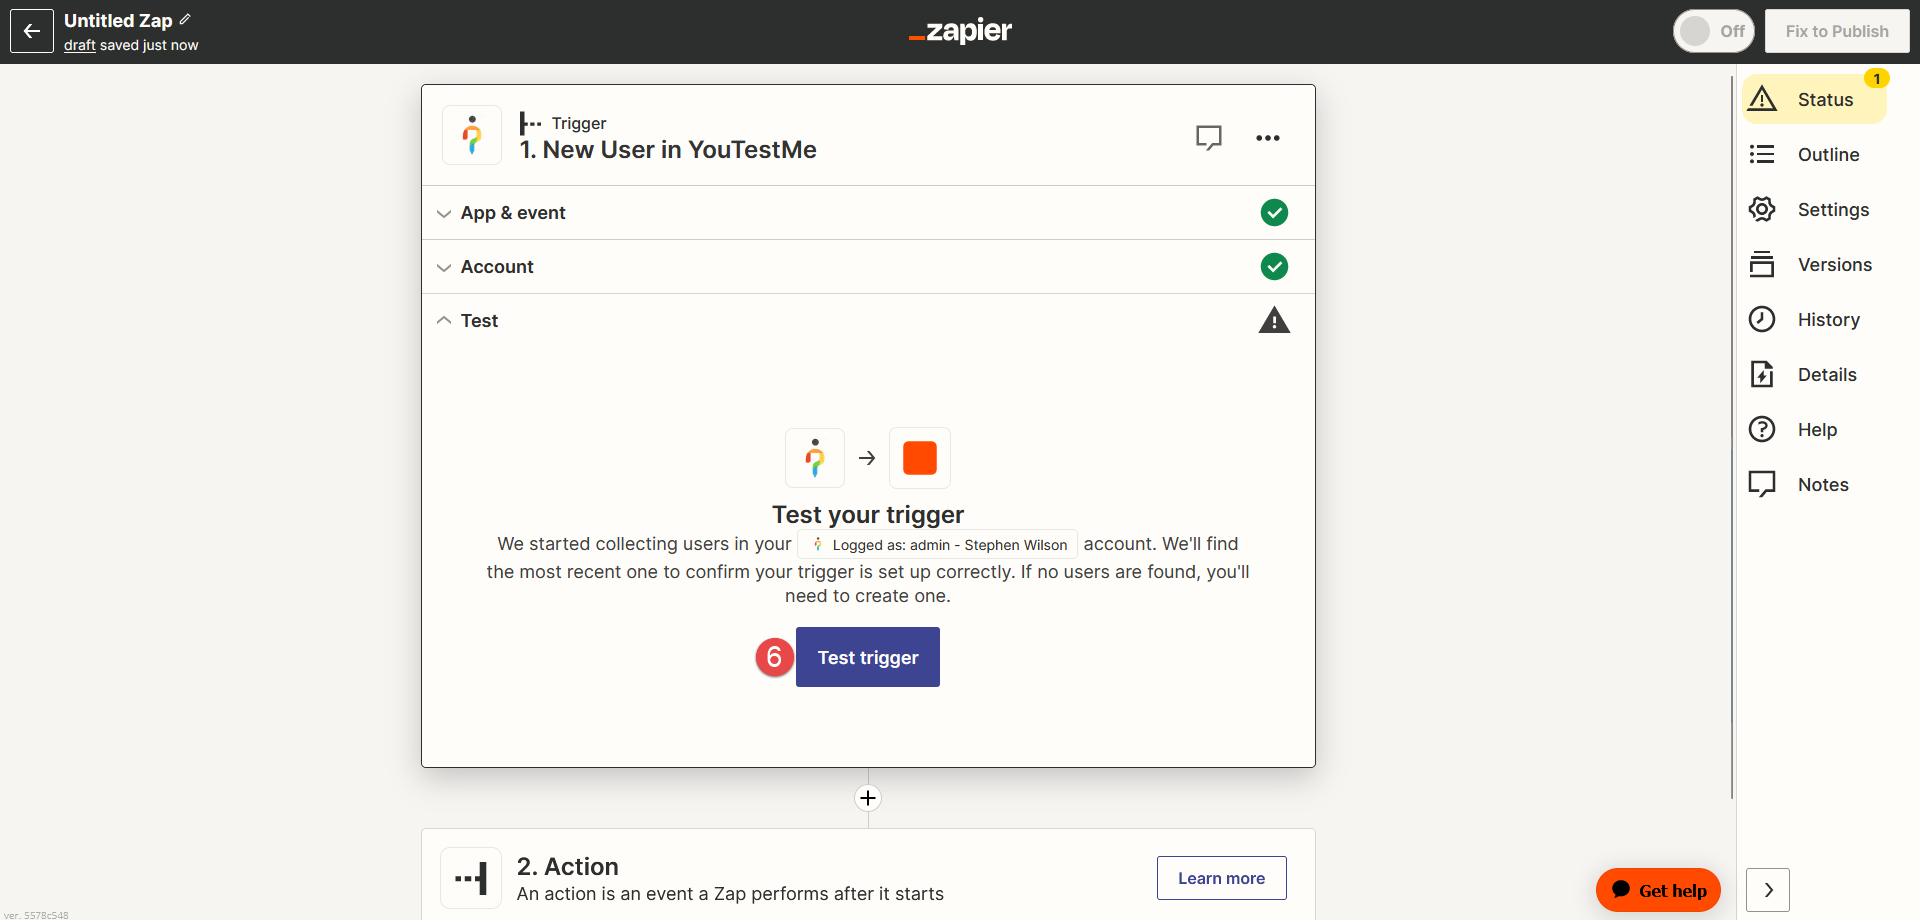
Note: You will receive the information about the last created user on the server.
-
-
Set up an action
-
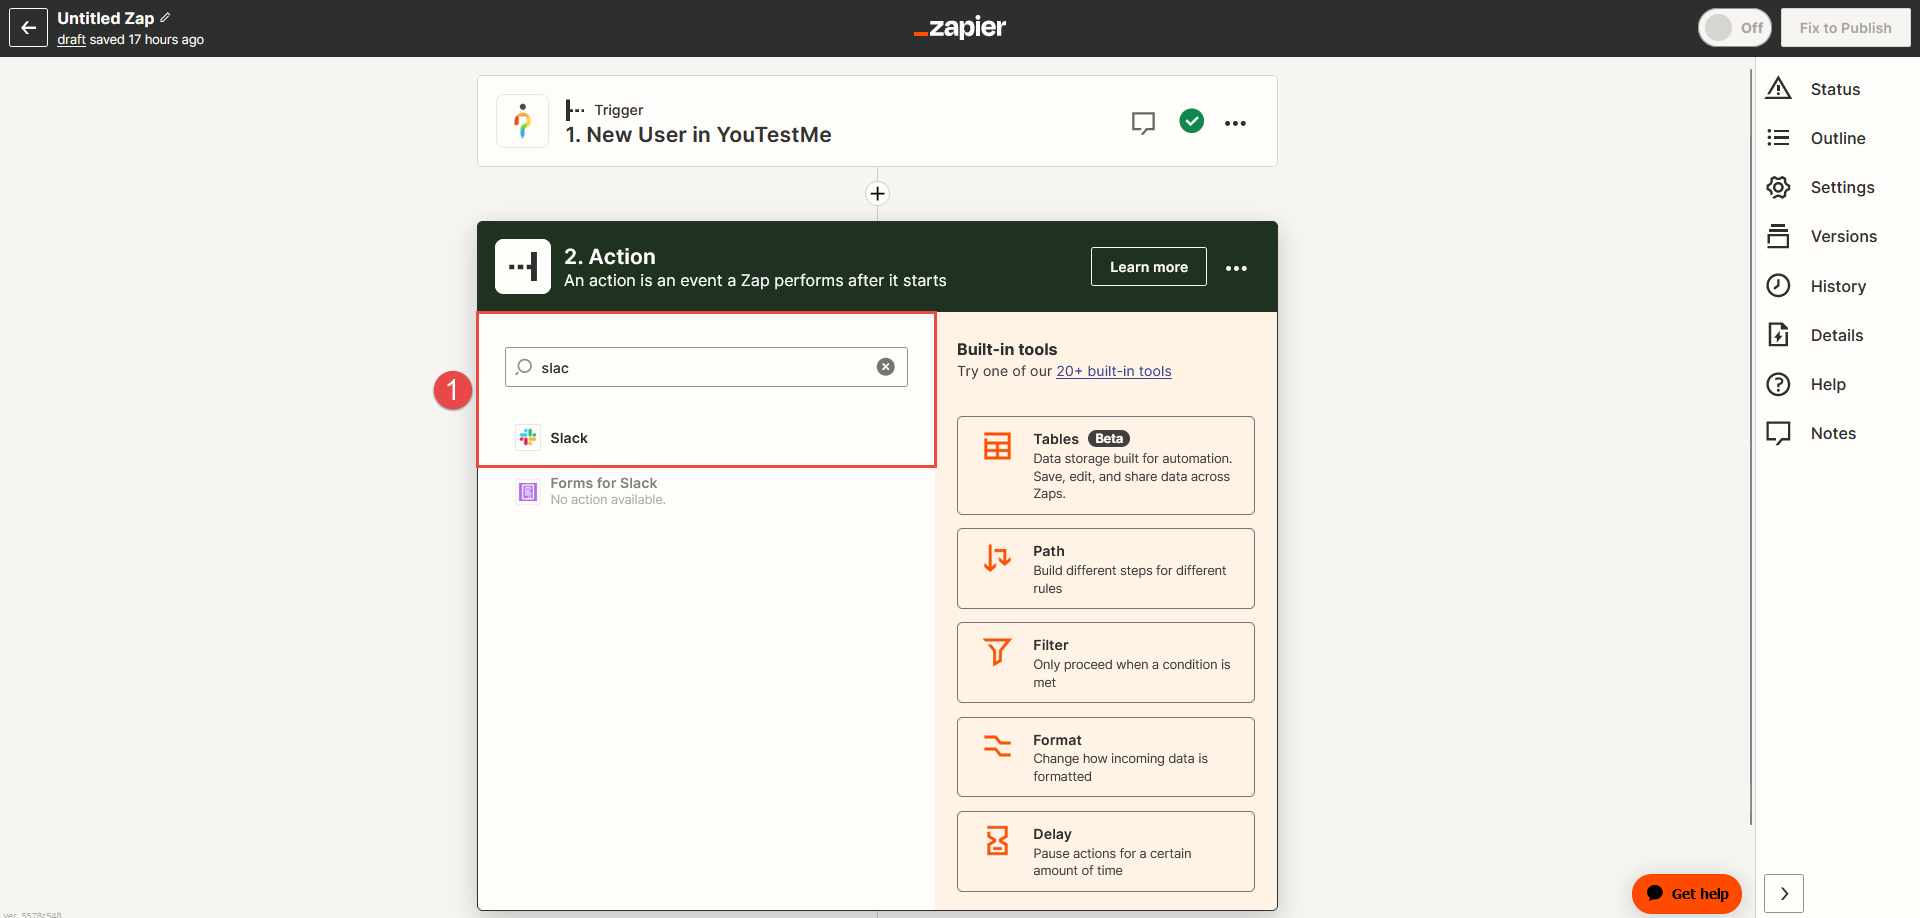
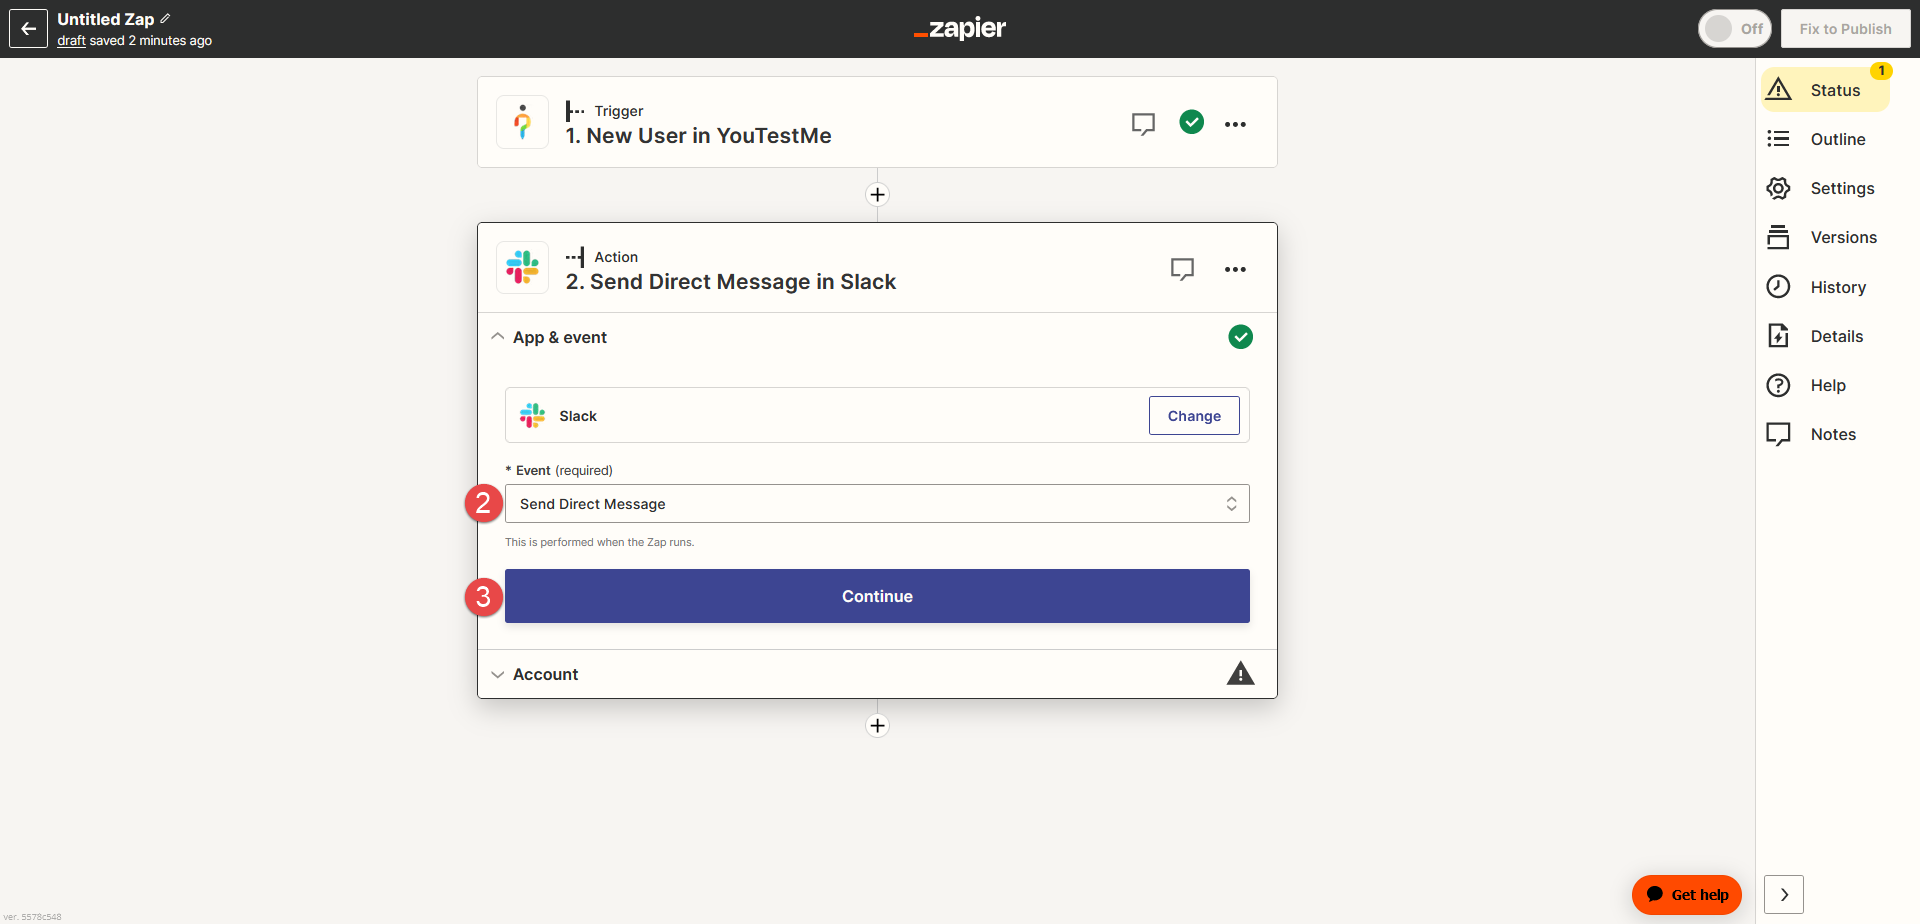
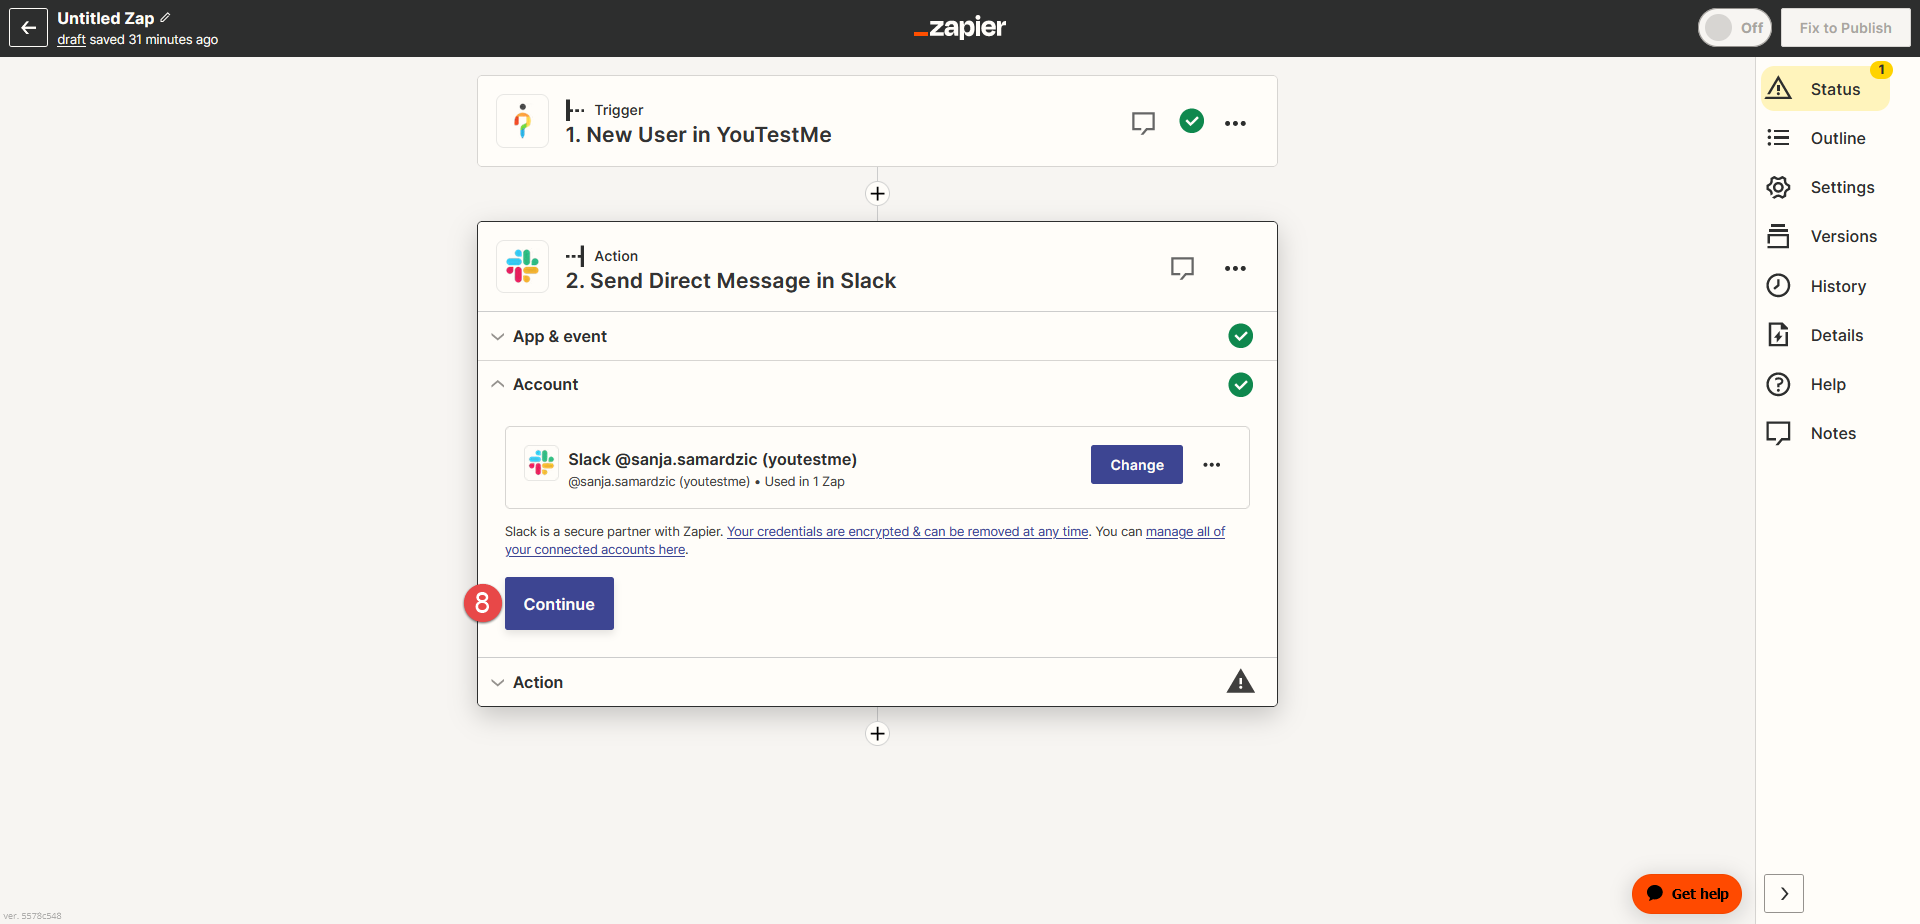
Choose the app you want to use for the event. For example, select Slack application.
-
Choose Send Direct Message from the dropdown for the trigger Event type.
-
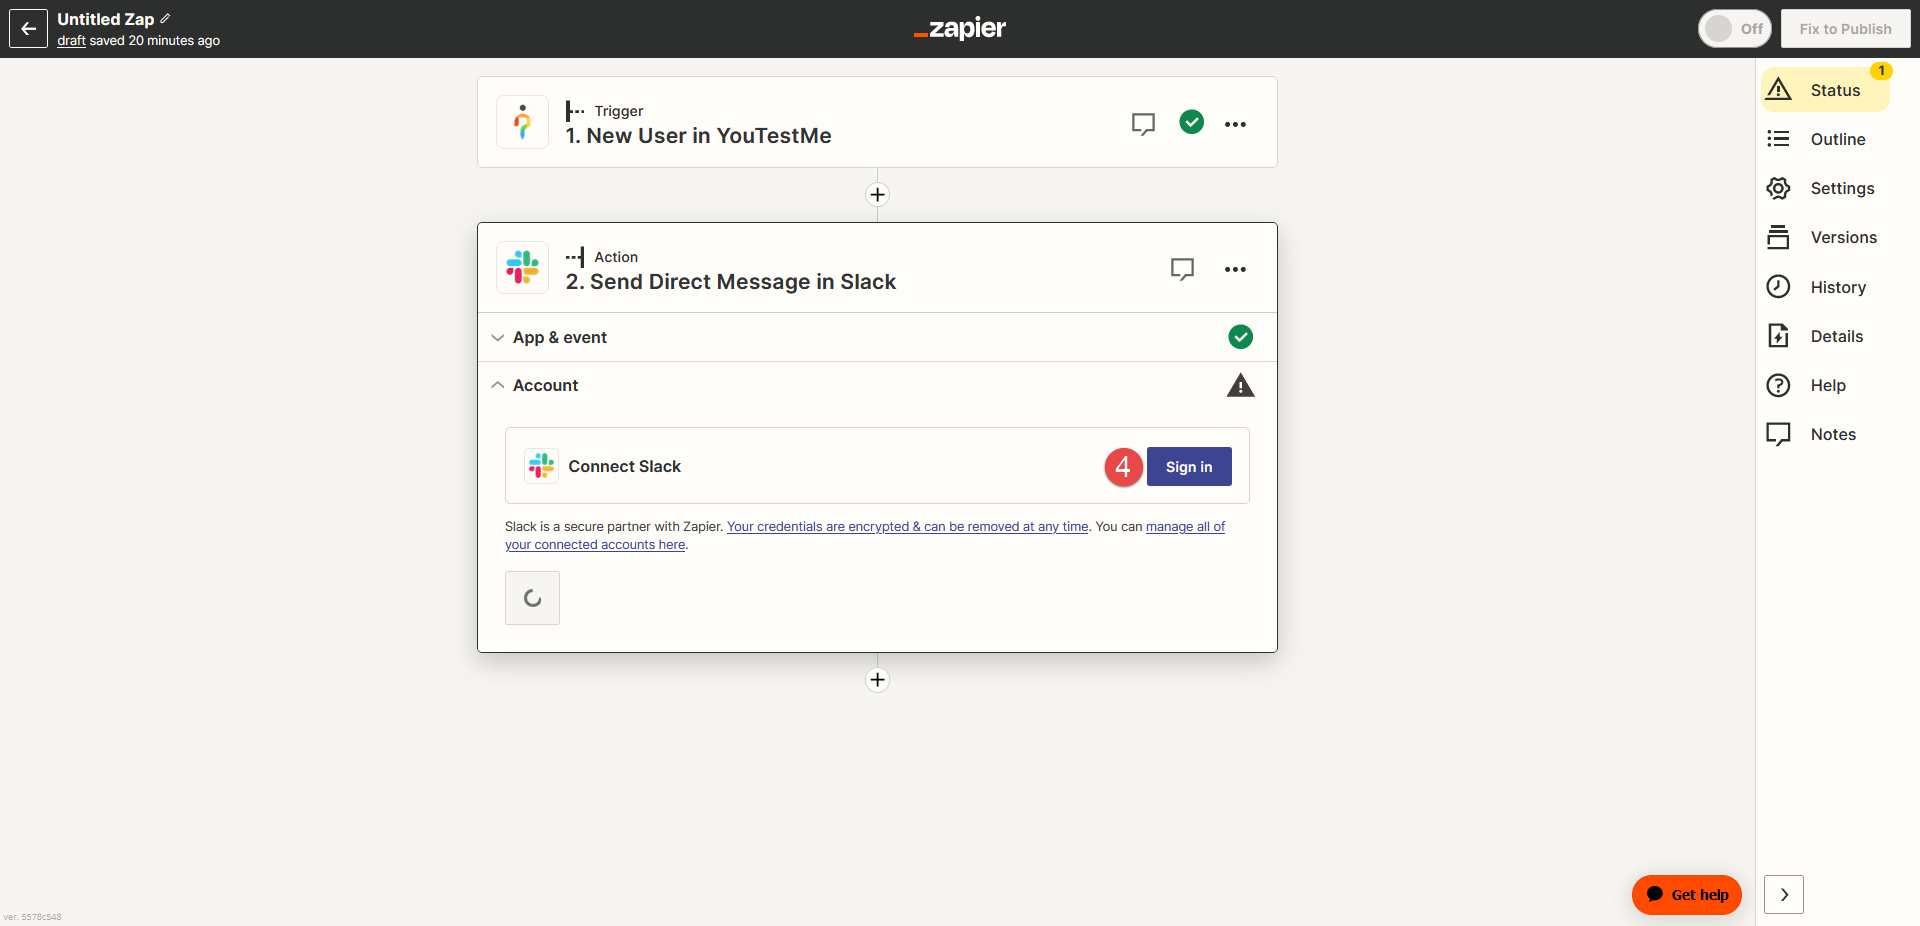
Click the Continue button, and choose the account.
-
Click the Log in to Connect Slack.
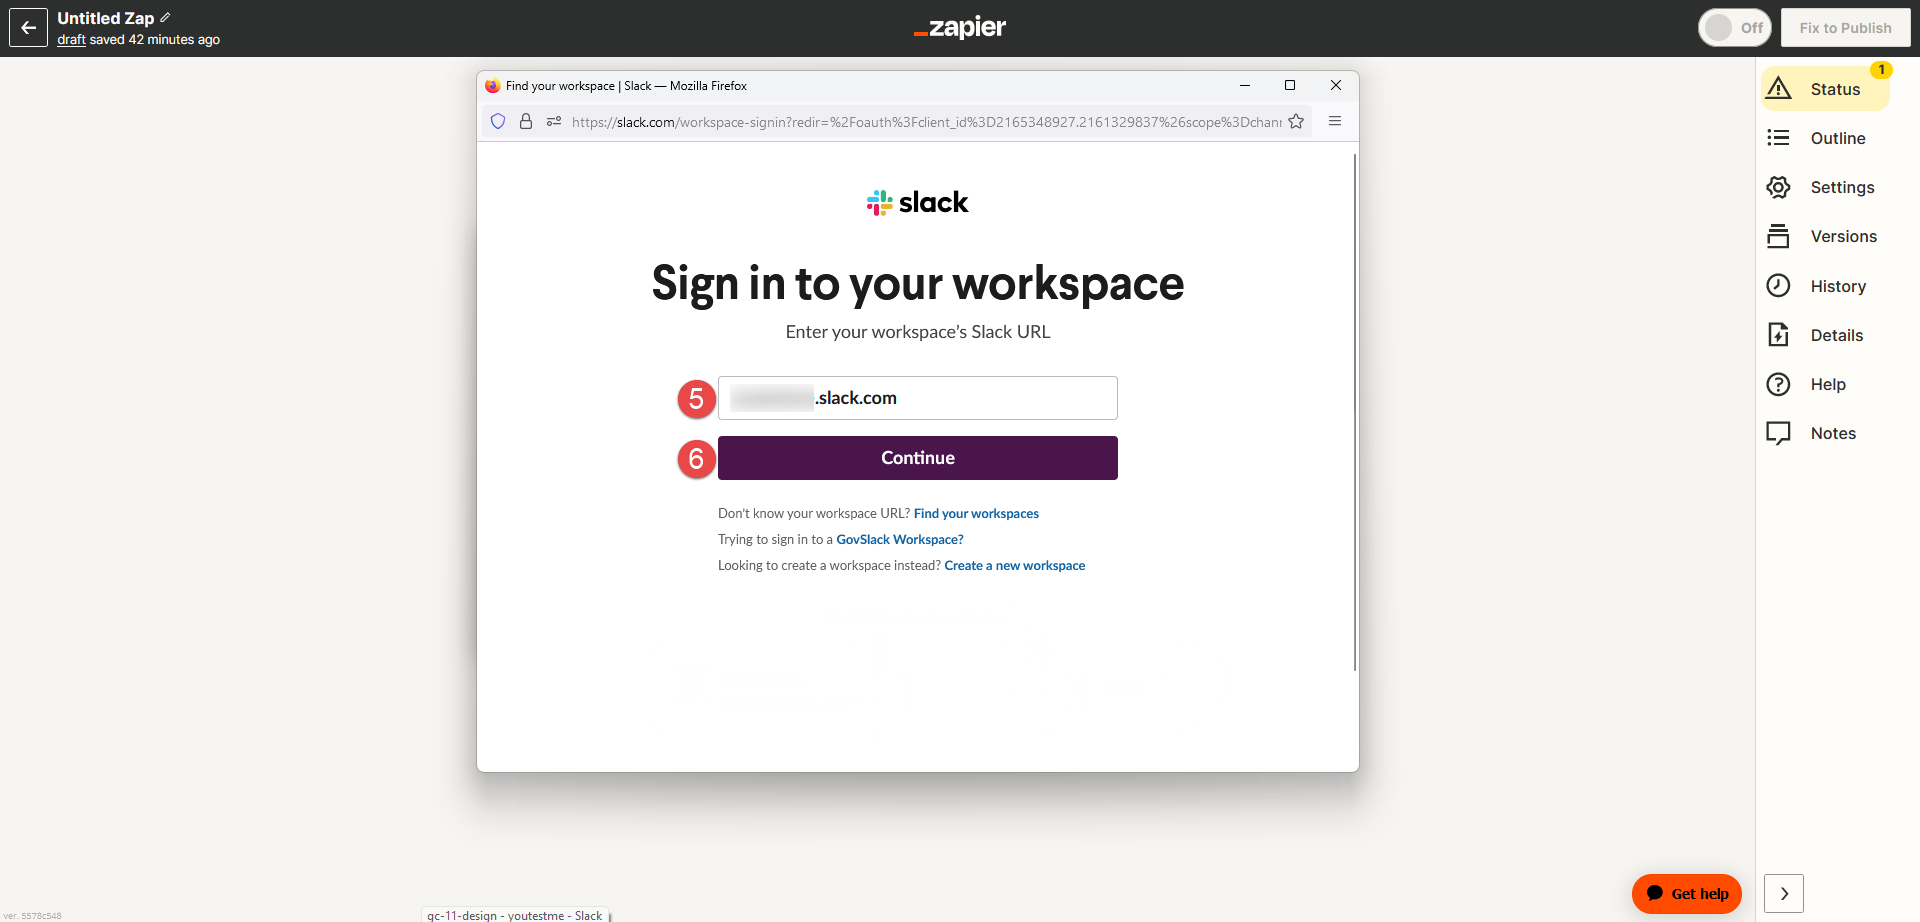
-
Upon clicking Log in, a pop-up window will appear. Enter your workspace’s Slack URL in the provided field.
-
Click the Continue button.
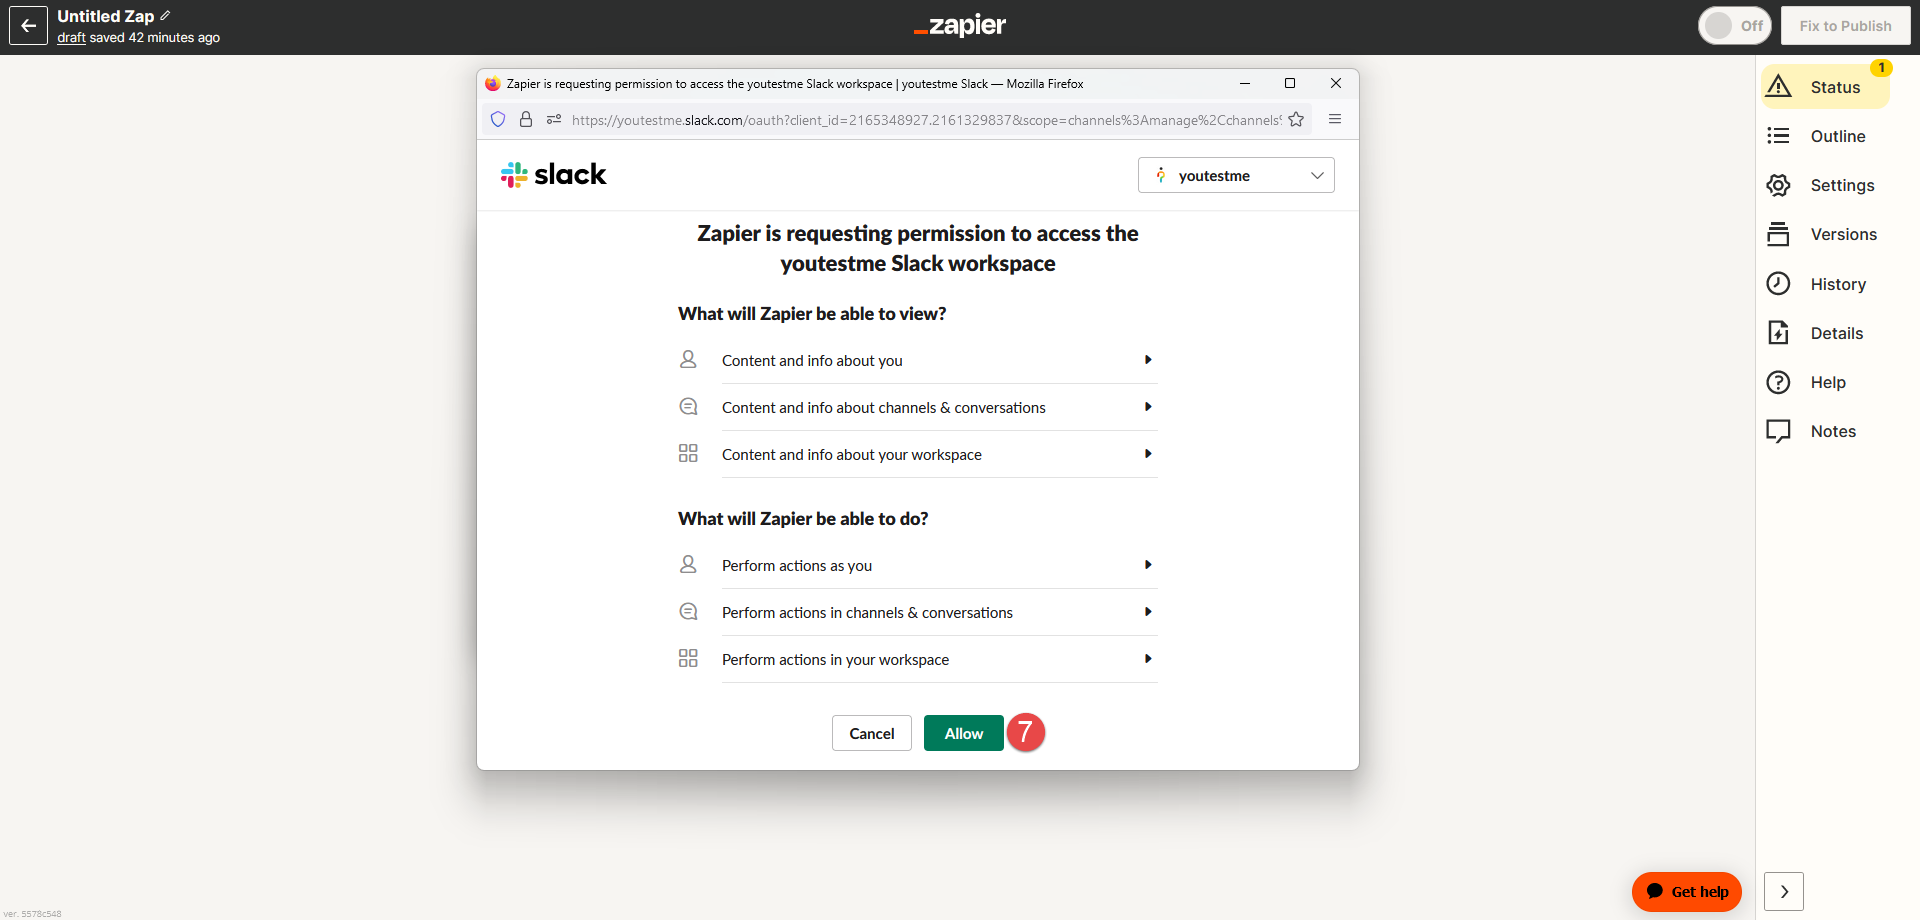
-
Zapier is requesting permission to access the YouTestMe Slack workspace. To proceed, click the Allow button.
-
When you set up Zapier to access your Slack workspace, click the Continue button.
In this step, we will set up an Action, which is an event that a Zap performs after it starts.
-
-
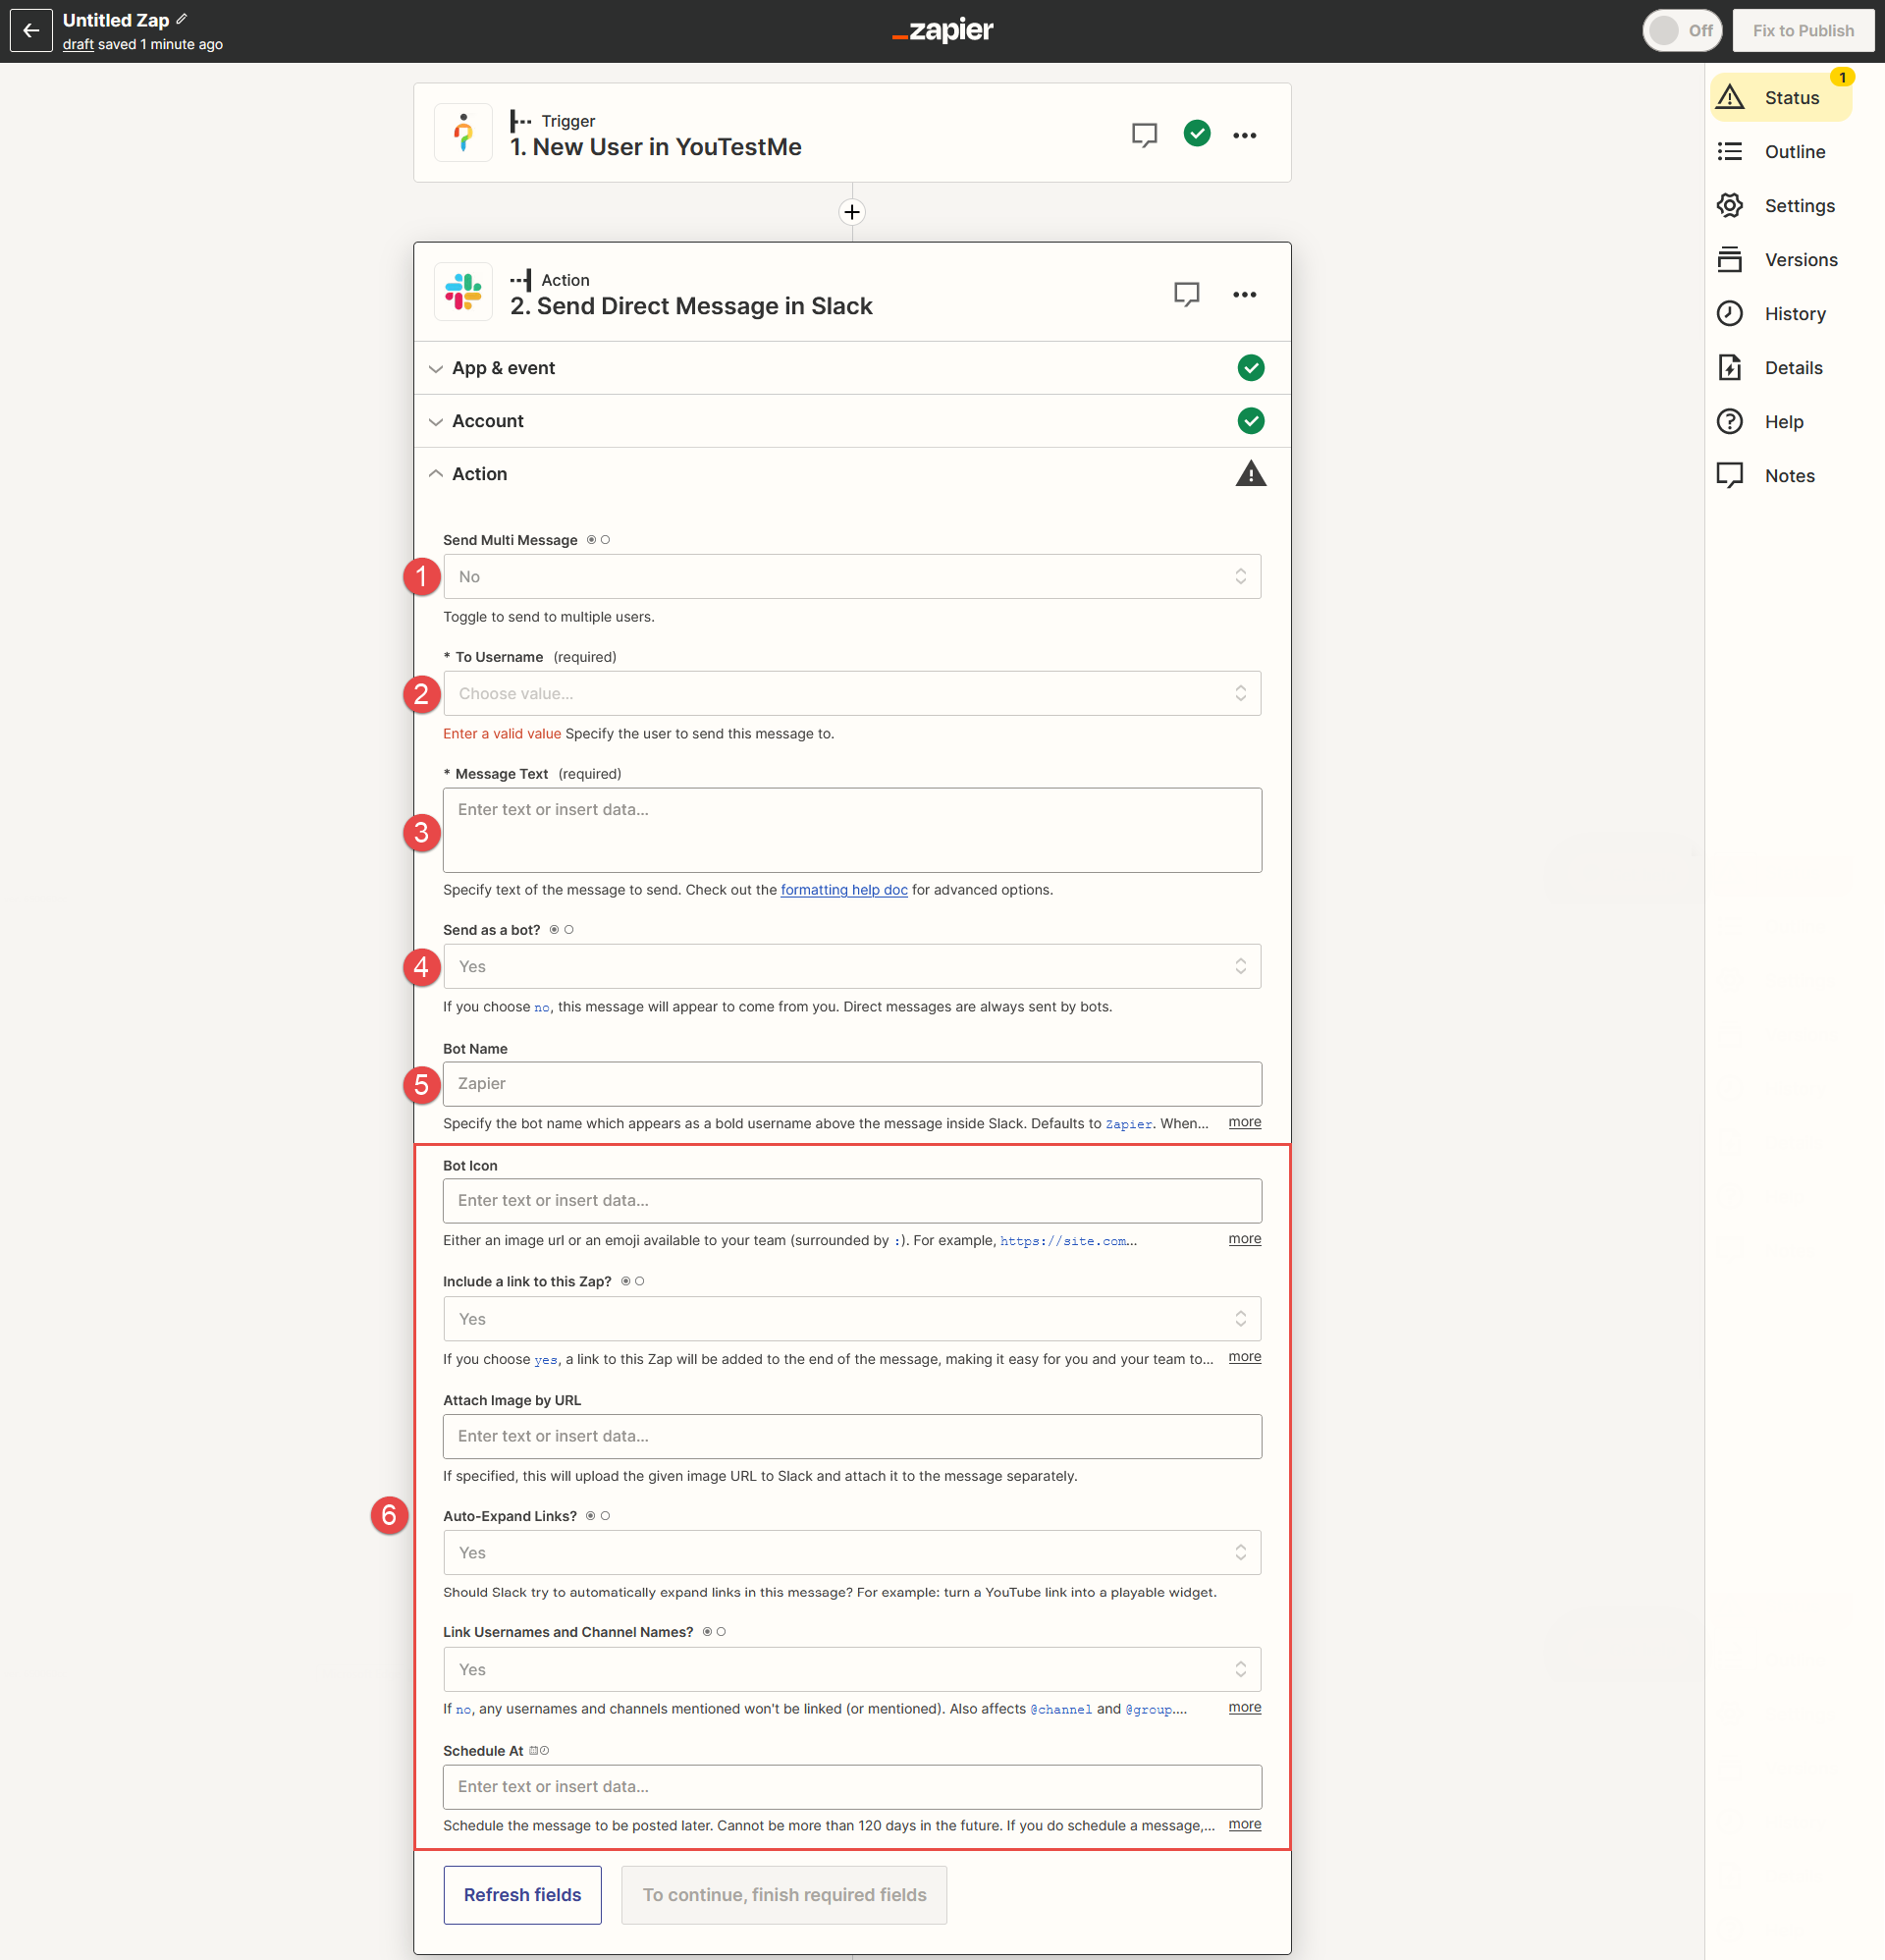
Configuring the Action: Sending Direct Message to Slack
-
Send Multi Message - Choose Yes if you want to send multiple messages to multiple users, or No if not needed..
-
To username - Specify the user who will receive the direct message.
-
Message Text - Enter the text of the message you wish to send. You can enter the text and data.
-
Send As A Bot? - Choose Yes or No. Choose No if you want the message to appear as if it's coming from you.
Note: Bots always send direct messages.
-
Bot Name - You can optionally specify the bot's name, which will appear as a bold username above the message in Slack. By default, the bot's name is Zapier.
-
There are other useful settings available to enhance your messaging experience: Bot Icon, Include a link to this Zap, Attach Image by URL, Auto-Expand Links, Link Usernames and Channel Names, and Schedule At.
To set up the action for sending a direct message to Slack, follow these steps:
-
-
Set up a message text
-
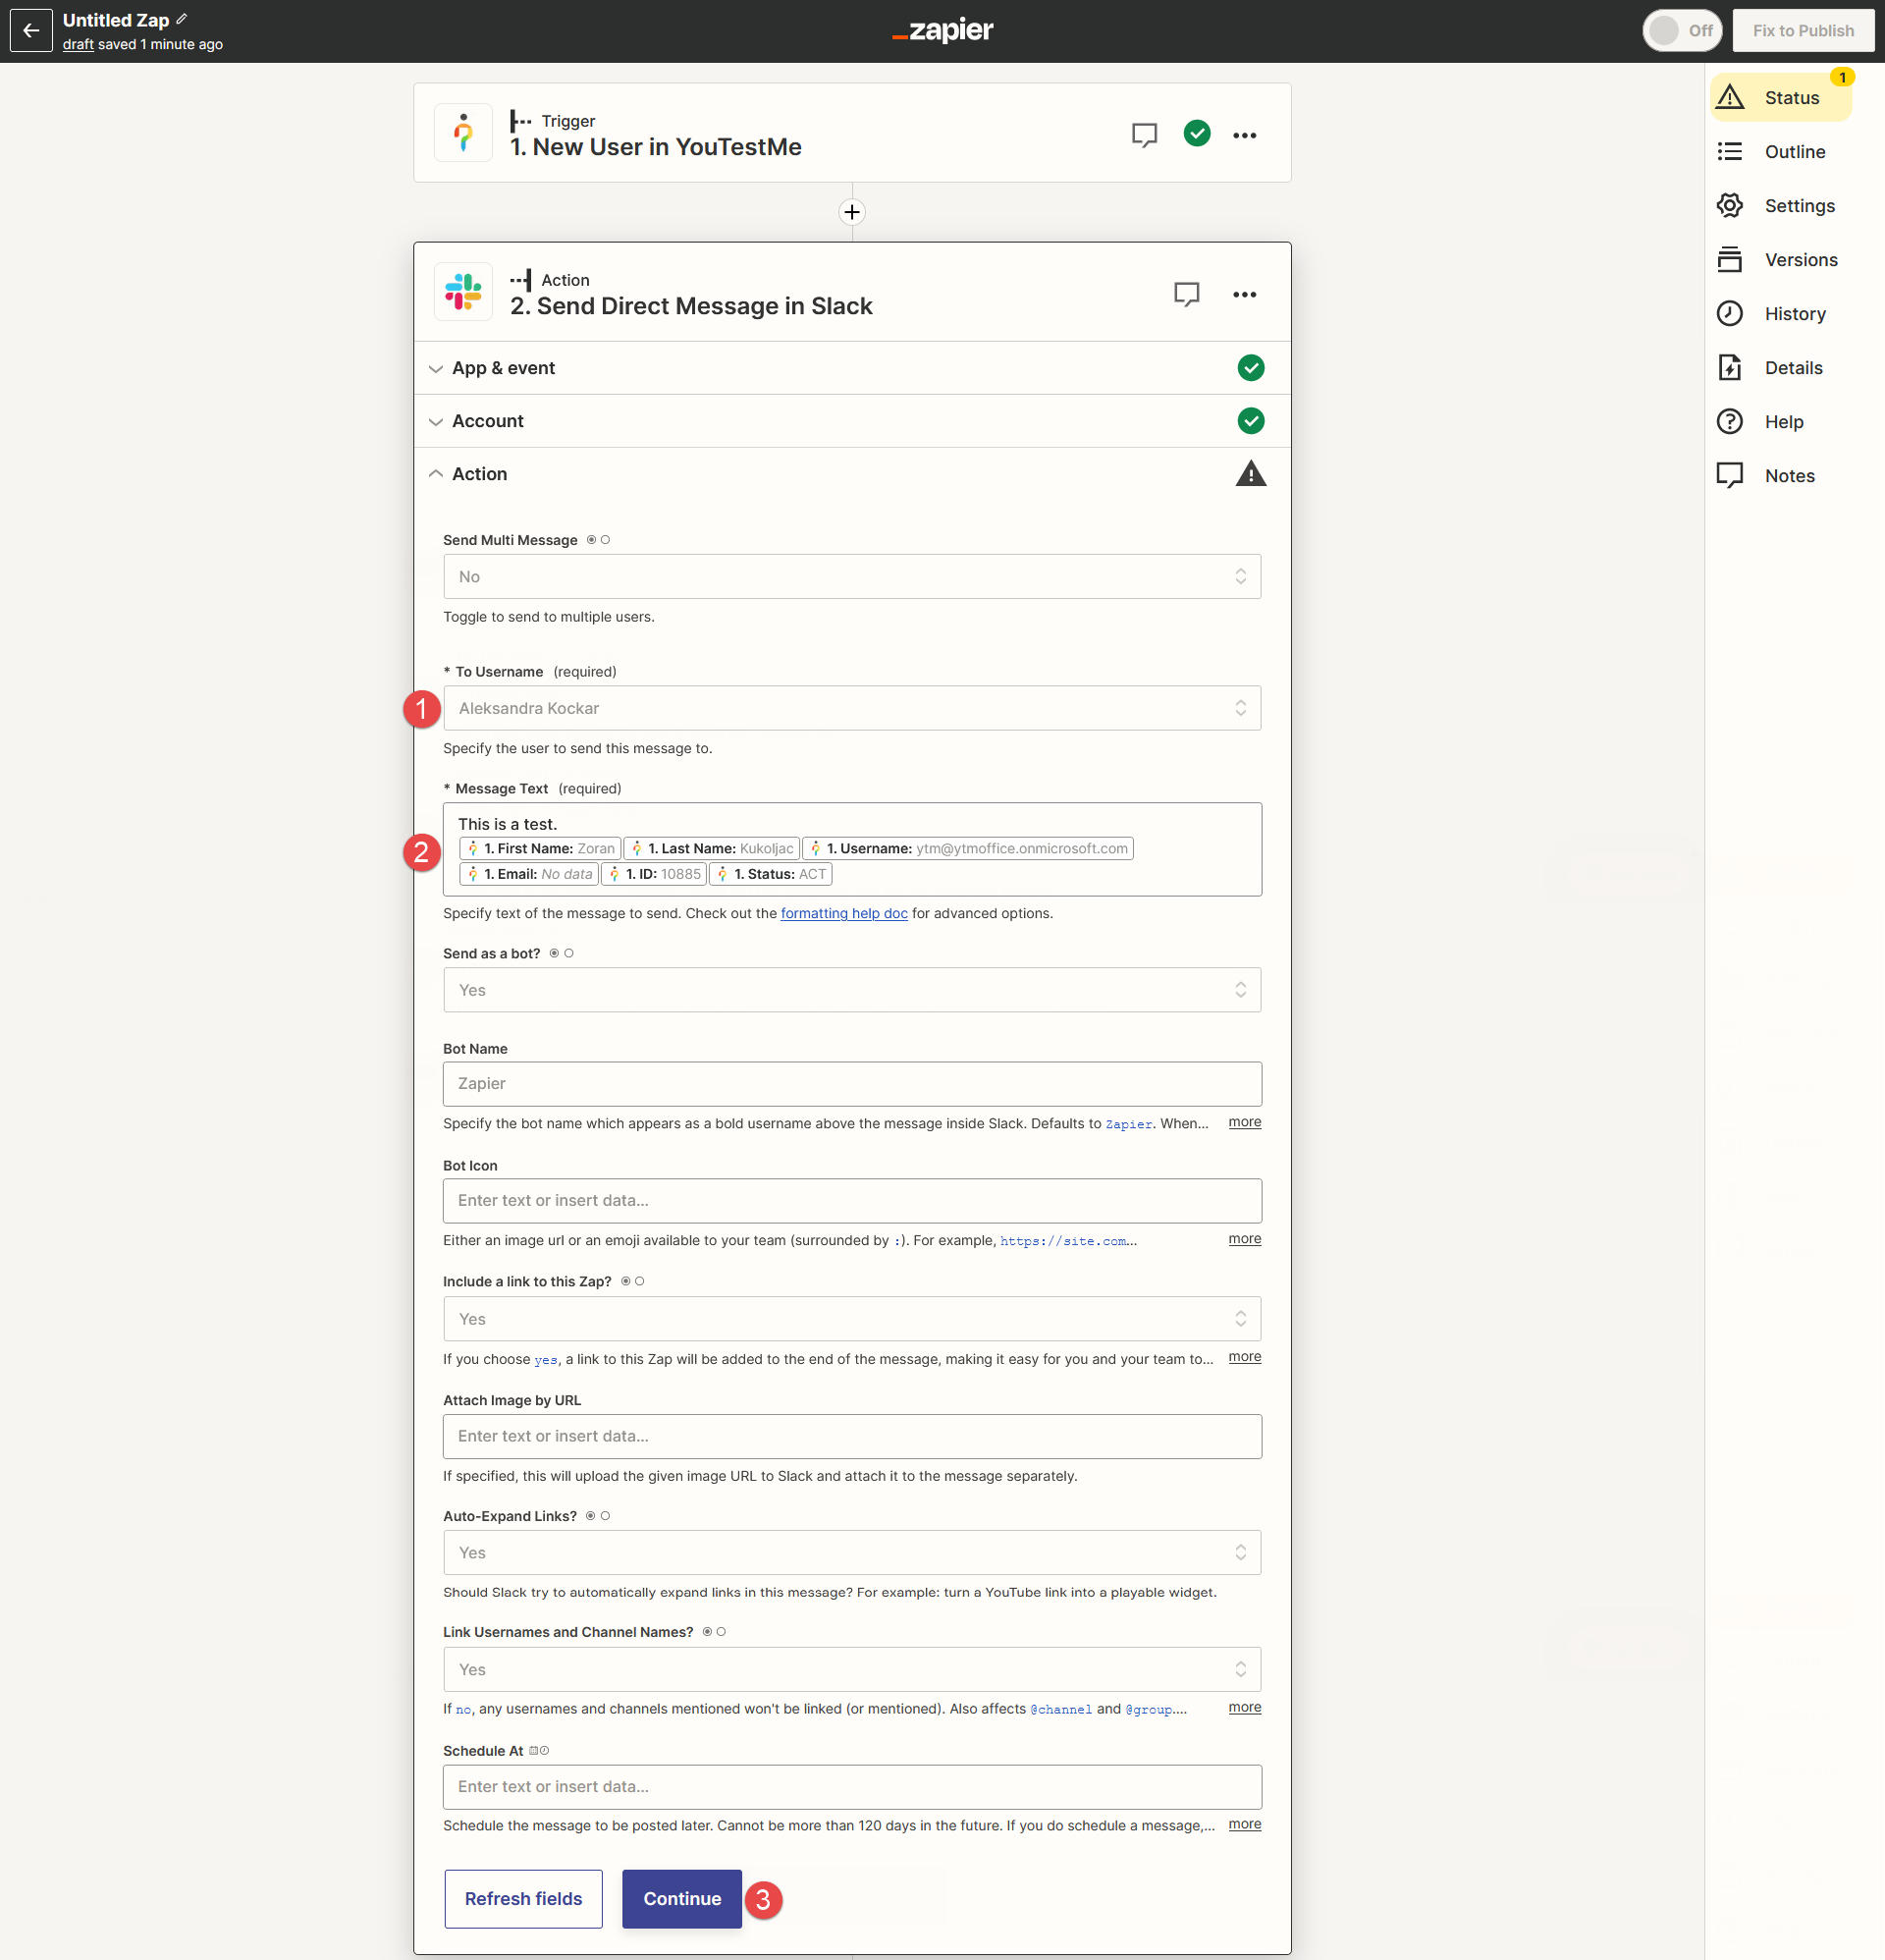
Select a Slack Username - Choose a Slack username from the dropdown list to whom you want to send the message.
-
Message Text - The message will contain the text and selected user data.
Note: You can customize the message text and data as you see fit.
-
Click the Continue button.
-
Before proceeding, preview the message data to ensure it appears as intended.
-
Click the Test action button to test sending the direct message, or click the Skip test button to skip test.
-
Click the Continue button.
-
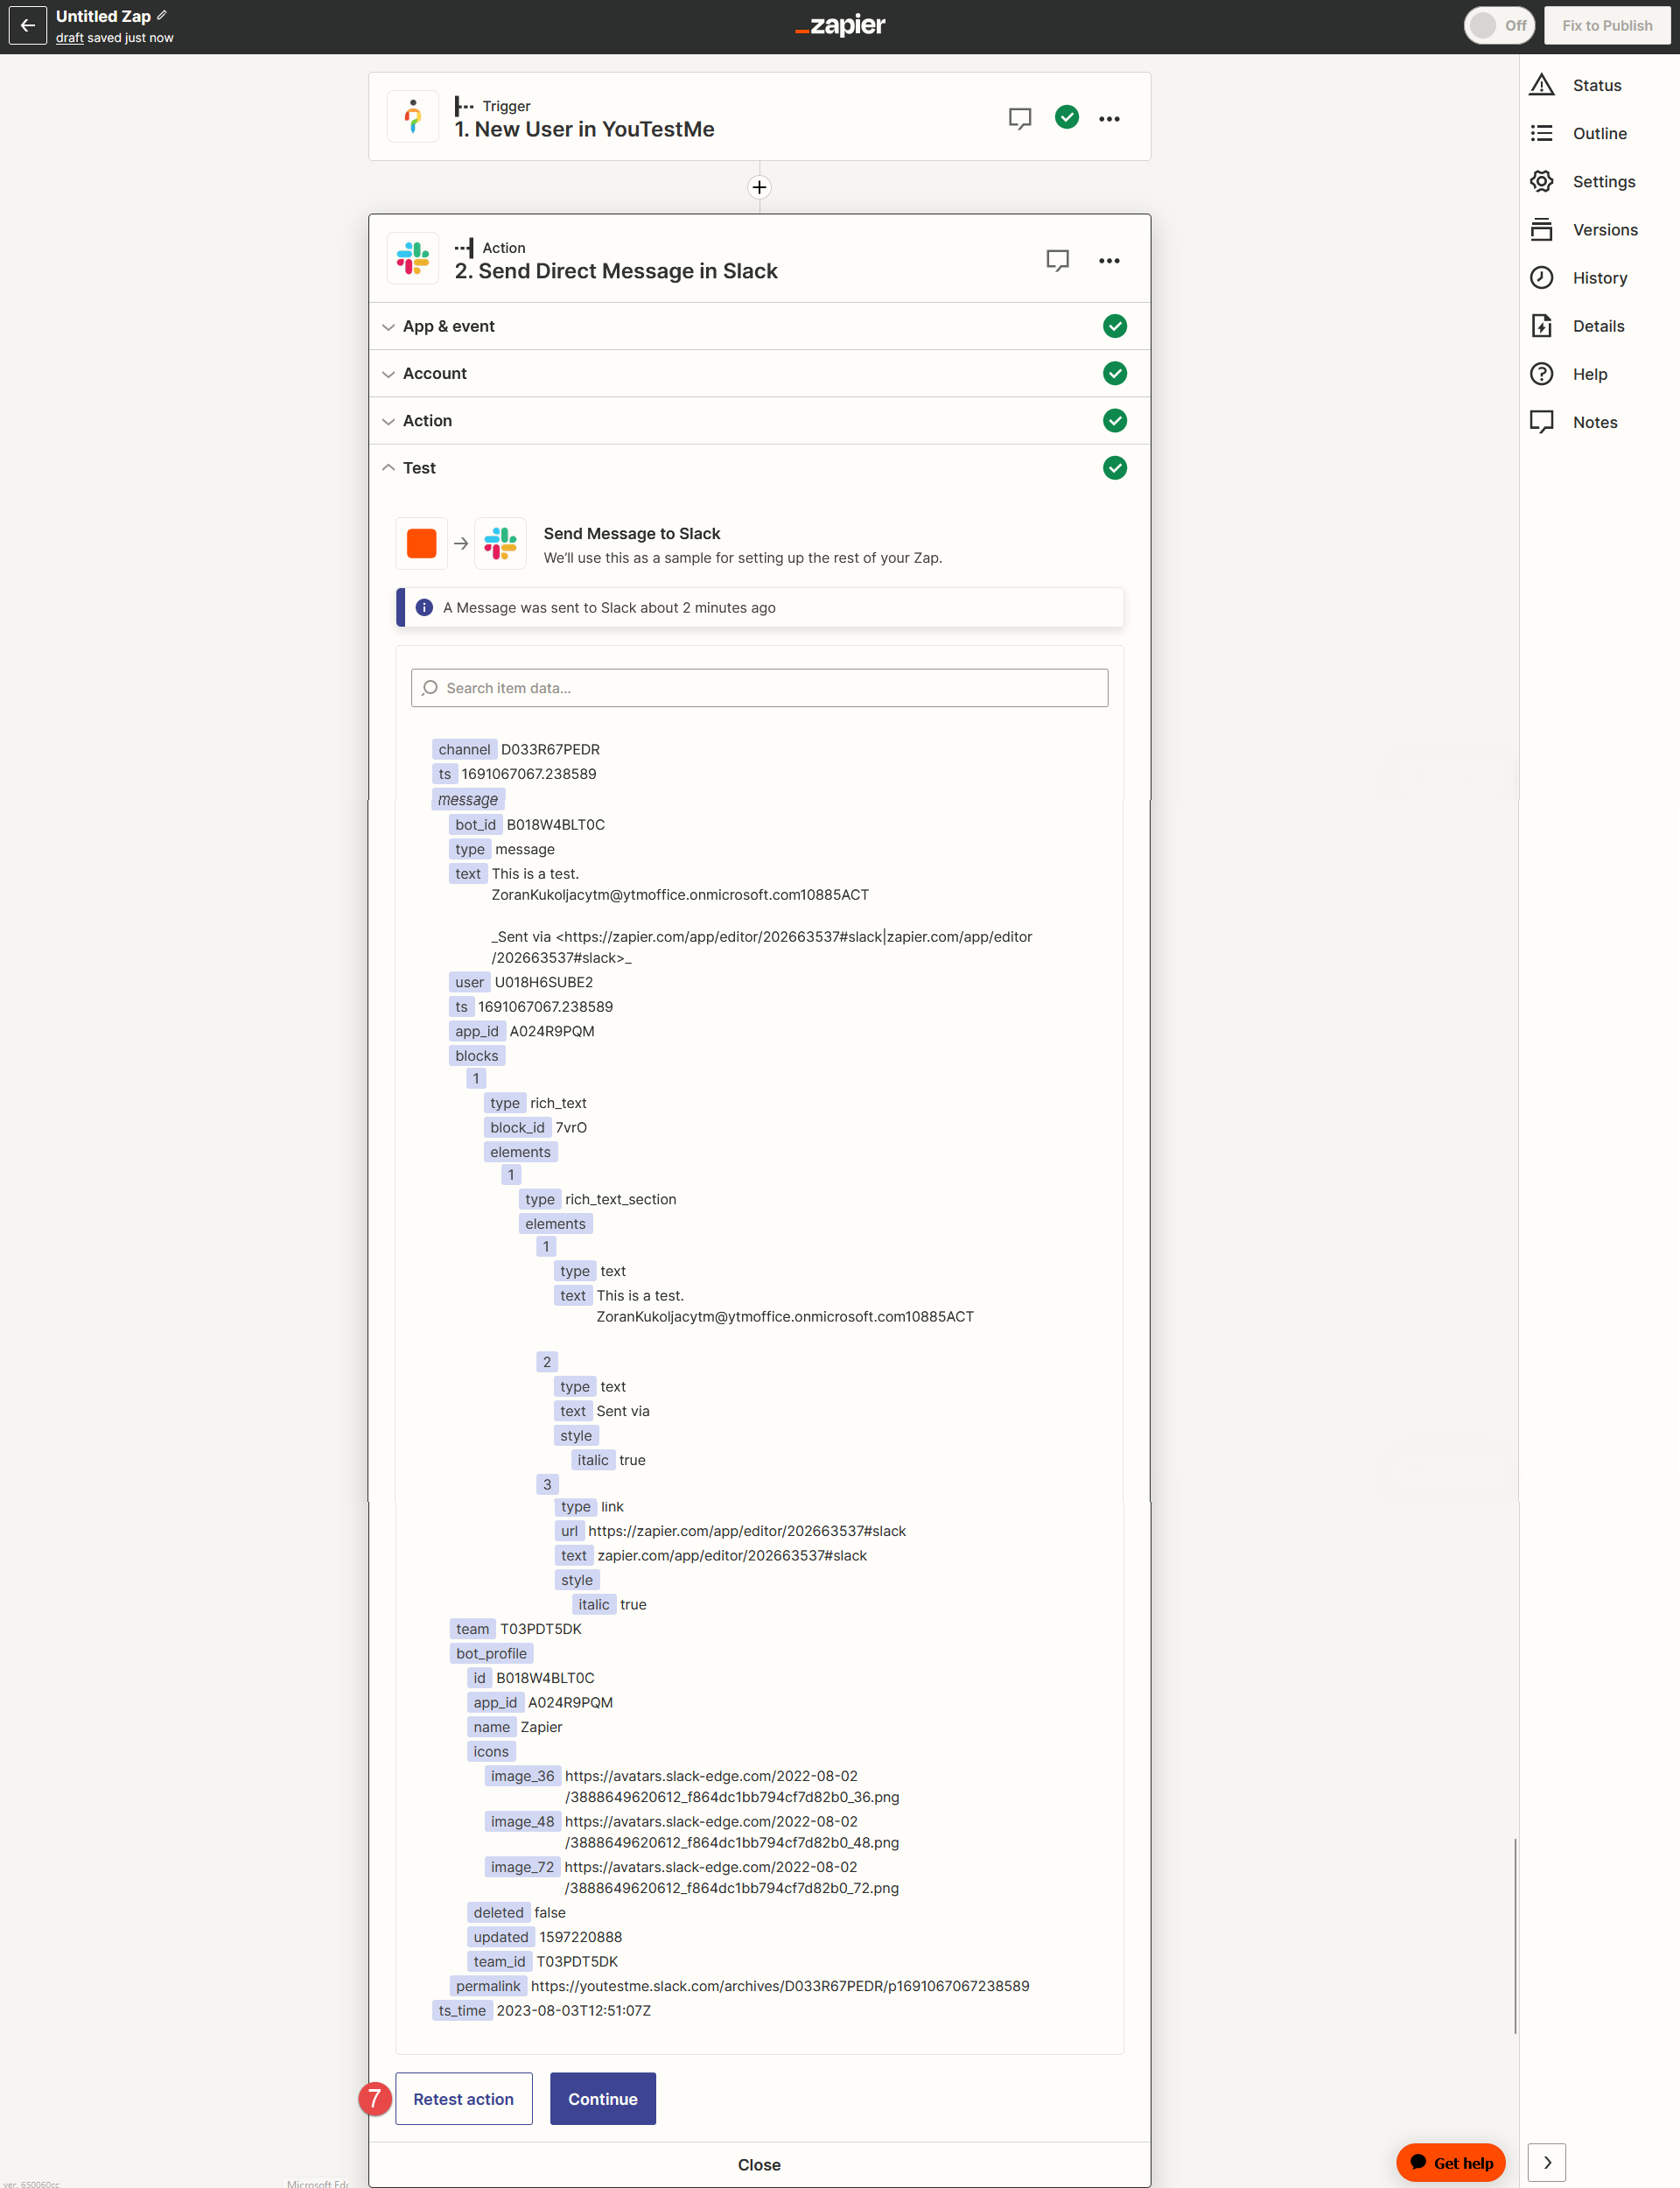
If you want to retest the action, click the Retest action button.
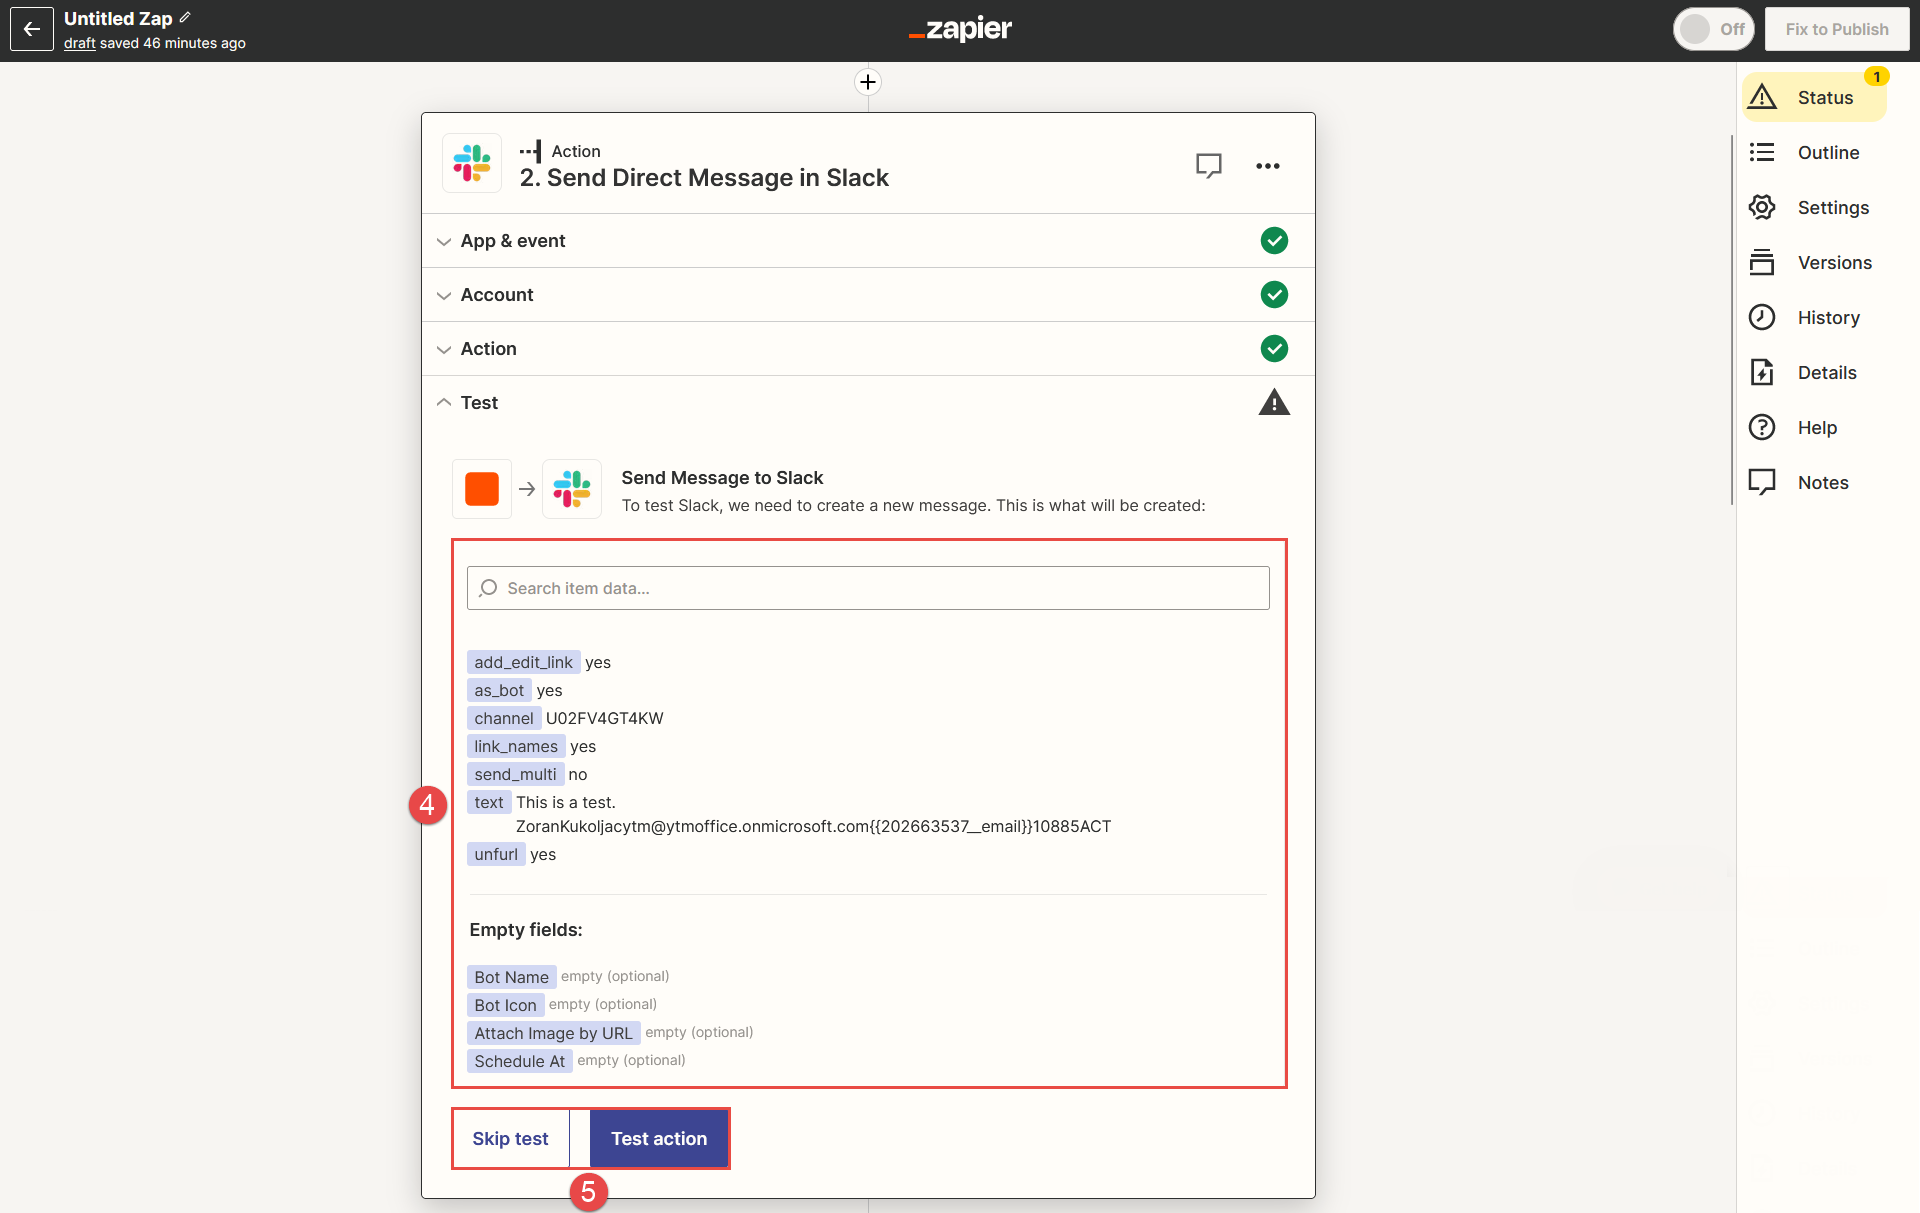
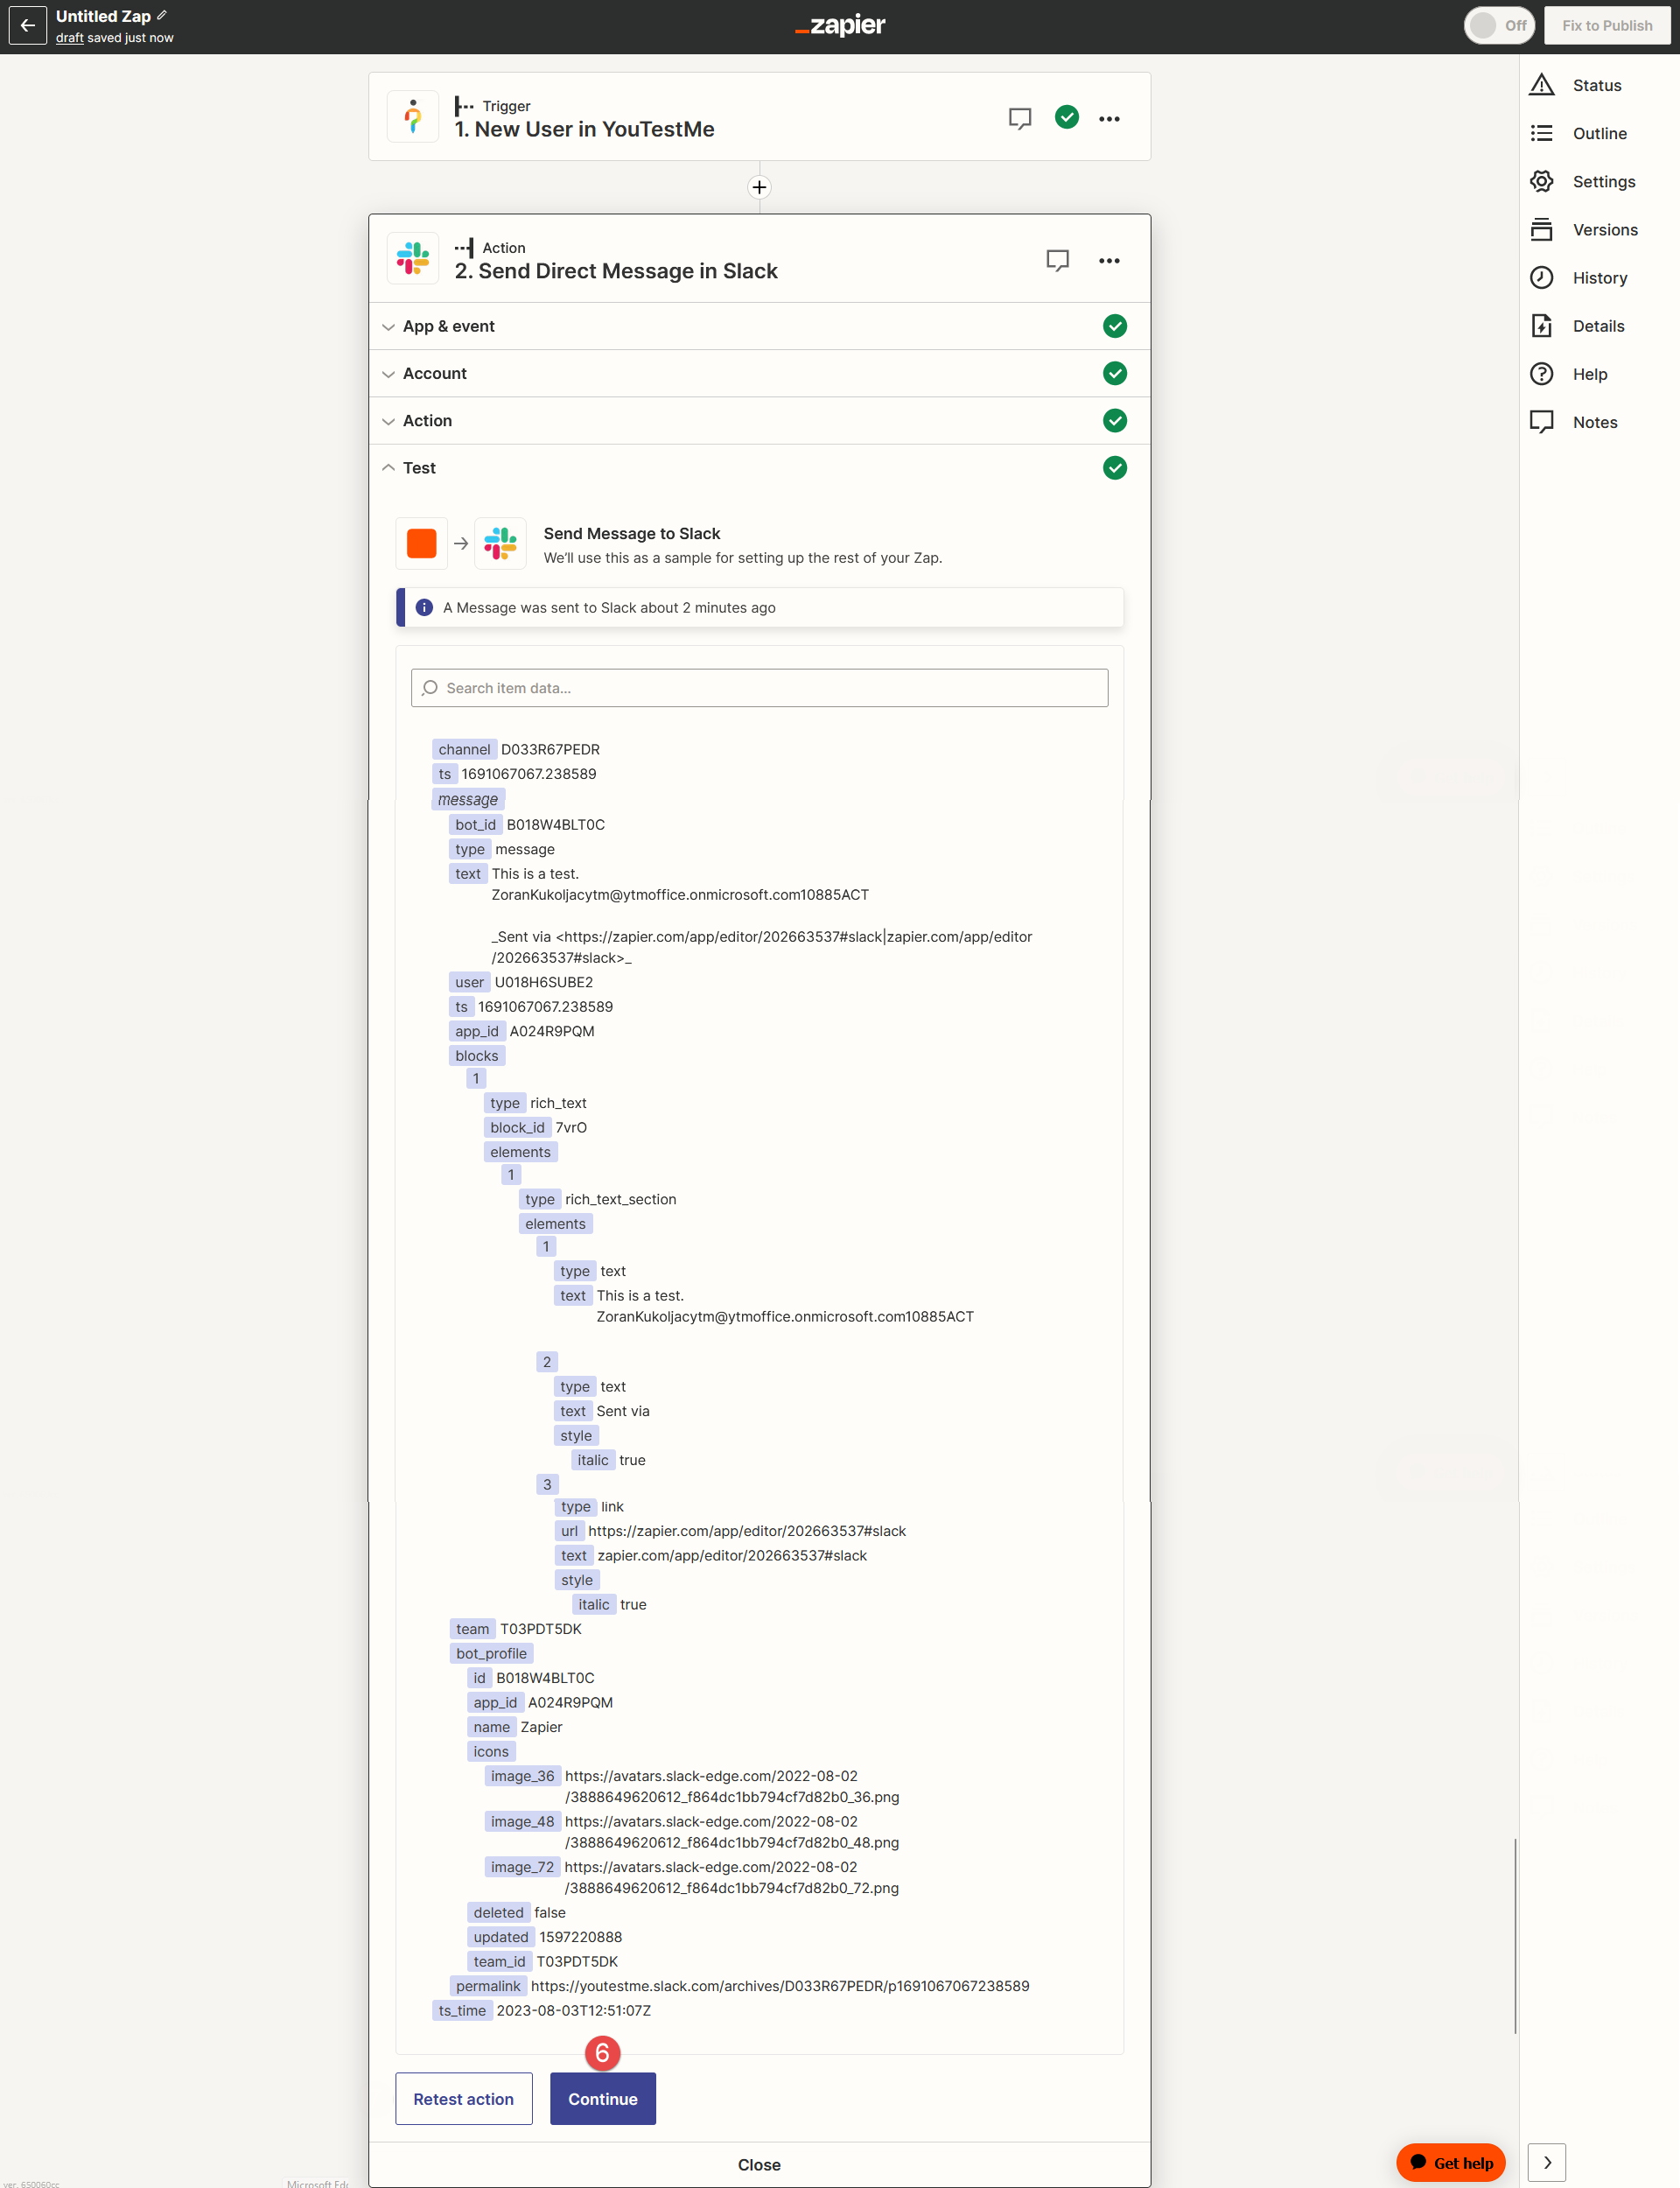
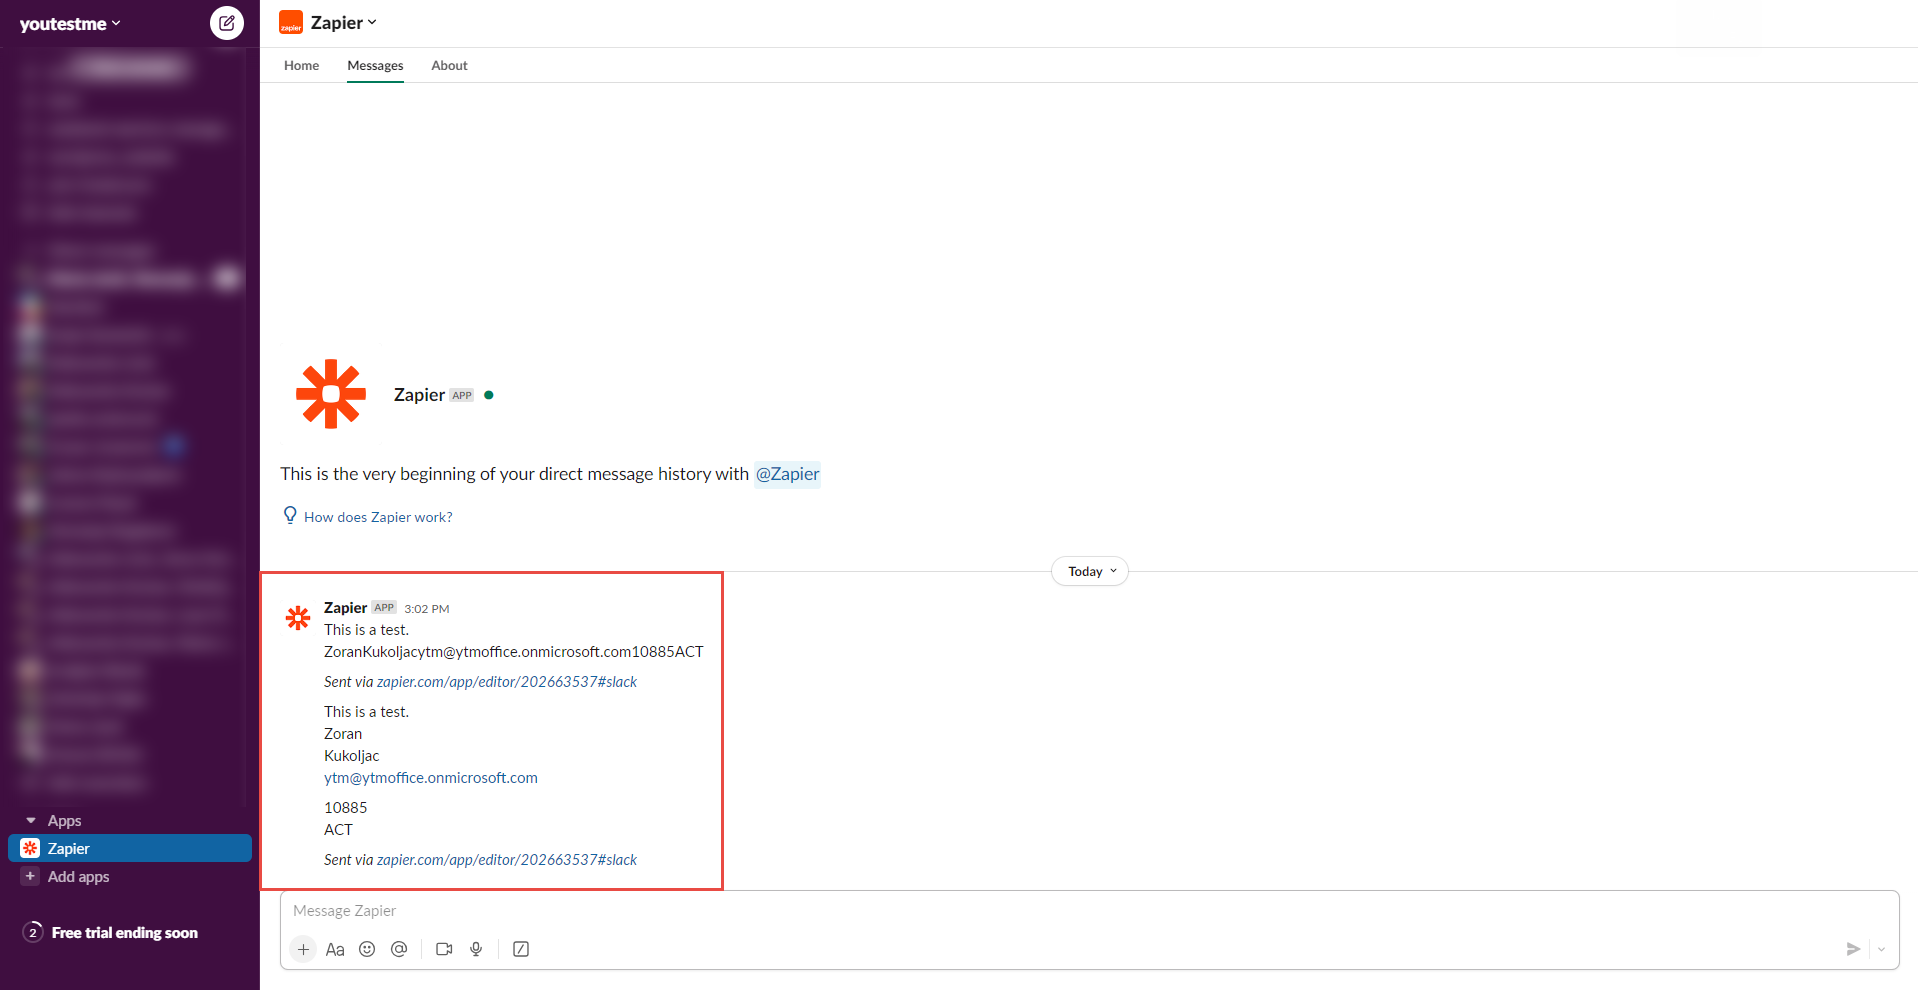
When you click the Continue button, you will receive a confirmation that the message has been sent to Slack.
-
-
-
Create a new user via spreadsheets
With Zapier, you can effortlessly create a new user using Google Sheets. The Zap you create will read the spreadsheet data and generate a new user in GetCertified.
-
Navigate and log in to the YouTestMe Zapier integration.
Note: If you don't have an account, you can follow the instructions on how to sign up in the chapter Sign up for Zapier integration.
-
Select the Zaps option on the left side menu.
-
Click the Create button.
-
Click the New Zap button.
-
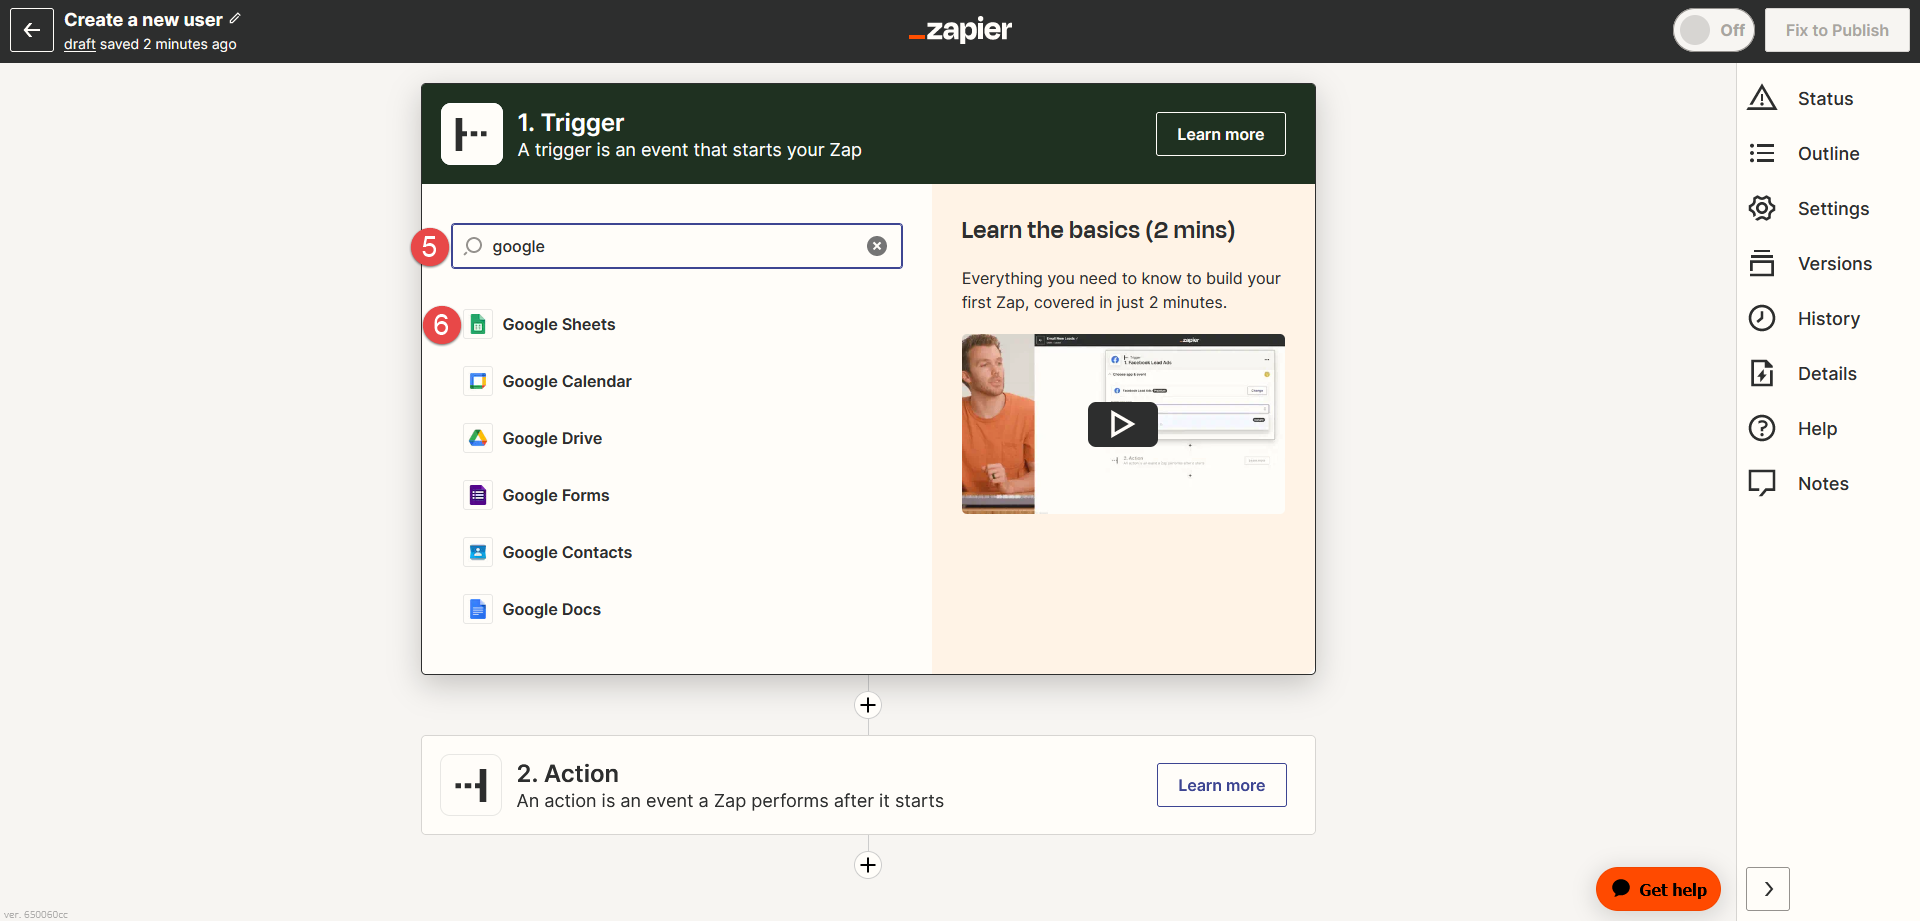
In the Search bar, locate the Google Sheets.
-
Select the Google Sheets.
-
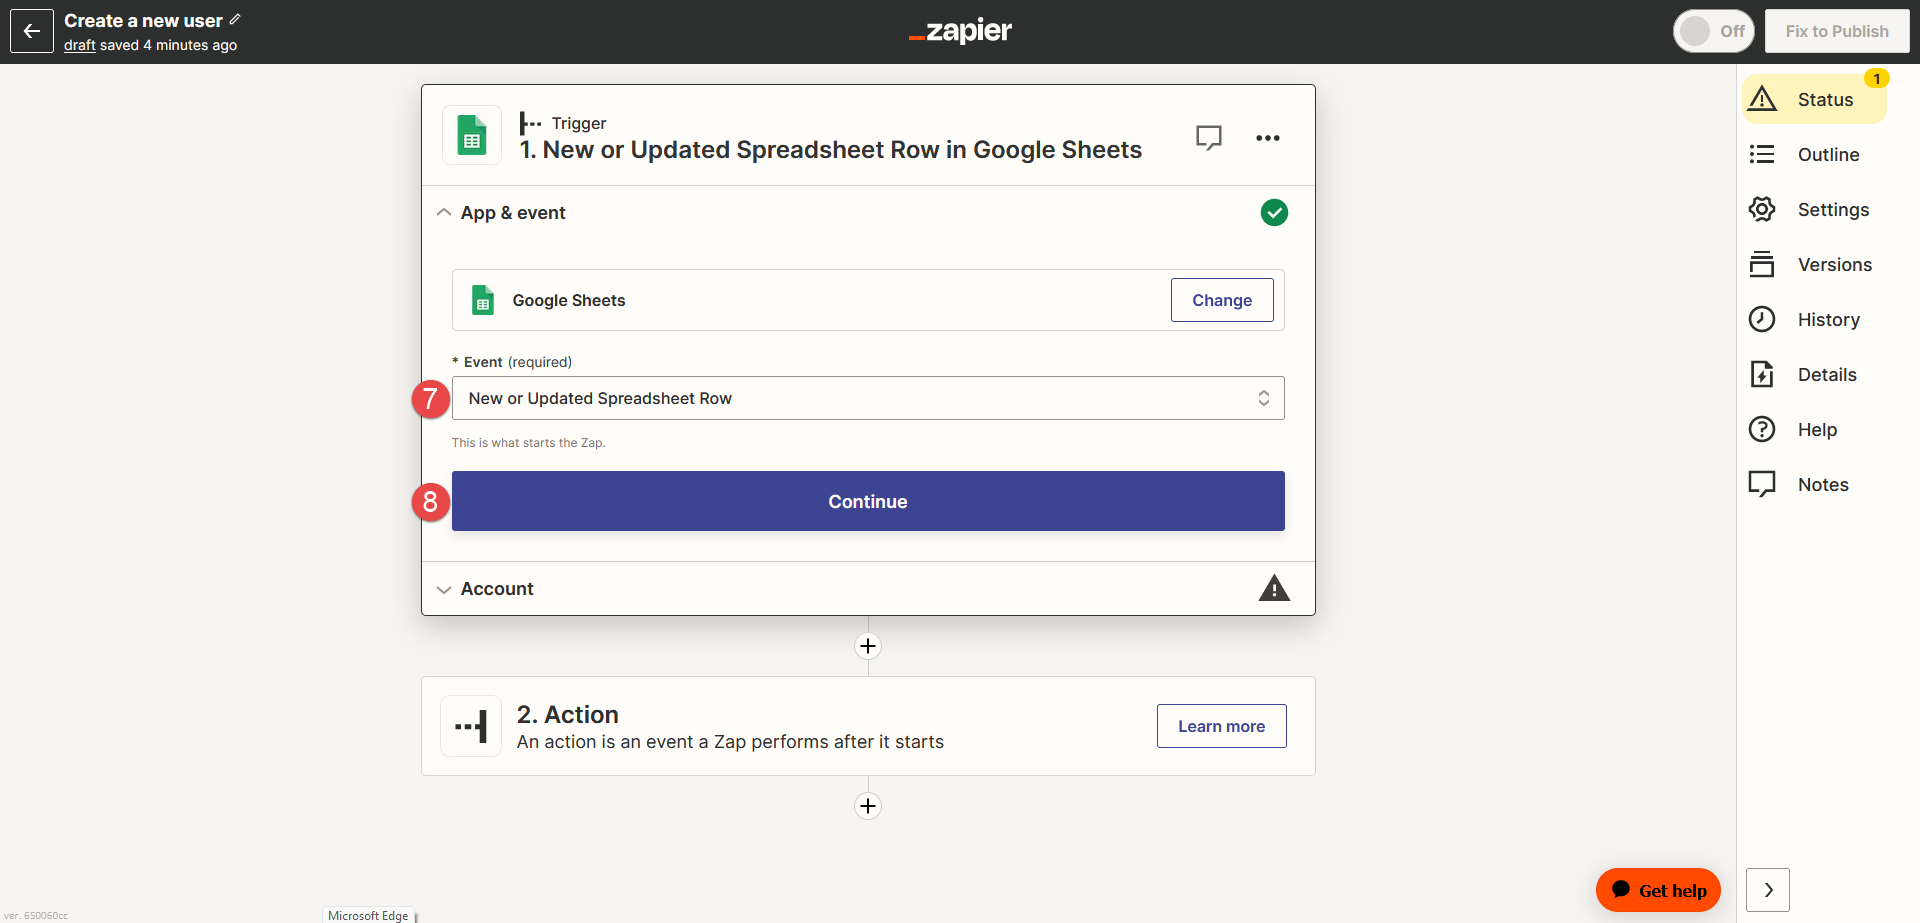
Choose New or Updated Spreadsheet Row from the dropdown for the trigger Event type.
Note: The new user will be created when you add a new row to the bottom of a spreadsheet.
-
Click the Continue button.
-
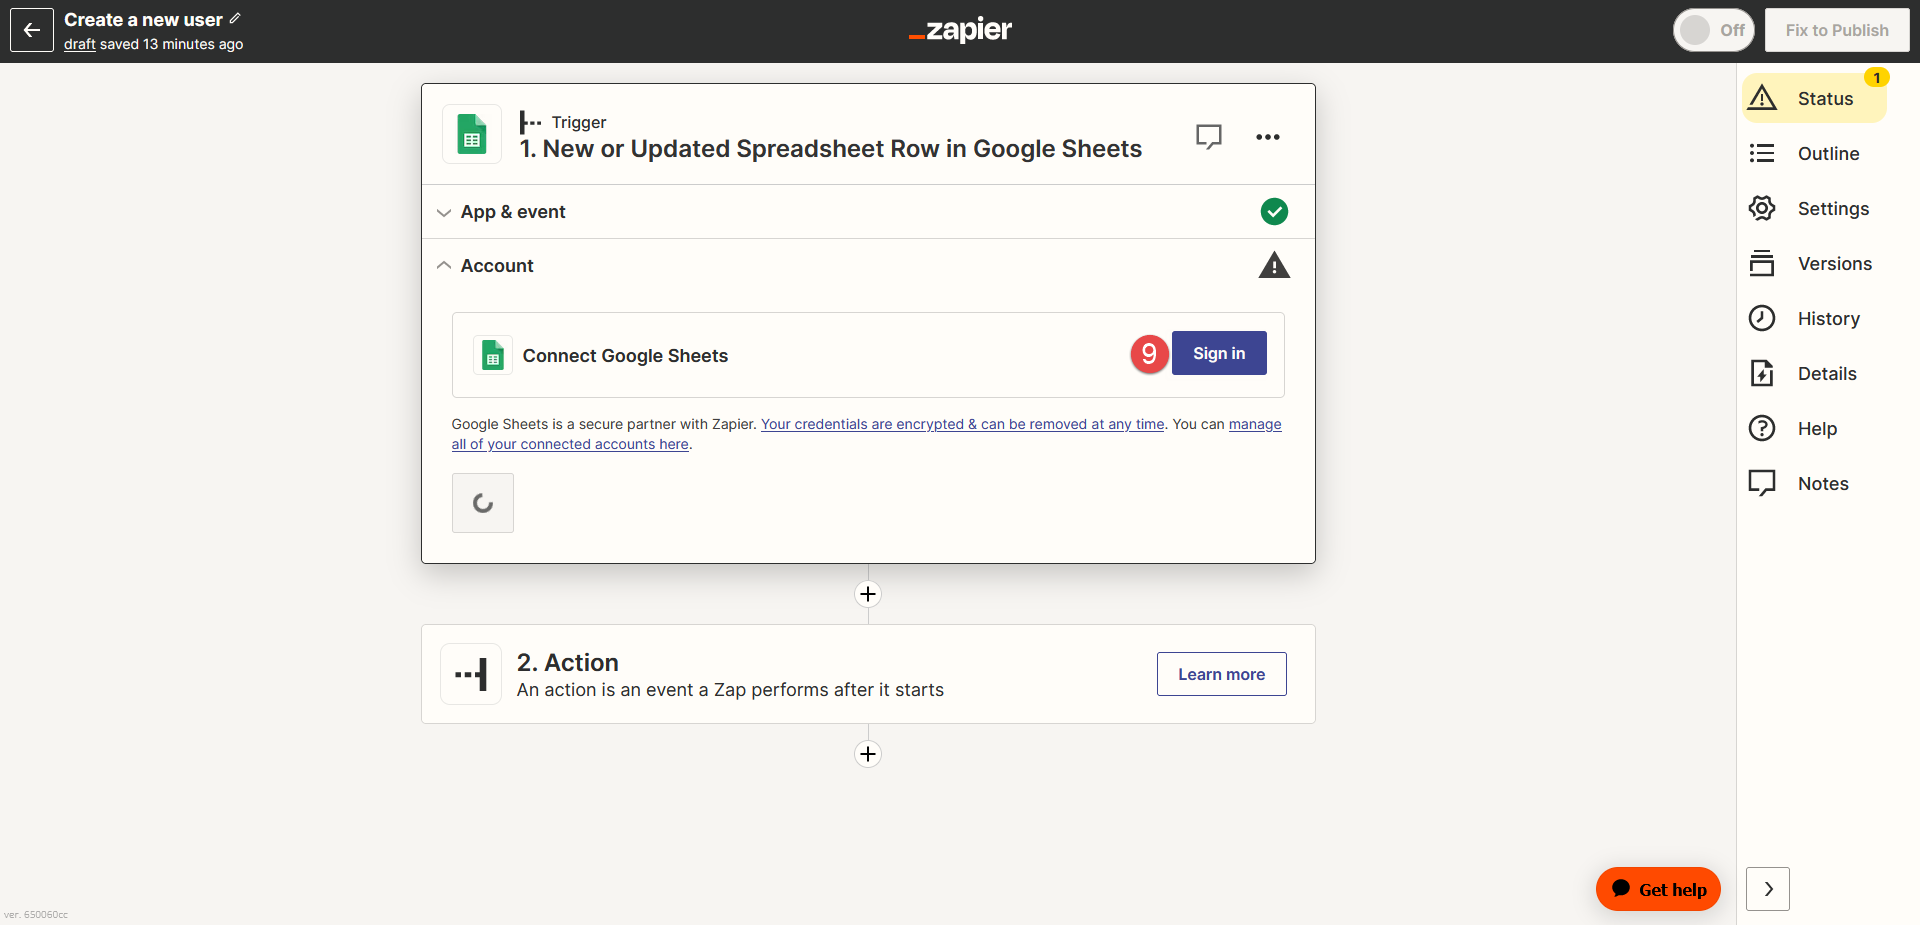
To connect with the Google Sheets you use for spreadsheet creation, click the Log in button.
-
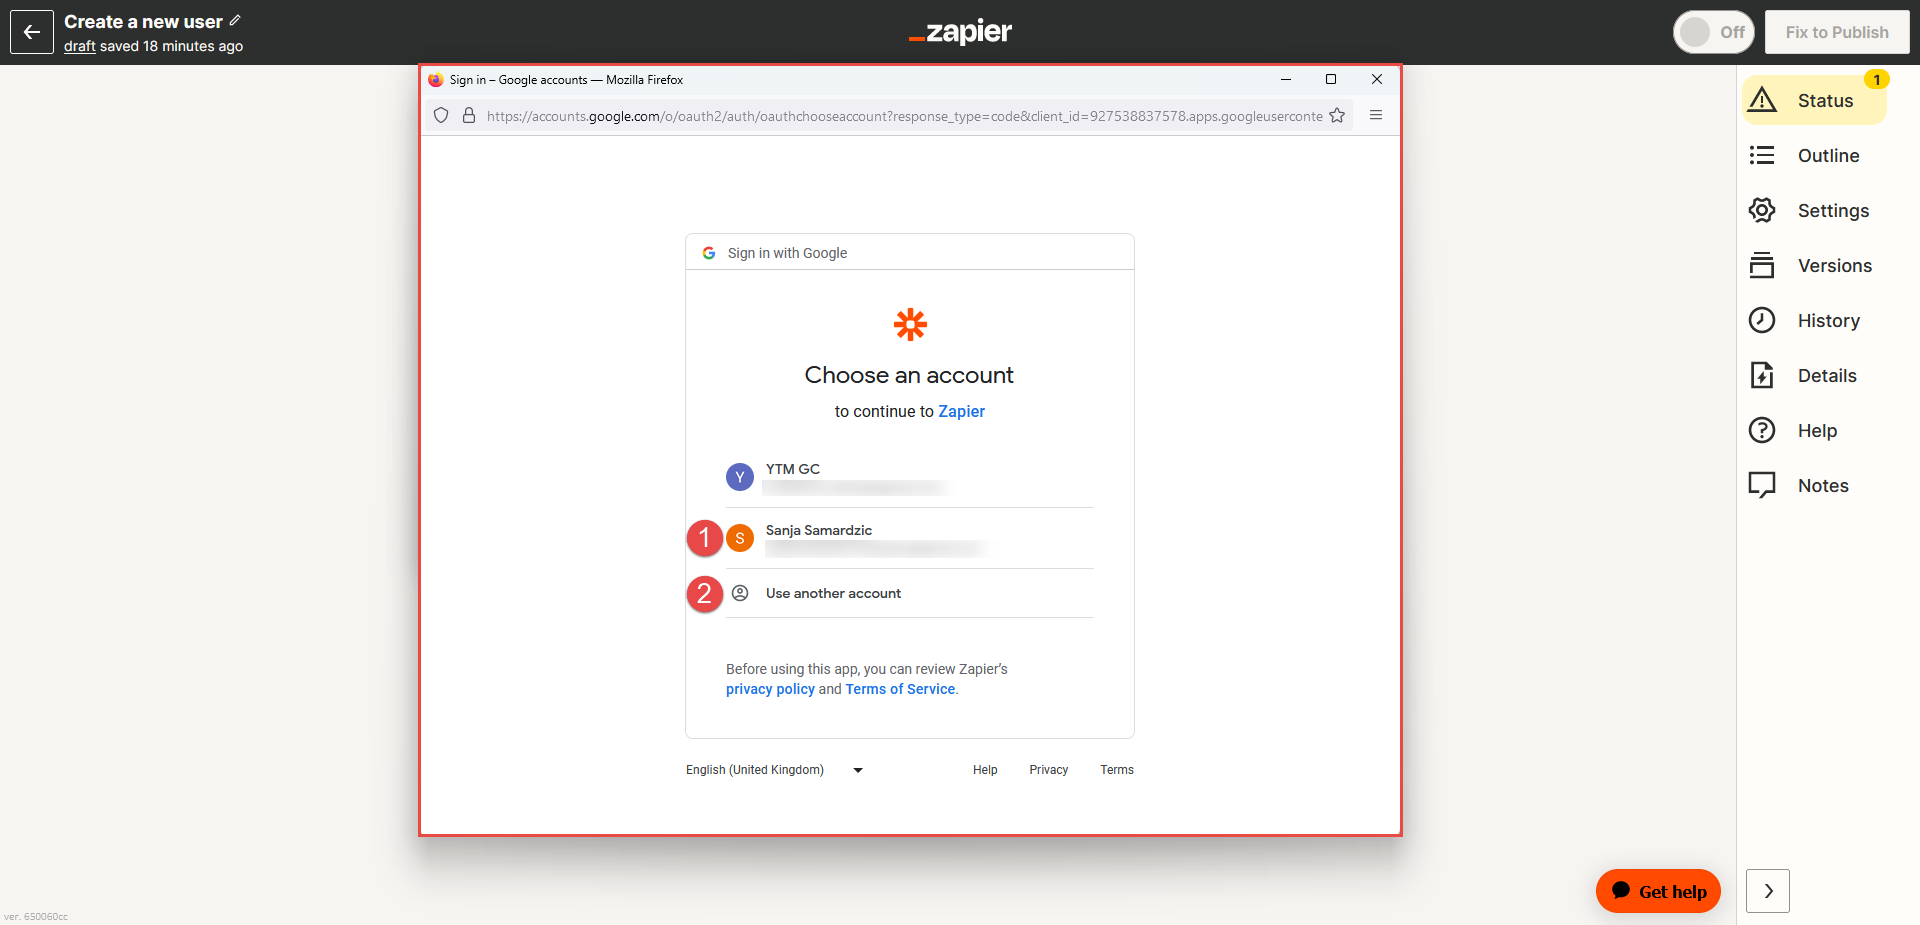
Select an account to continue with Zapier integration.
-
Alternatively, you can use the Use another account option.
-
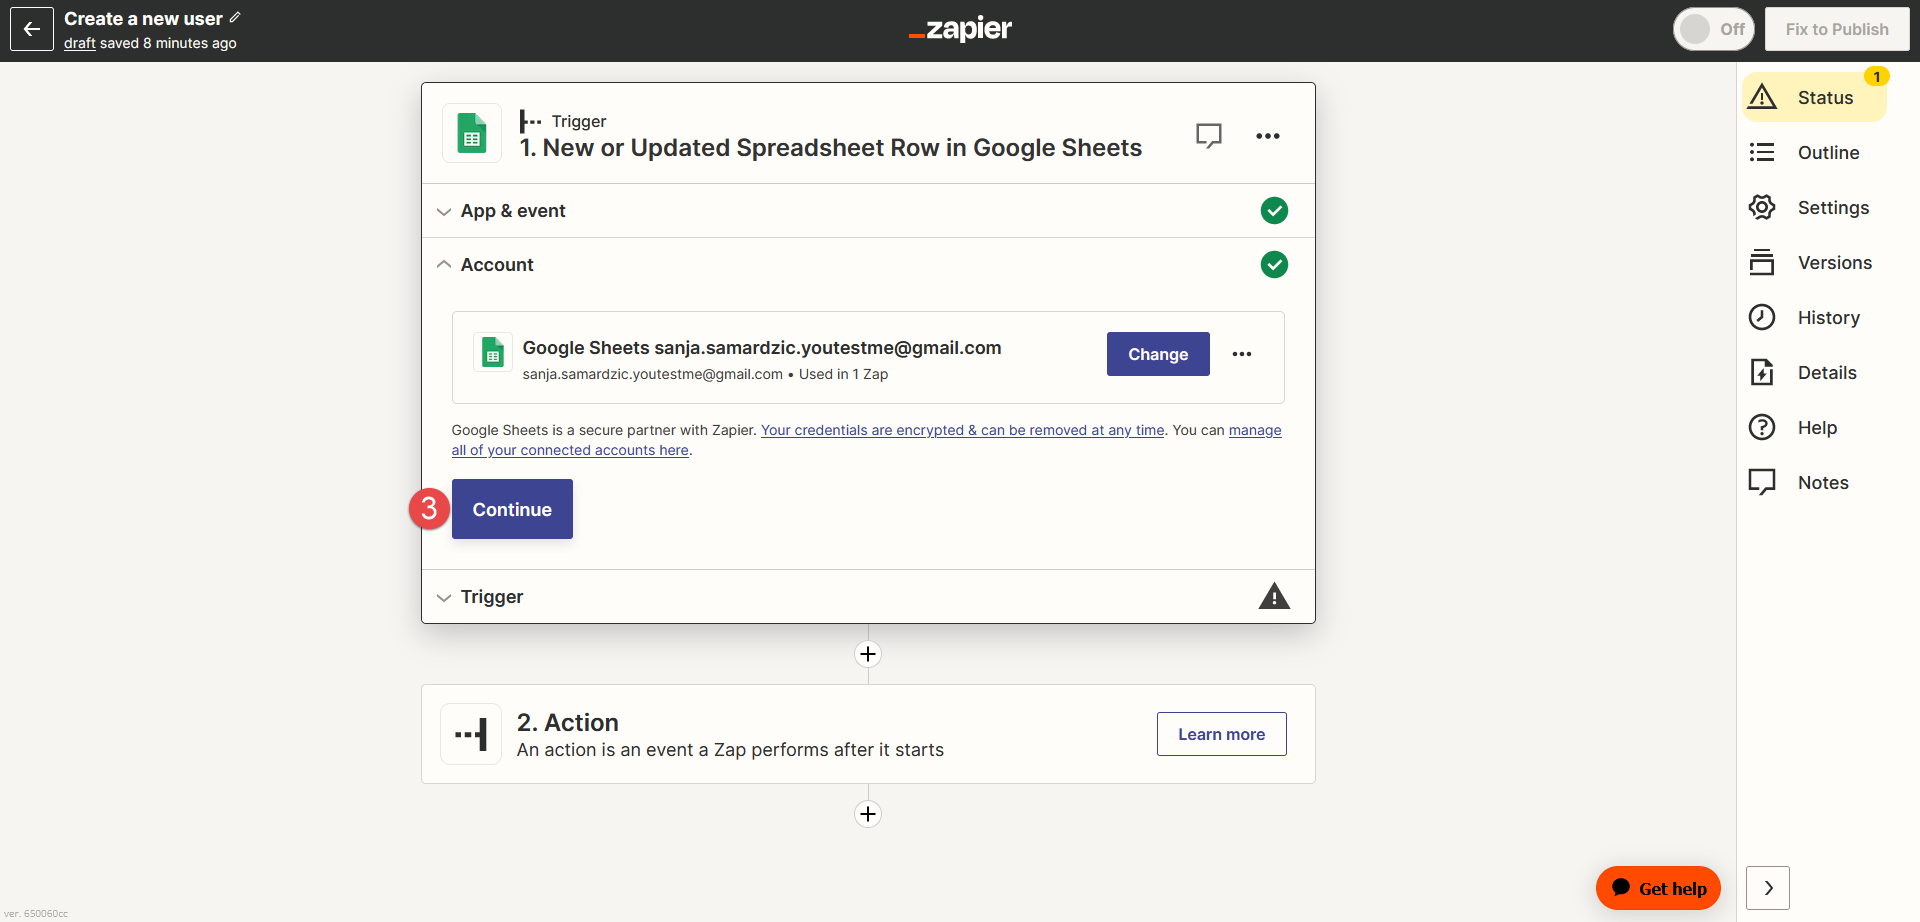
After connecting to Google Sheets, click the Continue button.
To begin, follow these steps to create New Zap:
A pop-up window will appear, and follow these steps:
-
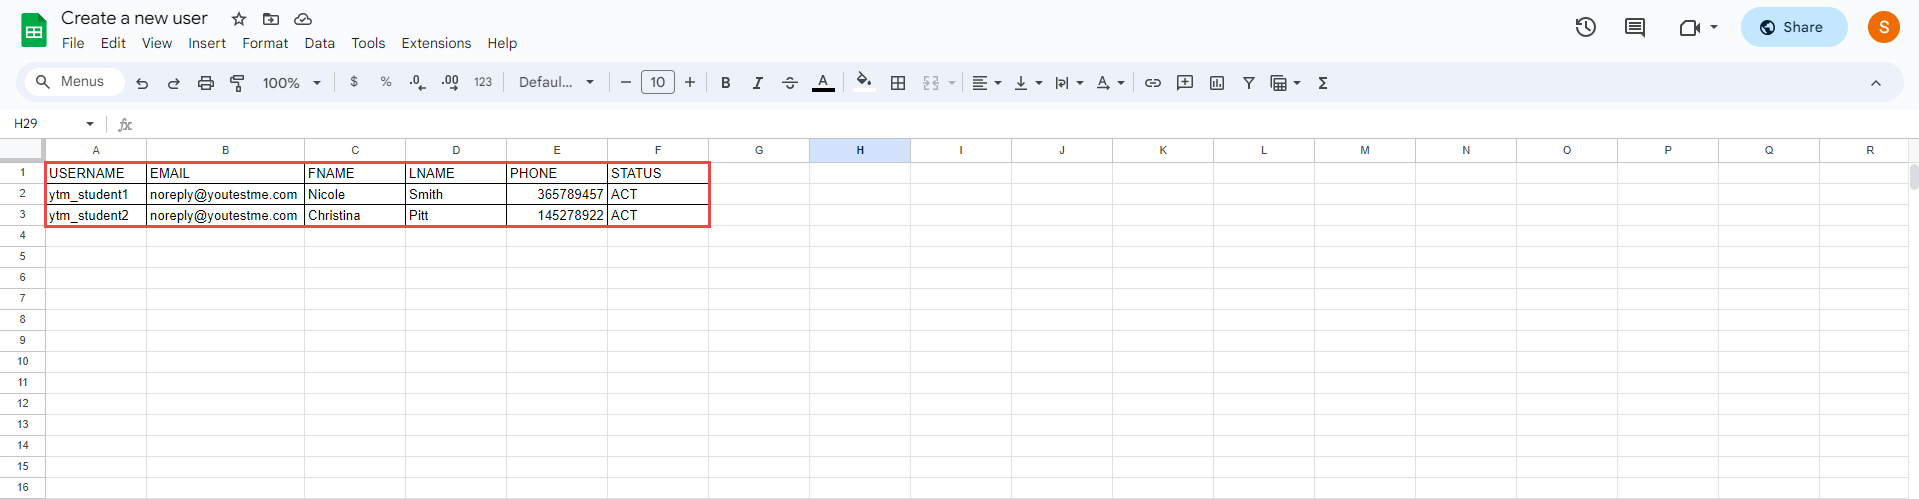
Fill in the Spreadsheet with the user data
-
USERNAME - Enter the username of the candidate.
-
EMAIL - Enter the email of the candidate.
-
FNAME - Enter the first name of the candidate.
-
LNAME - Enter the last name of the candidate.
-
PHONE - Enter the phone of the candidate.
-
STATUS - Enter ACT for Active or INV Inactive.
To create a new spreadsheet, use the columns as shown in the picture and fill it in with the following user data:
-
-
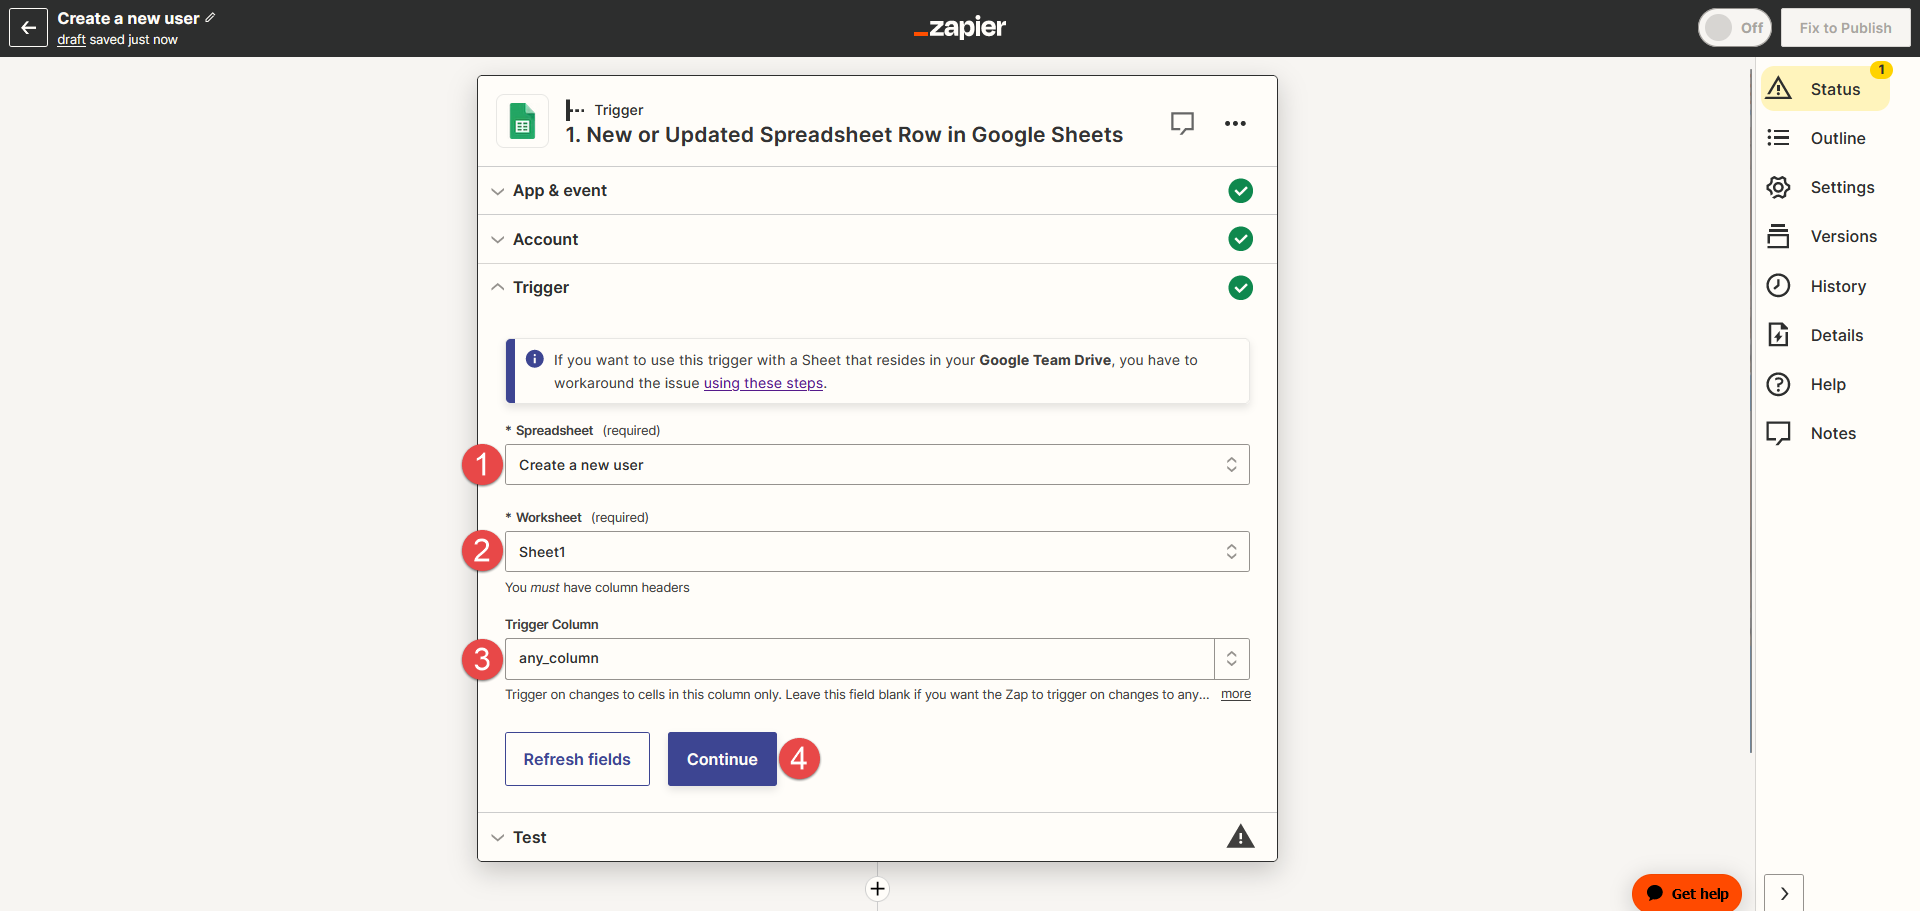
Set up a trigger
-
Select the Spreadsheet you will use to enter the data about users.
-
Select the Worksheet for the chosen sheet where you will enter the data about users.
-
Choose the trigger column. For example, USERNAME or select the Any column option. Depending on the option you select, the trigger will start only on the changes in one of the columns or All the Spreadsheet columns.
-
Click the Continue button.
-
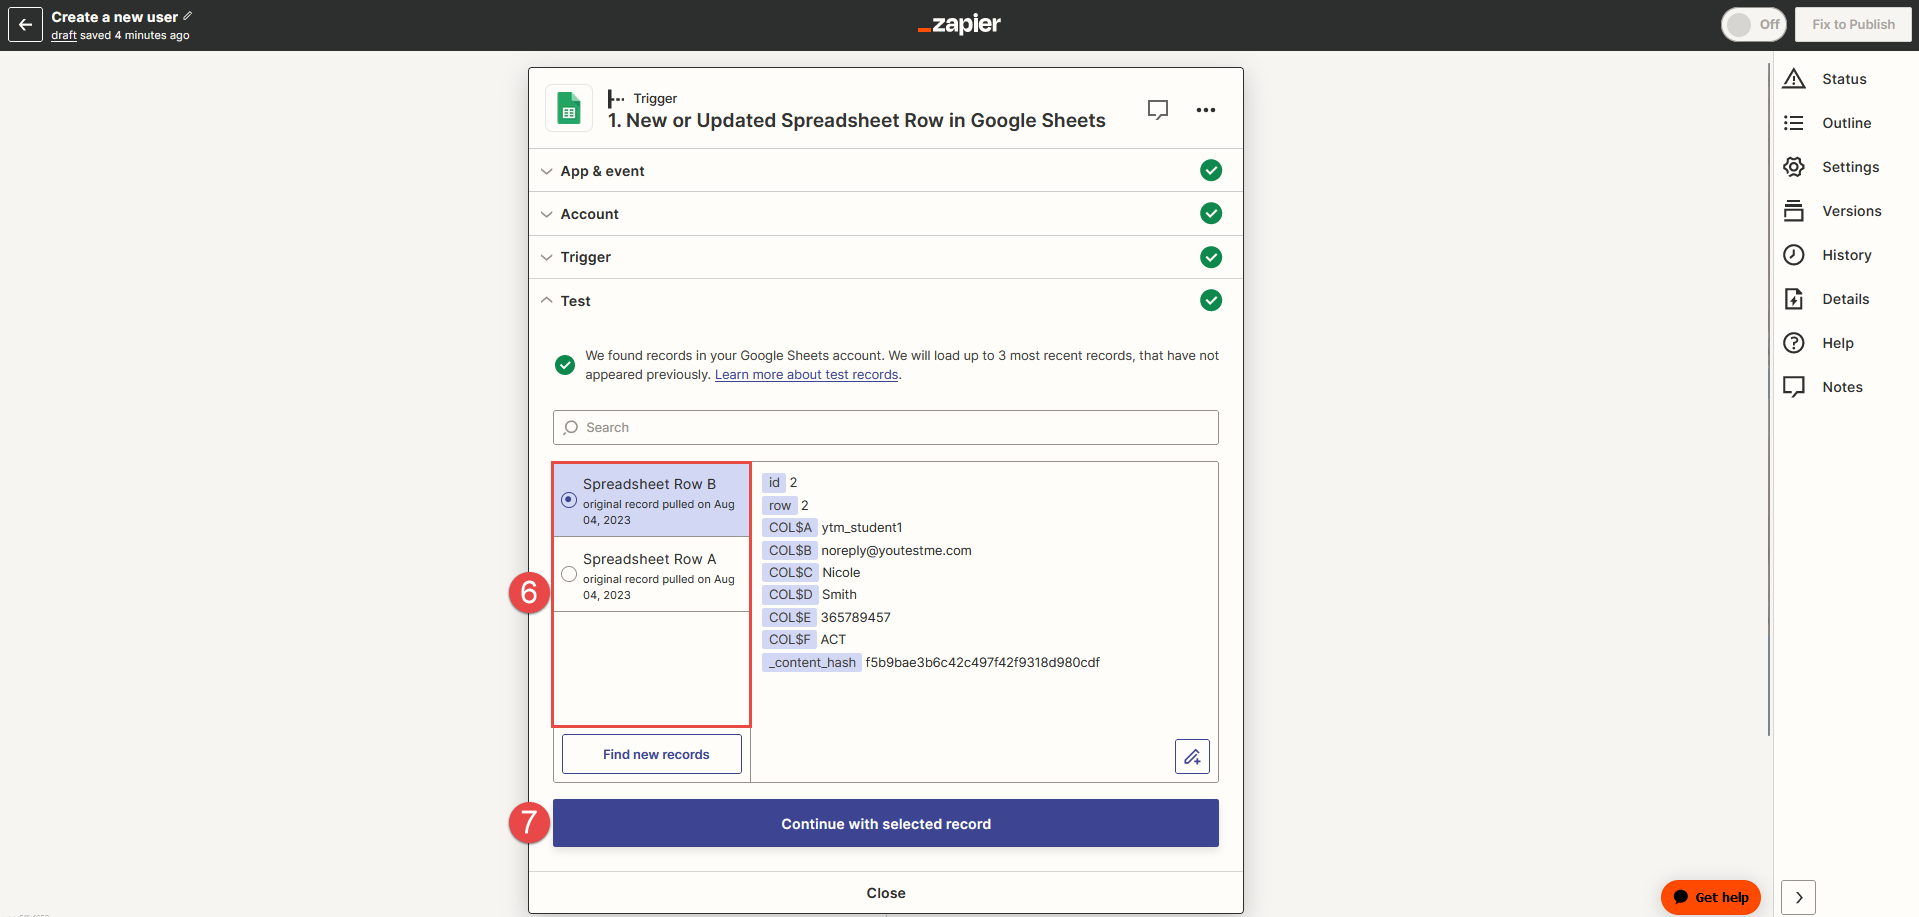
Click the Test trigger button.
Note: Before proceeding, it is necessary to test the trigger. This will ensure that Zapier can find a recent spreadsheet row containing user data.
-
Select the Spreadsheet row to continue with the record.
-
Click the Continue with selected record button.
The next step is to set up a trigger. To do that, follow these steps:

If the trigger test is successful, the user data will be read from a spreadsheet row and displayed.
-
-
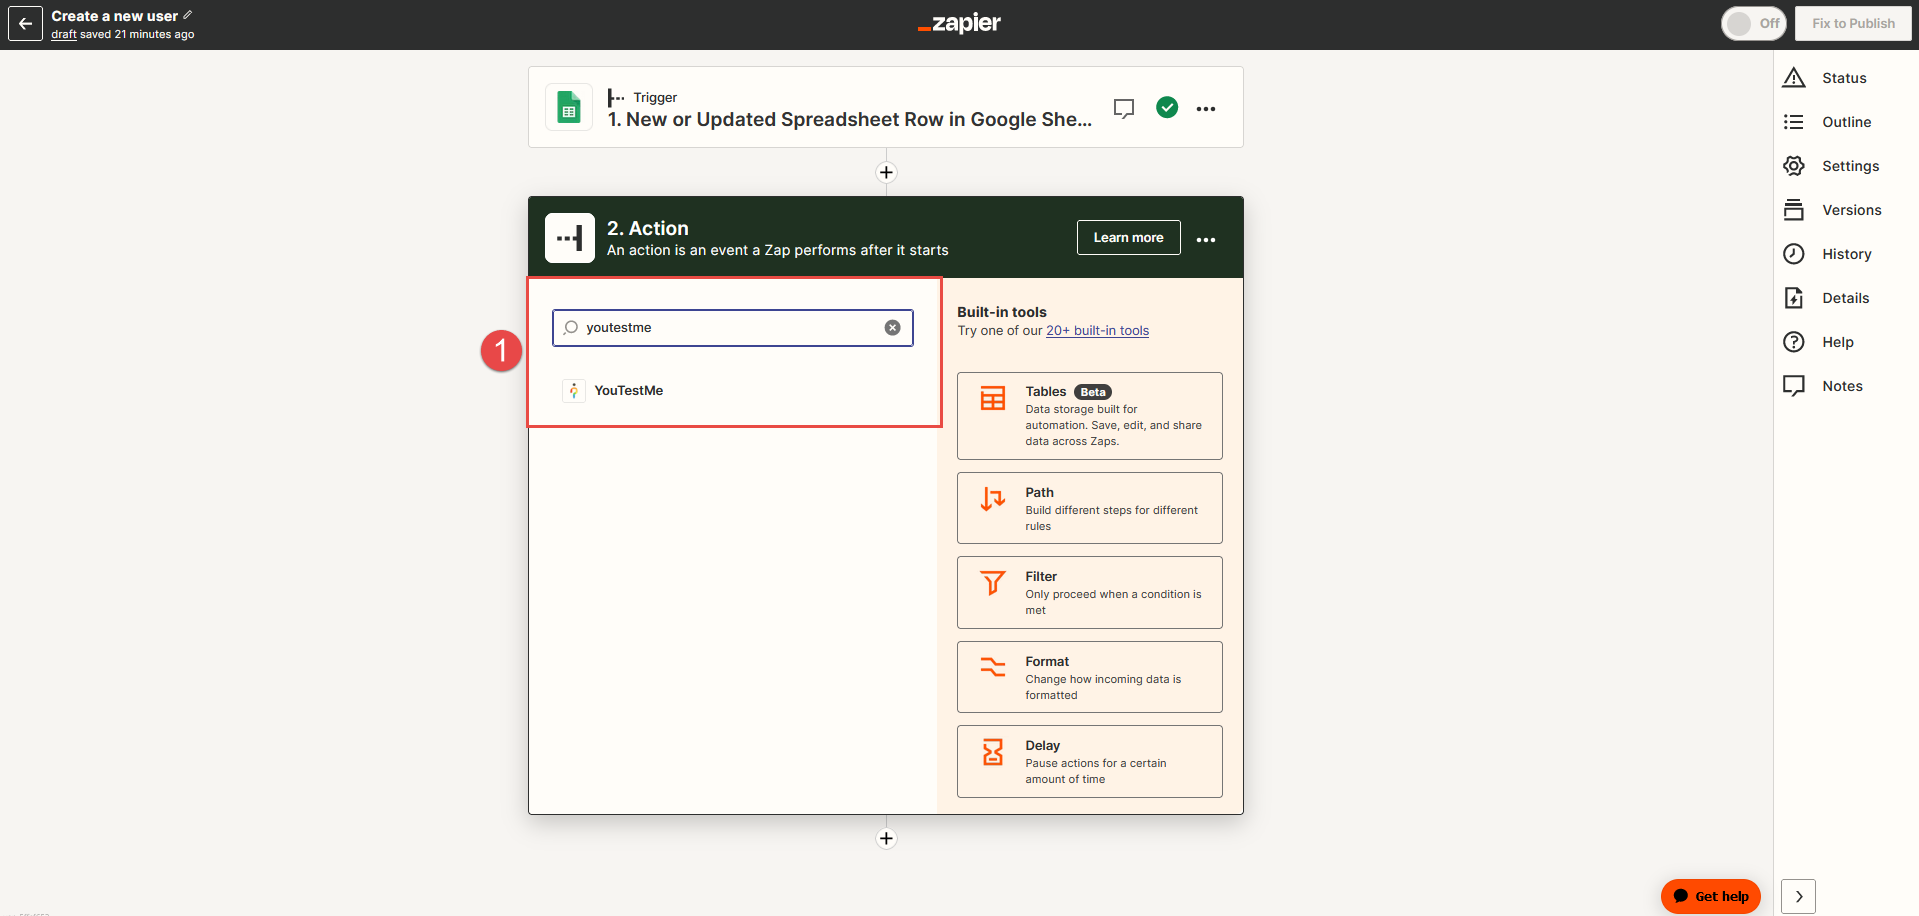
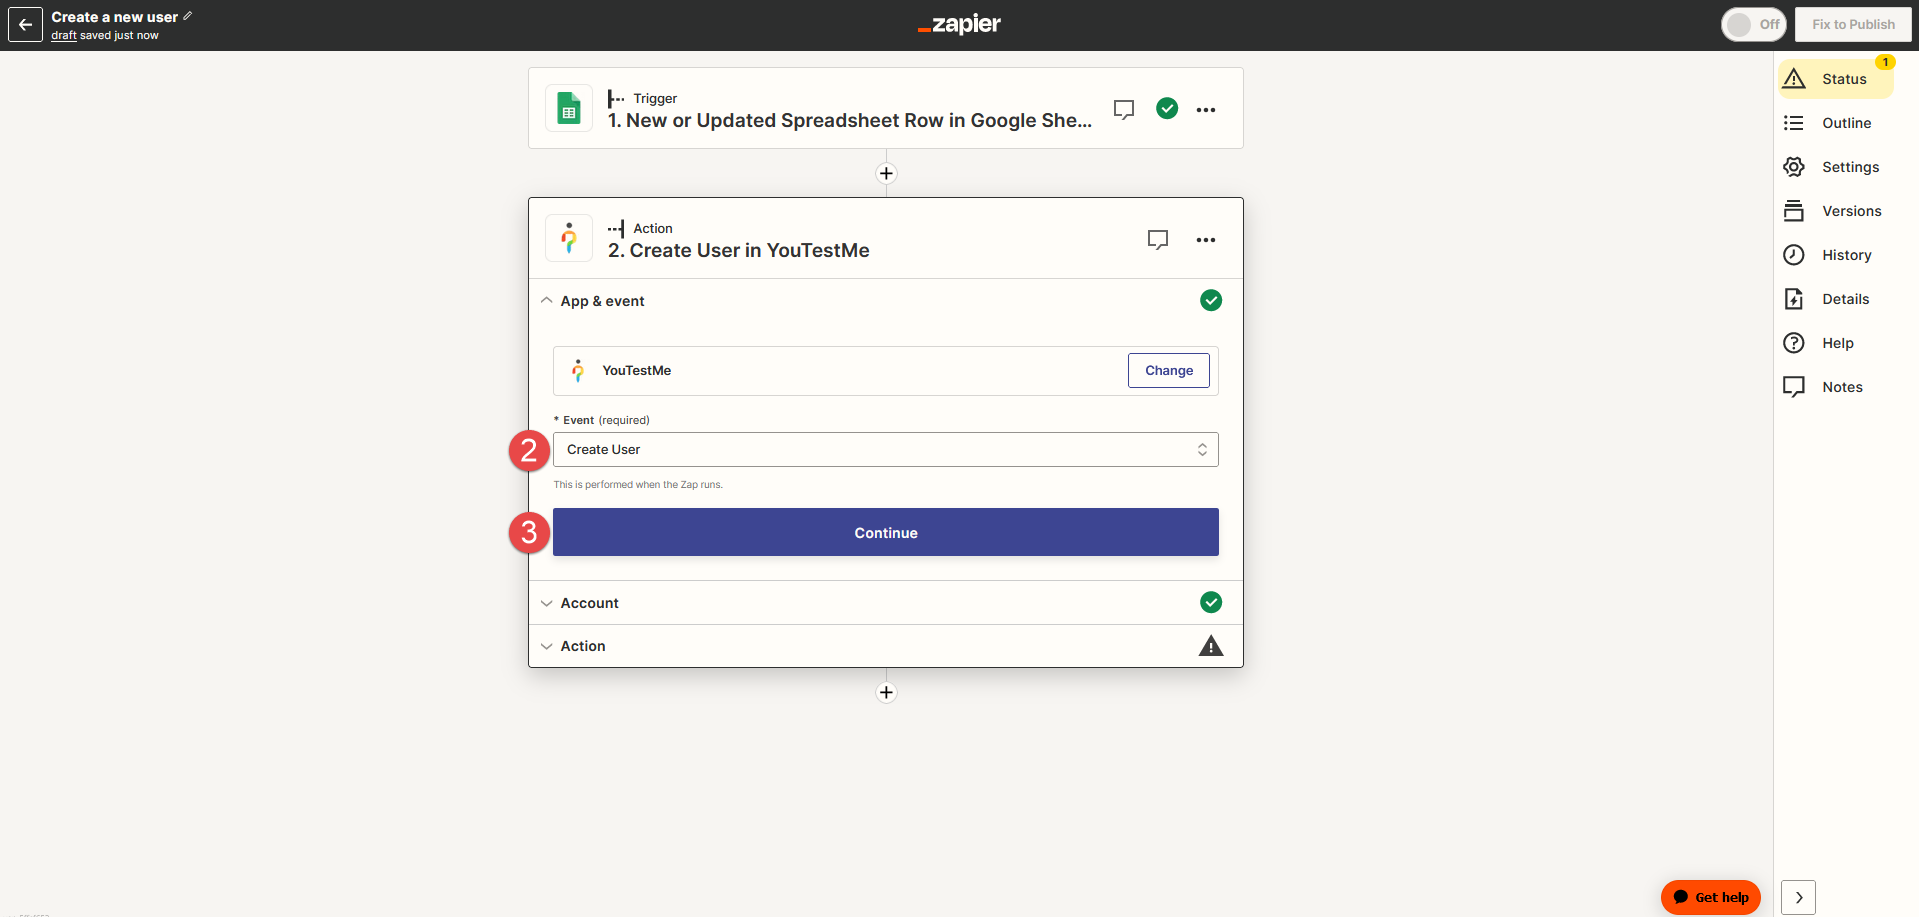
Set up an Action
The next step is to set up an Action. An action is an event a Zap performs when triggered.
-
Choose the YouTestMe app to use for the event.
-
Choose the Create user from the dropdown for the trigger Event type.
-
Click the Continue button.
-
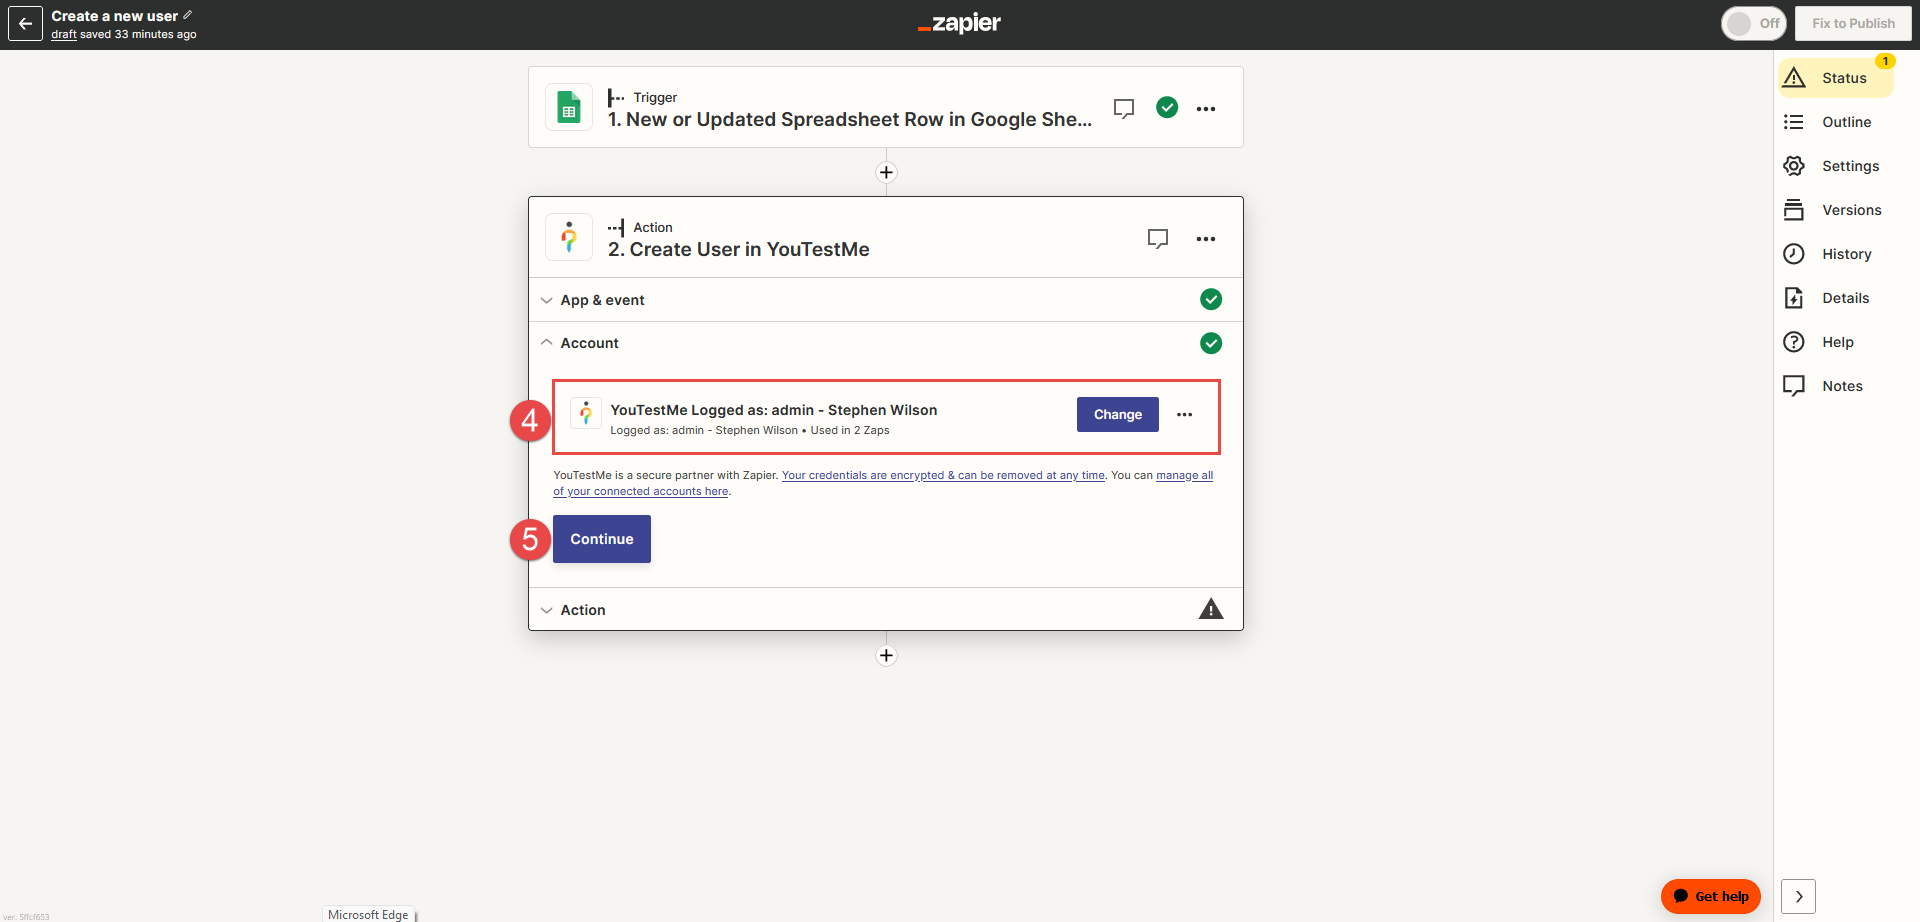
Choose the YouTestMe account to log in and connect with the application. For more instructions on how to log in to YouTestMe, read further in the section Connect to YouTestMe.
-
Click the Continue button.
-
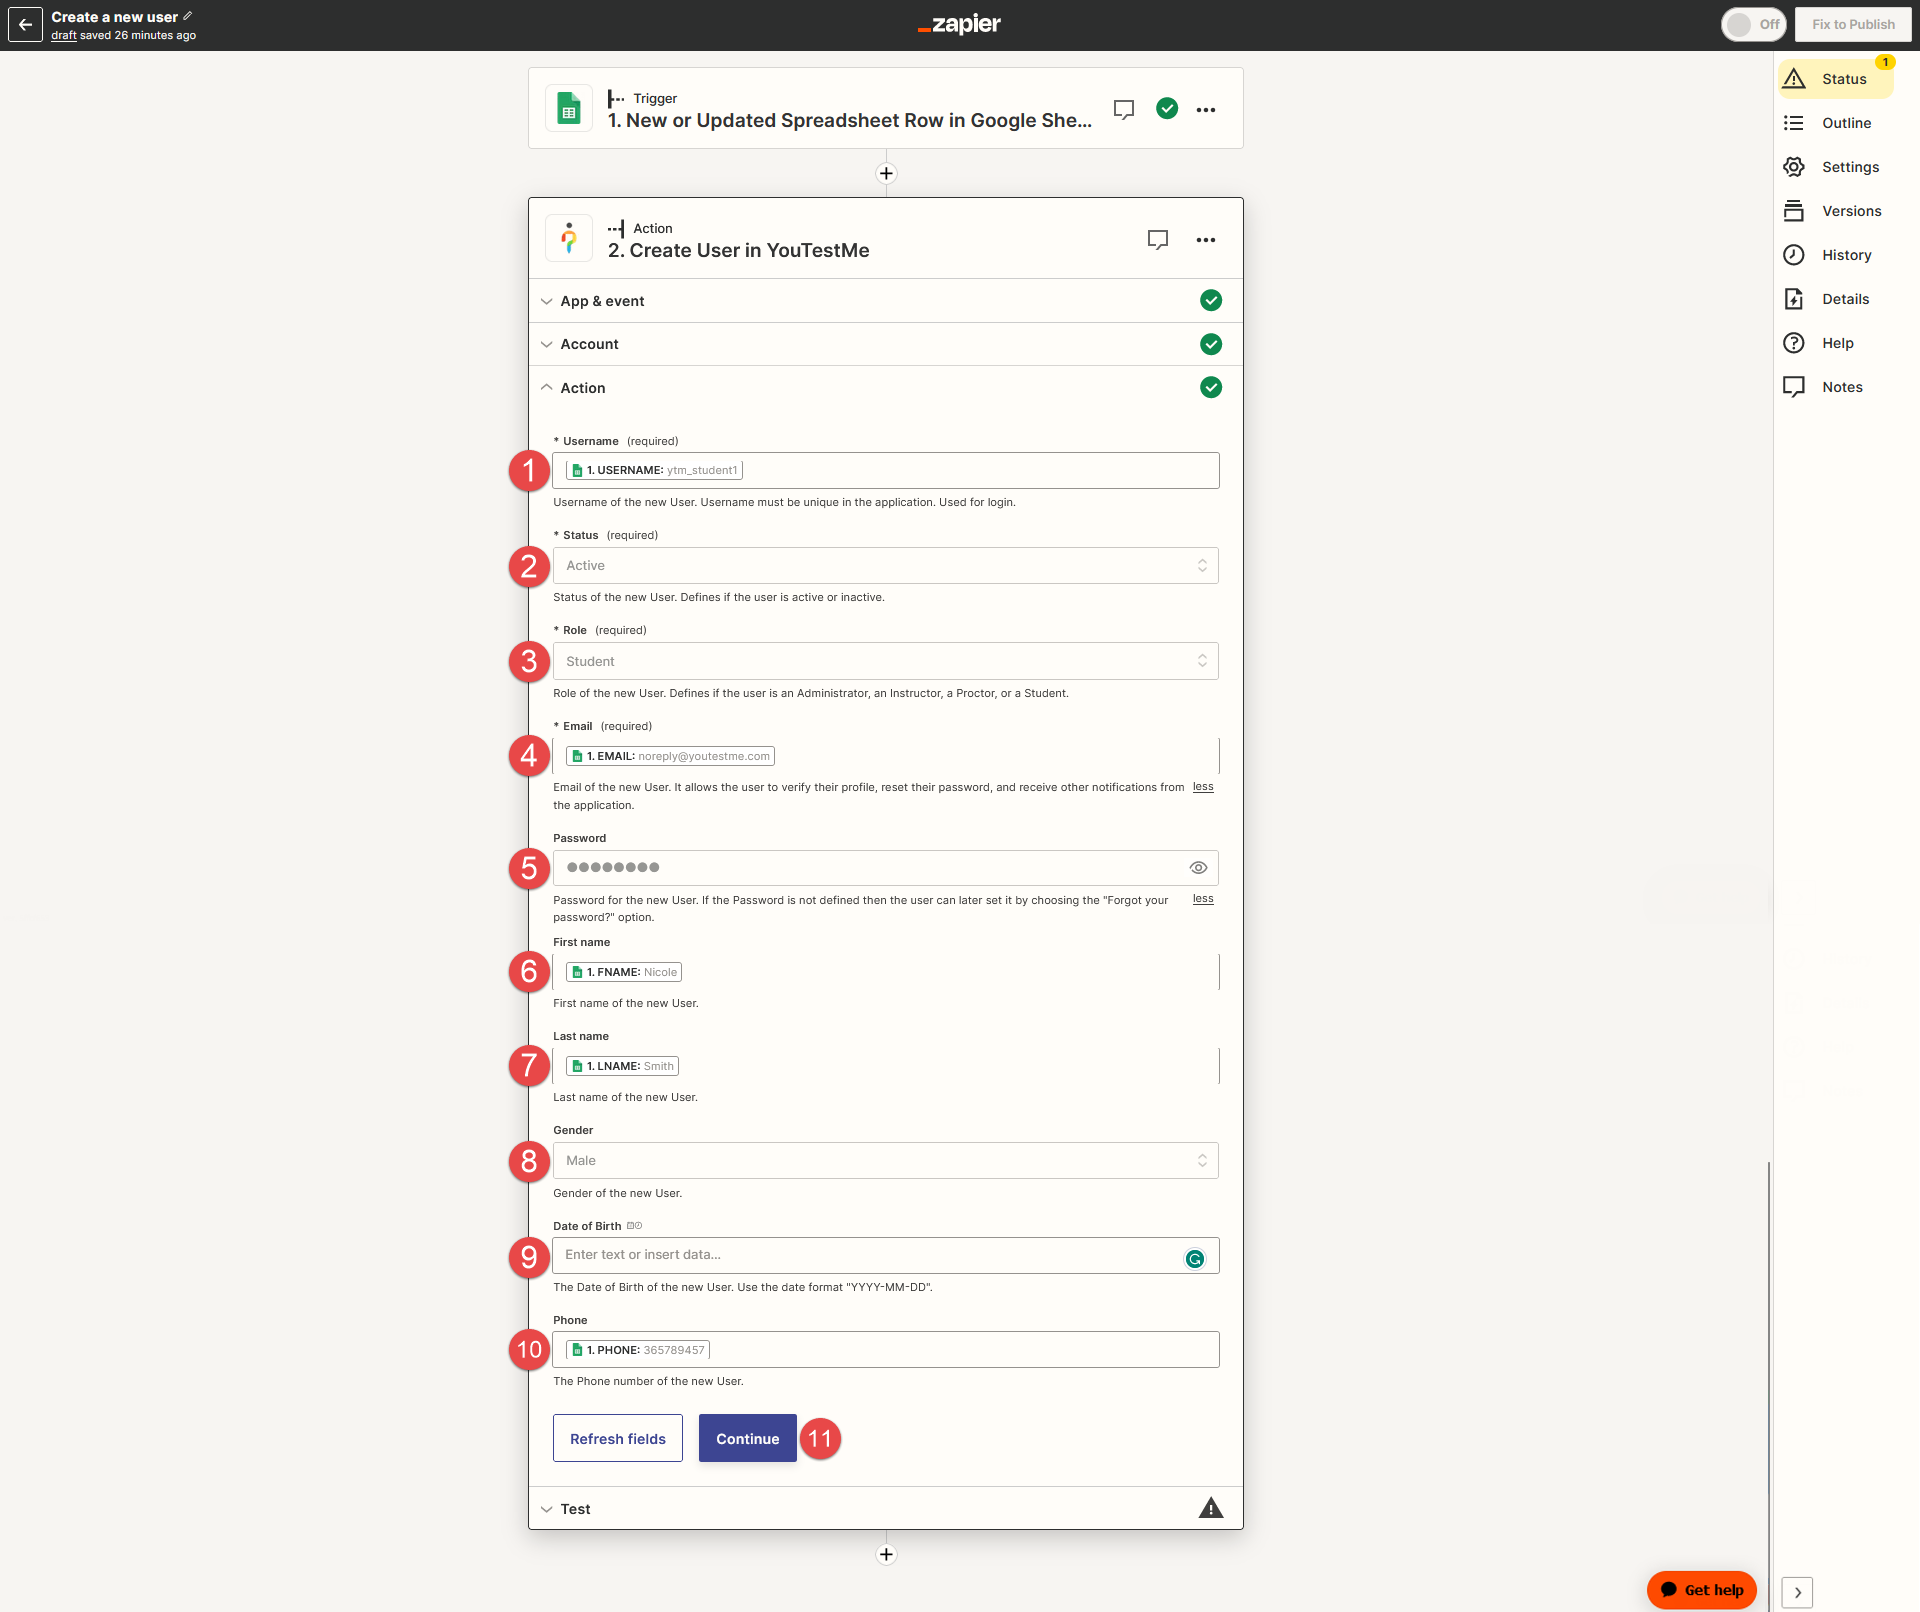
Username of the new user - Choose from the dropdown list the desired column from a spreadsheet (USERNAME).
Note: The username must be unique in the application and will be used to log in.
-
Status of the new user - Choose from the dropdown list the user's status (Active, Inactive, Suspended, Locked, or Pending)
-
Role of the new user - Define if the user is an Administrator, an Instructor, a Proctor, or a Student.
-
Email of the new user - Choose the desired column (EMAIL) from the dropdown list. It allows the user to verify their profile, reset their password, and receive other notifications from the application.
-
Password of the new user - Enter the desired password.
Note: If the password is not defined, the user can later set it by choosing the Forgot your password option.
-
First name of the new user - Choose from the dropdown list the desired column (FNAME).
-
Last name of the new user - Choose from the dropdown list the desired column (LNAME).
-
Gender of the new user (optional).
-
Date of birth of the new user (optional).
-
Phone number of the new user (optional).
-
Click the Continue button.
-
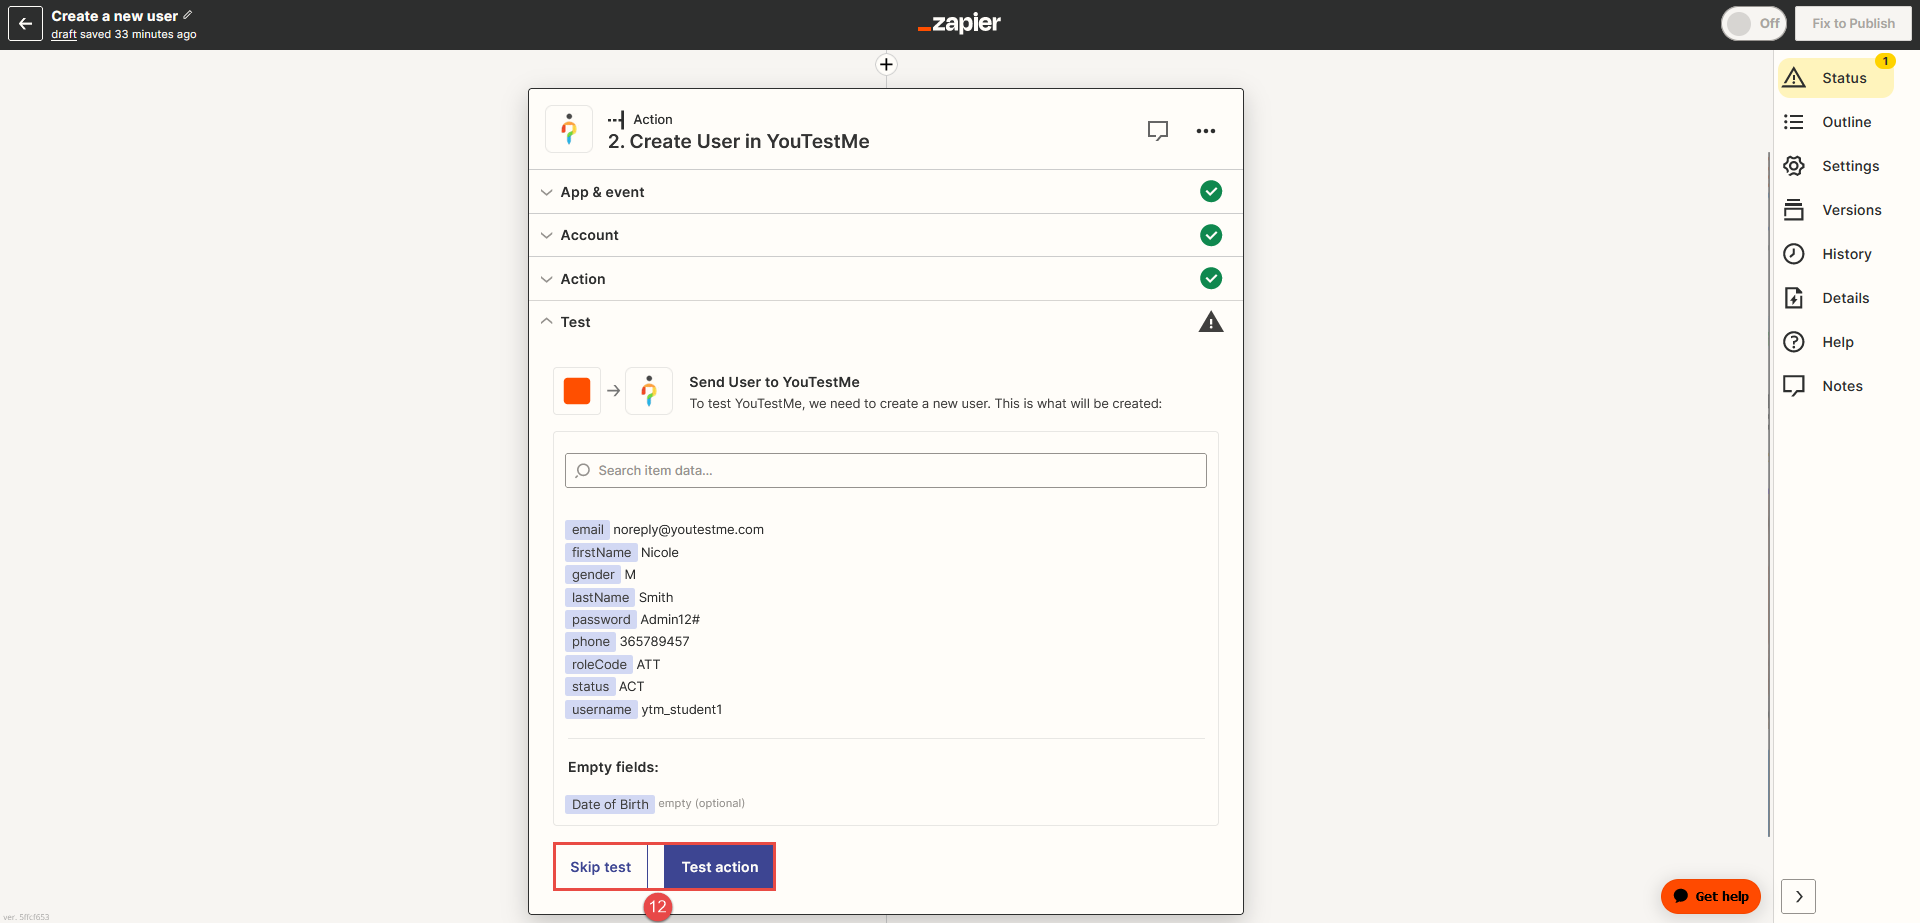
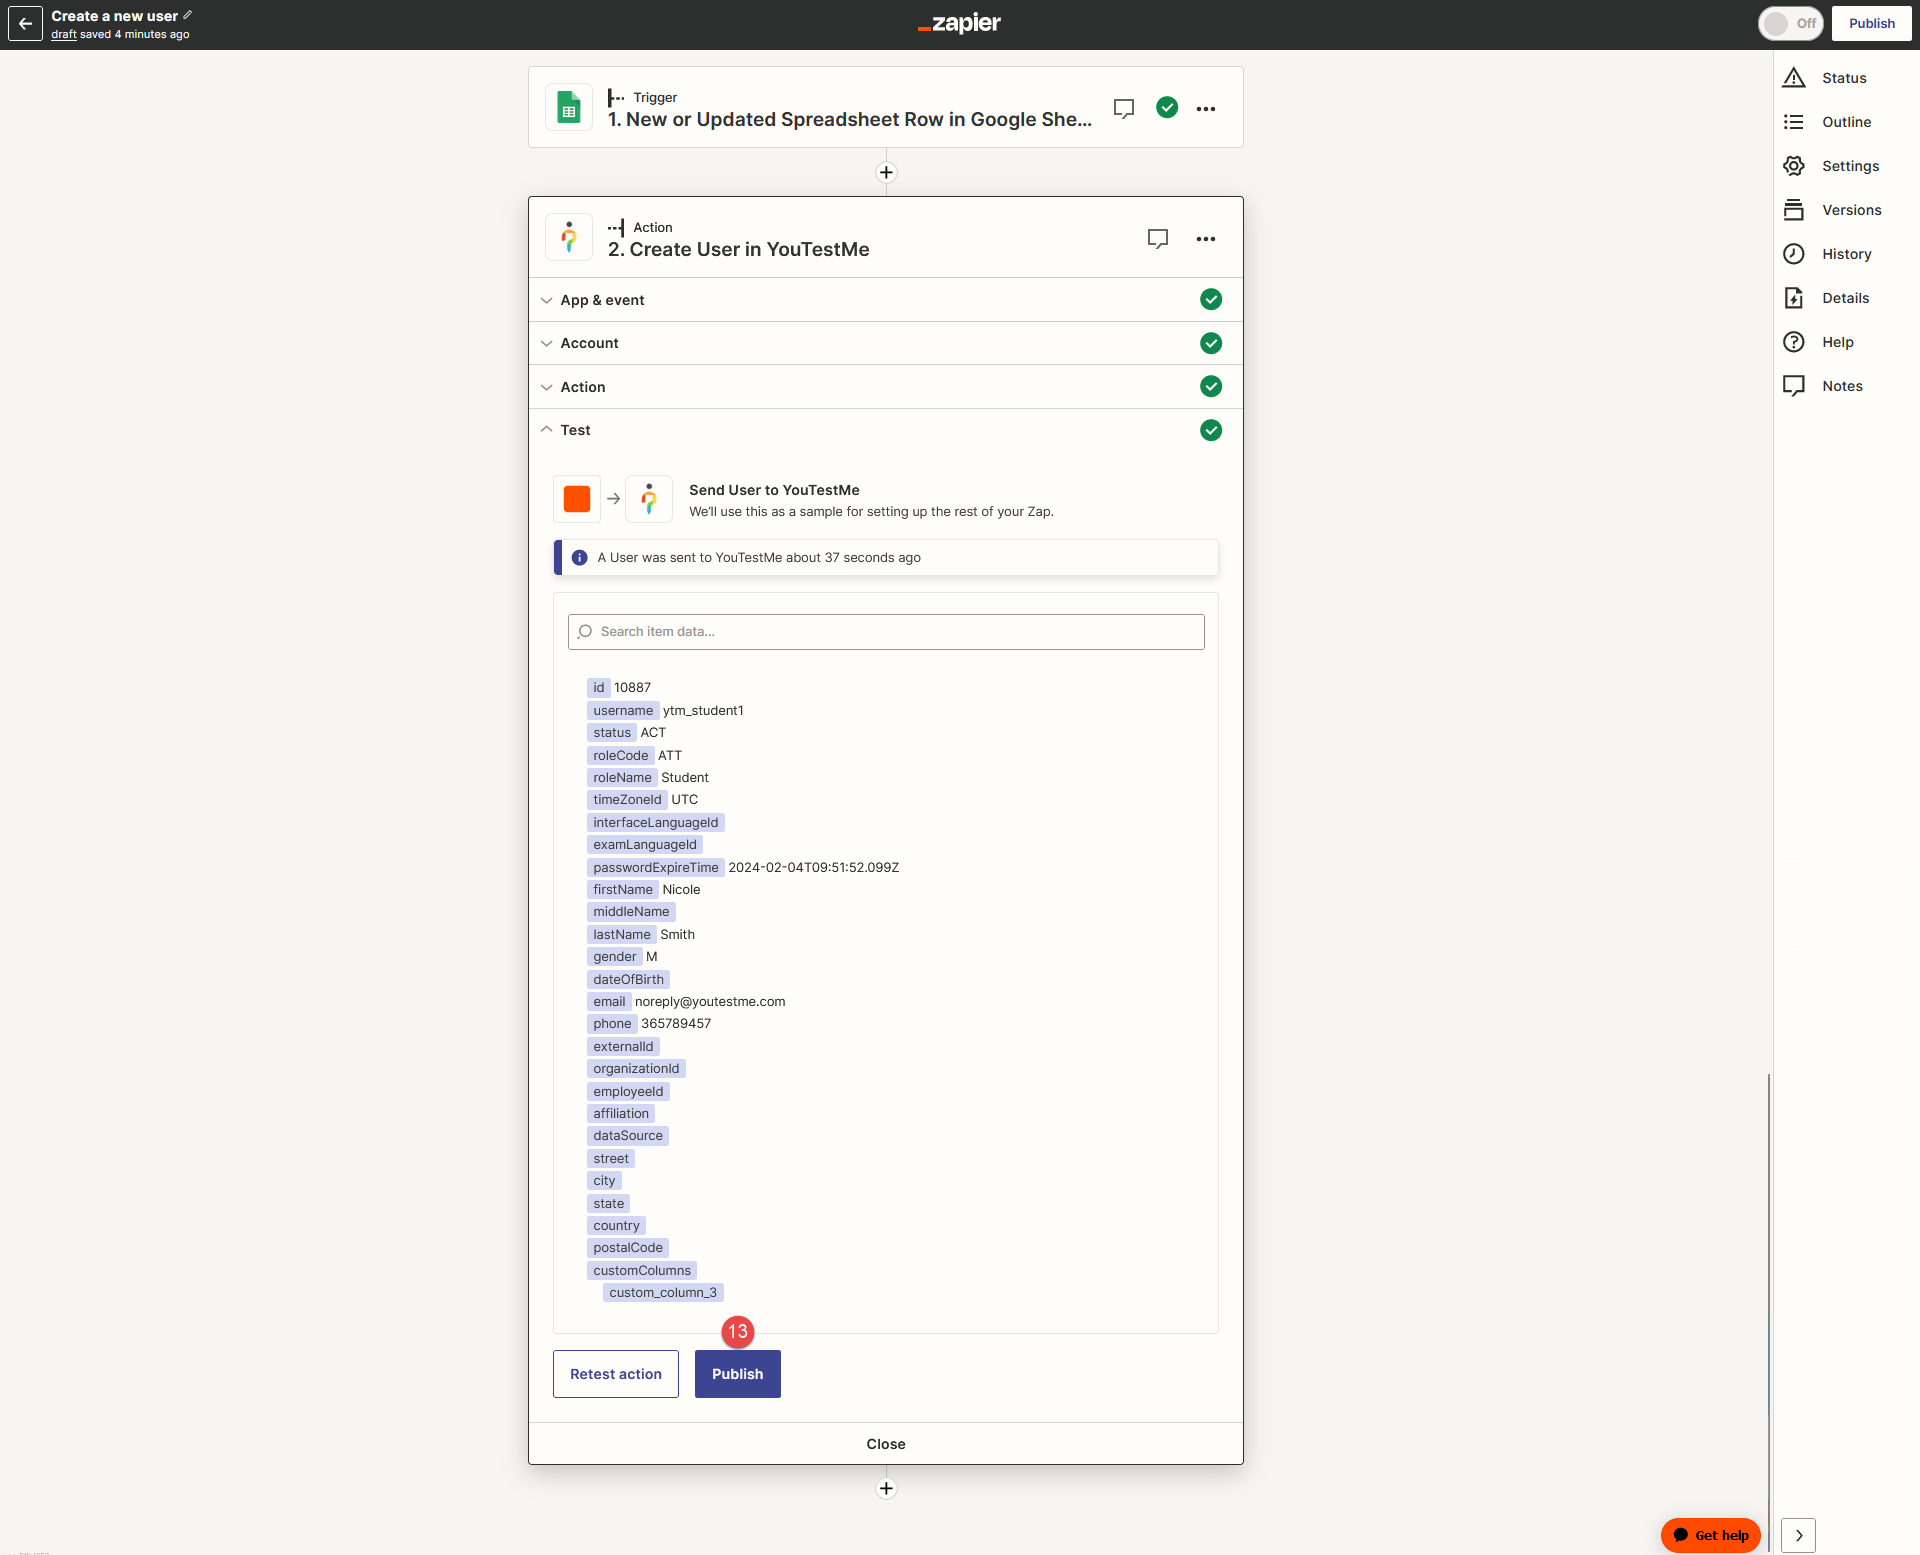
After the Zap setup, you can test the user creation action. To do so, click the Test action button. You will receive a message confirming the user has been sent to YouTestMe GetCertified and successfully created. Click the Skip test button to avoid creating a user with test data.
-
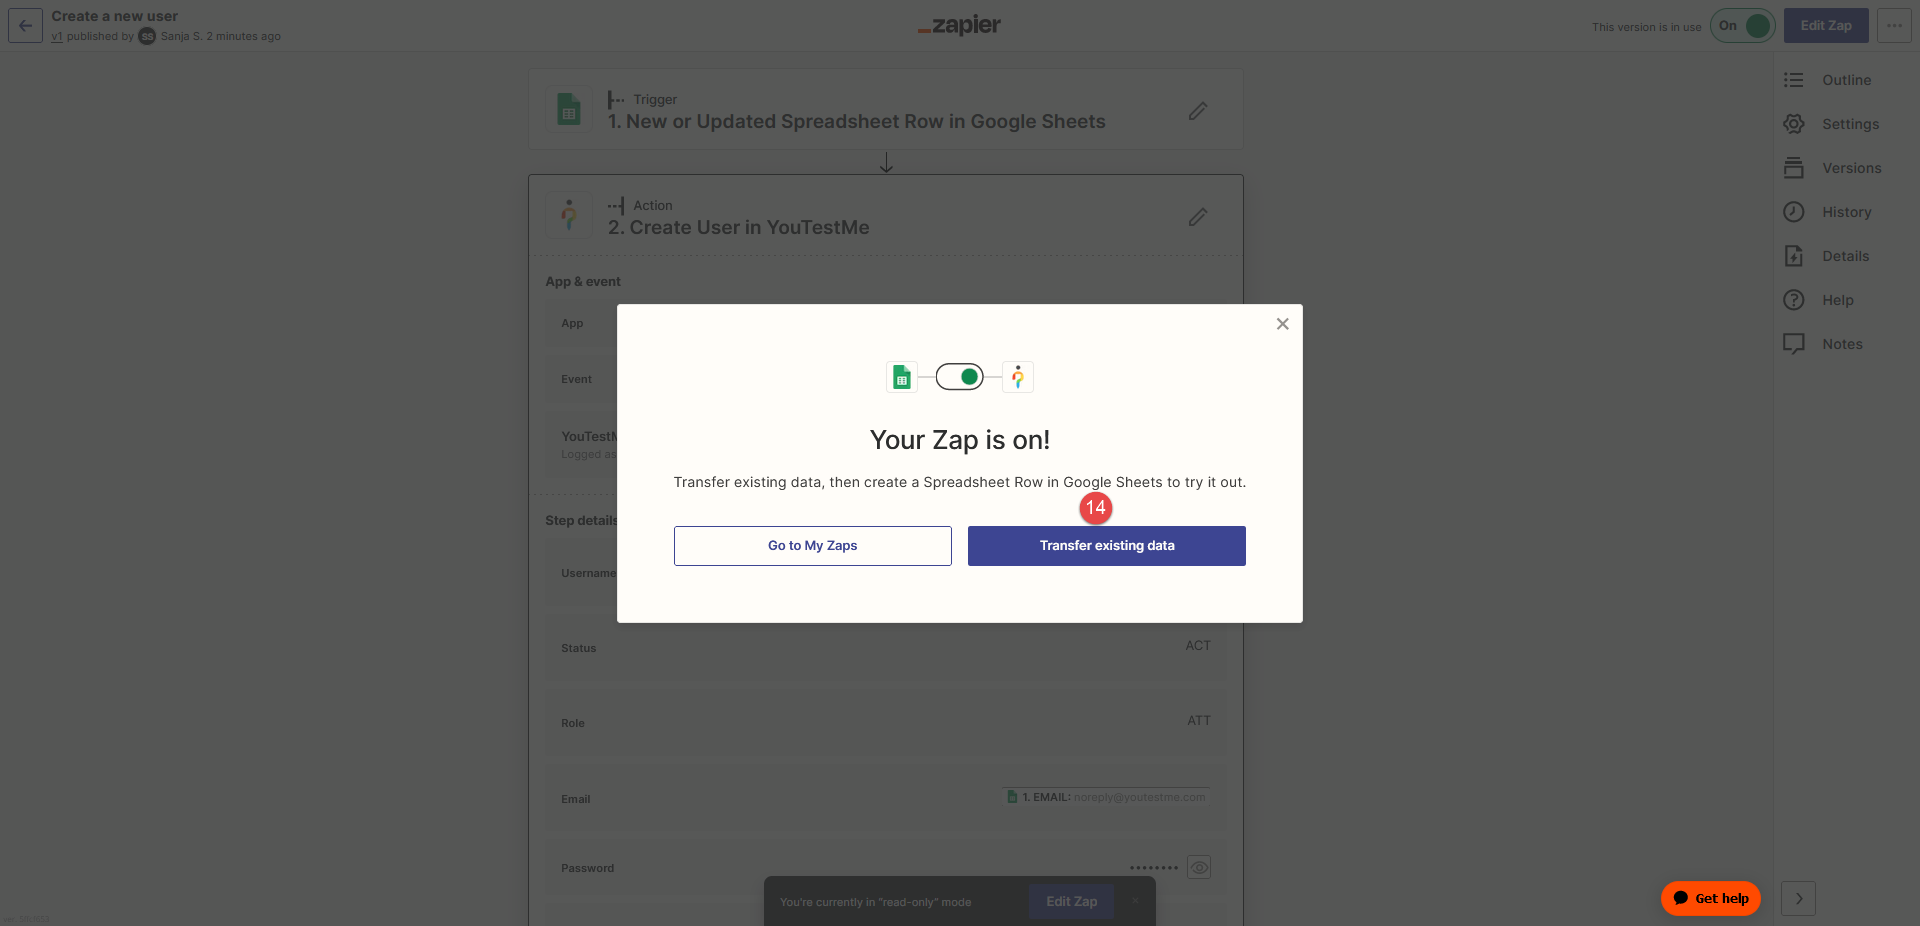
Click the Publish button. When you publish a Zap, it will be turned On, and each time you insert a new row into the spreadsheet, a new user will automatically be created. The Action will trigger when adding a new row containing the user data.
-
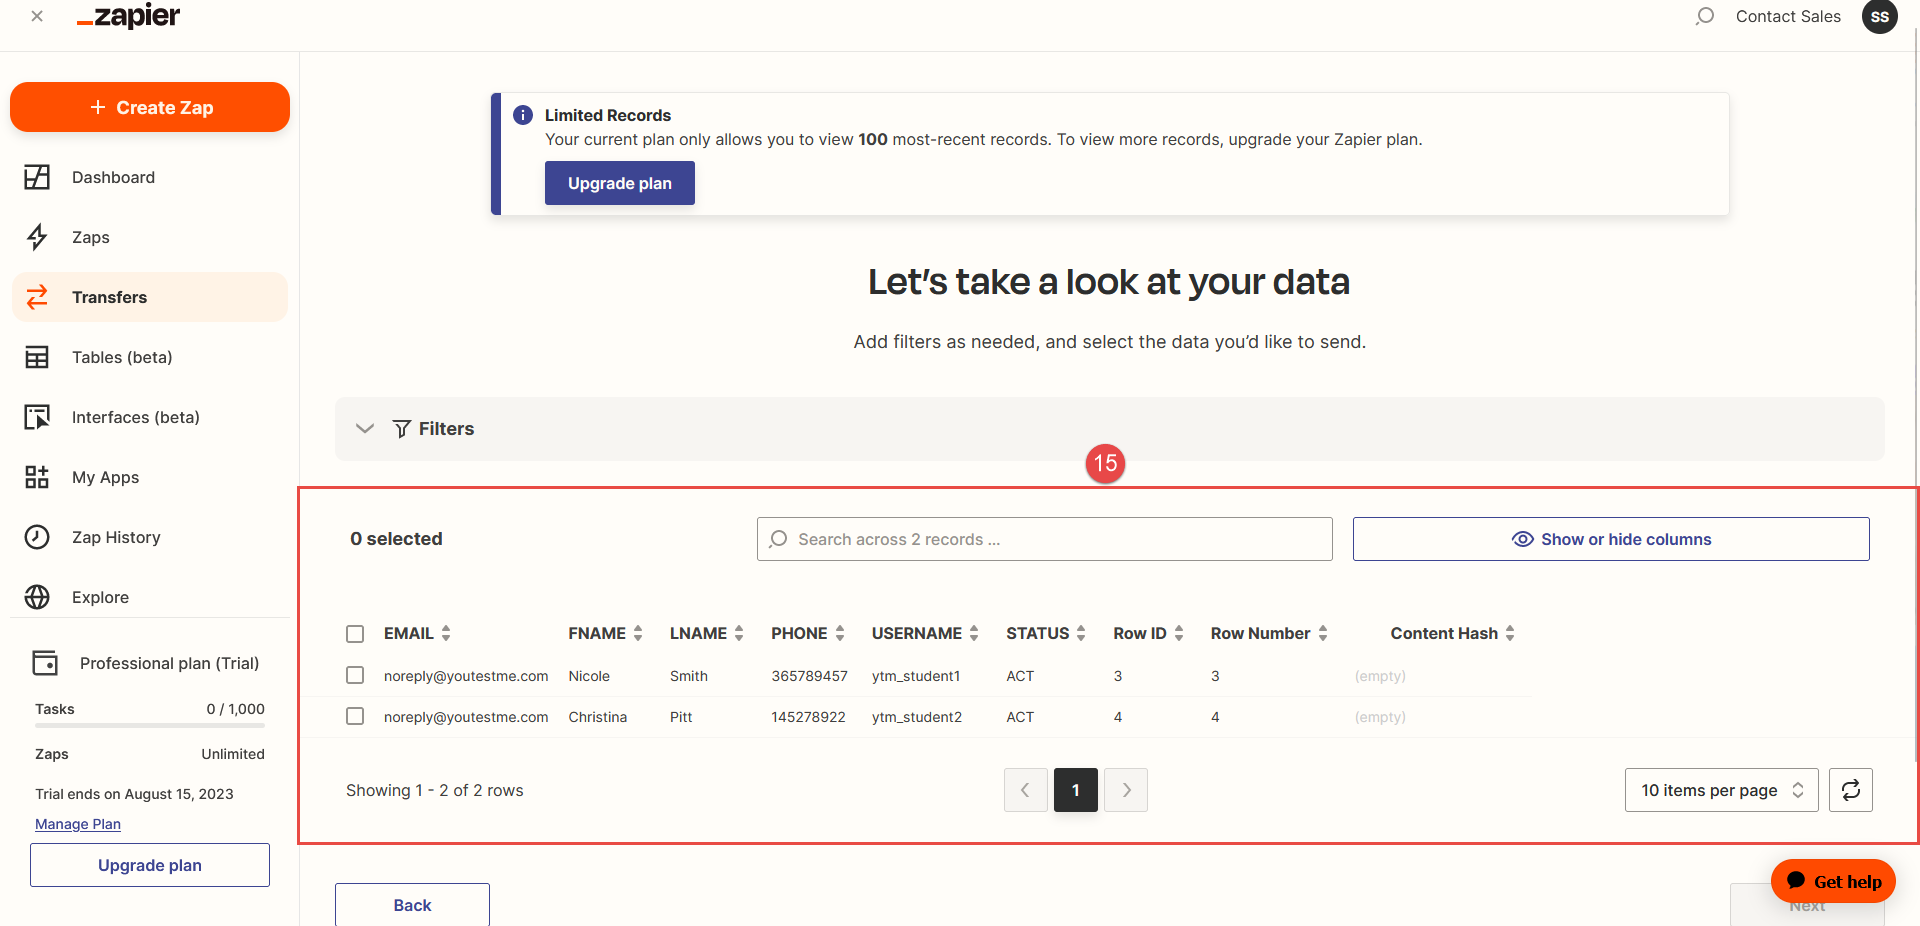
Click the Transfer existing data button.
-
When you click Transfer existing data, your data will be transferred to the Zap.
To set up Action, insert the following:
-
-
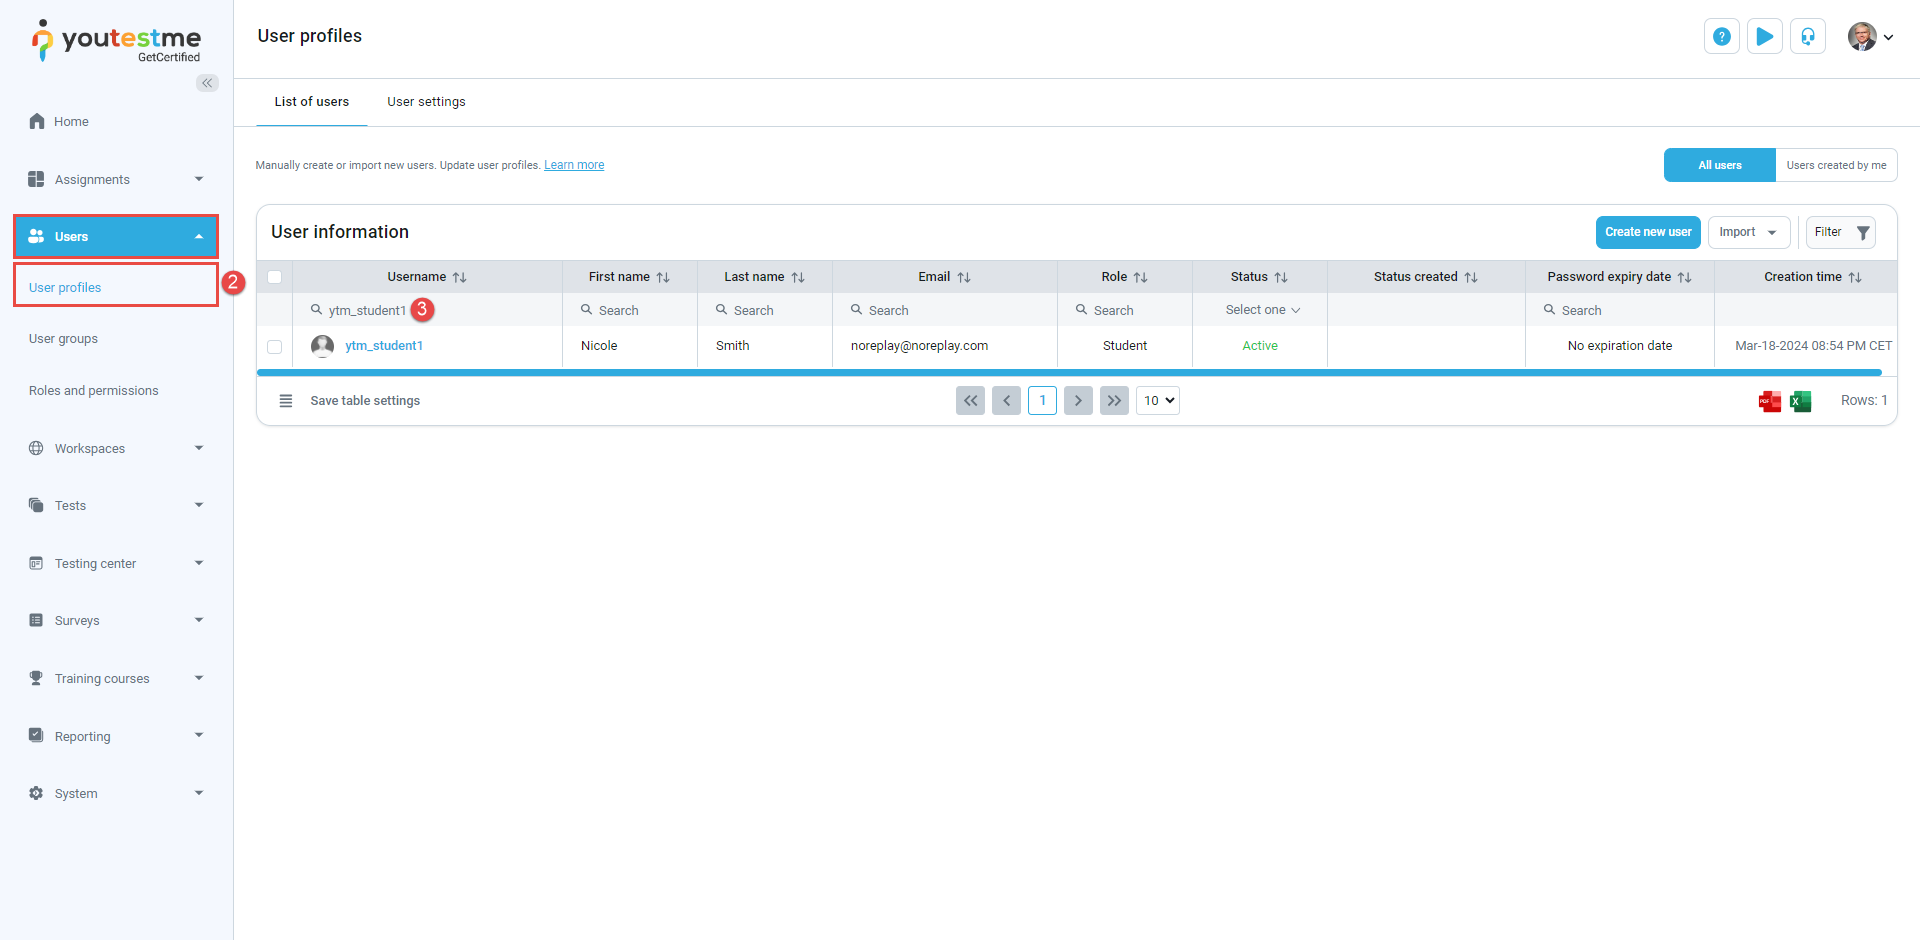
Check the Created Users on the YouTestMe App
To check the created user via Zap Integration and Google Sheets, follow these steps:
-
Navigate to the YouTestMe application, and log in.
-
Go to Users, and select the User profiles section.
-
In the Username column , use the Search bar to search for the username of the user which you integrated.
For more instructions on assigning users to a training course using Google Spreadsheets and Zapier Integration, refer to this article.
-
-
