User manual
Report builder
-
Introduction
The Report builder module enables users to create customized reports based on data collected during the testing process. Users can generate unique reports by utilizing advanced search filters to analyze test or survey statistics, compare items, or delve into individual items in detail.
To access the page, users are required to have "Access Report builder" permission.
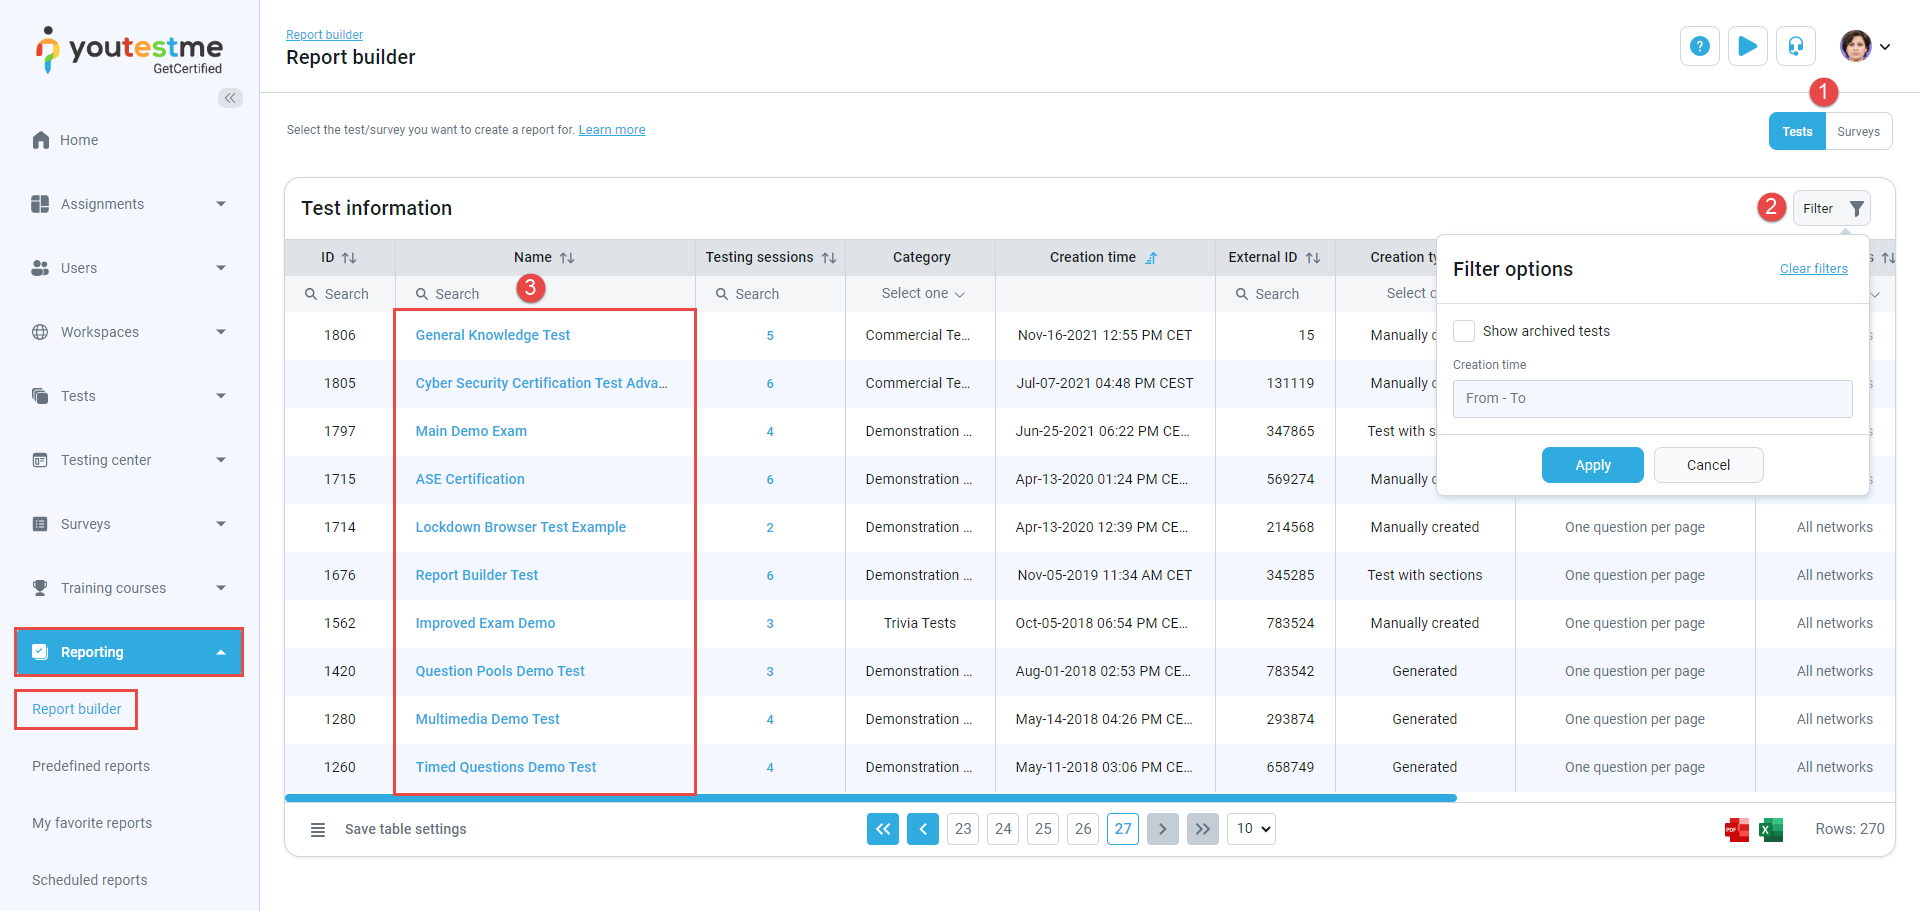
This feature is accessible from the Reporting section in the left-side menu and supports the creation of reports for tests and surveys.
On this page, you can:
-
Switch to display Tests or Surveys you can create the report for.
-
Filterthe list of tests and surveys.
-
Show archived tests/surveys in the list.
-
Filter the list of tests/surveys to display only those created within the selected timeframe.
Click the Apply button to fitler data, or Clear filters by clicking the corresponding button.
-
-
Select the test or survey name from the table to create a report.
-
-
Report builder
On this tab, you can:
-
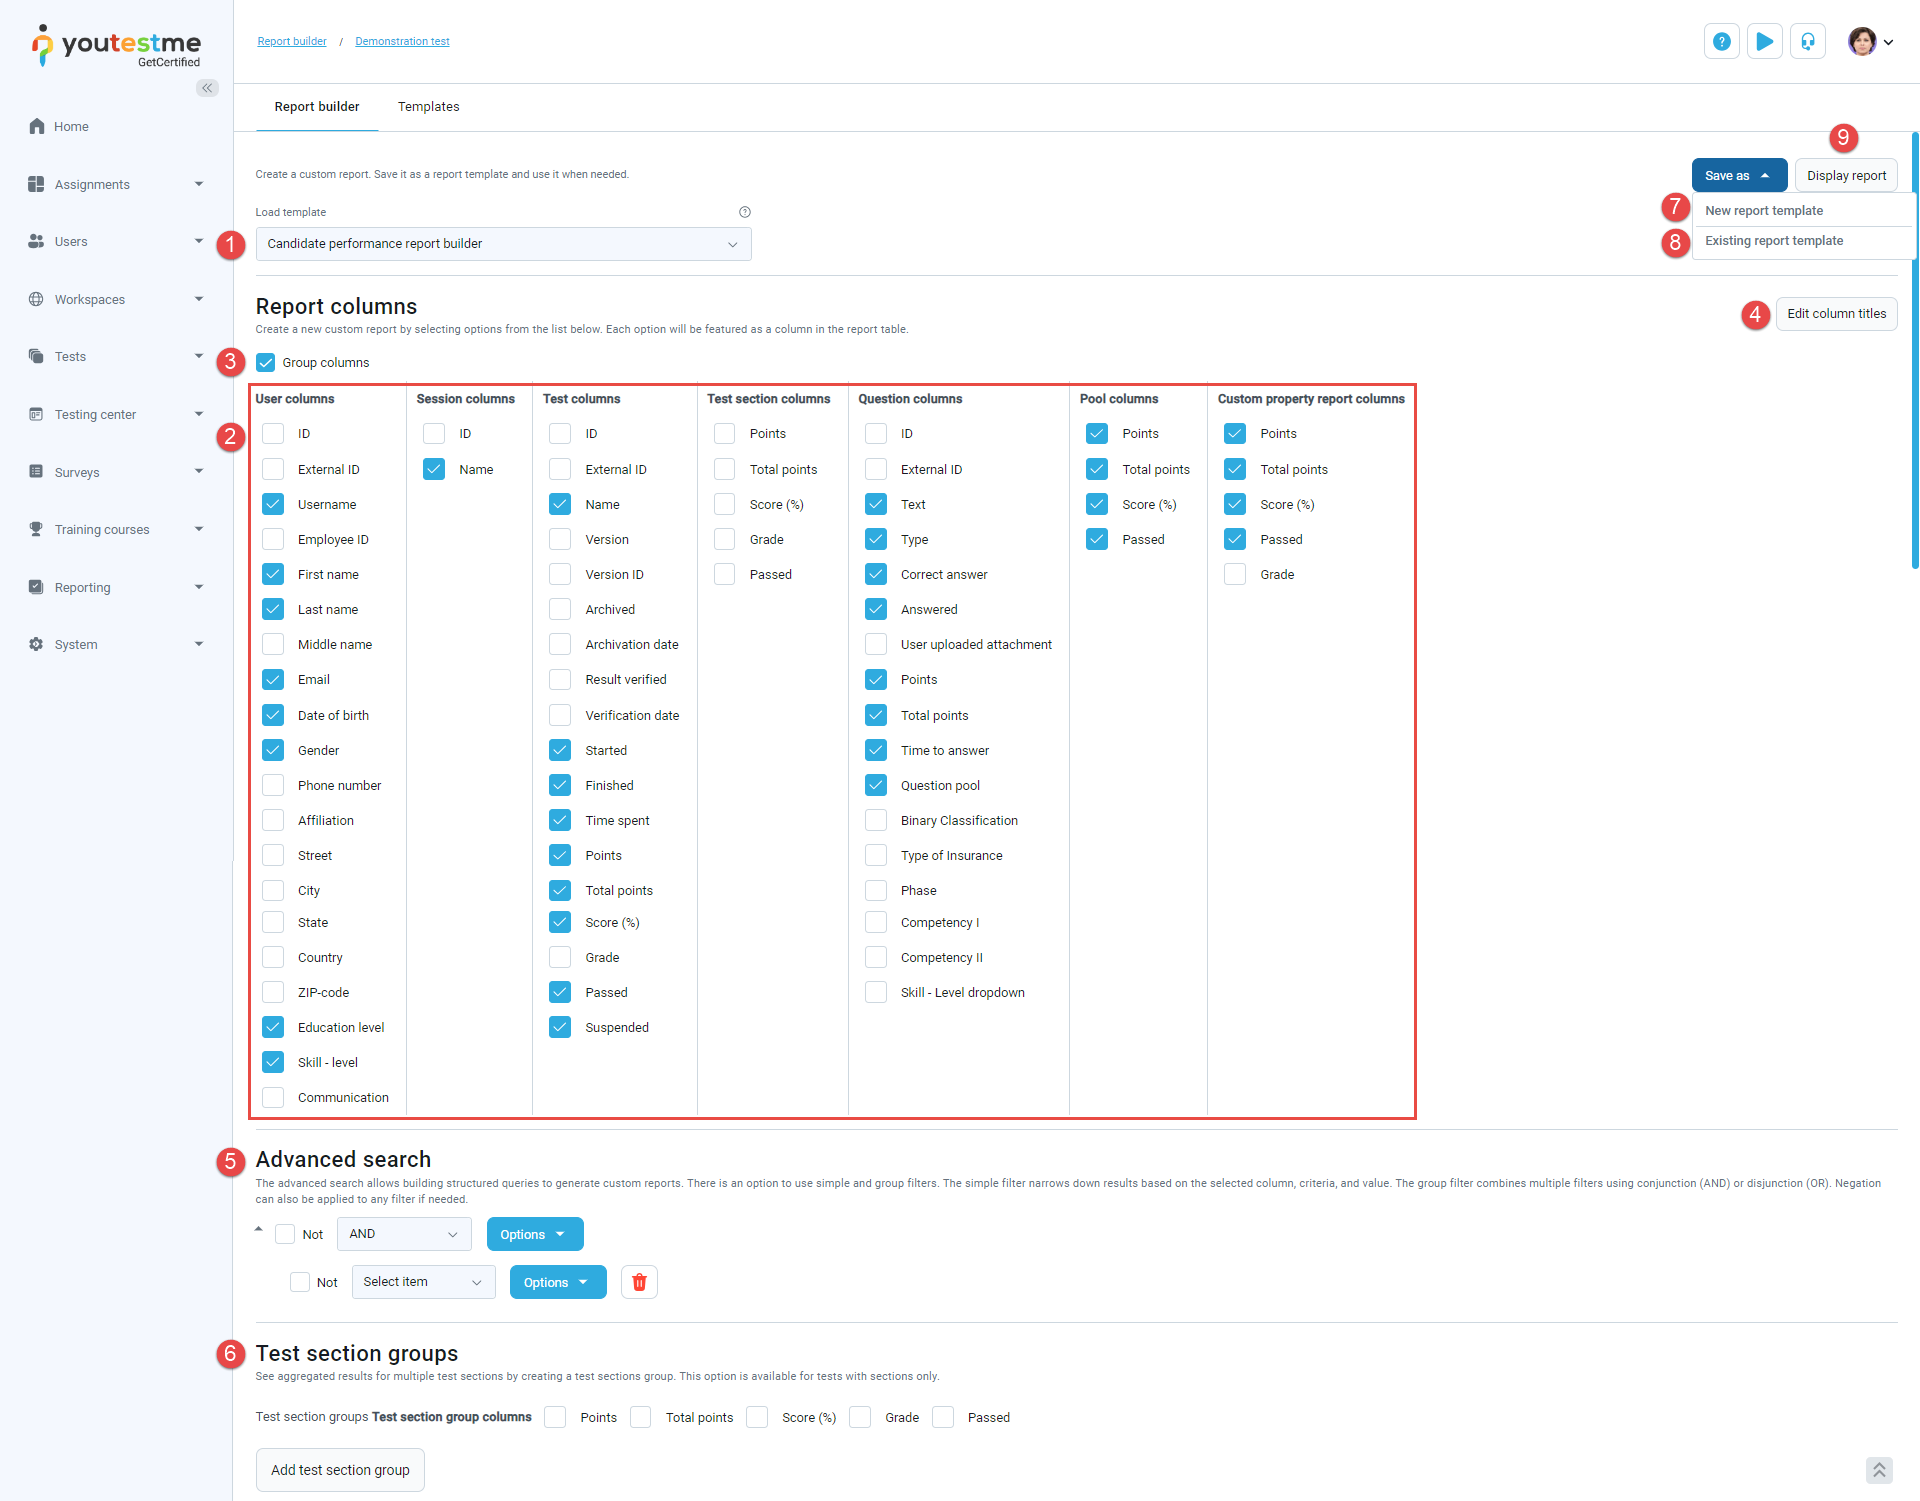
Load report column configurations from one of the previously saved report templates.
-
Manually select the columns you want to display in the report. Each selected option will be featured as a column in the report table.
-
Check the Group columns option to group similar headers under parent columns. For example, all columns about user information will be grouped under the parent column named User.
-
Edit column titles. In the Custom title column, enter a new name for the column you want to change, then click the Save button.
-
Use advanced search to build structured queries to generate custom reports.
-
See aggregated results for multiple test sections by creating a Test sections group. This option is available for tests with sections only.
-
Save a New report template. Click the Save as button, then select New report template. Enter name of the template and save it. Once saved, you can quickly load template and generate report, instead of manually choosing one by one option each time.
-
Update Existing report template. Click the Save as button, then select Existing report template. Choose the desired report Template you want to update. If the selected template is already loaded, that template will be chosen by default.
If you want, you can change the name of the selected template by editing the Name field, then click Save. -
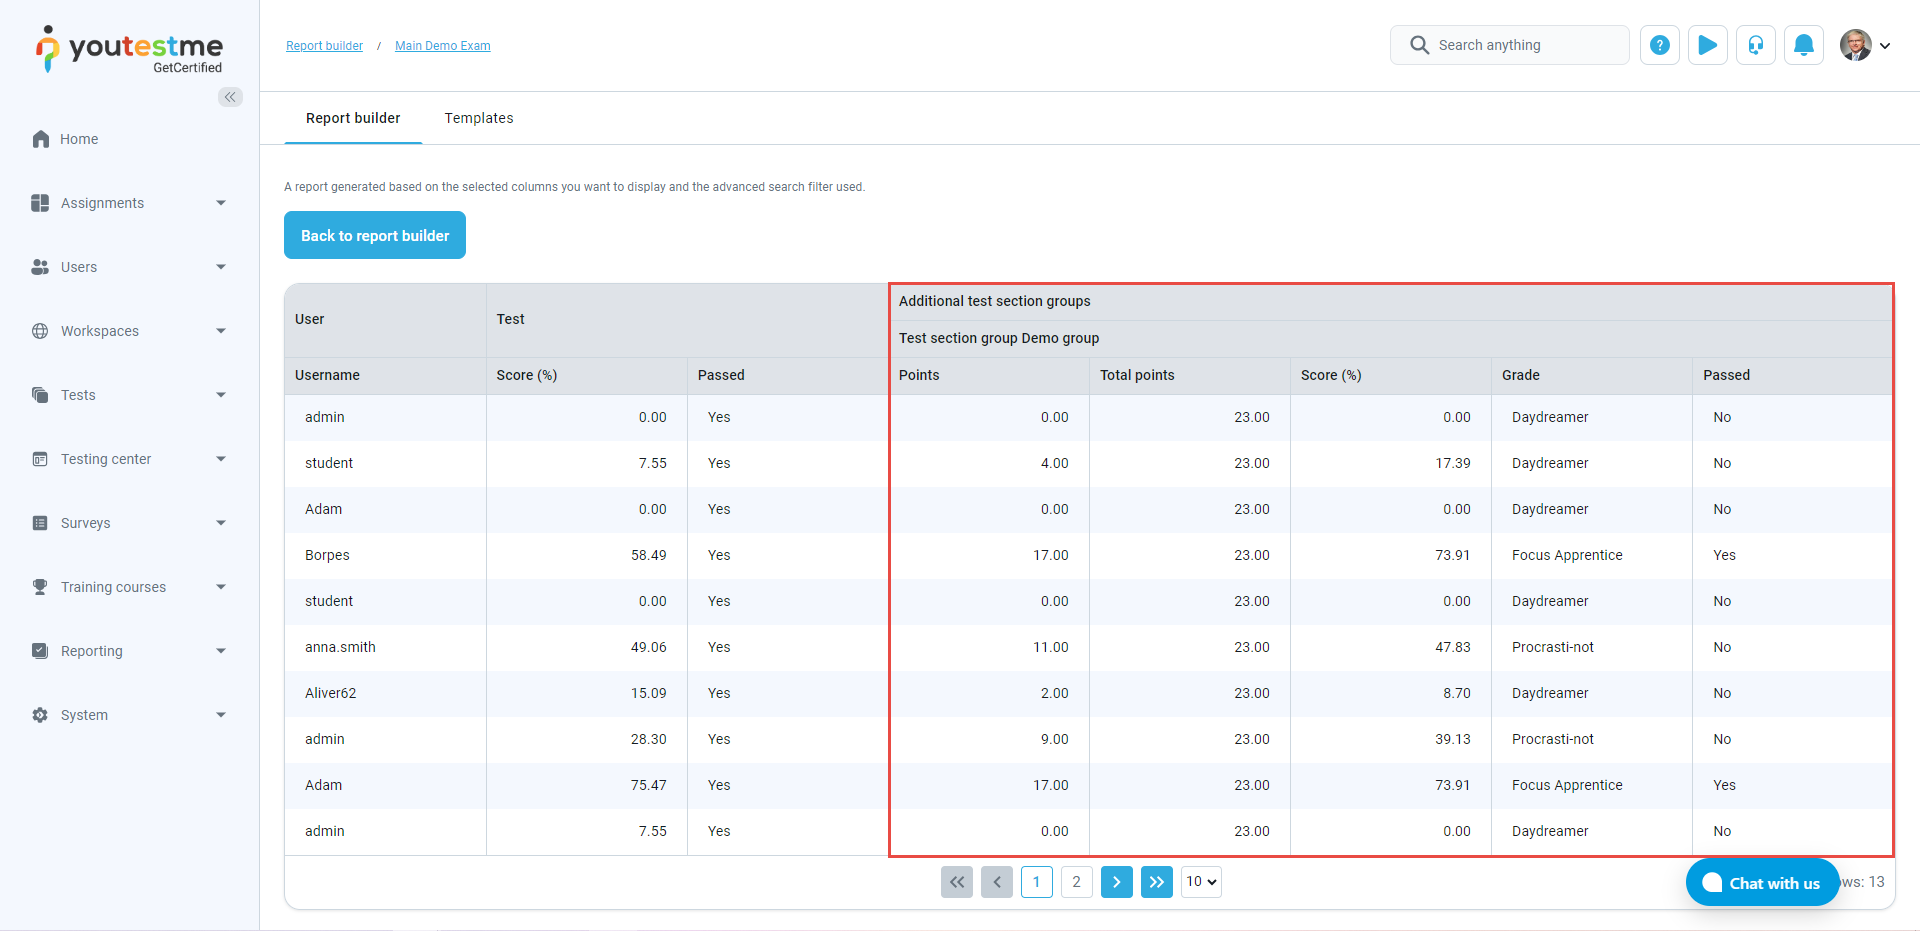
Click the Display report button to generate a report based on the chosen report configuration. The test/survey report and table with the columns you selected will open. Click the Back to report builder button to return to the Report builder tab.
Note: If you want to save the report configuration as a new or existing template, please note that only report columns will be saved. Advanced search queries and test section group configurations will not be saved.
-
Advanced search
The Advanced search feature enables you to create specific, structured queries using filters. The Simple filter allows you to display results based on specific columns, criteria, and values. The Group filter enables you to combine multiple filters using AND or OR operators, and you can also apply negation to any filter.
Below, you can see an example of how to view only suspended test attempts:
-
Check the columns represented in the screenshot below.
-
Set values for the query as shown.
-
Click the Display report button.
Note: Follow the same steps to apply advanced search for other columns. Check the columns you need and define conditions according to your preference.

Now, you can see only suspended test attempts.

-
-
Test section groups
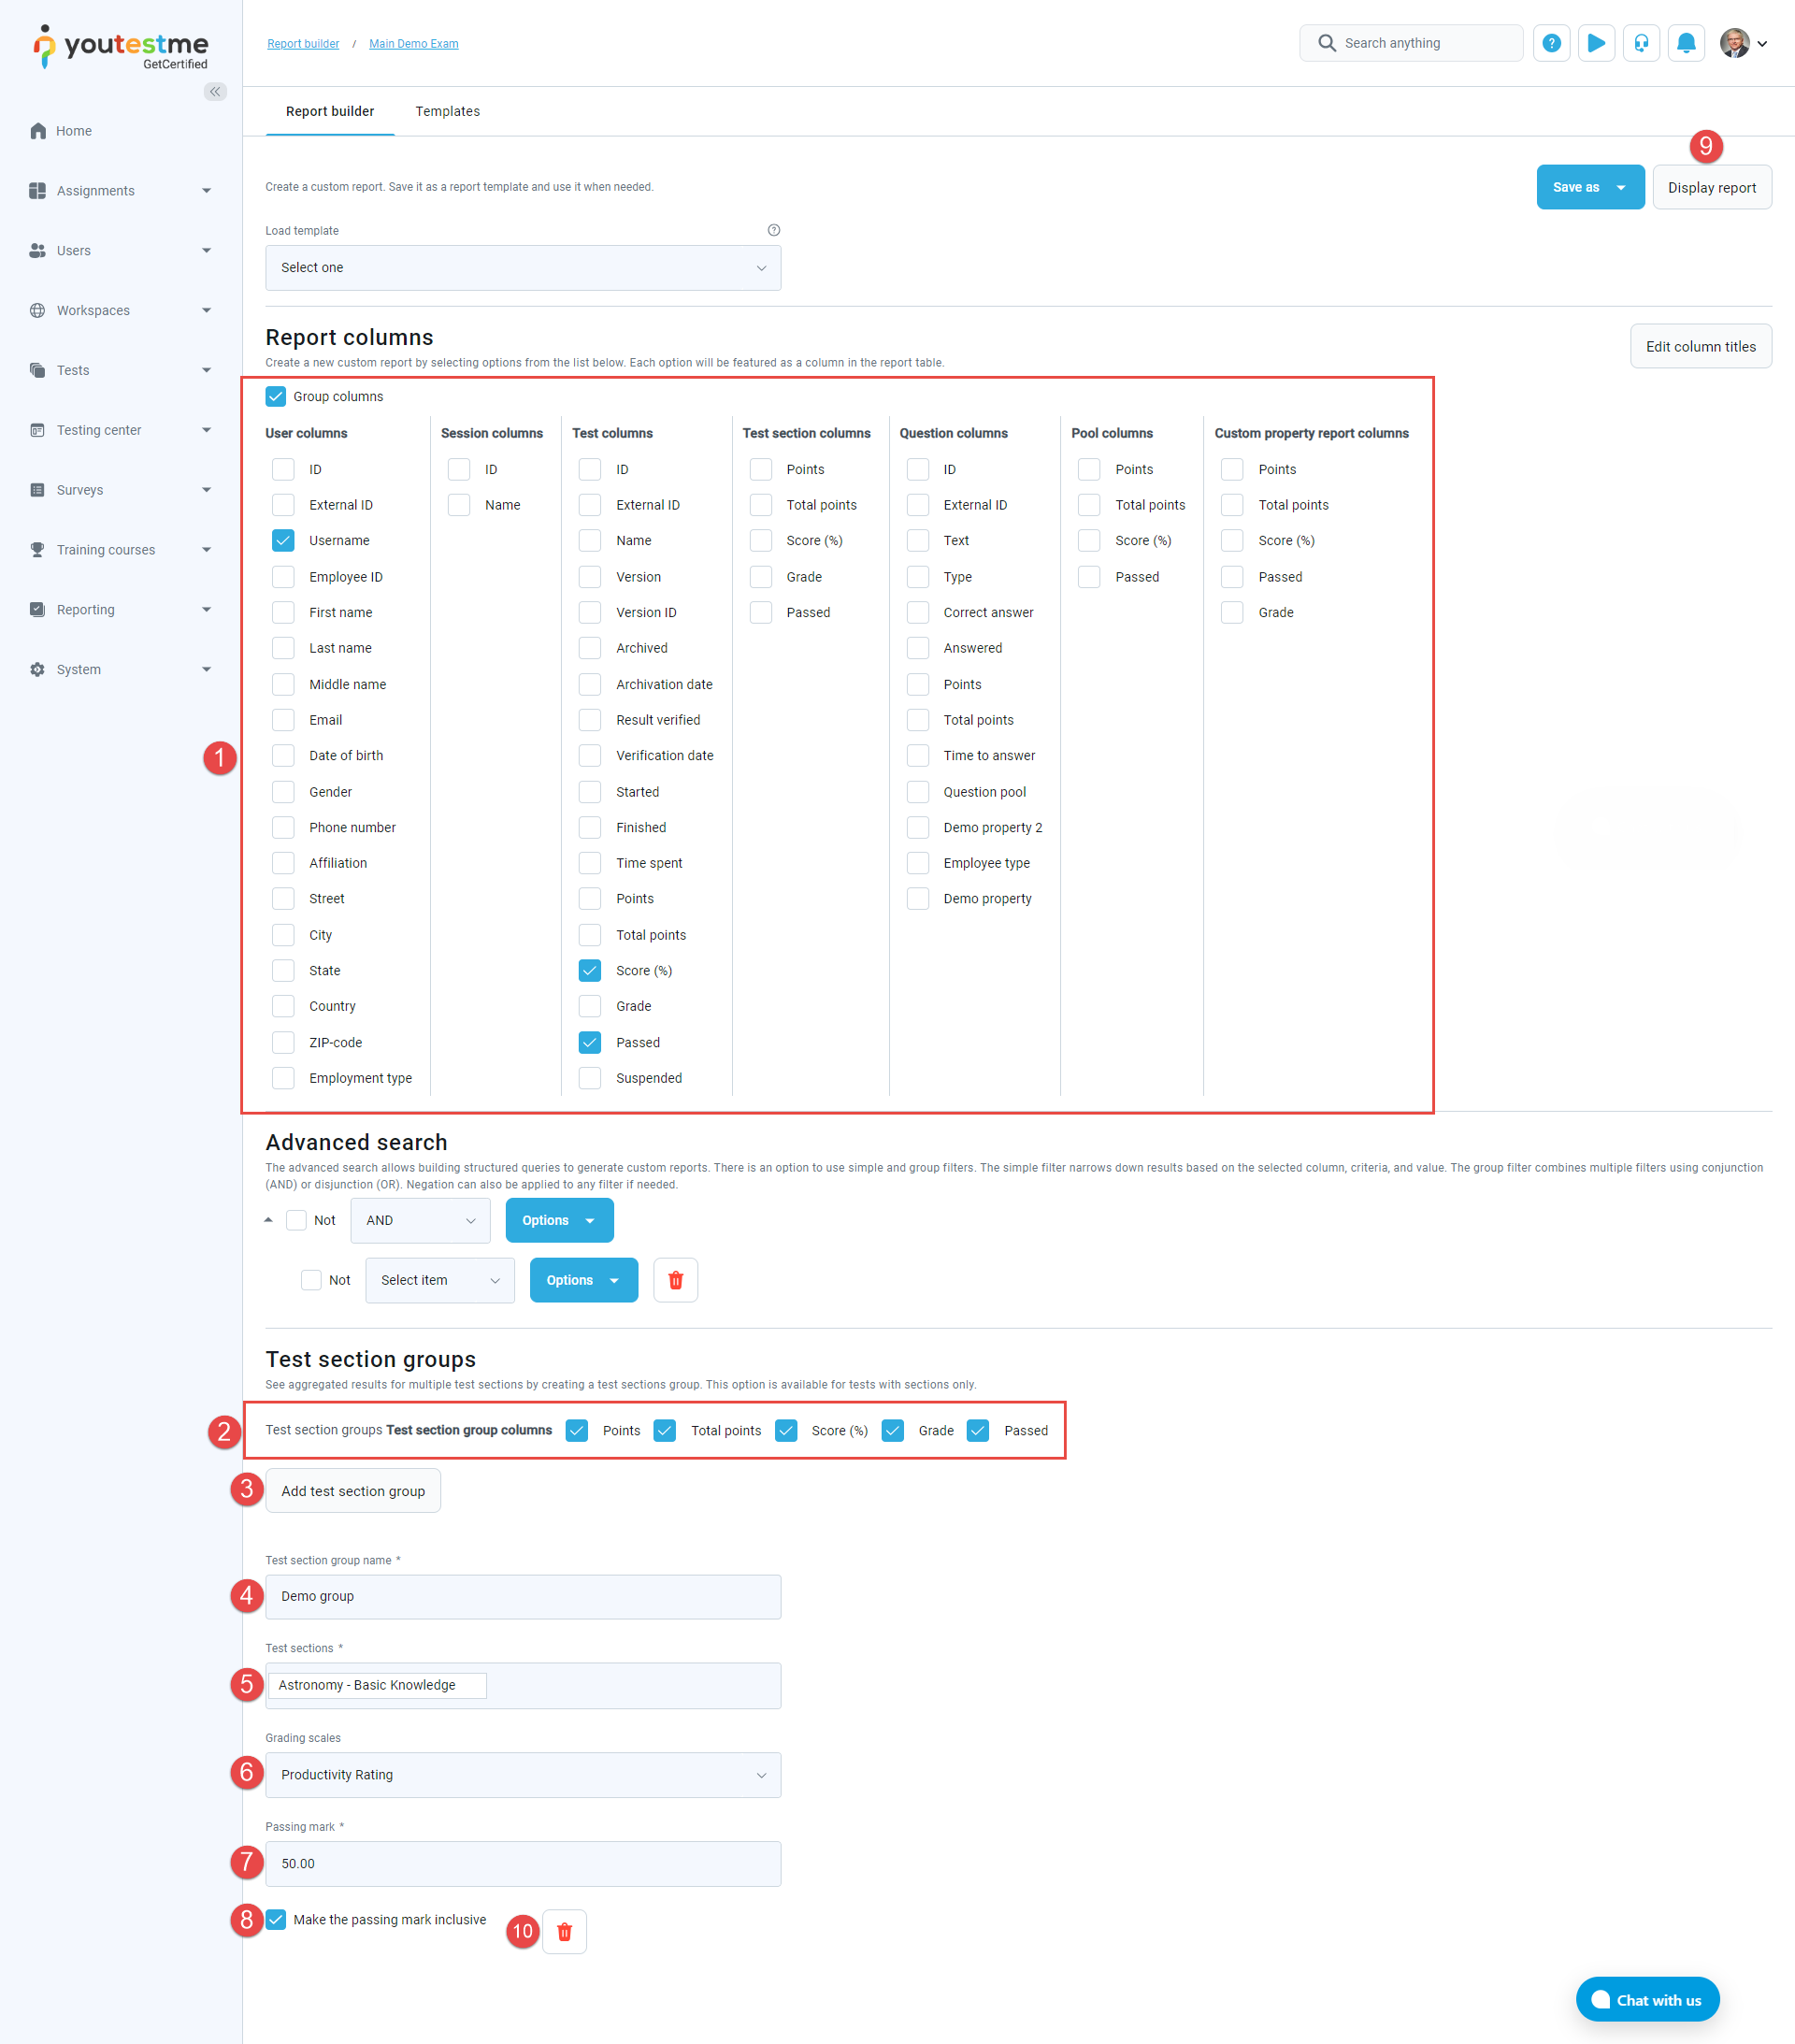
This feature allows you to see aggregated results for multiple test sections by creating test section groups. This option is available only for tests with sections.
To see aggregated results for multiple test sections by creating a test sections group, do the following:
-
Choose the options from the list to be displayed in the report. Each selected option will appear as a column in the report table.
-
Select the options from the list to be displayed in the report.
-
Click the Add section group button.
Note: You can add as many section groups as you want.
-
Enter the Test section group name.
-
Choose the Test sections for which you want to see the aggregated results.
-
You can choose a Grading scale for each section group to present results as grades.
-
Set Passing mark za section group. Based on this passing mark, the section group will be considered passed or failed, and the result will be displayed in the Passed column.
-
Make the passing mark inclusive so that the section group will be considered passed if the result is greater than or equal to the passing mark.
-
Click Display report to see aggregated results.
-
Click the corresponding icon if you want to remove test section groups.
By clicking the Display reports button, you can see aggregated results for the section groups you defined.
-
-
-
Templates
On this tab, you can view all saved report templates.
-
Click the Apply button to use the template and generate a report.
-
Click the Edit button to change the report template name.
-
Click the Delete button to permanently remove the report template from the system.

-
