User manual
Grader report
-
Introduction
This module enables collaborative grading by multiple graders. The test manager must define the minimum number of graders required to grade questions in order to generate the final result for a candidate's test attempt.
he process can be summarized as follows: the test manager creates a test, defines a multiple grader configuration, and adds a list of graders for the test. Depending on the grading configuration, grading requests are either automatically sent to graders, or the test manager assigns grading reports to graders.
The grader accepts the request, evaluates the candidate's report, and their grades contribute to the final result. Once the necessary number of graders has evaluated the report, the final result for the candidate's test attempt is obtained.
In case conflicting grades arise, the next grader in the queue makes the final decision.
For more detailed information about each step, refer to the headings below.
Note: This module is available only for tests without sections and that are manually created.
-
Test manager's perspective
-
Allowing multiple graders for a test
The configuration for multiple graders can be set either on the Grading step of the test creation wizard or under Tests/Manage tests/Grading configuration. The options available are the same, and they will be explained using the example of the Test creation wizard:
-
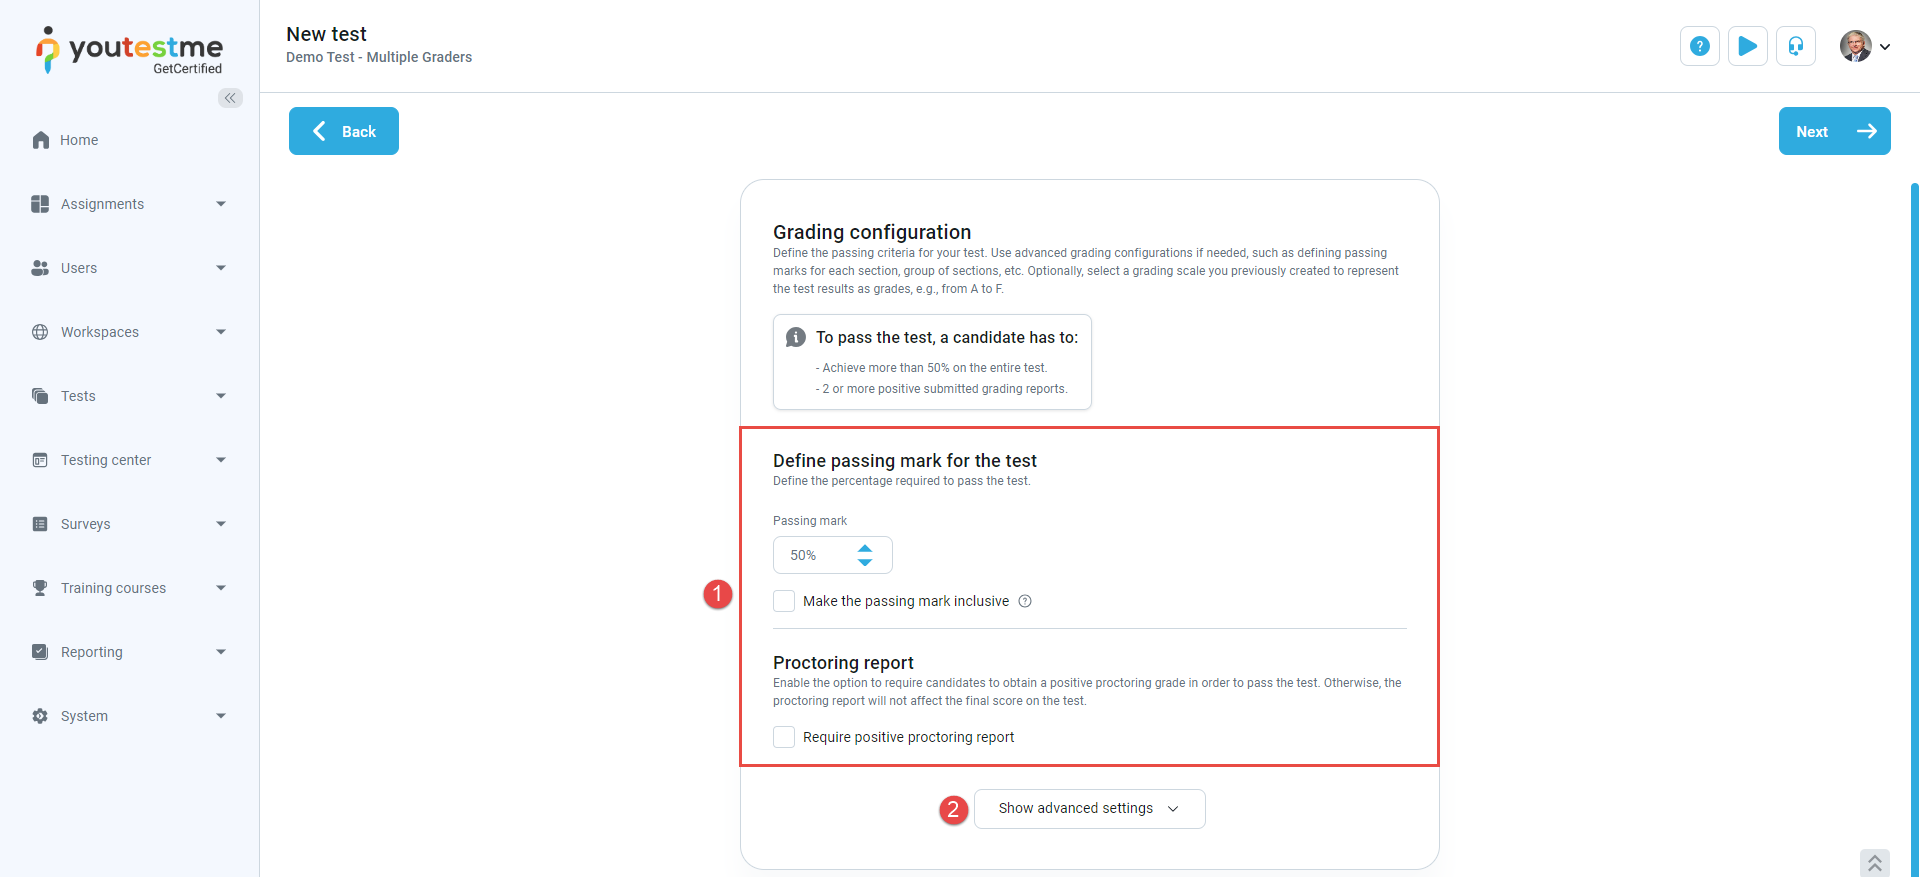
Define the desired grading settings for the test, such as passing marks, grading scales, etc.
-
Click on Show advanced settings.
-
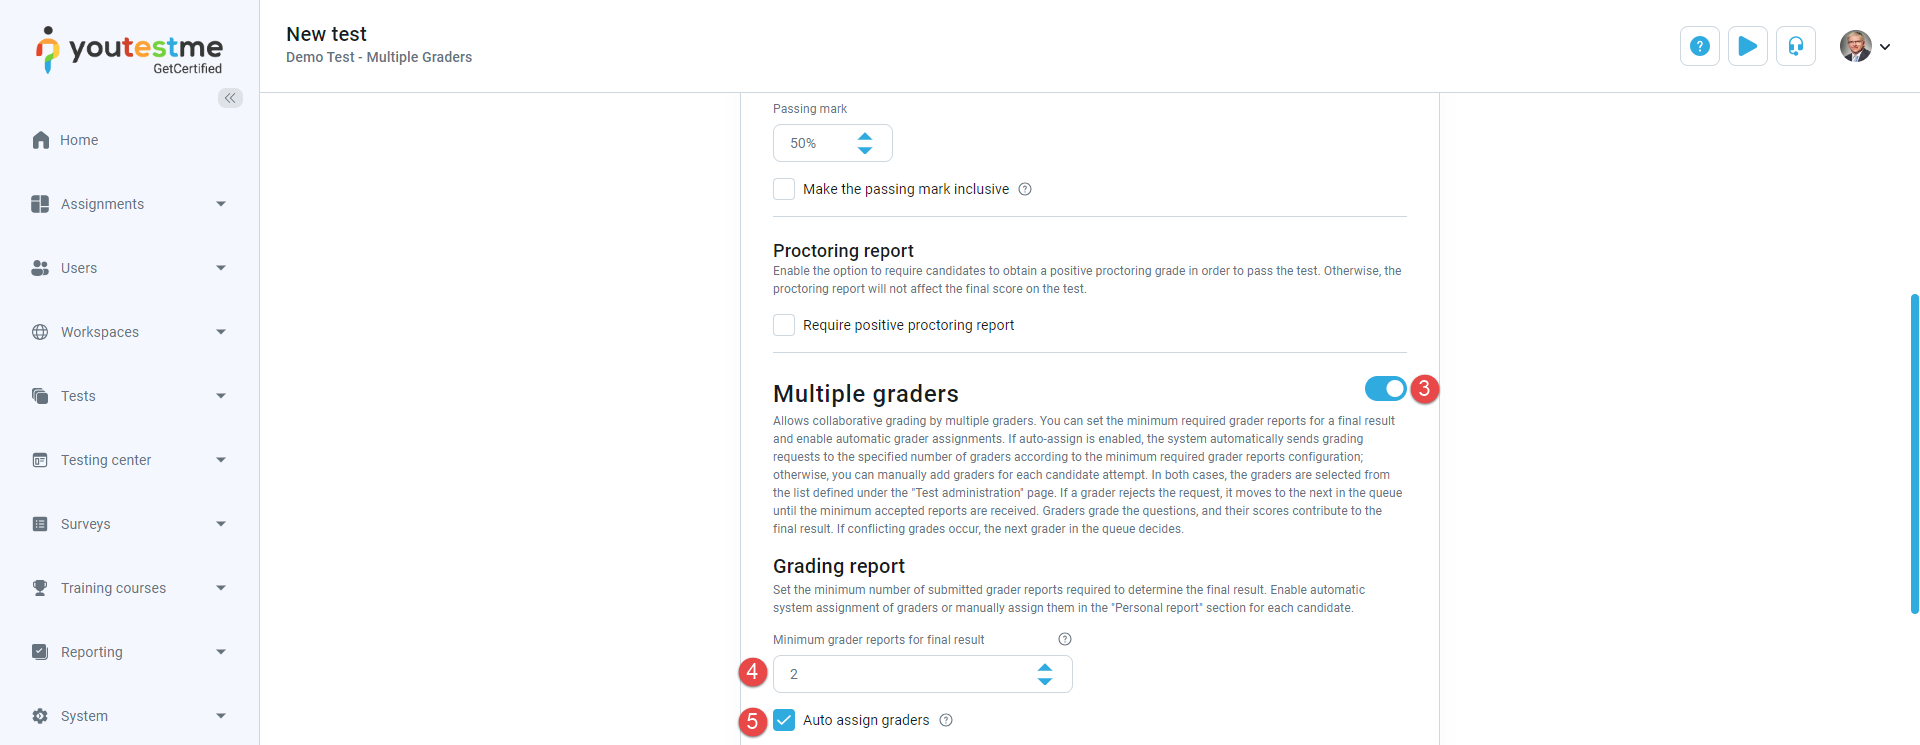
Enable the Multiple graders option.
-
Set the Minimum grader reports for final result number, which determines the number of non-conflicting reports needed for the grade to be resolved.
-
Enable the Auto assign graders option if needed. This setting allows the system to automatically send grading requests to the specified number of graders. Graders are selected from the list defined under Test administration/Graders page. If this option is disabled, you must manually assign graders to each candidate's personal report.
-
Configure the rest of the test settings and finish the test wizard.
-
-
Assigning graders to a test
For more information on assigning graders to a test, refer to the Test administration/Graders help page.
-
Manually assigning graders to a test version
If the Auto assign graders option is not enabled, you can manually assign graders to a candidate's report after they complete the test. Follow these steps:
-
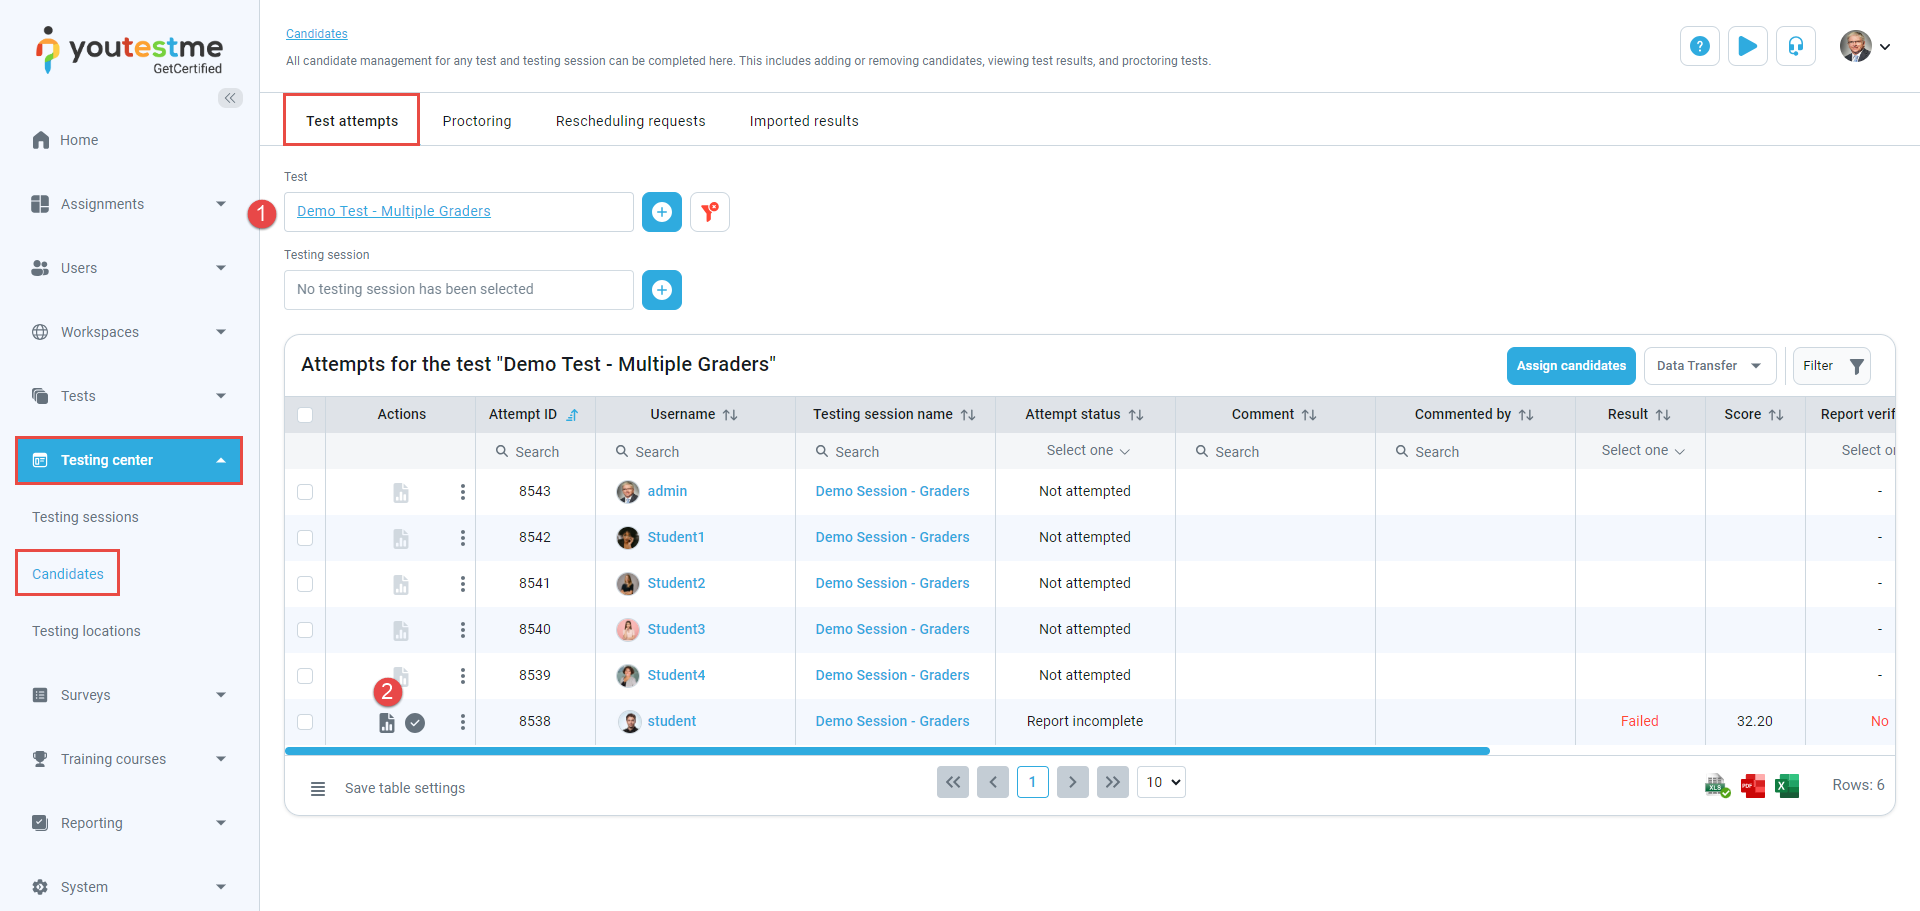
Open the list of test attempts for the desired test.
-
Click on the Personal report button of the candidate whose report you want to assign graders to.
-
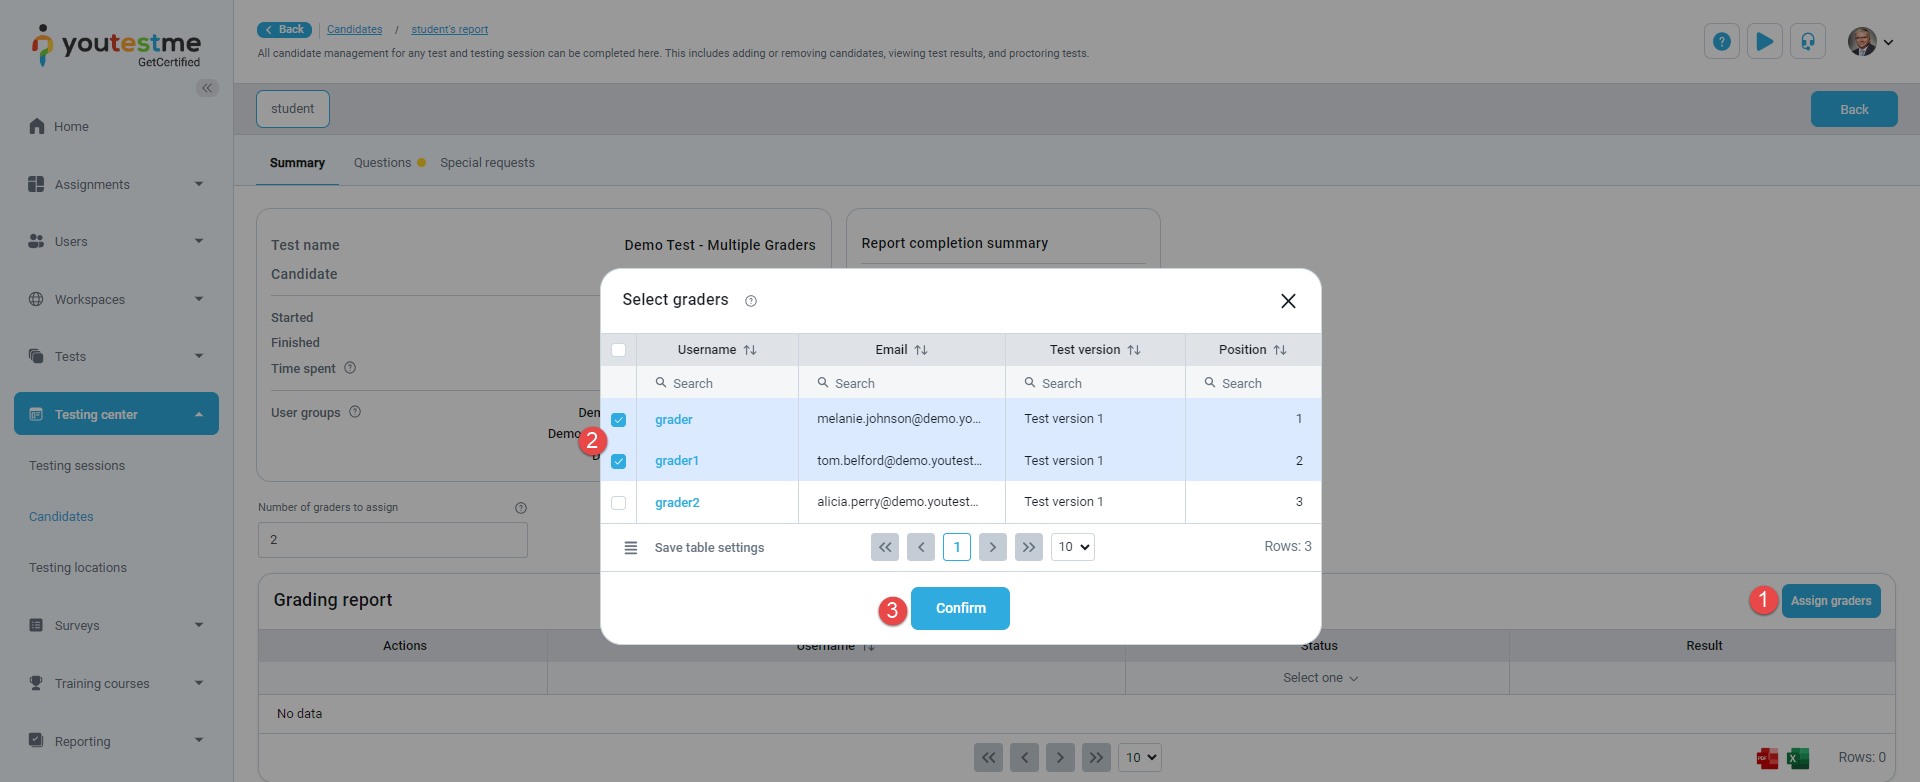
Click the Assign graders button.
-
Select the graders from the list of users.
-
Click the Confirm button.
-
-
Changing report status
The test manager can access the grader's reports and check or change their statuses. However, changes to the report status can only be made if the test attempt has not yet been verified.
The possible statuses are as follows
-
Created - This status indicates that a grader has yet to accept or reject a grading request.
-
Accepted/Rejected - If the status is Accepted, the grader will be able to grade and submit the report. If the status is Rejected, the grader won't be able to access the Grader report page, and the grading request will be sent to another grader.
-
Invalid - This status indicates that the submitted report will not be counted toward the candidate's final score, and the assigned grader will not be able to access the grading page.
-
Submitted - This status indicates that the grader has completed their review, and the grades from the report will be calculated into the candidate's final score.

The final result is Not resolved if one of the following conditions is satisfied:
-
There is at least one unresolved grader report.
-
All grader reports are resolved, and the number of passed submitted grader reports is equal to the number of failed submitted reports.
The final result will be Passed if the following conditions are satisfied:
-
All grader reports are resolved.
-
The number of submitted grader reports is greater or equal to the minimum number of submitted reports.
-
The number of passed submitted grader reports exceeds those of failed submitted reports.
The final result is Failed in all other cases.
For an example of how the report will be resolved if the minimum number of submitted grader reports is 2, see below:
-
First grader's report: Passed, Second grader's report: Passed, Other graders' reports: Rejected or Invalid -> Final result: Passed
-
First grader's report: Failed, Second grader's report: Failed, Other graders' reports: Rejected or Invalid-> Final result: Failed
-
First score: Passed, Second score: Failed, Other graders' reports: Rejected or Invalid -> Final result: Unresolved. An additional grader should be assigned to resolve the final result.
-
-
Notifications
Test managers can receive several types of notifications:
-
No graders remain notification - Test managers will receive a notification if the Auto assign graders option is enabled and there are not enough graders available to grade the candidate's report. This can occur due to insufficient graders assigned on the Test administration/Graders page or because some graders rejected the request, resulting in an insufficient minimum number to resolve the report. This notification alerts them that the system lacks the necessary graders for grading the report.
-
Grading response notification - Test managers will receive a notification when a grader responds to the request for grading the test.
-
Grader report submitted notification - Test managers will receive a notification when a grader submits grades for the candidate's report.
-
-
-
Grader's perspective
-
Resolving a grading request
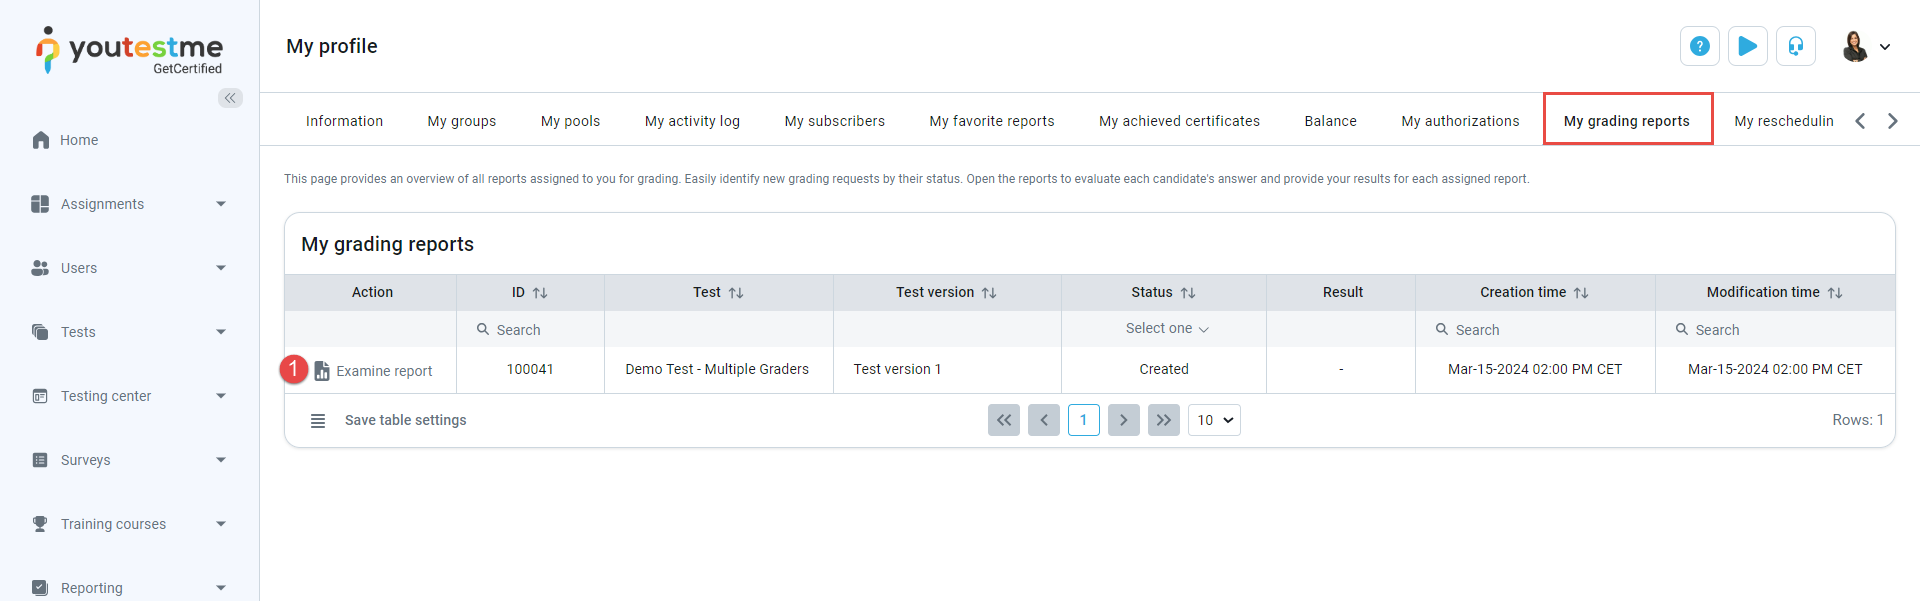
In order for the grader to evaluate the report, they must first accept it. Graders can access the report and their grading requests through the notification they receive or through their profile (Profile/My grading reports tab).
To accept or reject a grading request:
-
On the My grading reports tab, click the Examine report button.
-
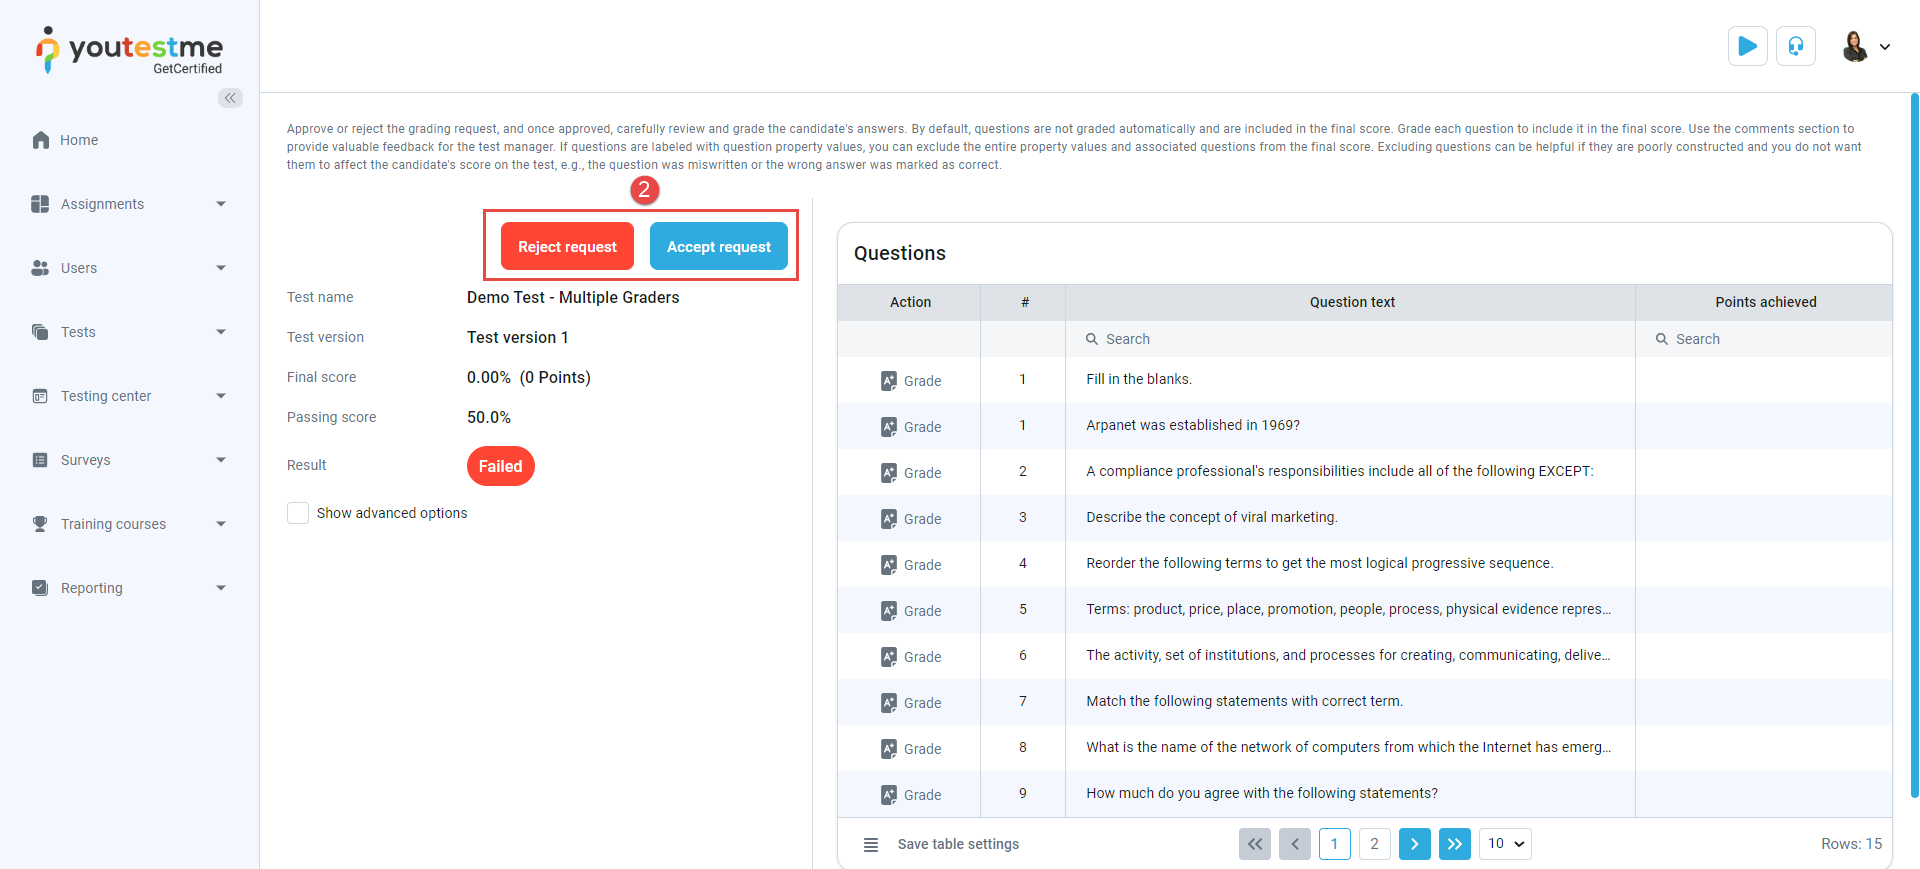
Choose to Accept or Reject the grading request.
-
-
Grading a report
In the candidate's report, you can:
-
See the Test name.
-
See the name of the Test version you are grading.
-
View the Final score achieved by the candidate. By default, questions are not graded automatically and are included in the final score. As you grade the questions, the final score will change.
-
See the Passing score required to pass the test.
-
Check whether the candidate Passed or Failed the test.
-
Add your comments to the test managers. Click on Save comment after entering feedback.
-
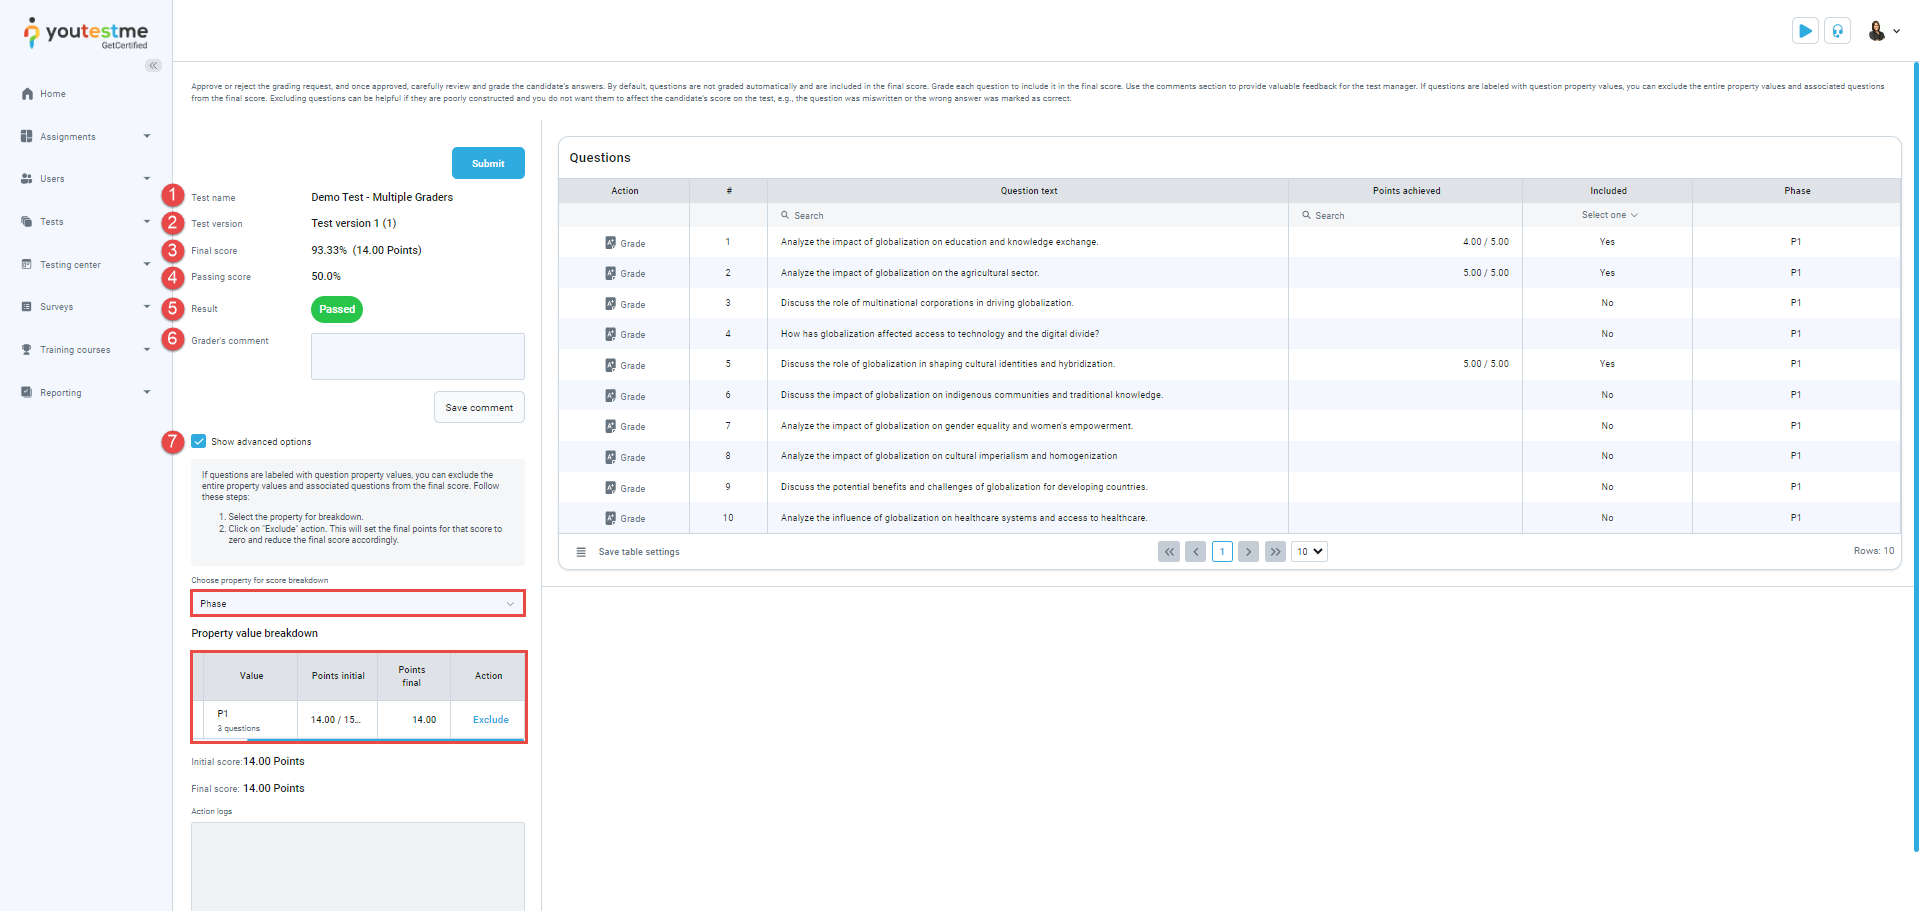
Show additional options.
If questions are labeled with question property values, you can exclude entire property values and associated questions from the final score. Excluding questions can be helpful if they are poorly constructed and you do not want them to affect the candidate's score on the test, e.g., the question was miswritten or the wrong answer was marked as correct. Follow these steps:
-
Select the property for breakdown.
-
Click on the Exclude action. This will set the final points for that score to zero and reduce the final score accordingly.
-
Explanation of the Property value breakdown table columns:
-
Value column represents the number of questions with that property value.
-
Points initial column shows the sum of points submitted for questions with that property value.
-
Points final column shows the sum of points for questions with that property value, after all of the graders submit their points for questions with that property value and after the performed Include or Exclude actions.
-
Actions allows you to include or exclude points from the questions with that property value. Excluded questions will not be calculated into the final result.
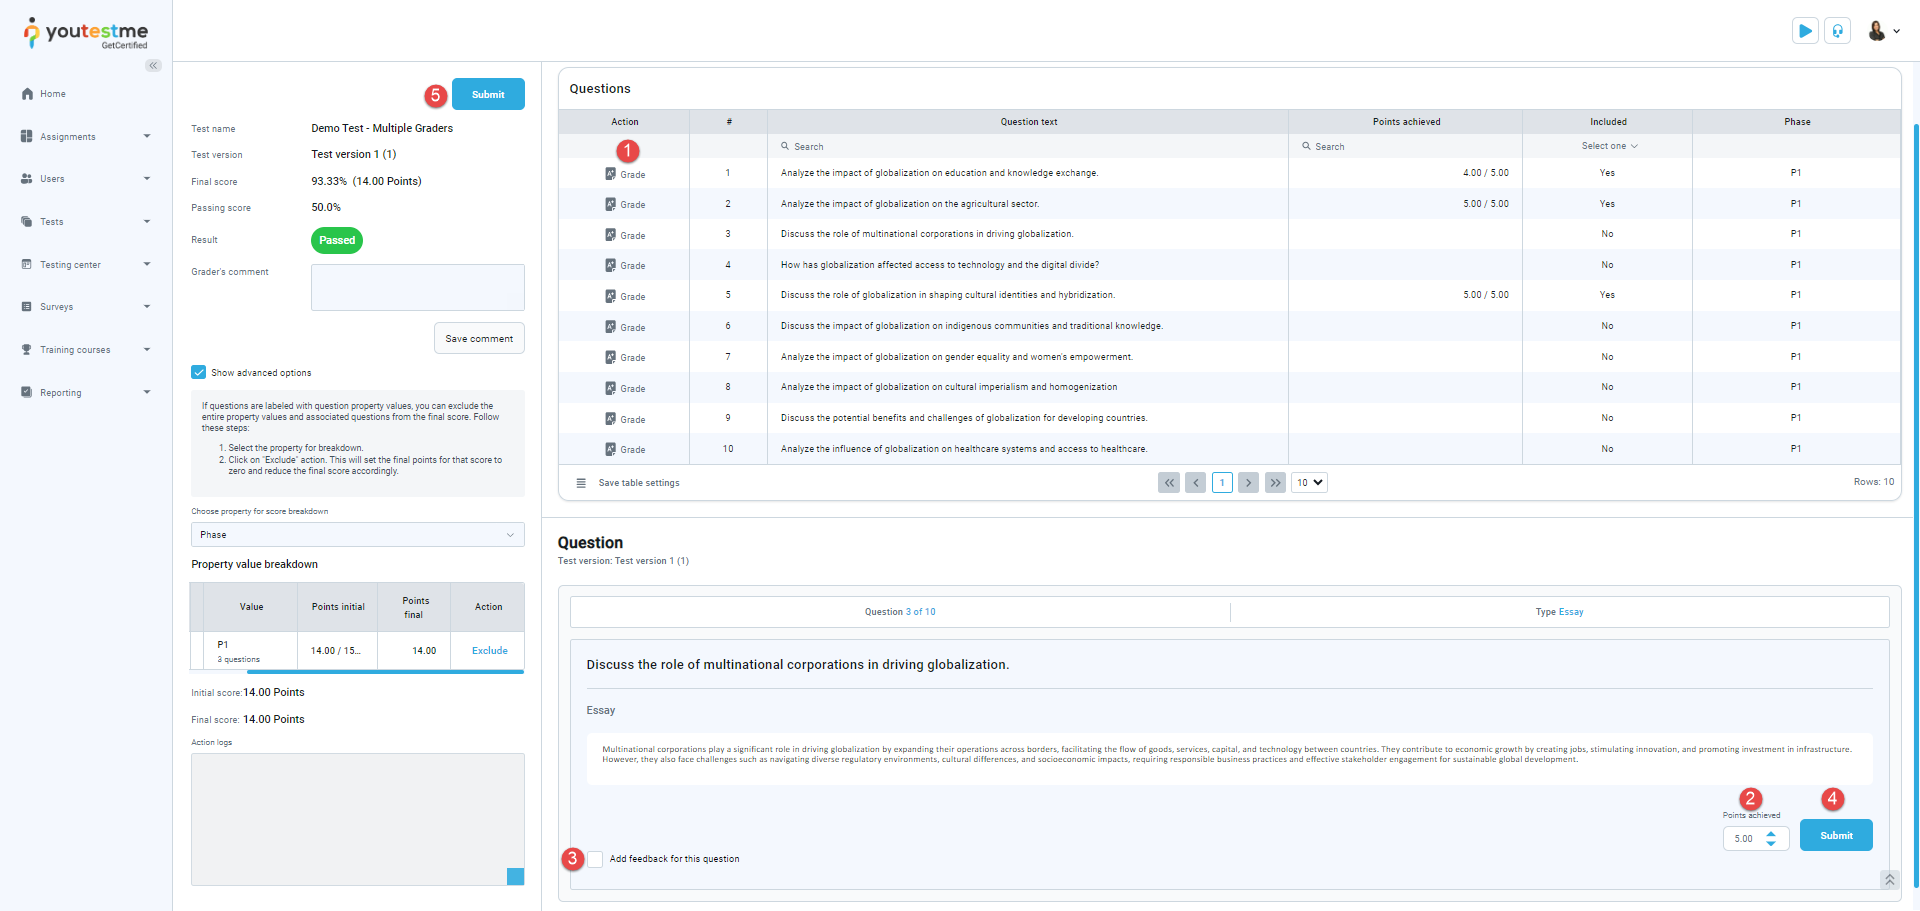
To grade questions:
-
Click the Grade button next to the question you want to grade.
-
Enter the desired number of points for the question.
-
If you want to add feedback to the question, click the Add feedback for question button and enter the desired text.
-
Save the entered changes by clicking the Submit button.
-
Repeat the steps to grade all questions. When your report is complete, click the Submit button to save it.
Note: As long as the test attempt is not verified by the test manager, the grader can Unsubmit the report, and grading options will become available again. Once the attempt is verified, the grader will no longer have the ability to change the report status.
-
-
Notifications
When the candidate completes the test, a grading request is automatically sent to the grader. Through the grading request notification, the grader can directly open the grading request, accept or reject it, and proceed to grade the report.
-
